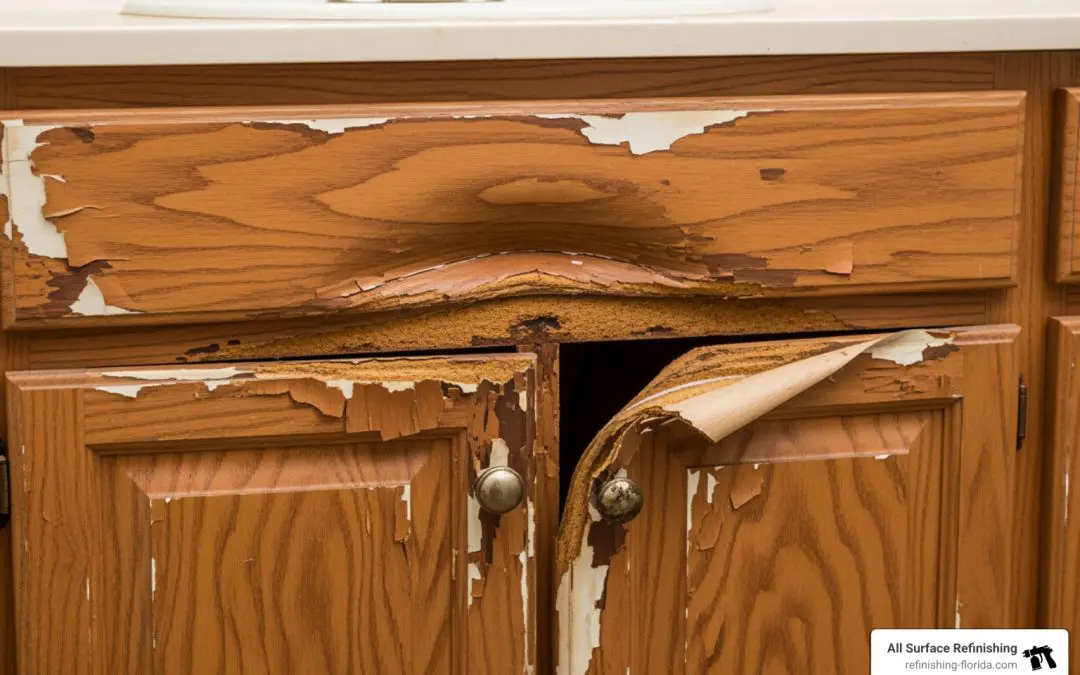
Why Bathroom Vanity Repair Matters for Florida Homeowners
Bathroom vanity repair can save you hundreds or even thousands of dollars compared to full replacement. Whether you’re dealing with water stains, peeling laminate, swollen MDF, or minor mold growth, most vanity damage is fixable with the right approach.
Quick Answer: Can You Repair a Water-Damaged Bathroom Vanity?
- Yes, if structurally sound – Minor water damage like stains, peeling veneer, surface bubbling, and small chips can be repaired
- DIY repairs cost $10-$50 – Basic repair kits and materials are affordable
- Repair extends life 10-15 years – When done correctly with proper sealing
- Replace if crumbling or sagging – Structural failure means it’s time for a new vanity
Bathroom vanities face constant exposure to moisture, splashes, and humidity. In Florida’s climate, this challenge is even greater. Over time, water finds its way into seams, under sinks, and around faucets, causing swelling, discoloration, peeling, and mold growth.
The good news? Most water-damaged vanities don’t need replacement. If the cabinet structure is still solid, you can restore it to like-new condition through targeted repairs. This approach is faster, more affordable, and far less disruptive than tearing out and replacing everything.
A typical DIY repair using basic materials like wood filler, sandpaper, primer, and paint costs just $10-$30, while buying and installing a new vanity can run anywhere from $300 to over $2,200 depending on size and materials.
The key is knowing what’s repairable and what’s not. Peeling laminate, surface stains, minor swelling, and small areas of mold can all be fixed. But if the particleboard has turned spongy, the cabinet is sagging, or damage is widespread, replacement becomes the better option.
I’m Frank Hernandez, and I’ve been helping South Florida homeowners restore their bathroom surfaces since 1996, specializing in bathroom vanity repair that extends the life of cabinetry for decades. In this guide, I’ll walk you through exactly how to assess damage, perform repairs, and protect your vanity from future water issues.
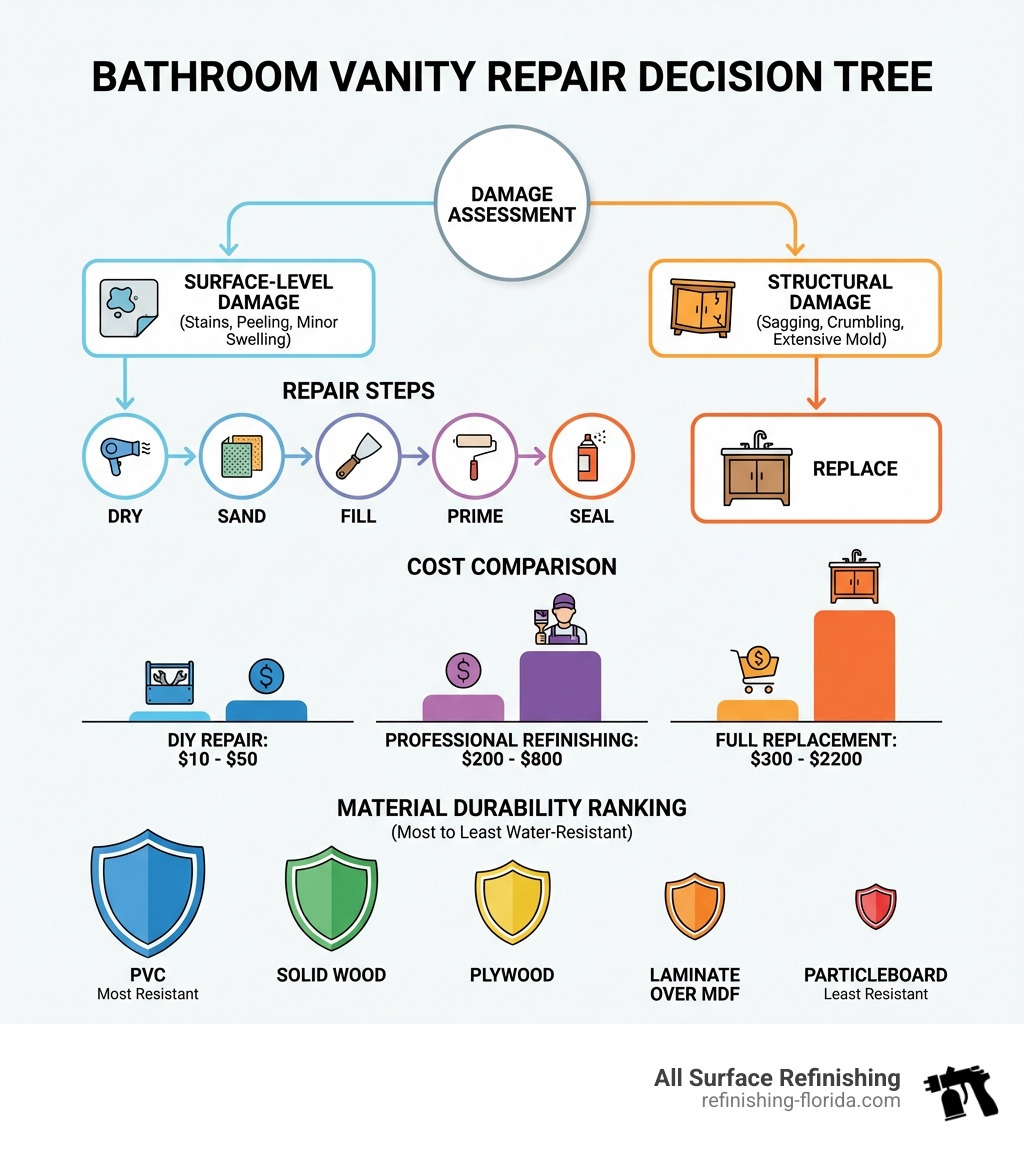
Assess the Damage: Is Your Vanity Repairable?
Before diving into any repairs, the first critical step is to thoroughly assess the extent of the damage. This helps determine if a bathroom vanity repair is feasible or if it’s time for a replacement. We’ll look for common signs of water damage, check the structural integrity, and consider the material your vanity is made from.
Common Types of Water Damage
Water damage in bathroom vanities often manifests in several tell-tale ways:
- Surface Stains and Discoloration: These are often the first signs, appearing as white rings from spilled water, dark spots, or general fading of the finish.
- Swollen MDF or Particleboard: A common issue with budget-friendly vanities. When engineered wood products like MDF absorb water, they swell and can become soft, spongy, or crumbly, leading to bubbling surfaces or warped panels.
- Peeling or Bubbling Laminate/Veneer: The decorative outer layer of many vanities can separate from the core material due to moisture. This creates unsightly bubbles or sections that peel away, particularly around edges and seams.
- Delaminating Veneer: Similar to peeling laminate, wood veneer can delaminate, lifting from the substrate and exposing the underlying material.
- Warped Doors and Drawers: Excessive humidity and direct water exposure can cause vanity doors and drawer fronts to warp, making them difficult to open or close properly.
- Rotted Wood at the Base: The base of the vanity, especially near the floor, is highly susceptible to water wicking up from splashes or minor leaks, leading to soft, dark, or crumbling wood.
- Mold and Mildew Growth: Dark spots, fuzzy patches, or a musty smell indicate mold or mildew, which thrive in damp environments.
When assessing, be thorough. Check under the sink, inside cabinets, and along baseboards, paying close attention to the integrity of the underlying material.
When to Replace Instead of Repair
While we love extending the life of vanities, replacement is sometimes more practical. Here are signs your bathroom vanity repair is beyond a simple fix:
- Compromised Structural Integrity: If the cabinet’s core structure is no longer sound – meaning it’s wobbly, sagging significantly, or major joints are failing – a repair might not be durable enough.
- Widespread Damage: If all panels are warping, the entire base is saturated, or damage extends throughout the majority of the vanity, the effort and cost of repair might approach or exceed the cost of a new unit.
- Crumbling Particleboard or MDF: Once engineered wood products turn into a soft, crumbly mess, they lose their ability to hold screws and provide structural support. Attempting to repair this often yields poor results.
- Extensive Mold Growth: While minor mold can be treated, widespread mold that has penetrated deep into the material can be difficult to fully eradicate and might pose health risks.
- Repair Costs Approach Replacement Cost: The average cost to install a new bathroom vanity ranges from $300 to $2,200. If the estimated cost of extensive repairs creeps into this range, a new vanity is likely a better investment.
- You Desire a Completely New Style: Sometimes, the damage is an opportunity for a fresh start. If your vanity is outdated and you’ve been dreaming of a new look, this might be the perfect time for an upgrade.
| Damage Type | Solid Wood | MDF/Particleboard | Laminate/Veneer | Repairability |
|---|---|---|---|---|
| Surface Stains | Sand & apply new finish (oxalic bleach for dark) | Sand & paint/stain (may show through) | Clean, touch-up marker, or patch | High |
| Minor Swelling | Dry, sand, fill, apply new finish | Dry, sand (carefully), fill, paint (challenging) | Dry, iron (small bubbles), patch | Medium |
| Peeling/Bubbling | N/A | Glue & clamp (veneer) | Glue & clamp (contact adhesive), patch | Medium |
| Extensive Swelling | Sand, structural repair, apply new finish | Often beyond DIY repair, replacement of section | Patch/replace veneer, often replacement of section | Low |
| Rot/Crumbling | Cut out, replace section, wood hardener | Replacement | Replacement | Very Low |
| Mold | Bleach solution, sand, apply new finish | Mild detergent, seal, paint | Mild detergent, seal, clean | High |
Your Step-by-Step Guide to Bathroom Vanity Repair
Once you’ve determined your vanity is repairable, it’s time to begin. We’ll walk you through the process, emphasizing safety and the right tools. Patience is key to a professional finish.
First, prepare the area. Shut off the water supply to the sink, detach the water lines and P-trap, and place a bucket underneath to catch residual water. Empty the cabinet for clear access. For extensive repairs, you may need to unscrew the vanity from the wall and pull it away for better drying and all-around access.
Safety is paramount. When sanding, treating mold, or working with chemicals, always use safety gear like gloves, goggles, and a dust mask. Ensure good ventilation in your bathroom, especially when using bleach or strong adhesives.
Essential Tools and Materials for Bathroom Vanity Repair
Having the right tools and materials is crucial for a successful bathroom vanity repair. We recommend the following for most projects:
- Safety Gear: Gloves, safety goggles, dust mask
- Cleaning Supplies: Rags or cleaning cloths, mild detergent, bleach (for mold on wood)
- Utility Knife: For cutting caulk, laminate, or veneer
- Screwdriver/Drill: For removing hardware or vanity from the wall
- Putty Knife/Scraper: For applying fillers and removing old caulk
- Sander (orbital or block): For smoothing surfaces
- Sandpaper: Medium-grit (100-150) and fine-grit (180-220+)
- Wood Filler or Epoxy Wood Repair Compound: For solid wood damage, holes, and gaps
- Epoxy Putty: For chips and cracks on composite or laminate
- Contact Adhesive/Wood Glue: For reattaching peeling laminate or veneer
- Clamps: To secure glued sections while drying
- Primer: Mold-resistant, bathroom-suitable primer
- Paint or Stain: Matching or new color, suitable for bathroom environment (satin, semi-gloss, or high-gloss)
- Paintbrushes/Rollers: For primer and paint
- Waterproof Sealant/Varnish: Polyurethane or similar for added protection
- Caulk (silicone or latex): For sealing seams around the sink and between the vanity and wall
- Mini Dehumidifier/Fans: To aid in drying
Step 1: Drying and Mold Remediation
The first and most crucial step in bathroom vanity repair is ensuring the vanity is thoroughly dry. Repairing damp wood will only cause future problems.
- Dry the Vanity: Remove all contents and open cabinet doors and drawers. If possible and safe, move the vanity to a dry, well-ventilated area. Use fans to circulate air and a mini dehumidifier to pull moisture from the air and the vanity materials. We recommend at least 24-48 hours of drying time, or even longer for heavily saturated areas. Patience here is key!
- Remove Mold and Mildew: If you spot any mold or mildew, it must be treated immediately.
- For Solid Wood: Mix 1 part household bleach with 3 parts water. Apply the solution to the affected areas with a cloth or sponge. Allow it to sit for 10-15 minutes, then scrub gently and wipe clean. Ensure good ventilation and wear gloves and eye protection.
- For Composite Materials (MDF, Particleboard, Laminate): A milder solution is often better to avoid further damage. Use 1 tablespoon of mild detergent mixed with 4 cups of warm water. Scrub the mold gently with a soft brush or cloth, then wipe clean. Avoid saturating the material.
After treating, ensure the area dries completely again before moving to the next step.
Step 2: Sanding, Filling, and Structural Fixes
With the vanity dry and mold-free, we can now address the physical damage.
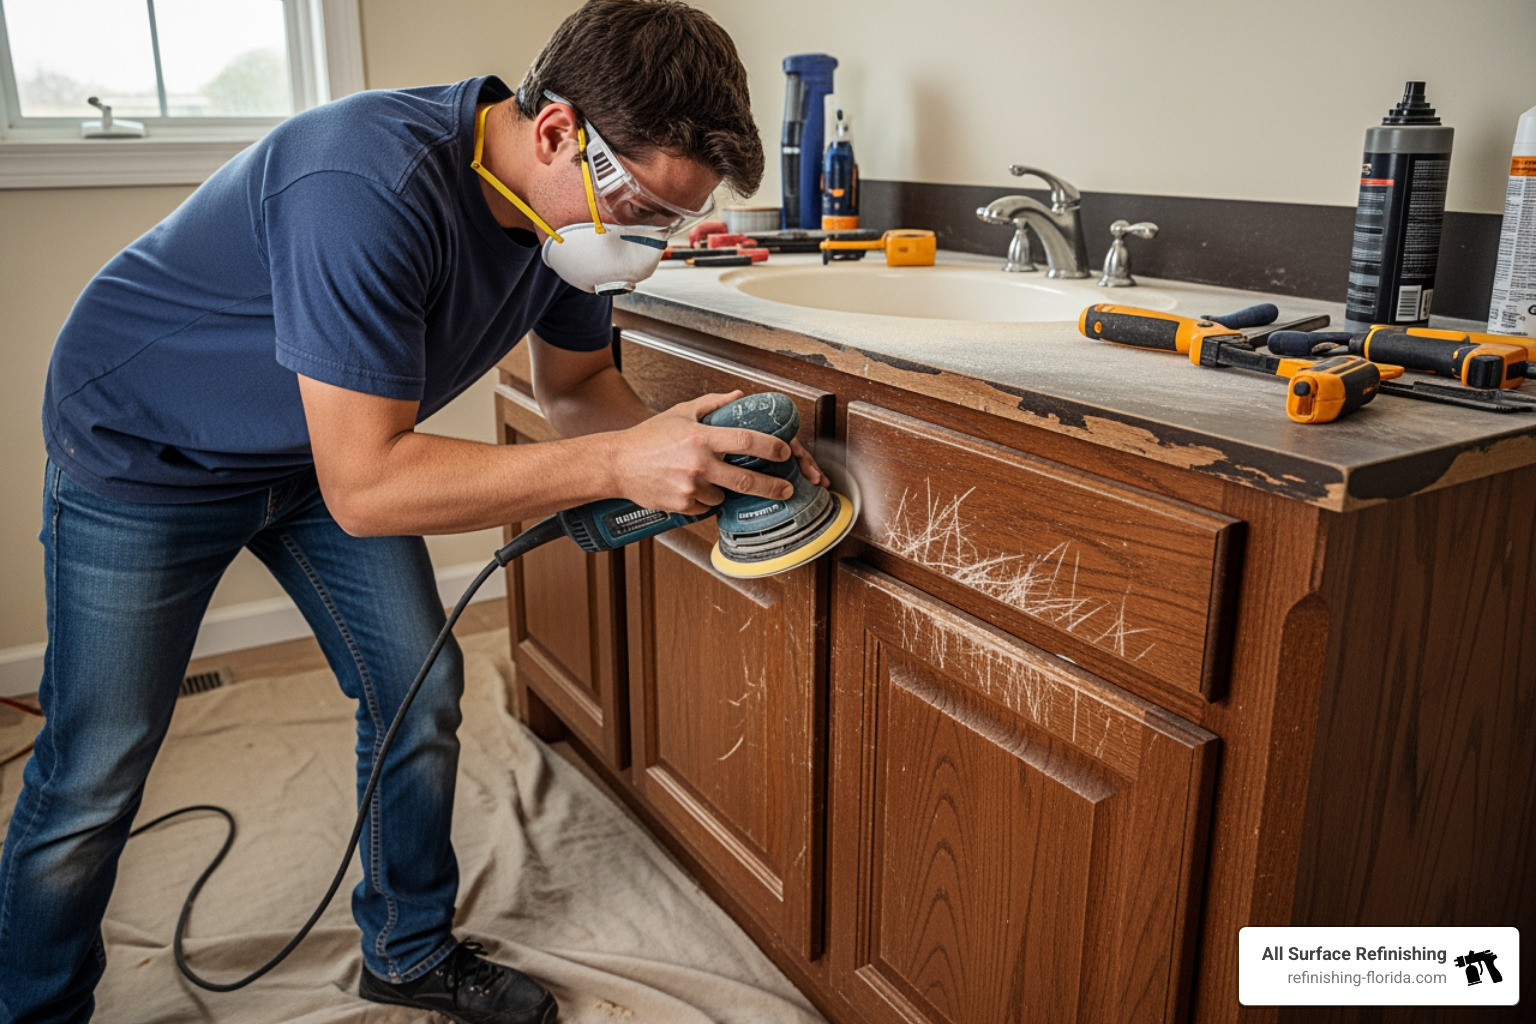
- Sanding Damaged Surfaces:
- Solid Wood: Start with medium-grit sandpaper (100-150) to remove discoloration, smooth out minor swelling, and prepare the surface. Follow with fine-grit sandpaper (180-220+) for a smooth finish.
- Composite or Veneer Materials: Sand very gently, if at all. The goal is to remove any loose or flaking material without damaging the thin surface layer. Use fine-grit sandpaper and a light touch. If the veneer is peeling, avoid sanding it until it’s reattached.
- Filling Holes and Gaps:
- For Wood: Use a wood filler or epoxy wood repair compound. Apply with a putty knife, pressing it firmly into holes, cracks, and gouges. Overfill slightly, as some products shrink when dry. Let it cure completely according to manufacturer instructions.
- For Composite/Laminate (Chips/Cracks): Epoxy putty works well for filling chips and cracks. Mix and apply it, then level it before it fully sets.
- Repairing Peeling Laminate or Veneer: This is a common bathroom vanity repair.
- Carefully lift the peeling section. Clean any debris from both the laminate/veneer and the substrate.
- Apply a thin, even layer of contact adhesive to both surfaces. Follow the product instructions for tack time (usually 5-15 minutes).
- Carefully press the laminate/veneer back into place. Use a roller or a clean cloth to smooth it, working from the center outwards to remove air bubbles.
- Secure the reattached section with clamps (using baking paper to prevent glue from sticking to the surface) or heavy objects for at least an hour, or preferably overnight for the best grip.
- For larger damaged sections of laminate, you might need to remove the old laminate, cut a slightly oversized patch of self-adhesive laminate, apply it carefully, and then trim with a sharp craft knife.
Step 3: Priming, Painting, and Sealing for a Flawless Finish
This is where your vanity starts to regain its former glory, or even get a whole new look!
- Choosing the Right Primer: For bathrooms, a mold-resistant, moisture-resistant primer is essential. It provides a barrier against humidity and ensures your paint adheres properly. Apply one to two even coats, allowing adequate drying time between each.
- Painting or Staining:
- Paint: Select a paint specifically designed for bathrooms or high-moisture areas. Satin, semi-gloss, or high-gloss finishes are recommended as they are less prone to moisture infiltration, easier to clean, and more durable. Apply at least two thin, even coats, allowing each to dry completely. For water-based paints, remember they can take up to a month to fully cure before you clean them aggressively.
- Stain: If you’re staining solid wood, choose a stain color that matches your desired look. Apply according to manufacturer instructions, then wipe off excess.
- Applying a Waterproof Sealant: After painting or staining (and allowing it to cure), a waterproof sealant or polyurethane varnish is your vanity’s best friend. This clear coat adds an extra layer of protection against moisture, splashes, and wear. Apply two or more thin coats, lightly sanding with fine-grit sandpaper between coats for optimal adhesion and smoothness. This step is crucial for preventing future water damage, especially in humid Florida bathrooms.
Proactive Protection: Preventing Future Water Damage
A bathroom vanity repair is rewarding, but the job isn’t done without preventing future water damage. In Florida’s humid climate, this proactive approach is critical for your vanity’s longevity.
Key Differences in Bathroom Vanity Repair: Solid Wood vs. MDF
Your vanity’s material is key for both repair and prevention:
- Solid Wood Vanities: These are generally more resilient to water than engineered wood. When damaged, solid wood can be sanded more aggressively, bleached for dark water stains (using oxalic wood bleach, followed by thorough rinsing), and then sealed and painted. Structural repairs, such as replacing a rotted section, are more straightforward as new wood can be joined effectively. Sealing and varnishing are highly effective in protecting solid wood.
- MDF/Particleboard Vanities: These materials are the most susceptible to water damage. Once they absorb water, they swell and can become soft or crumbly. While minor swelling can sometimes be dried and sanded, extensively swollen or saturated MDF/particleboard often loses its structural integrity and is difficult to compress back to its original state. Repairing peeling veneer or laminate on these materials is common, often involving re-gluing with contact adhesive. For significant swelling, replacing the entire damaged section or even the vanity might be necessary. Laminate repair kits are available for minor surface damage like scratches and chips.
Sealing, Caulking, and Humidity Control
These three elements are your best defense against water damage in the South Florida environment.
- Benefits of Sealing Wood Vanities and Cabinets: Sealing wood creates a protective barrier that repels water and moisture. This prevents absorption, which leads to swelling, warping, and mold growth. We always recommend applying a water-resistant sealant or polyurethane varnish to all wood surfaces, especially after a bathroom vanity repair. This simple step significantly extends the lifespan of your cabinetry.
- Role of Caulk in Preventing Water Damage: Caulk is an unsung hero! It creates a watertight seal in critical areas.
- Around the Sink: Ensure the caulk seal around your sink and faucet is intact. This prevents water from splashing onto the vanity top and seeping into the cabinet below.
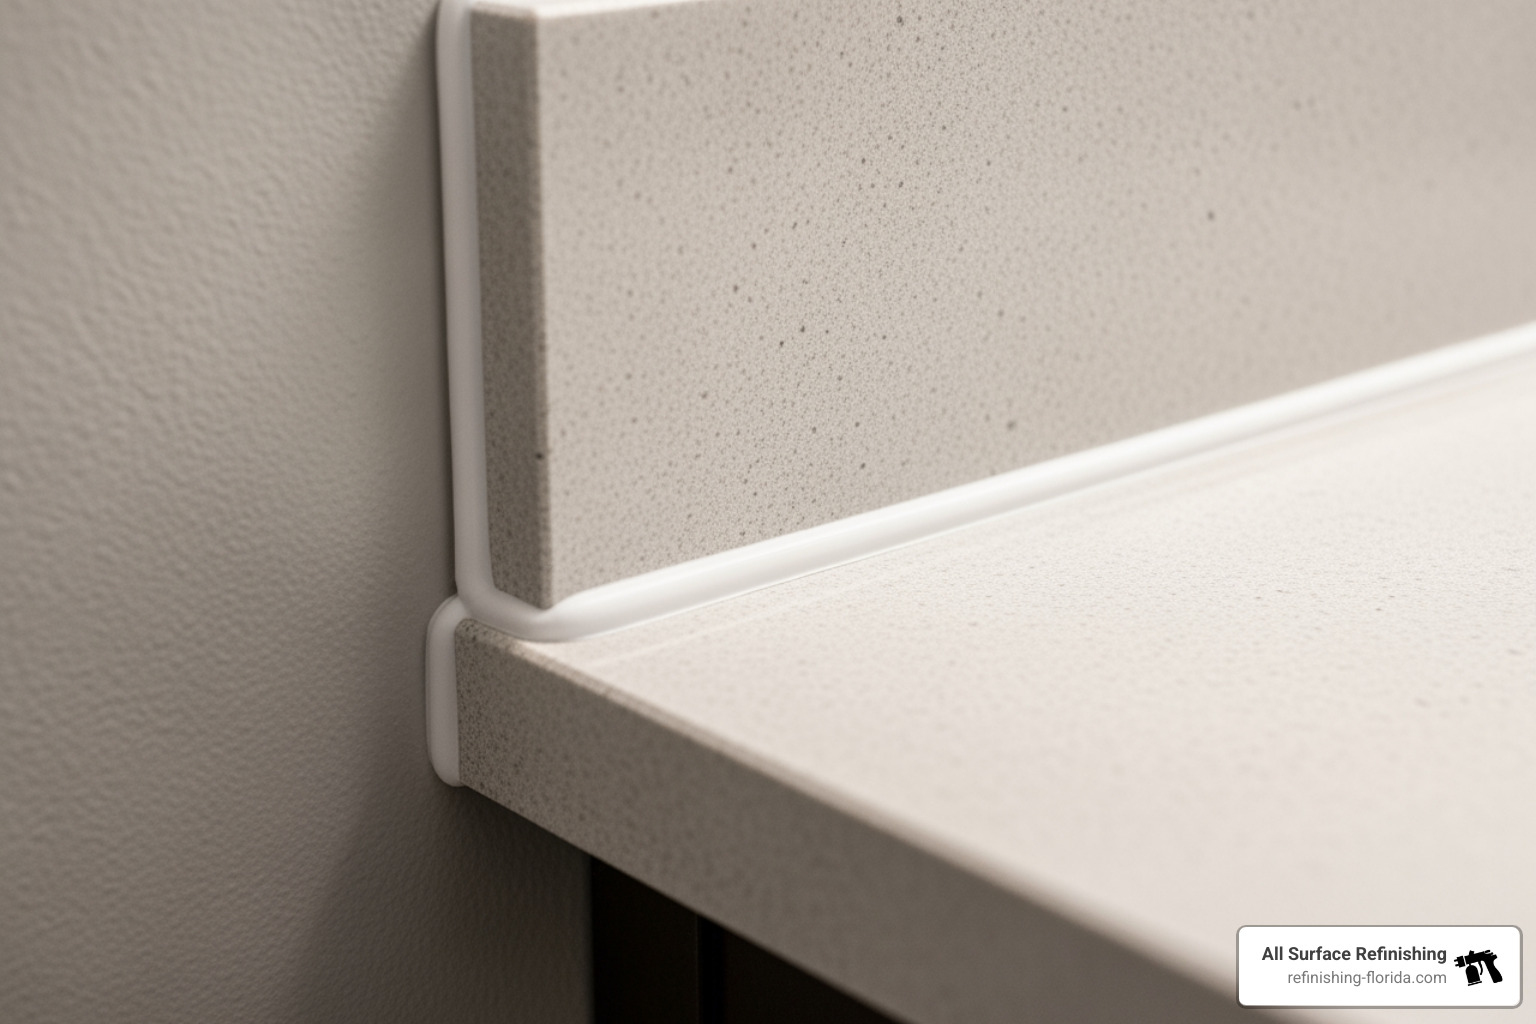
- Between Vanity and Wall: Apply a bead of silicone or latex caulk along the seam where the vanity top meets the backsplash, and where the backsplash meets the wall. This stops water from running down the back of the cabinet and protects the wall behind it. Even along the bottom of the vanity where it meets the floor, a thin bead of caulk can prevent water from wicking into the base.
- Reducing Humidity in the Bathroom: High humidity is a constant threat in Florida bathrooms.
- Exhaust Fans: Always use your bathroom exhaust fan during and after showers and baths. Ensure it’s properly sized for your bathroom.
- Ventilation: If possible, open a window after showering to allow moist air to escape.
- Dehumidifiers: For persistently humid bathrooms, a small dehumidifier can effectively pull excess moisture from the air, protecting your vanity and preventing mold growth. Ideal humidity levels for preventing mold are between 30% and 55%.
- Promptly Mop Up Spills: It sounds simple, but promptly wiping up any water spills or condensation on your vanity surfaces is one of the easiest and most effective preventative measures. Don’t let water sit!
- Check Pipes and Plumbing Connections Regularly: Regularly (every 6-12 months) check under your sink for leaks: drips, water spots, rust, or wet areas. A slow drip can cause significant damage over time. Replacing worn-out washers or seals promptly can save you from a much larger bathroom vanity repair down the line.
Frequently Asked Questions about Vanity Repair
We often hear similar questions from homeowners across Broward, Miami-Dade, and Palm Beach Counties about their bathroom vanities. Here are some of the most common ones we address:
Can a damaged laminate or MDF vanity be repaired?
Yes, many types of damage to laminate or MDF vanities are repairable, especially if caught early. Minor issues like peeling edges, small chips, and surface scratches are often fixable with DIY methods. Peeling laminate can be re-glued with contact adhesive and clamped for a secure bond. Chips and cracks can be filled with epoxy putty and color-matched with a repair marker or paint.
However, it’s crucial to distinguish between minor surface damage and extensive water saturation. If the underlying particleboard or MDF has absorbed a lot of water and has swollen significantly, becoming soft, spongy, or crumbling, then a simple repair might not be enough. In such cases, the structural integrity is compromised, and you might need to replace the damaged section or, if widespread, the entire vanity. We can assess this for you to determine the best course of action.
What are the best materials for a bathroom vanity to prevent water damage?
In a high-humidity Florida bathroom, certain materials resist water damage far better than others. The top contenders are:
- PVC (Plastic): This material is completely impervious to water, making it an excellent choice for ultimate water damage prevention. It won’t swell, rot, or mold.
- Solid Wood: While not completely waterproof without treatment, solid wood is far more durable and resilient than engineered wood products. It can be sealed and finished to a high degree of water resistance, and it’s generally more forgiving if it does get wet, as it dries out without crumbling.
- Marine-Grade Plywood: This type of plywood is specifically designed for high-moisture environments. Its layers are bonded with waterproof glues, making it much more resistant to delamination and swelling than standard plywood.
Materials like standard MDF (Medium-Density Fiberboard) and particleboard are the most susceptible to water damage. They readily absorb water, leading to rapid swelling, bubbling, and structural failure. If you have a vanity made from these materials, extra diligence in sealing and humidity control is necessary. When choosing a new vanity, investing in more water-resistant materials can save you significant bathroom vanity repair headaches down the line.
When should I hire a professional for vanity repair?
Calling a pro for bathroom vanity repair can save time, frustration, and ensure a lasting result. Consider hiring a professional if:
- Extensive Damage: The damage goes beyond minor surface fixes and involves significant swelling, warping, or structural compromise that you’re not comfortable tackling yourself.
- High-Quality or Sentimental Value Vanity: If your vanity is a high-end piece or holds sentimental value, a professional can often restore it without risking further damage.
- Time Constraints or Lack of DIY Confidence: If you simply don’t have the time, tools, or confidence to undertake the repair yourself, a professional service is a stress-free alternative.
- Mold Concerns: While minor mold can be DIY-treated, extensive mold growth might require professional remediation to ensure it’s fully eradicated and to prevent health issues.
A professional can assess the damage and recommend the best course of action, whether it’s a complex repair or a full replacement, ensuring a durable and safe result.
Conclusion: A Revitalized Bathroom Awaits
We’ve covered identifying damage, step-by-step bathroom vanity repair, and crucial prevention tips. Repairing your vanity is an achievable, cost-effective DIY project that can revitalize your bathroom. The key is thorough drying, meticulous filling and sanding, and a quality priming, painting, and sealing process.
Remember that for extensive damage or if you lack the time or confidence for a DIY project, consulting a professional is always a wise option. A local expert can help you achieve a durable, beautiful result and ensure your bathroom remains a functional and inviting space for years to come.
By taking the time to repair and protect your bathroom vanity, you not only save money but also contribute to a more sustainable home by extending the life of your existing fixtures.
