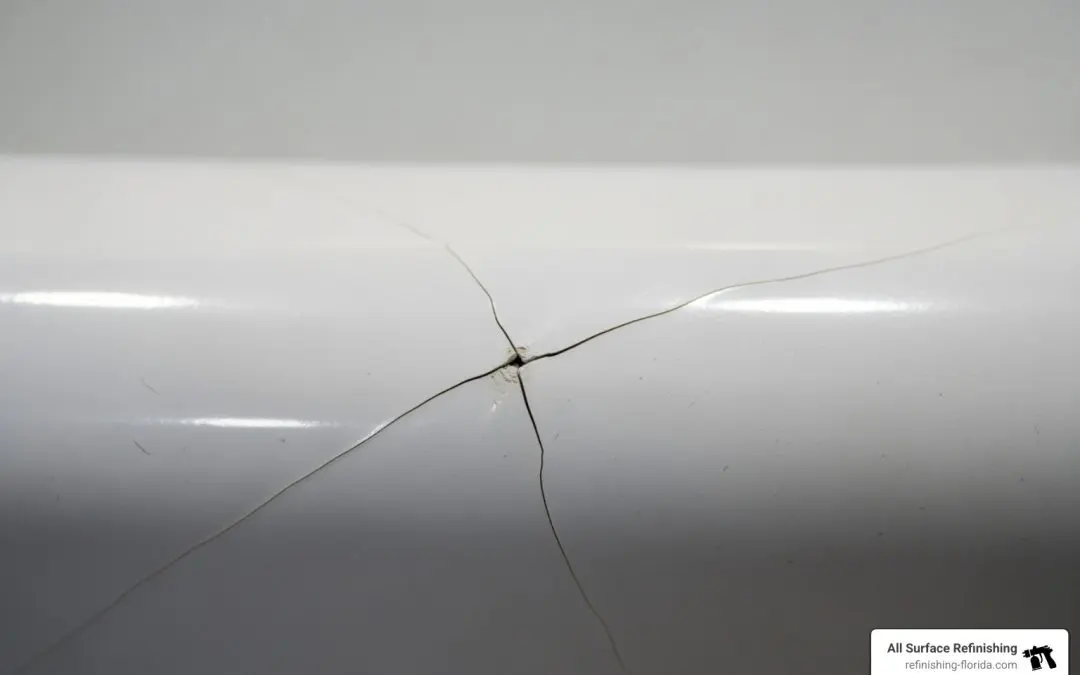
Why You Need a Fiberglass Tub Crack Repair Kit
A fiberglass tub crack repair kit is the fastest, most affordable way to fix a damaged bathtub, avoiding the cost and hassle of replacement. The right kit can restore your tub’s integrity and appearance, whether you have a hairline crack, a chip, or a structural break.
What You Need to Know About Fiberglass Tub Crack Repair Kits:
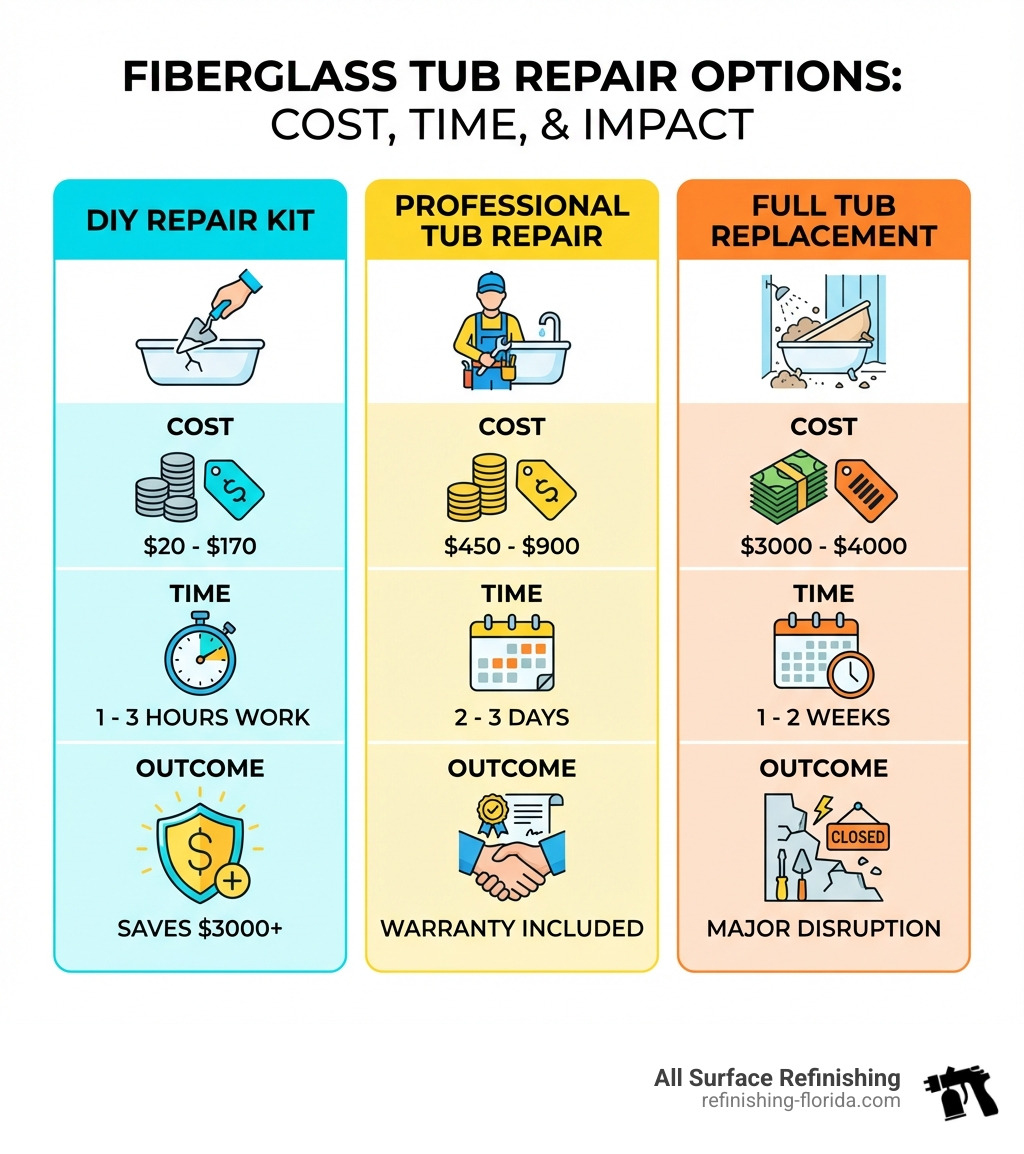
- Cost: DIY kits range from $18-$170, compared to $450-$900 for professional repair or $3,000-$4,000 for tub replacement
- Types: Epoxy-based kits for small chips ($27-$37), fiberglass mesh kits for wall cracks ($18-$27), and floor inlay kits with structural support for weight-bearing damage ($135-$170)
- Repair Capacity: Small kits handle up to 5-inch cracks or 10 square inches of damage; large kits can repair up to 10-12 inch cracks
- What’s Included: Most kits contain resin, hardener, fiberglass mesh, sandpaper, mixing tools, and color-matching tints
- Timeline: Most repairs take 1-3 hours of work time, with 24 hours of cure time before use
A crack in your fiberglass tub isn’t just an eyesore; it’s a potential leak waiting to happen. Unrepaired cracks can grow, allowing water to seep underneath, which can cause structural damage, rot, and mold.
The good news is you don’t need to replace the tub. A fiberglass tub crack repair kit provides everything you need to fix the damage yourself, saving thousands of dollars and avoiding demolition. The right kit can restore your tub to like-new condition.
I’m Frank Hernandez, a bathtub repair expert with over a decade of experience in South Florida. I know that the right fiberglass tub crack repair kit, used properly, can deliver lasting, professional-quality results.
Why Do Fiberglass Tubs Crack? Common Causes and Types of Damage
Understanding why your fiberglass tub cracked is the first step to a lasting repair and preventing future damage.
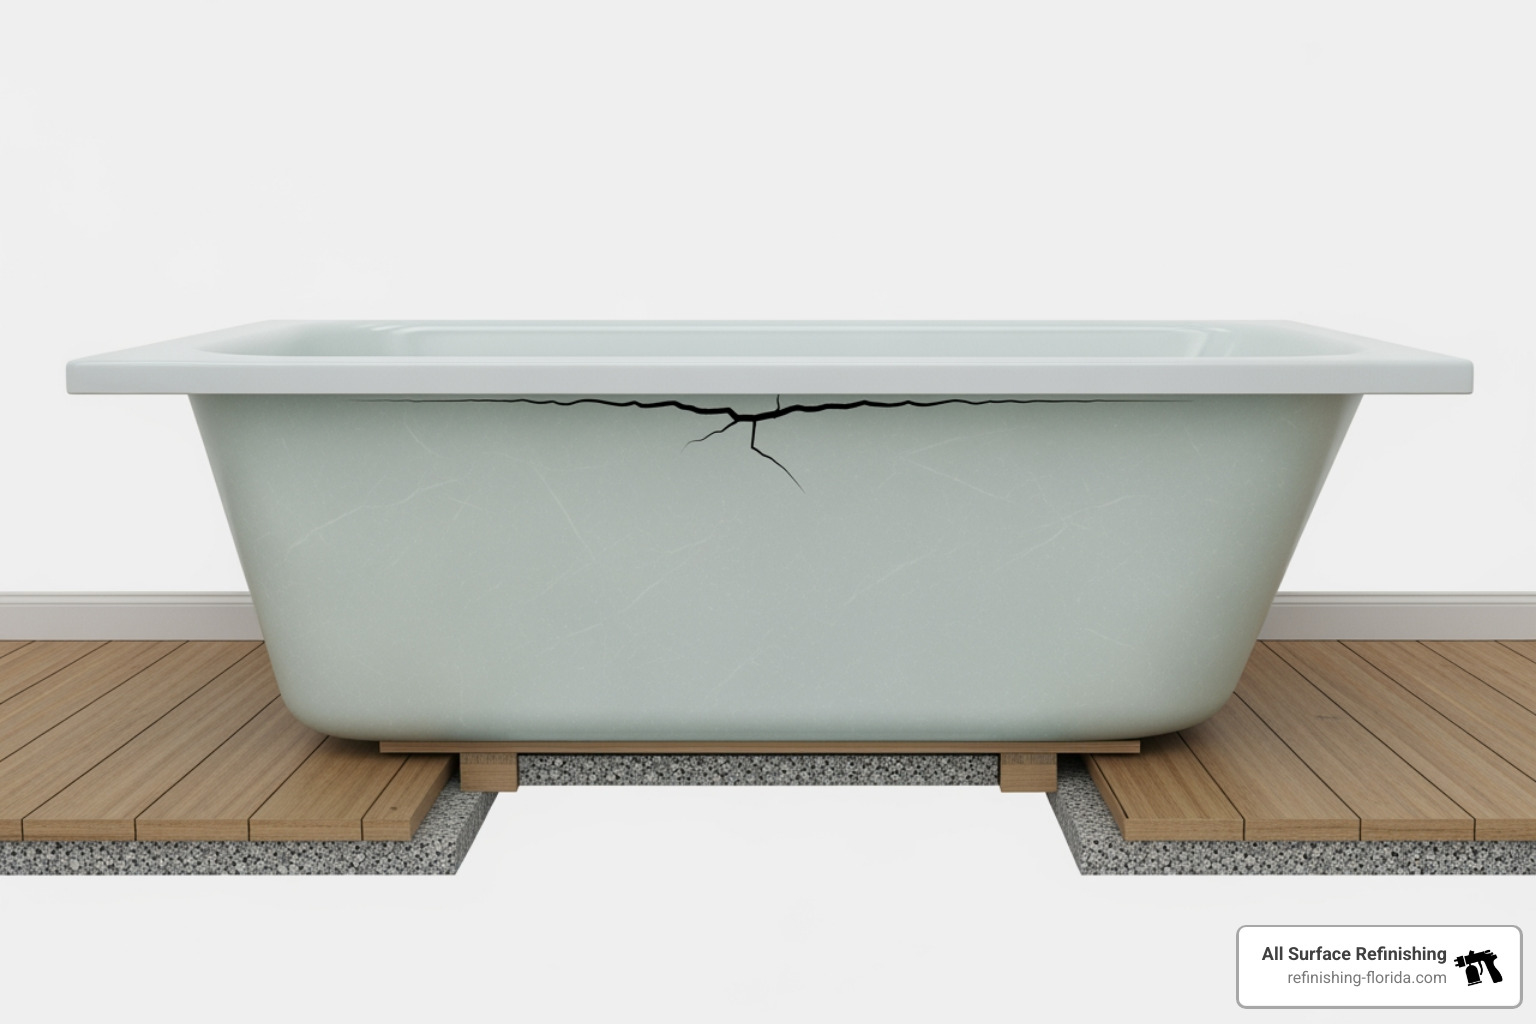
The most common cause of cracks is a lack of support under the tub. If the tub flexes when you step in, this repeated stress on the fiberglass leads to cracks. This often happens when subfloor support is weak or was installed improperly.
Other factors can also contribute to tub damage:
- Heavy Impact: Dropping a heavy object like a shampoo bottle or a tool can cause a sudden crack or chip.
- Harsh Cleaning Chemicals: Abrasive cleaners can degrade the fiberglass surface over time, making it brittle.
- Age and Wear: Years of use and temperature changes can lead to material fatigue.
Identifying the type of damage guides the repair strategy:
- Hairline Cracks: Superficial cracks that are often cosmetic but can worsen if ignored.
- Stress Cracks: Deeper cracks that indicate the tub material is flexing under stress.
- Spider Cracks: A network of small cracks, usually caused by impact.
- Structural Cracks: Serious cracks that extend through the fiberglass, often causing leaks and indicating a support issue.
- Chips and Gouges: Pieces of fiberglass that have broken off, exposing the inner layers.
Addressing the root cause is critical. If the tub flexes, a simple patch won’t last. The floor must be reinforced, often by adding support or using expanding foam underneath. This foundational work ensures a durable repair.
If you’re dealing with extensive tub damage or prefer expert assistance, professional services are always an option. You can find More info about tub repair services in South Florida.
Choosing the Right Fiberglass Tub Crack Repair Kit for Your Project
Choosing the right fiberglass tub crack repair kit is crucial for a lasting repair. The best kit depends on the type and severity of the damage. Most kits are compatible with both fiberglass and acrylic tubs, but always check the label.
- Epoxy or Polyester Resin Kits ($27-$38): Best for minor cosmetic issues like small chips, nicks, and hairline cracks (up to 5 inches). These two-part systems cure into a hard, waterproof finish and are sufficient for surface-level repairs.
- Kits with Fiberglass Mesh ($18-$27): Essential for longer cracks (up to 12 inches), holes, or structural damage. The fiberglass cloth provides reinforcement, like rebar in concrete, preventing the crack from returning.
- Fiberglass Inlay & Floor Repair Kits ($135-$170): The most robust solution for large, weight-bearing cracks or holes in the tub floor. These kits create a “new bottom” with a pre-cut inlay or use expanding foam for support. They are a permanent solution for serious damage.
When selecting a kit, also consider the cure time (most require 24 hours) and whether it includes color tints for an aesthetically pleasing match. For unique tub colors, achieving a perfect match can be challenging.
If you’re curious about what others have experienced, you can See what homeowners are discussing about tub repair methods.
What’s Inside a Typical Fiberglass Tub Crack Repair Kit?
A good fiberglass tub crack repair kit will come with most of the specialized materials you need:
- Resin and Hardener: The two-part chemical compound that creates the strong repair.
- Fiberglass Cloth or Mesh: Provides structural reinforcement for larger cracks.
- Filler Putty: A thick compound to fill deep gouges.
- Sandpaper (various grits): For preparing the surface and smoothing the final patch.
- Applicator Tools: Spreaders or brushes for applying the compound.
- Mixing Cups and Sticks: For measuring and mixing.
- Gloves: For safety and to protect skin.
- Color Matching Tints: Pigments to add to the resin to match your tub’s color.
While kits are comprehensive, some essential tools are often not included: a utility knife or Dremel tool, a power drill with a sanding attachment, safety glasses, and a respirator mask.
For those with a jacuzzi tub experiencing cracks, the principles remain similar, but the complexity might increase due to jets and plumbing. You can find More info about jacuzzi tub crack repair.
A Step-by-Step Guide to Using a Fiberglass Tub Crack Repair Kit
With the right fiberglass tub crack repair kit selected, follow this guide for a durable, professional-looking repair.
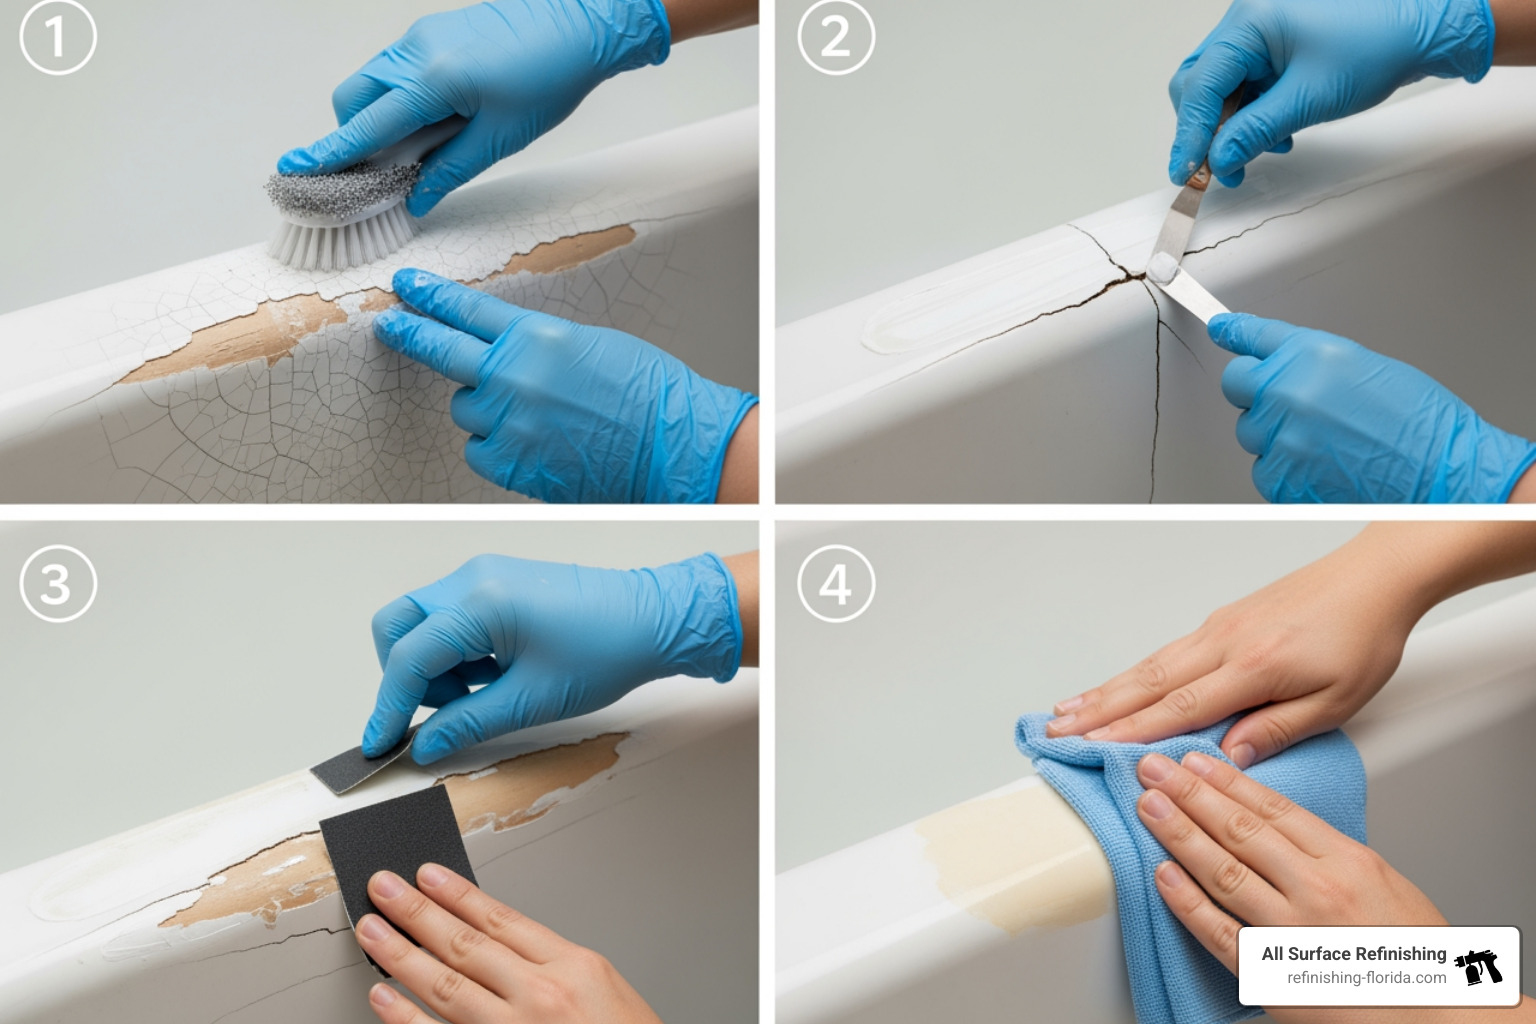
Safety is critical, as fiberglass repair involves chemicals and dust. Ensure good ventilation, and always wear safety glasses, chemical-resistant gloves, and a respirator mask rated for organic vapors.
Step 1: Prepare the Damaged Area
Proper preparation is the most critical step for a successful repair.
- Thorough Cleaning: Clean the damaged area with a non-abrasive cleaner to remove all soap scum and oils. Rinse and dry completely, as any moisture will compromise the repair.
- Widening the Crack: For hairline cracks, use a utility knife or Dremel tool to create a small ‘V’ groove. This gives the repair compound more surface area to grip.
- Drilling Stop-Holes: For longer cracks, drill a tiny (1/16-inch) hole at each end to stop the crack from spreading.
- Sanding for Adhesion: Use coarse-grit sandpaper (180-220 grit) to sand the area around the crack. This creates a rough surface for the repair compound to bond to. Wipe away all dust and ensure the area is dry.
Step 2: Mix and Apply the Repair Compound
Always follow your kit’s specific instructions for mixing ratios and working time.
- Mixing Resin and Hardener: In a clean cup, carefully measure and mix the resin and hardener. If your kit has color tints, add them now, mixing until you achieve a close match.
- Adding Fiberglass Mesh: For structural cracks, cut a piece of fiberglass mesh slightly larger than the crack. Apply a thin layer of resin, press the mesh into it, and cover with more resin, ensuring it’s fully saturated without air bubbles.
- Applying the Mixture: Use the applicator tool to apply the compound evenly, filling the crack and covering the sanded area. It’s better to slightly overfill the area, as you can sand it down later.
- Removing Air Bubbles: Gently press and smooth the compound to work out any trapped air bubbles, which can weaken the repair.
- Curing: Leave the repair undisturbed for the time specified in your kit, typically 24 hours for a full cure. Do not touch it.
Step 3: Sand, Finish, and Polish for a Seamless Look
Patience during this final stage is key to a seamless finish.
- Initial Sanding: Once fully cured, use coarse-grit sandpaper (e.g., 220-grit) to sand the patch level with the tub surface.
- Fine Sanding: Gradually switch to finer grits of sandpaper (e.g., 400, 600, then 800-grit) to smooth the repair.
- Wet Sanding: For the finest grits (400+), wet sanding (keeping the paper and surface wet) reduces dust and produces a much smoother finish.
- Color Coat (if needed): If your kit has a separate color coat, apply it now over the sanded repair according to the instructions.
- Polishing: Once any color coat is dry, use a fine polishing compound and a soft cloth to buff the area to a shine that matches your tub’s luster.
DIY vs. Professional Tub Repair: Making the Right Choice
Deciding between a DIY repair and calling a professional is a common dilemma. While a fiberglass tub crack repair kit can yield great results, it’s important to weigh the pros and cons.
| Feature | DIY Fiberglass Tub Repair Kit | Professional Tub Repair |
|---|---|---|
| Cost | $18 – $170 (kit only) | $450 – $900 (for professional repair) |
| Time Investment | 1-3 hours active work, 24-hour cure time | 2-3 days for complete repair |
| Skill Required | Moderate patience, attention to detail | Expert-level, specialized tools and materials |
| Aesthetic Result | Can be good with care, but color matching can be tricky | Near-flawless, seamless finish, often with warranty |
| Durability | Good for minor damage, dependent on prep and execution | Highly durable, often stronger than original, guaranteed |
| Warranty | None | Typically includes a warranty on work |
| Convenience | Work on your schedule | Schedule with technician, minimal effort on your part |
| Mess/Disruption | Minimal mess, no demolition | Minimal mess, no demolition |
Pros of DIY:
- Cost Savings: A DIY kit is significantly cheaper than professional services or tub replacement, saving hundreds or thousands of dollars.
- Satisfaction: There’s a sense of accomplishment in fixing it yourself.
- Speed: You can address minor damage quickly.
Cons and Risks of DIY:
- Poor Color Matching: Achieving a perfect color match is difficult and can result in a visible patch.
- Weak Repair: If you don’t reinforce a structural crack or fix underlying support issues, the crack will likely reappear.
- Future Leaks: An improperly sealed repair can lead to water damage and mold.
- Time and Effort: The process requires patience and meticulous attention to detail.
When to Call a Professional:
In some cases, calling a professional is the smartest move. Consider hiring an expert for:
- Large Structural Damage: If your tub has a large crack with significant flexing, a professional can properly rebuild and reinforce the area to be stronger than new.
- Lack of Time or Confidence: If you’re short on time or unsure about your skills, a pro handles everything.
- A Guaranteed, Flawless Finish: Professionals have the tools and experience to achieve a seamless, factory-like finish, often with a warranty for peace of mind.
- Recurring Cracks: If DIY repairs have failed, it indicates an underlying issue that needs professional diagnosis.
For comprehensive and reliable solutions, you can Explore professional tub repair options in Miami, Fort Lauderdale, Boca Raton, West Palm Beach, and other South Florida locations.
Frequently Asked Questions about Fiberglass Tub Repair
Here are answers to common questions about fiberglass tub repair:
How long does a fiberglass tub repair last?
A well-executed DIY repair with a quality fiberglass tub crack repair kit can last for years, but its longevity depends on proper preparation and addressing the root cause (like a lack of support). If the tub still flexes, the crack will return.
Professional repairs often include a warranty because they use industrial-grade materials and fix underlying support issues, making the repair extremely durable and often stronger than the original tub.
Can you repair a large hole in a fiberglass tub?
Yes, but it requires structural reinforcement. Kits with fiberglass mesh are essential for bridging the gap and adding strength. For very large holes on the tub floor, specialized inlay kits that create a new, solid surface are the best DIY option.
However, for extensive damage, professional tub repair is highly recommended. Experts can handle complex repairs, ensuring a lasting and watertight seal. You can learn more about professional tub repair services.
How do you fix a crack in the bottom of a fiberglass tub?
This is the most challenging DIY repair because the floor is a weight-bearing surface. The key is to eliminate any flexing before patching the crack.
- Address Flexing: If possible, access the underside of the tub to add support. Injecting expanding foam (specifically for tubs) into the void beneath the floor can create a solid base.
- Use a Structural Kit: After minimizing flex, use a fiberglass tub crack repair kit with mesh. Prepare the crack (clean, V-groove, sand) and apply layers of resin and mesh to build a strong, reinforced patch.
- Consider an Inlay Kit: For large or persistent floor cracks, an inlay kit provides a robust, permanent new surface.
Due to the complexity, professional repair is often recommended for cracks in the tub bottom to ensure the underlying support issues are resolved correctly for a safe, long-lasting fix.
Conclusion: A Restored Tub and Peace of Mind
A fiberglass tub crack repair kit is a great, cost-effective solution for minor to moderate tub damage, saving you from a full replacement. Proper preparation is key to a durable, invisible repair.
For complex cracks, large structural damage, or a guaranteed, flawless finish, professional help is the best investment. Top professional teams have over 30 years of experience and have completed more than 14,000 projects, offering expert tub repair services in Aventura, Boca Raton, Boynton Beach, Broward County, Coconut Creek, Coral Gables, Coral Springs, Dania Beach, Davie, Deerfield Beach, Delray Beach, Fort Lauderdale, Hialeah, Hollywood, FL, Jupiter, Key Biscayne, Lake Worth, Lauderdale By The Sea, Lauderhill, Lighthouse Point, Margate, Miami, Miami Beach, Miami-Dade County, Miramar, North Miami, North Miami Beach, Oakland Park, Palm Beach, Palm Beach County, Palm Beach Gardens, Pembroke Pines, Port Saint Lucie, Stuart, Tamarac, Vero Beach, Wellington, FL, West Palm Beach, Weston, Wilton Manors, and throughout South Florida.
Ready to restore your tub to its former glory and enjoy peace of mind? Contact a professional for a free estimate on your tub repair project! They can help you make the best choice for your home and your budget.
