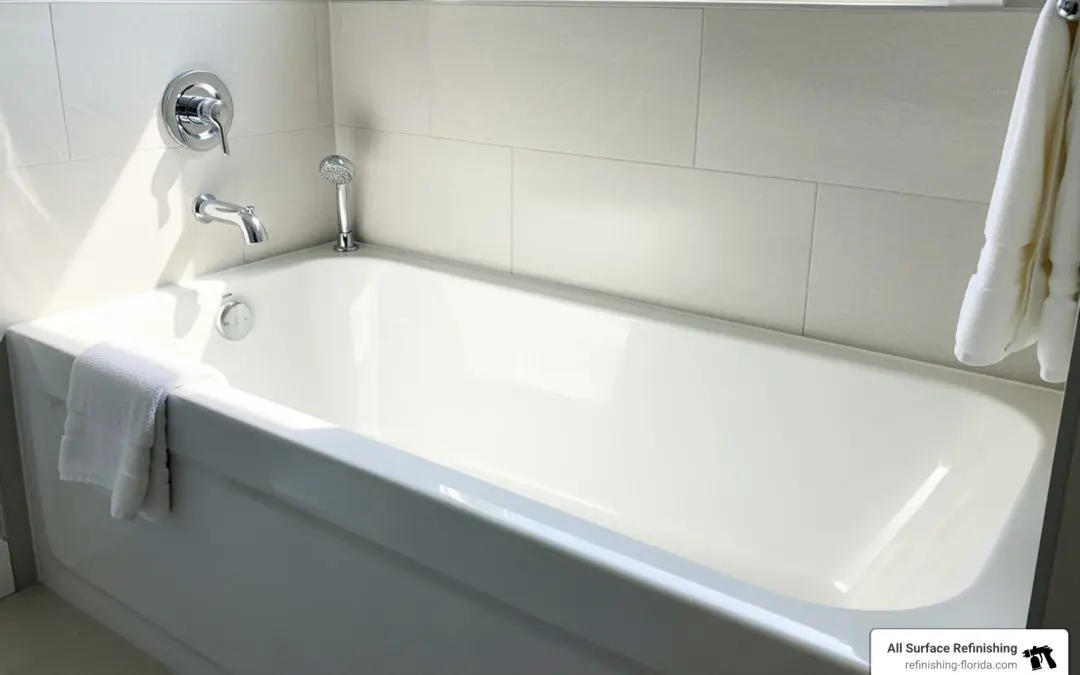
Why Bathtub Re-glaze is the Smart Alternative to Replacement
Bathtub re-glaze (also called refinishing) is a professional process that restores your worn, stained, or outdated tub to a like-new condition—without the expense, mess, or disruption of full replacement.
Quick Answer: Should You Reglaze Your Bathtub?
| You Should Reglaze If: | You Should Replace If: |
|---|---|
| Tub has minor scratches, stains, or dullness | Tub has major cracks or leaks |
| You want to change the color | Tub floor is warped or structurally damaged |
| Surface is hard to clean but structurally sound | Widespread mold indicates deeper issues |
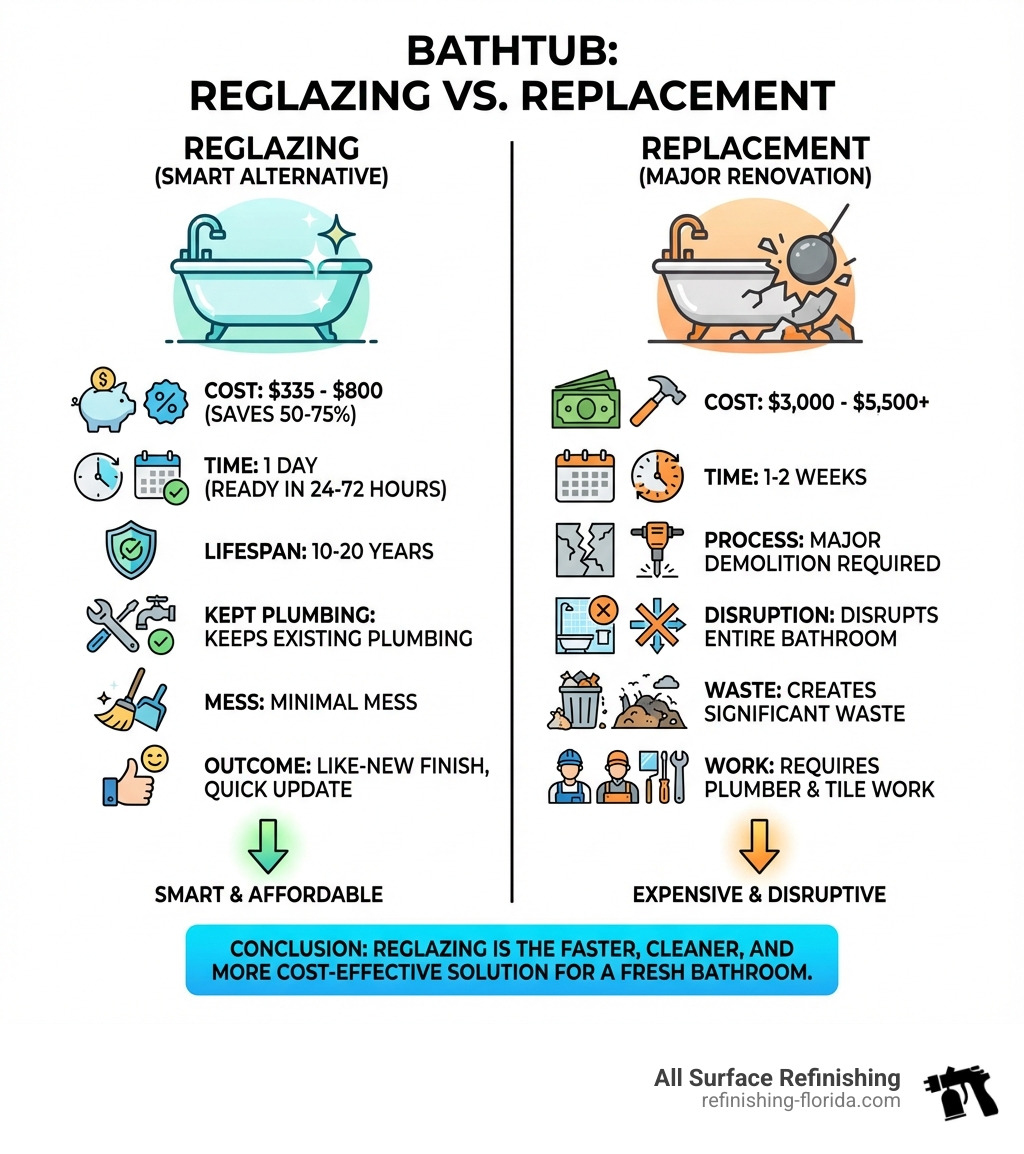
| Cost: $335-$800 | Cost: $3,000-$5,500+ |
| Time: 1 day (ready in 24-72 hours) | Time: 1-2 weeks |
The research is clear: reglazing saves you 50-75% compared to replacement and can be completed in just one day, with your tub ready to use within 24 to 72 hours. A professionally reglazed bathtub should last 10 to 20 years when done correctly and maintained properly.
But here’s the truth most homeowners don’t know: not all reglazing is created equal. DIY kits that cost $40-$150 often peel and fail within a few years, while professional refinishing uses industrial-grade bonding agents and coatings that create a durable, glossy finish indistinguishable from a brand-new tub.
Whether you’re dealing with a dingy, hard-to-clean surface or an outdated avocado-green relic from the 1970s, reglazing offers a fast, affordable path to a fresh bathroom—if you understand the process, costs, and what separates a quality job from a disappointing one.
I’m Frank Hernandez, President of All Surface Refinishing. With over a decade of hands-on experience, my team and I have transformed thousands of bathrooms across South Florida. I’m here to give you the complete picture of what to expect from a professional bathtub re-glaze.
What is Bathtub Reglazing, Really?
The terms “reglazing,” and “refinishing” are often used interchangeably, and in bathtub restoration, they all refer to the same general process: giving an old tub a new lease on life by applying a fresh, protective coating. However, it’s worth noting a subtle distinction. Technically, true reglazing involves firing clay in a kiln at extremely high temperatures—a process not practically achievable for an existing bathtub in your home. So, when we talk about bathtub re-glaze, we’re really referring to a professional refinishing process.
At its core, bathtub re-glaze is a cosmetic upgrade that involves carefully preparing the surface of your existing tub and then applying a durable, high-gloss finish. This protective coating not only makes your tub look brand new but also seals minor imperfections, making the surface easier to clean and more resistant to future wear and tear. It’s an incredible way to achieve that “like-new” look without the hassle and expense of a full replacement.
For more in-depth information, explore our insights on Bath Tub Refinishing.
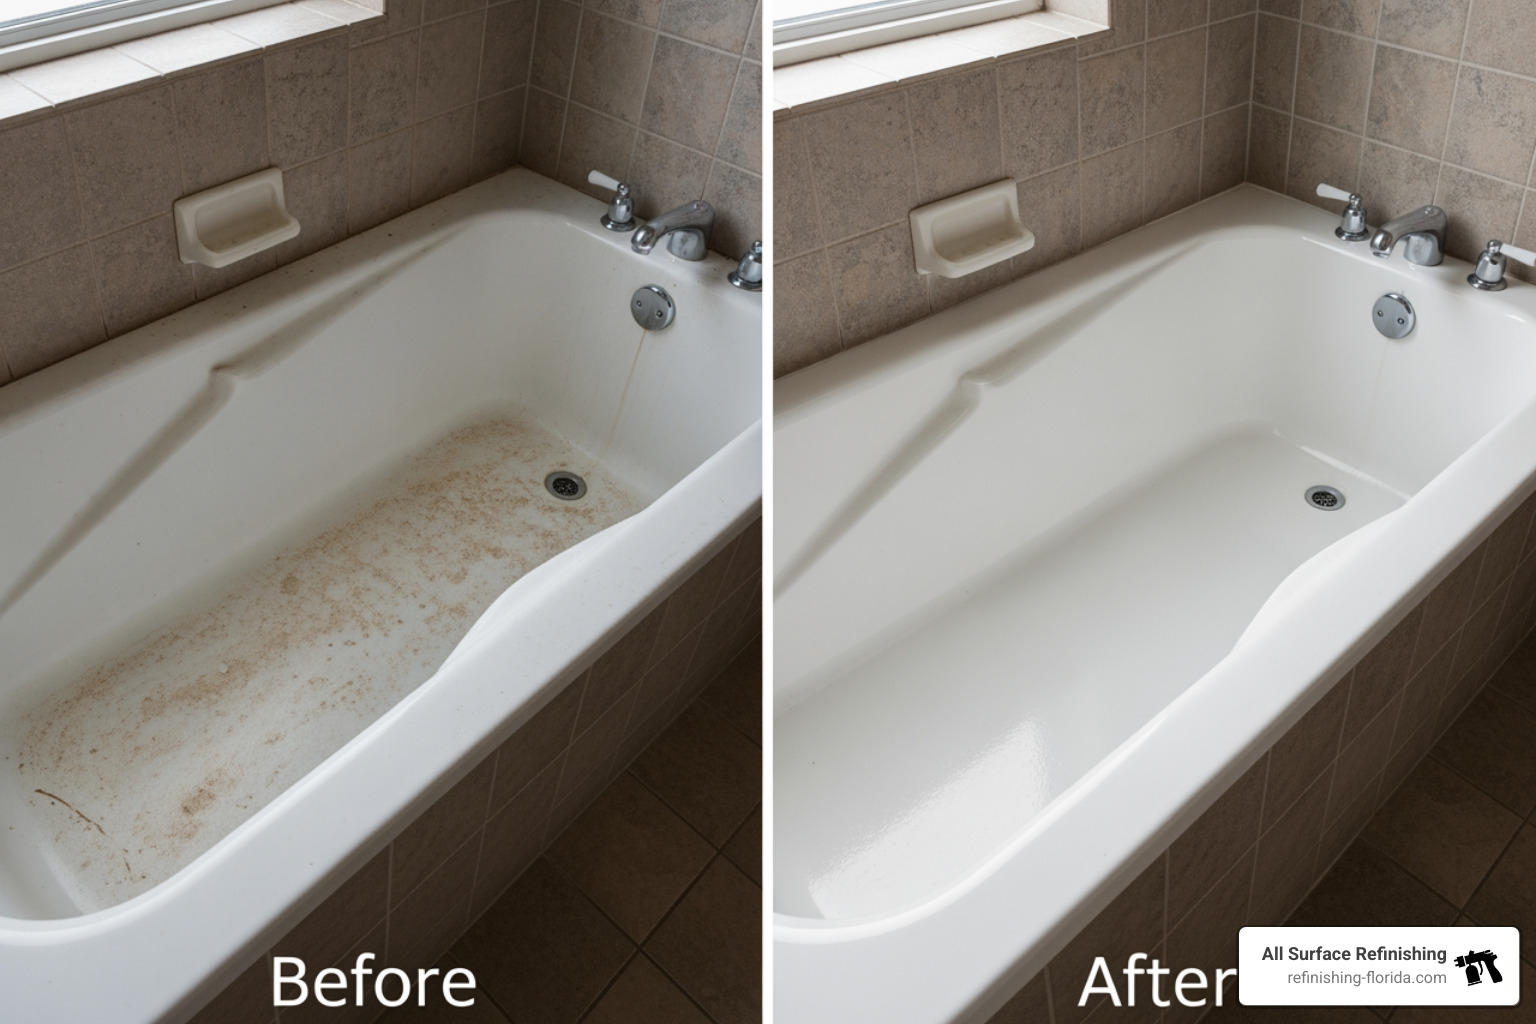
When to Reglaze vs. When to Replace
Deciding whether to reglaze or replace your bathtub is a common dilemma. We always aim to provide the most cost-effective and beneficial solution for our clients. Here’s how we typically break it down:
You should consider a bathtub re-glaze if:
- Your tub has minor scratches, chips, or surface imperfections.
- It’s stained, discolored, or difficult to clean, but otherwise structurally sound.
- You’re tired of an outdated color (think avocado green or baby blue) and want a fresh, modern look.
- You’re looking to update your bathroom’s aesthetic without the significant cost and disruption of a full renovation.
- You have an antique tub, like a clawfoot, that you want to preserve for its character and quality.
Conversely, replacement might be the better option if:
- Your tub has major cracks, leaks, or significant structural damage.
- The tub floor is warped or has soft spots, indicating underlying issues.
- You have widespread mold or mildew that suggests deeper moisture problems within the tub’s structure or surrounding areas.
- You want a completely different tub style, size, or depth that refinishing simply can’t achieve.
Reglazing is perfect for cosmetic issues and extending the life of a sound tub, but it’s not a magic bullet for structural problems.
Can Any Tub Material Get a Bathtub Re-glaze?
One of the great advantages of professional bathtub re-glaze is its versatility. Most common bathtub materials can be successfully refinished, allowing us to transform a wide range of tubs. This includes:
- Porcelain: A classic, durable material that takes beautifully to reglazing, restoring its original luster.
- Fiberglass: Often prone to dullness and minor cracks, fiberglass tubs are excellent candidates for a refresh.
- Acrylic: Similar to fiberglass, acrylic tubs can become scratched or faded over time, making them ideal for a new coating.
- Cast Iron: These heavy, incredibly durable tubs are fantastic for reglazing. They’re expensive to replace, so refinishing them is a smart, cost-effective choice that preserves their inherent quality. Learn more about Cast Iron Bathtub Refinishing.
- Cultured Marble: These tubs often show wear and tear, and a professional reglaze can bring back their neat appearance.
- Clawfoot Tubs: Beloved for their vintage charm, clawfoot tubs are prime candidates for reglazing, allowing us to preserve their unique character while making them look brand new. Find more about Clawfoot Bathtub Reglazing.
Regardless of the material, the key to a successful and long-lasting bathtub re-glaze lies in the meticulous preparation of the surface, which is where our professional expertise truly shines.
The Professional Bathtub Re-glaze Process: What to Expect
When you choose a professional for your bathtub re-glaze, you’re investing in a thorough, multi-step process designed to deliver a durable, beautiful finish. We typically complete the hands-on work in about three to five hours for a standard-sized tub. However, the tub will then need to cure, meaning it will be ready for use within 24 to 72 hours. This quick turnaround is one of the many reasons our clients across Florida, from Miami to Fort Pierce, love the refinishing option!
For a comprehensive look at the process, check out our Professional Bathtub Refinishing Complete Guide.
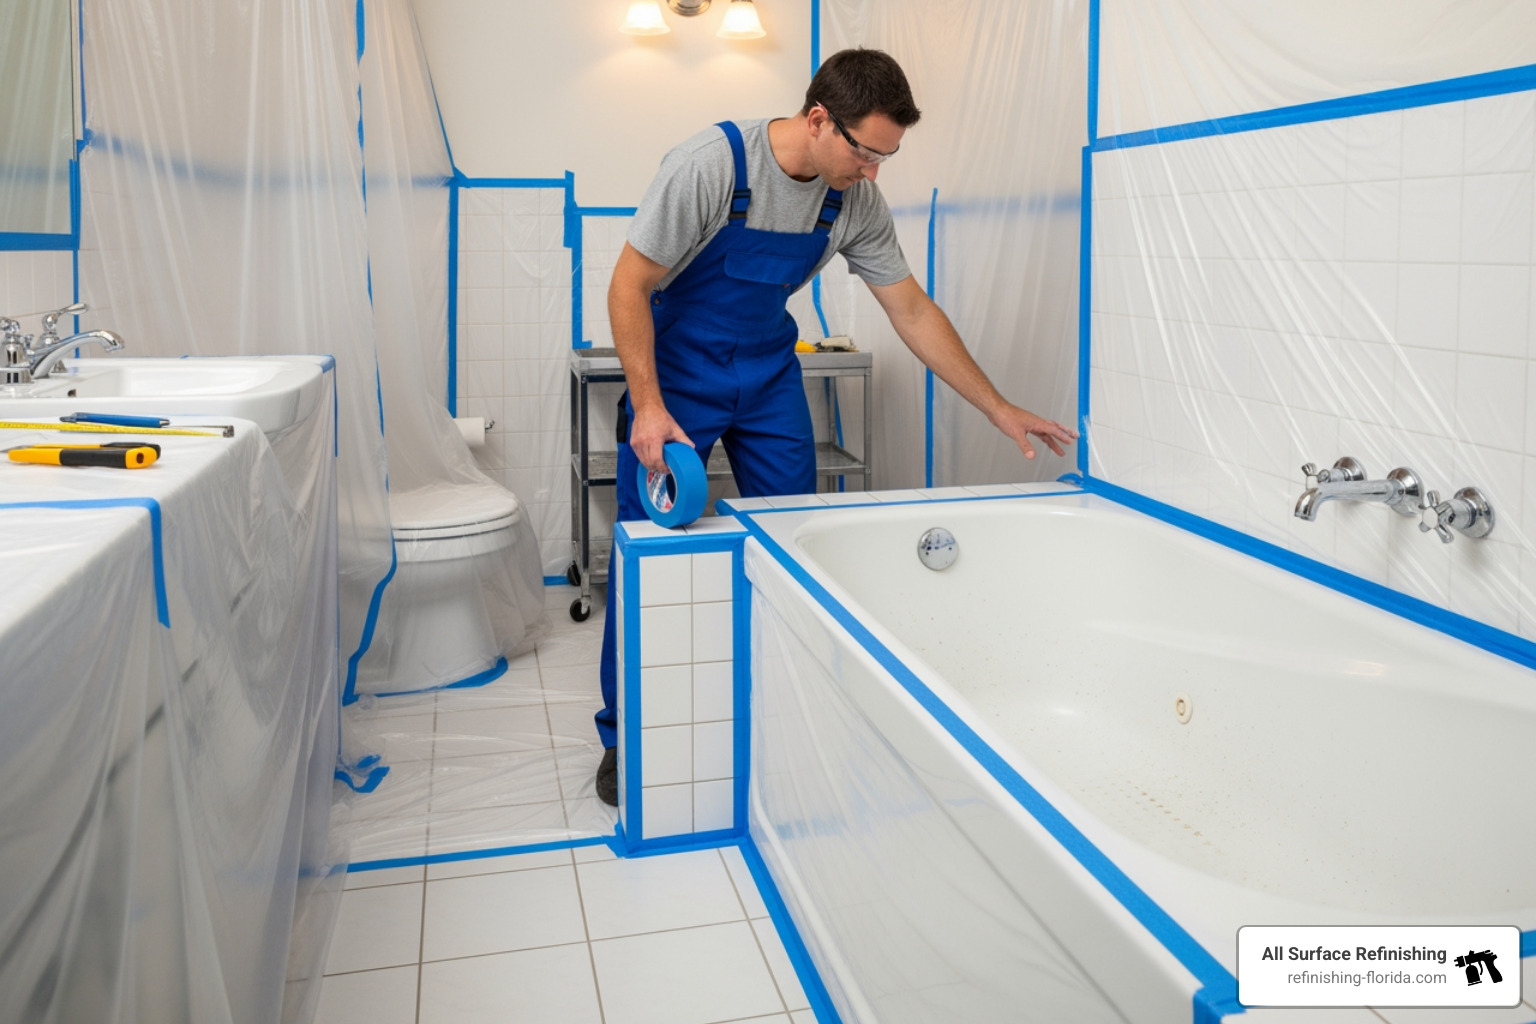
Step 1: Preparation and Damage Repair
This is arguably the most crucial step, as proper preparation accounts for about 80% of a successful reglaze. Our team begins by carefully removing all old caulk around the tub. This often reveals hidden dampness or minor issues that we address before proceeding. Next, we carefully clean the tub, removing all soap scum, body oils, and mineral deposits using specialized cleaners.
Once clean, we protect your bathroom by masking off all surrounding walls, flooring, fixtures, and anything else that shouldn’t get coated. We then move on to repairing any existing damage:
- Chips and Pits: We fill these with epoxy putty, ensuring a smooth, seamless surface.
- Cracks: For minor cracks, we can often fill and blend them in.
- Sanding: After repairs, we sand the patched areas and the entire tub surface to ensure they blend perfectly and create a smooth foundation for the new finish.
For more details on addressing damage, please visit our page on Tub Repair.
Step 2: Surface Stripping and Etching
With the tub cleaned and repaired, the next critical step is to prepare the existing surface for the new coating to adhere properly. This involves a process of stripping and etching. If the tub has been previously refinished, we’ll first strip off any old, peeling coatings. This is a vital but potentially hazardous step, as the chemicals involved can be strong.
We then apply a chemical etcher or perform wet sanding to abrade the glossy tub surface. This creates a microscopic texture, allowing the new bonding agents and coatings to grip firmly, preventing future peeling or flaking. This step is where professional expertise, specialized products, and strict safety protocols are paramount. The chemicals used can be quite strong, and proper ventilation is absolutely essential to manage fumes and ensure a safe working environment.
Step 3: Priming and Coating Application
This is where the magic really starts to happen! After the surface is perfectly prepared, we apply a proprietary bonding agent, often a specialized epoxy primer. This agent creates a molecular bond between your old tub and the new finish, ensuring superior adhesion and durability. This is a significant differentiator from many DIY kits, which often lack such high-grade bonding capabilities.
Next, we apply multiple thin coats of a high-tech acrylic urethane topcoat. We use professional-grade HVLP (High Volume Low Pressure) spray systems, similar to those used in the automotive industry, to achieve a perfectly smooth, even, and drip-free finish. This fine-finish spray process creates that “wet look” with high light refraction and a deep gloss, just like a brand-new tub. Each coat is allowed to dry for a short period before the next is applied, building up a robust and beautiful surface.
Step 4: Curing and Finishing
Once all the coats are applied, the tub needs time to cure. This is the period when the new coating hardens and reaches its maximum durability. While the application takes only a few hours, the curing process typically requires the tub to be out of commission for 24 to 72 hours. We understand it’s tough to wait, but patience here is key to a long-lasting finish!
After curing, we return to carefully remove all protective masking and re-caulk around the tub with fresh, high-quality silicone caulk rated for bathrooms. We then reinstall any hardware that was removed. Finally, we buff and polish the surface, deepening the gloss and ensuring a silky-smooth feel. The result is a stunning, like-new tub that’s ready for years of enjoyment.
You can learn more about how we Restore Tub surfaces to their former glory.
DIY vs. Professional: Costs, Risks, and Rewards
When considering a bathtub re-glaze, many homeowners wonder if they can tackle it themselves. While DIY kits exist, the differences between a DIY and a professional job are vast, impacting cost, time, durability, and most importantly, safety.
Cost & Durability
A DIY reglazing kit might seem like a bargain, typically costing between $40 and $150. However, the results are often short-lived, with the new finish peeling or chipping within a few years. This means you’ll likely be redoing the work or calling a professional sooner than you think.
Professional reglazing, on the other hand, costs between $335 and $800 on average. While the initial investment is higher, it provides a high-quality, long-lasting finish that can endure for 10 to 20 years with proper care. This saves you significant money in the long run compared to a full bathtub replacement, which can cost thousands.
For a broader look at average costs and typical lifespans of different tub materials, you can also review independent resources such as Consumer Reports when planning your bathroom project.
Time & Finish Quality
A DIY project can easily consume an entire weekend, especially for someone without experience. Achieving a smooth, factory-like finish is extremely difficult with brushes or rollers, often resulting in visible brush marks, drips, and an uneven surface.
A professional can typically complete the entire reglazing process in just 3-5 hours. They use specialized HVLP (High Volume Low Pressure) spray systems to apply the coating, ensuring a flawless, high-gloss finish that looks brand new. Your tub is then ready for use in just 24-72 hours.
Safety
Bathtub refinishing involves strong chemicals, including acids and isocyanates, which can be hazardous without proper handling and ventilation. DIY kits often don’t provide adequate safety gear. Professionals, however, are trained in safety protocols and use industrial-grade ventilation systems to protect both themselves and your home from harmful fumes. For more information on the potential hazards of chemicals like methylene chloride, which is found in some stripping agents, it’s best to rely on trained experts.
Why Bathtub Re-glaze is the Smart Alternative to Replacement
Bathtub re-glaze (also called refinishing) is a professional process that restores your worn, stained, or outdated tub to a like-new condition—without the expense, mess, or disruption of full replacement.
Quick Answer: Should You Reglaze Your Bathtub?
| You Should Reglaze If: | You Should Replace If: |
|---|---|
| Tub has minor scratches, stains, or dullness | Tub has major cracks or leaks |
| You want to change the color | Tub floor is warped or structurally damaged |
| Surface is hard to clean but structurally sound | Widespread mold indicates deeper issues |
| Cost: $335-$800 | Cost: $3,000-$5,500+ |
| Time: 1 day (ready in 24-72 hours) | Time: 1-2 weeks |
The research is clear: reglazing saves you 50-75% compared to replacement and can be completed in just one day, with your tub ready to use within 24 to 72 hours. A professionally reglazed bathtub should last 10 to 20 years when done correctly and maintained properly.
But here’s the truth most homeowners don’t know: not all reglazing is created equal. DIY kits that cost $40-$150 often peel and fail within a few years, while professional refinishing uses industrial-grade bonding agents and coatings that create a durable, glossy finish indistinguishable from a brand-new tub.
Whether you’re dealing with a dingy, hard-to-clean surface or an outdated avocado-green relic from the 1970s, reglazing offers a fast, affordable path to a fresh bathroom—if you understand the process, costs, and what separates a quality job from a disappointing one.
I’m Frank Hernandez, President of All Surface Refinishing, and I’ve been professionally refinishing surfaces across South Florida since 2011, with over a decade of hands-on experience in bathtub re-glaze projects. Together with my team, we’ve transformed thousands of bathrooms, and I’m here to give you the complete picture of what to expect, what to avoid, and how to make your reglazed tub last for decades.
What is Bathtub Reglazing, Really?
The terms “reglazing,” and “refinishing” are often used interchangeably to describe the process of applying a new, durable coating to an old tub. While true reglazing involves high-temperature firing in a kiln, what we do is a professional refinishing process that gives your tub a brand-new look and feel right in your home.
This cosmetic upgrade involves preparing the tub’s surface and applying a durable, high-gloss finish. The new coating makes your tub look brand new, seals minor imperfections, and creates an easy-to-clean, wear-resistant surface. It’s a fantastic way to get a like-new tub without the cost and mess of a full replacement.
For more in-depth information, explore our insights on Bath Tub Refinishing.
When to Reglaze vs. When to Replace
Deciding whether to reglaze or replace your bathtub is a common dilemma. Here’s a quick guide:
Consider a bathtub re-glaze if:
- Your tub has minor scratches, chips, or surface imperfections.
- It’s stained, discolored, or difficult to clean, but structurally sound.
- You want to change an outdated color (like avocado green or baby blue).
- You’re looking for a cost-effective update without a full renovation.
- You have an antique tub, like a clawfoot, that you want to preserve.
Replacement might be the better option if:
- Your tub has major cracks, leaks, or significant structural damage.
- The tub floor is warped or has soft spots, indicating underlying issues.
- You have widespread mold or mildew, suggesting deeper moisture problems.
- You want a completely different tub style, size, or depth.
Reglazing is perfect for cosmetic issues and extending the life of a sound tub, but it’s not a solution for structural problems.
Can Any Tub Material Get a Bathtub Re-glaze?
One of the great advantages of professional bathtub re-glaze is its versatility. Most common bathtub materials can be successfully refinished, including:
- Porcelain: A classic, durable material that takes beautifully to reglazing.
- Fiberglass: Often prone to dullness and minor cracks, fiberglass tubs are excellent candidates for a refresh.
- Acrylic: Similar to fiberglass, acrylic tubs can be restored from scratches or fading.
- Cast Iron: These heavy, durable tubs are expensive to replace, making refinishing a smart, cost-effective choice. Learn more about Cast Iron Bathtub Refinishing.
- Cultured Marble: A professional reglaze can bring back the neat appearance of these tubs.
- Clawfoot Tubs: Beloved for their vintage charm, clawfoot tubs are prime candidates for reglazing. Find more about Clawfoot Bathtub Reglazing.
Regardless of the material, the key to a successful and long-lasting bathtub re-glaze lies in meticulous surface preparation, which is where our professional expertise truly shines.
The Professional Bathtub Re-glaze Process: What to Expect
A professional bathtub re-glaze is a multi-step process designed for a durable, beautiful finish. The work itself typically takes 3-5 hours, and your tub will be ready for use within 24-72 hours. This quick turnaround is a key benefit of refinishing over replacement.
For a comprehensive look at the process, check out our Professional Bathtub Refinishing Complete Guide.
Step 1: Preparation and Damage Repair
Proper preparation is the most crucial step for a lasting finish. Our team begins by removing old caulk and thoroughly cleaning the tub to eliminate soap scum, body oils, and mineral deposits. We then protect your bathroom by masking off all surrounding walls, flooring, and fixtures. Any existing damage is addressed:
- Chips and Pits: Filled with epoxy putty for a smooth, seamless surface.
- Cracks: Minor cracks are filled and blended.
- Sanding: The entire tub surface is sanded to create a perfect foundation for the new finish.
For more details on addressing damage, please visit our page on Tub Repair.
Step 2: Surface Stripping and Etching
To ensure the new coating adheres properly, the existing surface is stripped and etched. If the tub has been previously refinished, we’ll first strip off any old, peeling coatings. We then apply a chemical etcher or perform wet sanding to abrade the glossy tub surface. This creates a microscopic texture, allowing the new bonding agents and coatings to grip firmly, preventing future peeling. This step requires professional expertise and strict safety protocols, as some chemicals used, like methylene chloride, can be hazardous without proper ventilation and handling.
Step 3: Priming and Coating Application
After the surface is perfectly prepared, we apply a proprietary bonding agent, often a specialized epoxy primer. This agent creates a molecular bond between your old tub and the new finish, ensuring superior adhesion and durability—a key differentiator from many DIY kits.
Next, we apply multiple thin coats of a high-tech acrylic urethane topcoat using professional-grade HVLP (High Volume Low Pressure) spray systems. This technique achieves a perfectly smooth, even, and drip-free finish with a high-gloss, “wet look” appearance, just like a brand-new tub.
Step 4: Curing and Finishing
Once all the coats are applied, the tub needs time to cure. This is when the new coating hardens and reaches its maximum durability. The curing process typically requires 24 to 72 hours. After curing, we remove all protective masking, re-caulk around the tub with high-quality silicone, and reinstall any hardware. Finally, we buff and polish the surface, deepening the gloss and ensuring a silky-smooth feel. The result is a stunning, like-new tub that’s ready for years of enjoyment.
You can learn more about how we Restore Tub surfaces to their former glory.
DIY vs. Professional: Costs, Risks, and Rewards
When considering a bathtub re-glaze, many homeowners wonder if they can tackle it themselves. While DIY kits are available, the differences between a DIY and a professional job are vast, impacting cost, time, durability, and most importantly, safety.
Cost & Durability
A DIY reglazing kit might seem like a bargain, typically costing between $40 and $150. However, the results are often short-lived, with the new finish peeling or chipping within a few years. This means you’ll likely be redoing the work or calling a professional sooner than you think.
Professional reglazing, on the other hand, costs between $335 and $800 on average. While the initial investment is higher, it provides a high-quality, long-lasting finish that can endure for 10 to 20 years with proper care. This saves you significant money in the long run compared to a full bathtub replacement, which can cost thousands.
For independent cost comparisons and typical service life of different bathroom fixtures, you can consult trusted resources such as Consumer Reports alongside getting local quotes in South Florida.
Time & Finish Quality
A DIY project can easily consume an entire weekend, especially for someone without experience. Achieving a smooth, factory-like finish is extremely difficult with brushes or rollers, often resulting in visible brush marks, drips, and an uneven surface.
A professional can typically complete the entire reglazing process in just 3-5 hours. They use specialized HVLP (High Volume Low Pressure) spray systems to apply the coating, ensuring a flawless, high-gloss finish that looks brand new. Your tub is then ready for use in just 24-72 hours.
Safety
Bathtub refinishing involves strong chemicals, including acids and isocyanates, which can be hazardous without proper handling and ventilation. DIY kits often don’t provide adequate safety gear. Professionals, however, are trained in safety protocols and use industrial-grade ventilation systems to protect both themselves and your home from harmful fumes. For more information on the potential hazards of chemicals like methylene chloride, which is found in some stripping agents, it’s best to rely on trained experts.
To understand these chemical risks in more detail, review guidance from the CDC and NIOSH on methylene chloride exposure at cdc.gov.
Longevity and Maintenance for Your Reglazed Tub
A professionally reglazed bathtub can last 10 to 20 years with proper care. The longevity of the finish depends on the quality of the materials and application, as well as your cleaning and maintenance routine. For more details on our services, visit our Bathtub Services.
How to Clean a Reglazed Bathtub
To keep your newly refinished tub looking its best, follow these simple cleaning tips:
- Use non-abrasive cleaners: Gentle, non-abrasive, liquid cleaners are best. Products like Scrubbing Bubbles, Lysol Basin Tub & Tile Cleaner, or simple dish soap and water are excellent choices.
- Avoid harsh chemicals: Do not use cleaners containing bleach, ammonia, or strong acids.
- Use soft sponges: Avoid abrasive pads, steel wool, or harsh brushes that can scratch the new surface. A soft sponge or cloth is all you need.
- Rinse thoroughly: After cleaning, always rinse the tub thoroughly with water to remove any soap residue.
Frequently Asked Questions about Bathtub Reglazing
How long does a reglazed bathtub last?
A professionally reglazed tub can last 10 to 20 years with proper care. The lifespan of a DIY kit is much shorter, often only 1-3 years. The final durability depends on the quality of the materials, the preparation process, and your ongoing maintenance.
Is there a strong smell during the process?
Yes, the reglazing process involves strong-smelling chemicals and coatings. However, our professional technicians use industrial-strength ventilation systems to exhaust fumes directly outside, minimizing the odor in your home. The smell typically dissipates completely within 24-48 hours as the new surface cures.
Can you reglaze a tub that has been reglazed before?
Absolutely. However, the old, failing coating must be completely stripped off before the new finish can be applied. This is a crucial step to ensure the new coating adheres properly and provides a long-lasting finish. This extra step can add to the time and cost, and it’s a job best left to a professional.
