Transform Your Worn-Out Tub Without Breaking the Bank
Reglaze my bathtub is a cost-effective way to restore a worn, stained, or outdated bathtub to like-new condition without the expense and disruption of full replacement. Here’s what you need to know:
Quick Answer: Bathtub Reglazing at a Glance
- What it is: Applying a durable coating over your existing tub surface to restore its appearance
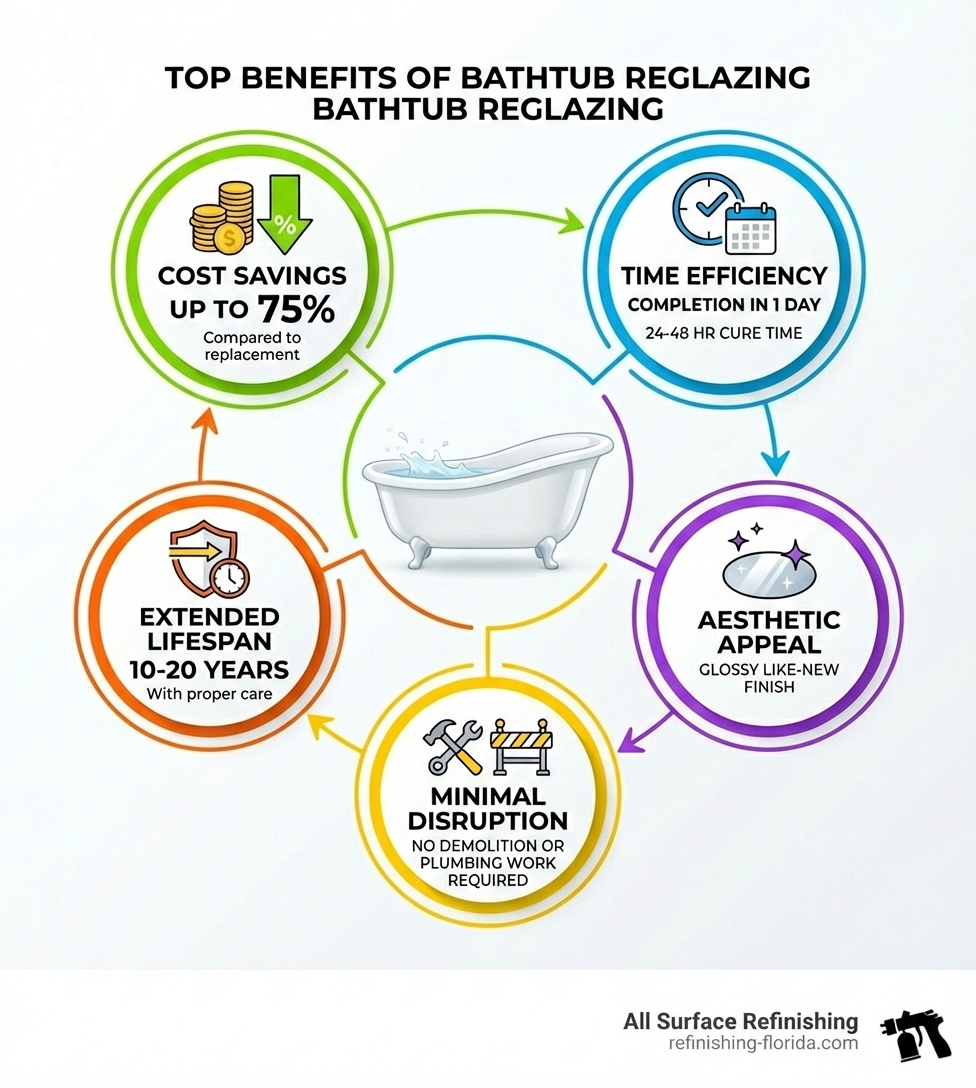
- Cost: $300-$600 professionally vs. $3,000+ for replacement (save up to 75%)
- Timeline: Completed in one day; ready to use in 24-48 hours
- Lifespan: 10-20 years with proper care
- Best for: Tubs with minor damage, stains, dull finish, or outdated colors
- Not suitable for: Deep structural cracks, severe rust, or persistent leaks
If your bathtub looks dingy, impossible to clean, or just plain dated, you’re probably staring at what feels like a $3,000+ problem. But here’s the good news: professional reglazing can save you up to 75% compared to replacement costs while giving your tub a fresh, glossy finish in just one day.
The reality is that most old bathtubs—especially vintage cast iron or porcelain models—are built better than many new ones. They’re structurally sound and worth keeping. The problem isn’t the tub itself; it’s just the finish that’s worn out.
That’s where reglazing comes in. This process involves thorough cleaning, repairing any chips or cracks, and applying a professional-grade coating that bonds to the original surface. The result? A smooth, glossy finish that looks and feels brand new—without the mess, time, and expense of demolition and replacement.
But can you do it yourself? While DIY kits exist, they rarely deliver professional results. The process requires specialized equipment, proper ventilation for toxic fumes, and professional-grade materials that aren’t available to homeowners. Most DIY attempts result in peeling, bubbling, or uneven finishes that fail within months.
I’m Frank Hernandez, and I’ve been helping South Florida homeowners reglaze their bathtubs since 2011, with over a decade of hands-on refinishing experience. As President of All Surface Refinishing and a Certified Kohler Authorized Rep, I’ve seen how proper reglazing can transform tired bathrooms across Aventura, Boca Raton, Fort Lauderdale, Miami, West Palm Beach, and beyond.
In this guide, I’ll walk you through everything you need to know about bathtub reglazing—from understanding the process to deciding between DIY and professional services. Whether you’re dealing with a chipped vintage tub or just want to update that awful avocado green from the 1970s, you’ll learn how to make the smartest choice for your bathroom and budget.
What is Bathtub Reglazing, Really?
The terms “reglazing,” “refinishing,” and “resurfacing” are often used interchangeably in our industry, and frankly, it can be a bit confusing! However, they all refer to the same fundamental process: restoring a worn, stained, or outdated bathtub to look and feel new again. At All Surface Refinishing, when we talk about reglazing, we’re describing the meticulous application of a durable, high-tech coating over your existing tub finish.
This process is a far cry from the original “glazing” of a porcelain tub, which involves heating clay in a kiln at temperatures as high as 2,500°F. Since we can’t bring a kiln into your bathroom in Coral Springs or Pembroke Pines, our method involves applying specialized polyurethane or epoxy coatings that bond directly to the original surface. The goal is to create a seamless, like-new finish that’s both beautiful and resilient. It’s about restoring the original surface’s integrity and aesthetic appeal, giving your bathtub a true second life.
While the terminology might vary, the outcome is clear: a beautifully restored bathtub that improves your entire bathroom. To learn more about our comprehensive approach, please visit our page on More info about our bathtub refinishing services.
Reglazing vs. Replacement: Making the Smart Choice
Deciding whether to reglaze my bathtub or replace it entirely is a common dilemma for homeowners in South Florida. It often comes down to assessing the current condition of your tub against your budget and renovation goals.
Signs Your Tub Needs Help (and Can Likely Be Reglazed):
If your bathtub exhibits any of the following, reglazing is often the perfect solution:
- Minor cracks or chips: Surface-level damage that hasn’t compromised the tub’s structural integrity.
- Stains: Persistent discoloration from hard water, rust, or dyes that won’t scrub away.
- Dull or worn finish: The once-glossy surface has lost its luster and feels rough.
- Outdated color: You’re tired of that avocado green, harvest gold, or baby blue tub from decades past and want a modern white or off-white look.
These are cosmetic issues that reglazing can effectively address, changing your tub without the need for demolition.
When to Consider Replacement (and When Reglazing Isn’t Enough):
While reglazing is incredibly versatile, there are situations where replacement becomes the more practical or necessary option. You should consider replacing your tub if it has:
- Major structural cracks: Deep cracks that go through the tub material, potentially causing leaks.
- Persistent leaks: If your tub is leaking from its base or around the drain, indicating structural failure or severe plumbing issues.
- Severe rust or corrosion: Extensive rust that has eaten through the metal base of a cast iron tub.
- Structural instability: A tub that flexes significantly or feels soft underfoot, which can indicate underlying water damage or a failing subfloor.
- Undesirable depth or style: If you simply hate the overall design or size of your tub and want a complete change, like converting to a walk-in shower.
Cost Comparison and Time Commitment:
This is where reglazing truly shines. Bathtub replacement is a major undertaking. It involves demolition, plumbing work, potential tile damage, and the installation of a new tub. The national average cost for tub replacement can easily exceed $3,000, and often ranges from $1,400 to $10,000 or more, depending on the tub type and labor involved. This also means your bathroom could be out of commission for several days, if not a week or more.
Reglazing, on the other hand, is a much more budget-friendly option. The national average cost for professional bathtub reglazing is around $480, with ranges typically from $350 to $600. In South Florida cities like Fort Lauderdale, Miami, or West Palm Beach, these prices remain highly competitive. The best part? Most reglazing projects can be completed in just one day, and your tub will be ready for use within 24-48 hours. This means minimal disruption to your daily routine and no messy demolition.
| Feature | Bathtub Reglazing | Bathtub Replacement |
|---|---|---|
| Cost | $350 – $600 (average $480) | $3,000 – $10,000+ |
| Time | 1 day (ready in 24-48 hrs) | 3-5 days or more |
| Disruption | Minimal (no demolition, no major plumbing) | High (demolition, plumbing, potential tile work) |
| Longevity | 10-20 years with proper care | 15-20 years (for new tub) |
| Damage Type | Minor chips, cracks, stains, dullness, color change | Structural damage, severe leaks, major design change |
If your tub is structurally sound but just needs a cosmetic facelift, reglazing offers a cost-effective, efficient, and environmentally friendly solution. For more detailed information on making this choice, explore What To Know About Reglazing a Tub.
The DIY Guide to Reglaze My Bathtub
We understand the appeal of a good DIY project. There’s a certain satisfaction that comes from tackling a home improvement task yourself. When it comes to something as visible and heavily used as your bathtub, however, we urge caution. While DIY reglazing kits are readily available at hardware stores across South Florida, they often fall short of delivering professional, long-lasting results. The professional-grade materials, specialized equipment, and extensive experience required for a truly durable and beautiful finish are simply not accessible to the average homeowner.
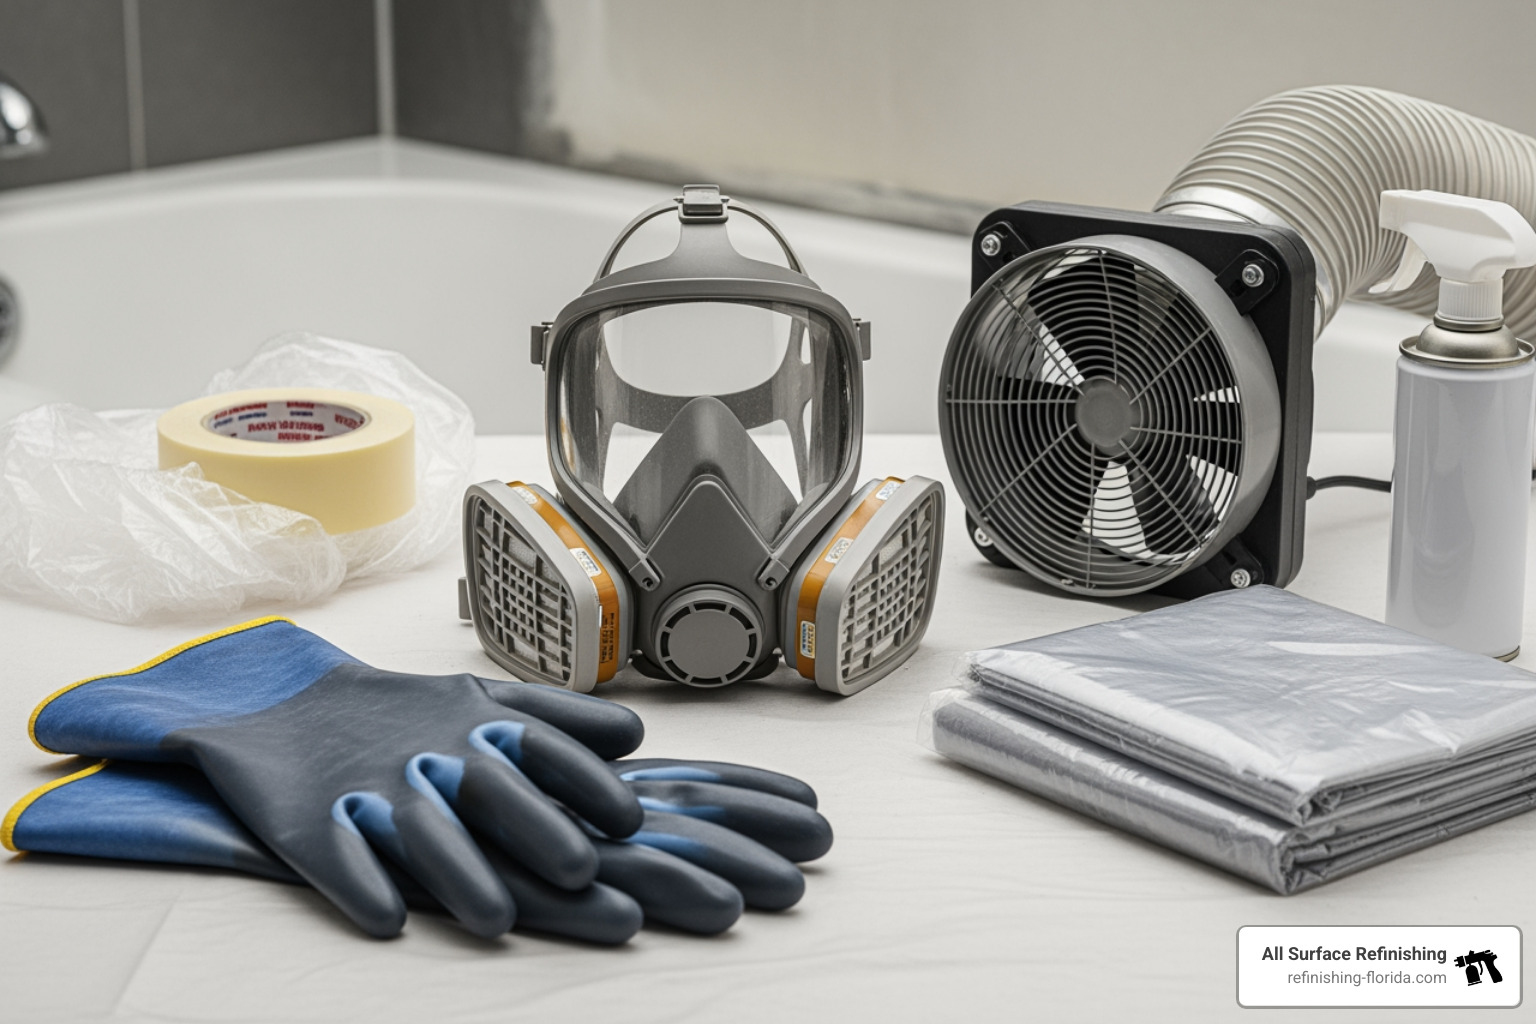
Attempting to reglaze my bathtub yourself carries significant risks, not just for the aesthetic outcome but also for your health. The chemicals involved are potent, and proper ventilation and personal protective equipment are non-negotiable. For instance, some strippers can contain methylene chloride, a chemical with serious health side effects including headaches, dizziness, and eye, nose, and throat irritation. Paper or cartridge masks are insufficient protection against these strong fumes, necessitating a fresh air breathing system and professional exhaust setup. You can read more about this solvent and its health effects on the CDC/NIOSH page about methylene chloride or the general Paint stripper safety overview.
Despite these warnings, if you’re determined to try a DIY approach, here’s a general step-by-step guide. Please remember that this is a simplified overview, and you must follow your specific kit’s instructions carefully.
Step 1: Preparing Your Bathroom and Tub
Preparation is arguably the most critical step in any reglazing project, whether DIY or professional. It ensures proper adhesion and a smooth finish.
- Remove Hardware: Turn off the water supply to the bathroom. Carefully remove all tub hardware, including the faucet, handles, drain cover, and overflow plate. This ensures you can apply the coating evenly without obstruction.
- Deep Cleaning: The tub must be immaculately clean. Use a heavy-duty abrasive cleaner or bleach to remove all soap scum, mineral deposits, oils, and grime. Repeat this process until the tub is spotless. Any residue will prevent the new coating from adhering properly.
- Caulk Removal: Using a utility knife and a caulk remover tool, carefully remove all existing caulk around the tub. This creates a clean seam for re-caulking later.
- Masking Surfaces: Protect your bathroom! Use painter’s tape and plastic sheeting to carefully cover all surrounding surfaces: walls, flooring, toilet, vanity, and any fixtures you don’t want coated. Create a “spray booth” effect to contain dust and overspray.
- Ventilation Setup: This is crucial. Open windows, use an exhaust fan, and set up additional fans to blow air out of the bathroom. Consider venting directly outside to minimize fume exposure. The fumes can be intense and linger for days. For more on chemical hazards, refer to the Dangers of methylene chloride.
Step 2: Repairing and Sanding the Surface
Once clean and masked, your tub needs a smooth, receptive surface for the new glaze.
- Filling Chips and Cracks: Inspect your tub for any chips, pits, or minor cracks. Use an epoxy putty stick (often included in DIY kits) to fill these imperfections. Apply the putty, ensuring it’s flush with the original surface. If you have significant damage, we strongly recommend professional bathtub repair before even considering reglazing. For comprehensive repair guidance, you can Read our Bathtub Repair Complete Guide.
- Sanding for Adhesion: After repairs dry, lightly sand the entire tub surface. This step dulls the existing finish and creates a microscopic texture that the new coating can grip onto. Use 120-grit wet/dry sandpaper or a sanding block, ensuring you cover every inch. Rinse the tub thoroughly to remove all sanding dust, then wipe it down with a tack cloth until no dust remains.
Step 3: Applying the New Finish
This is the moment of truth, where precision and speed are key.
- Primer Application: Some kits include a primer. If yours does, apply it according to the instructions. This layer helps with adhesion and provides a uniform base. A professional would use a two-part epoxy primer for superior bonding.
- Epoxy Coating: Mix the hardener and epoxy resin from your kit just before application, as these coatings have a limited working time. Work quickly and evenly. For DIY, you’ll likely use a foam roller for flat surfaces and a foam brush for edges and corners.
- Roller and Brush Techniques: Apply thin, even coats. Avoid applying too much product at once, as this will lead to drips and runs. Overlap your strokes slightly to ensure full coverage.
- Multiple Thin Coats: Most DIY kits recommend two to four thin coats rather than one thick one. This builds durability and a smoother finish.
- Drying Times: Allow adequate drying time between each coat, as specified by your kit. Rushing this step can lead to a tacky, uneven, or peeling finish.
- Curing Time: After the final coat, the tub needs to cure. This is typically 24-72 hours before you can use it. Avoid placing anything on the surface during this time. After the curing period, carefully re-caulk around the tub and reinstall your hardware.
DIY Risks vs. Professional Results
While the idea of saving money by tackling a DIY reglaze my bathtub project is tempting, the reality often falls short of expectations. We’ve seen countless homeowners in Miami, Fort Lauderdale, and West Palm Beach come to us after a failed DIY attempt, and the results can be disheartening.
Common DIY Failures:
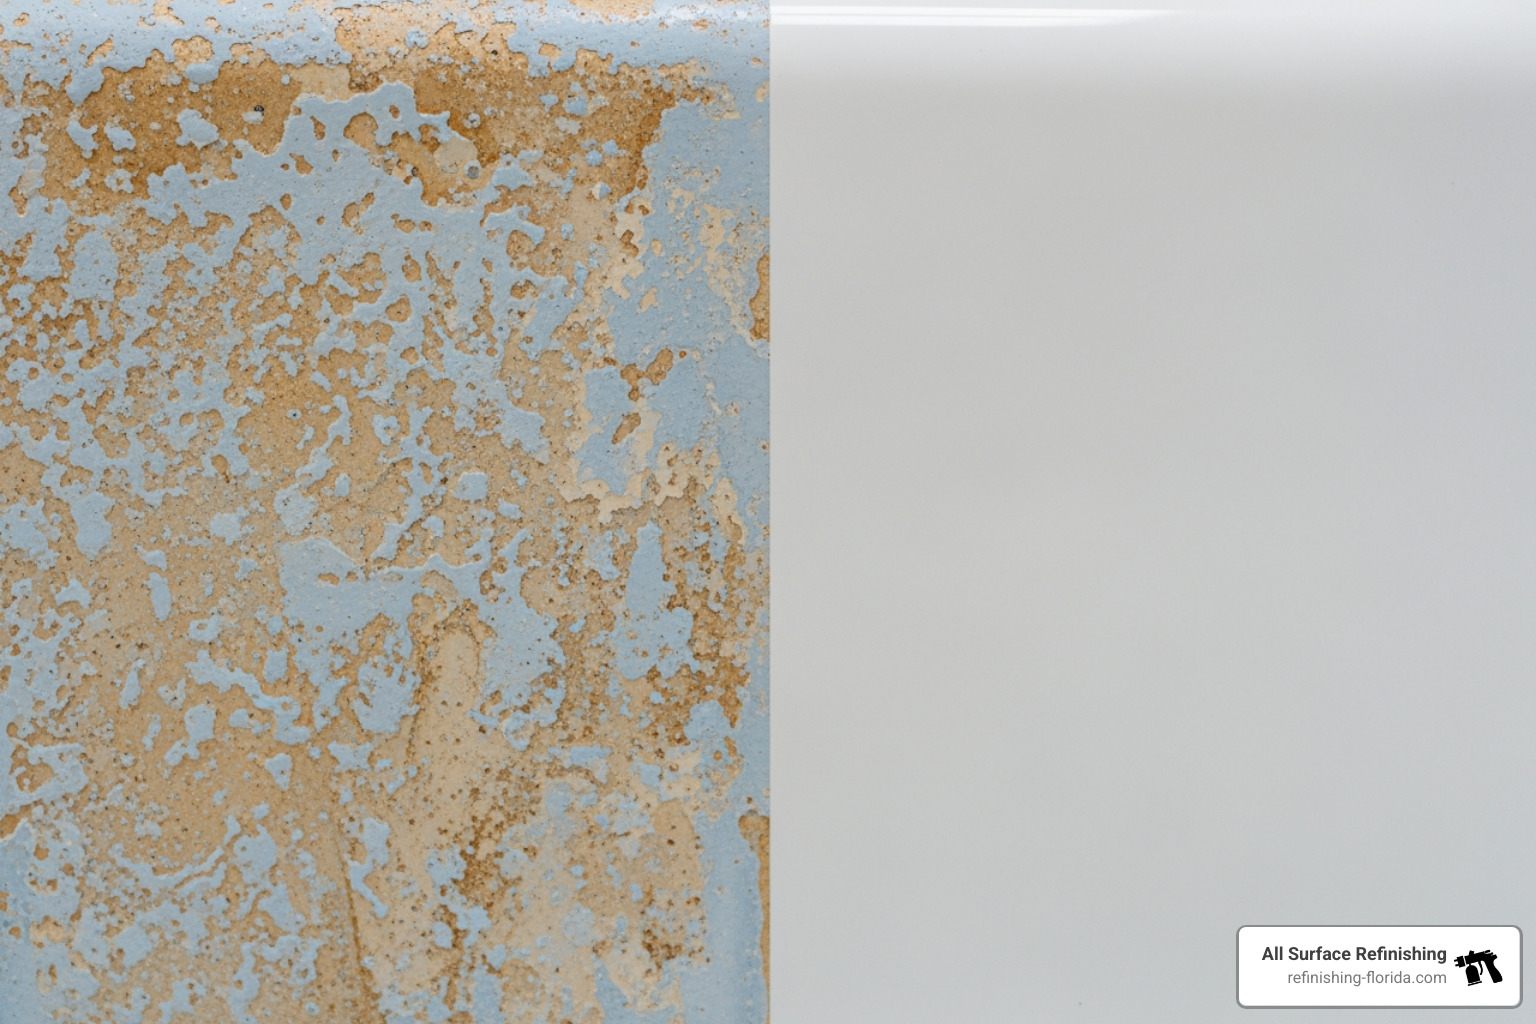
- Peeling and bubbling: This is perhaps the most common issue. Improper surface preparation, inadequate bonding agents, or applying too thick a coat can cause the new finish to peel or bubble within weeks or months.
- Uneven finish: Brush strokes, roller marks, drips, sags, or an inconsistent texture are hallmarks of DIY kits. Achieving a smooth, factory-like finish without specialized spray equipment is incredibly difficult.
- Short lifespan: DIY reglazing typically lasts only a year or two before showing significant wear, compared to the decade-plus you’d expect from a professional job. This means you’ll be repeating the process sooner, costing more in the long run.
- Health risks: As mentioned, the strong chemicals in DIY kits require robust ventilation. Without it, you risk exposure to toxic fumes that can cause headaches, respiratory issues, and other health problems.
Why Hire a Pro?
When you choose a professional service like All Surface Refinishing to reglaze my bathtub, you’re investing in expertise, quality materials, and a guaranteed outcome.
- Durability: We use industrial-strength, two-part epoxy and polyurethane coatings that form a much stronger bond and create a far more durable finish than anything available in a DIY kit.
- Warranty: Reputable professionals stand by their work. We offer a warranty on our reglazing services against peeling or adhesion failure, giving you peace of mind.
- Proper bonding agents: Our proprietary techniques, including thorough surface etching and high-quality bonding agents, ensure the new finish adheres flawlessly and lasts for years.
- Flawless, like-new appearance: With professional spray equipment and skilled technicians, we achieve a smooth, glossy finish that mimics a brand-new tub. Our results are so good that 9 out of 10 people can’t tell the difference between our refinished bathtubs and new ones.
- Safety: We use professional ventilation systems and protective gear to ensure the safety of your home and our technicians, minimizing fume exposure.
Can a reglazed tub be refinished again in the future? Yes! A professionally reglazed tub can certainly be refinished again down the line if it starts to show wear or if you simply want a new color. However, if a tub has been previously refinished by a DIY kit or a low-quality service, the cost of the subsequent professional reglazing might be higher because we’ll need to strip off the old, failing coating first. For a guaranteed superior result, learn more about Professional Bathtub Reglazing.
How long does a professional job last?
A professionally reglazed bathtub, done by a high-quality, skilled company like All Surface Refinishing, can last between 10 to 20 years. This impressive lifespan isn’t just a stroke of luck; it’s influenced by several critical factors:
- Quality of materials: We use premium, industrial-grade coatings and bonding agents designed for longevity and daily use.
- Technician skill and process: Our 30+ years of experience mean meticulous surface preparation, expert application, and proper curing.
- Proper care and maintenance: Just like a new tub, a reglazed surface requires ongoing care, which we detail later in this guide. Avoiding harsh chemicals and abrasive cleaners is key.
What are the downsides of trying to reglaze my bathtub myself?
The downsides of attempting to reglaze my bathtub as a DIY project are significant:
- Lack of professional equipment: Without industrial-grade sprayers, bonding agents, and ventilation systems, achieving a smooth, durable finish is nearly impossible.
- Insufficient ventilation and exposure to toxic fumes: DIY kits often don’t emphasize the severity of the chemical fumes. This can lead to serious health issues and lingering odors in your home for days.
- Poor adhesion and premature failure: This is the most common complaint. The coating will likely peel, chip, or bubble within a short period, leaving you with a worse problem than you started with.
- Wasted money on failed kits: You’ll spend money on the kit, tools, and your time, only to likely need a professional to fix the botched job, which can cost more than the original professional reglazing would have.
Hiring a Pro: Your Checklist for Success
When you decide to invest in professional bathtub reglazing, selecting the right contractor is paramount to ensuring a beautiful, long-lasting finish. In a busy area like South Florida, from Aventura to West Palm Beach, there are many options, but not all are created equal.
Here at All Surface Refinishing, with over 30 years of experience and 14,000+ projects completed, we pride ourselves on being Florida’s trusted experts. When vetting professionals, always look for:
- Reputation and experience: Look for companies with a long track record and positive reviews from local customers.
- Insurance and licensing: Ensure the contractor is fully licensed and insured. This protects you in case of accidents or damage during the process.
- Warranty details: A reputable company will offer a clear warranty on their work, typically covering peeling or adhesion failure for several years. We offer comprehensive warranties because we stand by our quality.
- Local expertise: Choose a company familiar with the specific needs and conditions of South Florida homes. We have extensive experience serving areas like Boca Raton, Fort Lauderdale, Miami, and surrounding communities.
For more guidance on finding a qualified service, refer to our page on Finding a Professional Reglazer in South Florida.
Questions to Ask a Reglazing Contractor
Before you commit, arm yourself with these essential questions to ensure you’re hiring the best:
- What is your preparation process? (A thorough answer should include deep cleaning, repairs, and surface etching/bonding agent application.)
- What materials do you use? (Look for high-quality, industrial-grade epoxy or polyurethane coatings.)
- How do you ensure proper ventilation during the process? (They should describe using powerful exhaust fans and sealing off the work area.)
- What does your warranty cover, and for how long? (A 5-year warranty against peeling or adhesion failure is a good standard.)
- Can you show me examples of your work in Aventura, Boca Raton, Fort Lauderdale, Miami, West Palm Beach, or other South Florida locations? (Before-and-after photos are a great indicator of quality.)
- Are you licensed and insured? (Always ask for proof.)
- What is the total cost, and are there any hidden fees?
How Bathtub Material Affects Reglazing
The material of your bathtub plays a significant role in the reglazing process and its final outcome. Each material has unique properties that require specialized techniques and products.
- Porcelain: Often found on cast iron or steel tubs, porcelain is a very durable, non-porous material. Reglazing porcelain involves thorough cleaning, etching the surface to create adhesion, and then applying the new coating. Older porcelain tubs are excellent candidates for reglazing due to their inherent quality.
- Cast Iron: These heavy, sturdy tubs are excellent candidates for reglazing. Their robust construction means they rarely have structural issues, making cosmetic restoration incredibly effective. We have extensive experience with Cast Iron Bathtub Refinishing details.
- Fiberglass: Fiberglass tubs are lighter and more prone to flexing, cracking, and surface wear. Reglazing fiberglass requires careful repair of any cracks or soft spots before applying the finish. Our expertise in Fiberglass Bathtub Resurfacing info ensures a lasting result.
- Acrylic: Similar to fiberglass, acrylic tubs can also be reglazed. The process for acrylic is often similar to fiberglass, focusing on proper cleaning, minor repair, and a coating compatible with the plastic surface.
No matter the material, our technicians at All Surface Refinishing are trained in the specialized techniques needed to ensure optimal adhesion and a beautiful finish for your specific bathtub type.
Maintaining Your Beautifully Reglazed Bathtub
Congratulations! Your beautifully reglazed bathtub is now the sparkling centerpiece of your bathroom. To ensure it stays that way for the next 10-20 years, proper maintenance is key. Think of it like caring for a brand-new tub – gentle care goes a long way.
Cleaning Guidelines:
- Non-abrasive cleaners only: This is the golden rule. Avoid any cleaners containing harsh chemicals like bleach, strong acids, or abrasive particles. These can dull the finish, cause discoloration, or even lead to premature peeling.
- Recommended cleaners: Opt for mild, liquid, organic, or “green” cleansers. Products like 409, Scrubbing Bubbles, or Fantastic are generally safe. Always check the label to ensure they are non-abrasive.
- Soft cleaning tools: Use a soft cloth, sponge, or non-abrasive brush. Never use steel wool, abrasive pads, or wire brushes, as these will scratch the new finish.
Curing Period Importance:
Remember the initial curing period (typically 24-48 hours before use, and a full cure can take up to 6 days)? During this time, it’s crucial to:
- Avoid use: Do not use the tub for bathing or showering.
- No objects on surface: Do not place any heavy objects, bottles, or mats on the reglazed surface.
- Ensure ventilation: Continue to ventilate the bathroom to aid in the curing process and dissipate any lingering odors.
Daily Care and Preventing Damage:
- Wipe down after each use: This helps prevent soap scum and mineral buildup, reducing the need for heavy cleaning.
- Address chips promptly: While our finish is durable, accidents happen. If a small chip occurs, contact us immediately. Prompt repair can prevent the damage from spreading.
- Use bath mats with caution: If you use a bath mat, choose one that is designed for refinished surfaces or has suction cups that are not too aggressive. Remove it after each use to allow the tub to dry and prevent moisture from getting trapped underneath, which can cause issues over time.
By following these simple maintenance tips, you’ll maximize the lifespan of your reglazed bathtub and keep it looking “wow” for years to come.
Your Bathtub’s Second Life Starts Here
We’ve explored bathtub reglazing, from understanding what it truly means to weighing the pros and cons of DIY versus professional services. The benefits are clear: a cost-effective, fast, and stunning change for your worn-out tub. You save up to 75% compared to replacement costs, avoid messy demolition, and get to enjoy a beautiful, like-new bathroom in just a day or two.
At All Surface Refinishing, we believe in the power of restoration. With 30+ years of experience and thousands of successful projects, we are South Florida’s trusted expert in bringing bathtubs, tiles, and countertops back to life. Our professional advantage ensures a durable, flawless finish that DIY kits simply can’t match.
Whether you’re in Aventura, Boca Raton, Fort Lauderdale, Miami, West Palm Beach, or any of our other service areas across South Florida, we’re ready to help you reglaze my bathtub and give your bathroom the makeover it deserves.
For a guaranteed beautiful and durable finish for your tub, get your free estimate today and let us show you the All Surface Refinishing difference.
