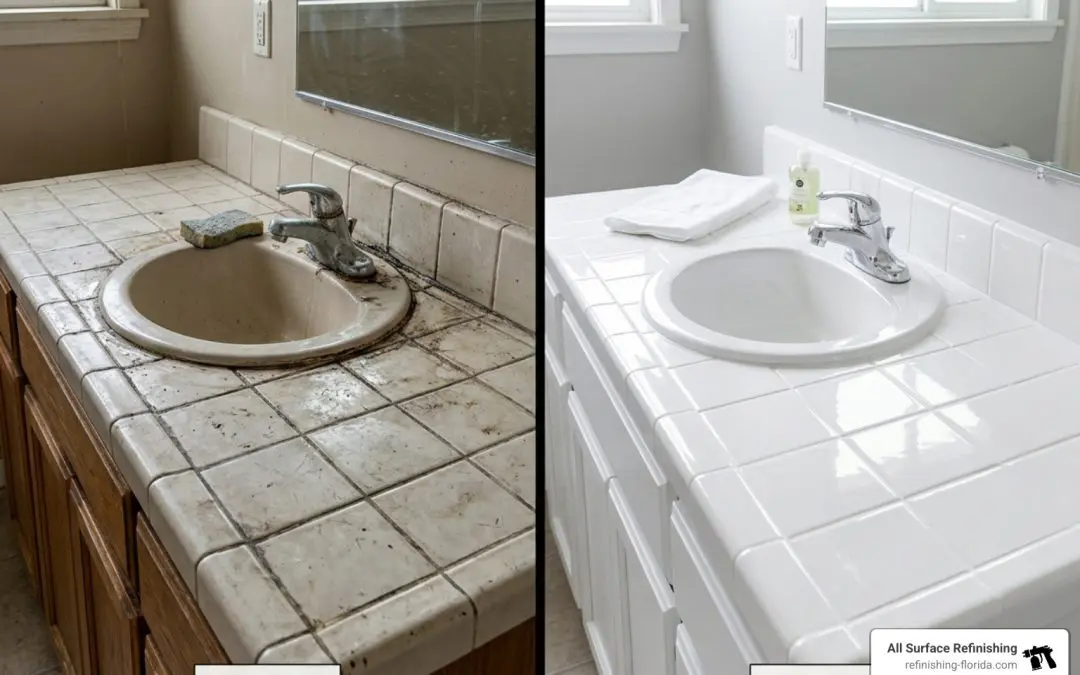
Why Learning How to Reglaze Tile Can Save You Thousands
How to reglaze tile is one of the most cost-effective ways to transform worn, outdated surfaces without tearing anything out.
Here’s the quick version:
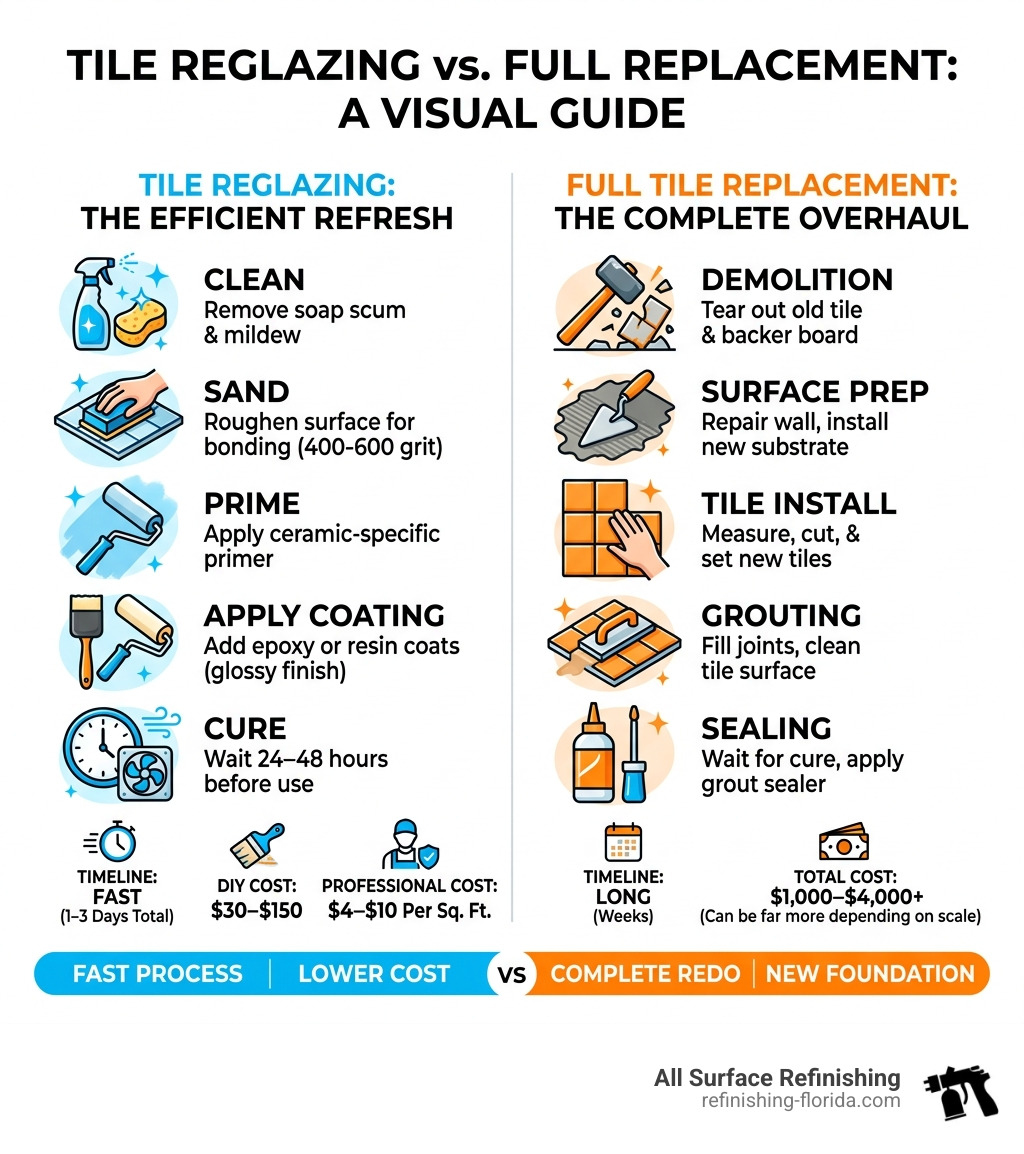
- Clean the tile thoroughly — remove all soap scum, grease, and mildew
- Sand the surface with 400–600 grit sandpaper to help the coating bond
- Prime with a ceramic-specific primer and let it dry fully
- Apply two coats of epoxy or resin coating using a foam brush and roller
- Cure for at least 24–48 hours before use
That’s the core process. A DIY kit runs $30–$150, while professional reglazing costs $4–$10 per square foot — still far less than full tile replacement, which can run $1,000–$4,000 or more.
Reglazing (also called refinishing or resurfacing) works by applying a durable epoxy or resin coating over your existing tile. When it cures, it creates a hard, glossy, porcelain-like finish. It won’t look brand new in every case, but for tiles that are dull, discolored, or dated — not cracked or structurally damaged — it’s a remarkably effective fix.
I’m Frank Hernandez, President of All Surface Refinishing, with over a decade of hands-on refinishing experience and a track record of helping South Florida homeowners refresh their tile surfaces without the cost or disruption of full replacement — so I know exactly what it takes to get great results when you reglaze tile. Keep reading for everything you need to do it right the first time.
Glossary for how to reglaze tile:
Understanding How to Reglaze Tile and When to Choose It
When we talk about how to reglaze tile, it is important to clear up a common industry secret: we aren’t actually “reglazing” in the scientific sense. True glazing happens in a kiln at temperatures up to 2,500°F. Unless you plan on turning your bathroom into a volcanic crater, you won’t be doing that at home! Instead, reglazing refers to applying a high-tech epoxy or acrylic resin coating that mimics that hard, porcelain-like finish.
This process is also known as refinishing or resurfacing. It is a fantastic “middle ground” between living with your grandma’s 1950s pink bathroom and spending your life savings on a gut renovation. By applying this coating, we seal the tile and the grout, creating a seamless, non-porous surface that looks fresh and modern.
The Cost-Benefit Analysis of How to Reglaze Tile
In April 2026, home improvement costs are higher than ever, but reglazing remains a budget hero. If you are looking at a basic DIY kit, you might spend between $30 and $150. However, if you want a professional finish that lasts, hiring an expert typically costs between $4 and $10 per square foot.
| Feature | Reglazing/Refinishing | Full Tile Replacement |
|---|---|---|
| Average Cost | $750 – $1,200 (Professional) | $3,000 – $15,000+ |
| Timeframe | 1 – 2 Days | 1 – 2 Weeks |
| Mess Level | Minimal (Fumes/Dust) | High (Demolition/Debris) |
| Durability | 5 – 10+ Years | 20 – 75+ Years |
| Grout | Sealed & Uniform | New Grout Required |
Choosing to Update Old Bathroom Tiles through refinishing can save you up to 50% compared to the cost of replacement. In areas like Miami-Dade or Palm Beach County, where a basic bathroom renovation can easily start at $15,000, those savings are nothing to sneeze at.
When to Replace Instead of Refinishing
As much as we love a good transformation, reglazing isn’t a magic wand for every situation. You should consider it a “cosmetic overhaul.” If your tiles are structurally sound but ugly, reglaze away! However, if you see the following, it’s time to call the demo crew:
- Significant Cracking: A few hairline cracks can be filled, but if the tile is shattered, the coating will eventually fail.
- Water Leaks: If there is moisture trapped behind the wall, reglazing will only trap the rot.
- Loose Tiles: If the tiles are falling off the wall, the substrate (the wall behind them) is likely compromised.
- Previous Bad DIY: If someone already tried to “paint” the tile with cheap hardware store paint and it’s peeling, you’ll need to strip it entirely before you can Restore Old Tiles properly.
Check out this guide on How to Reglaze Tile and When You Should Replace Instead for a deeper dive into making that tough decision.
Essential Tools and Safety Gear for Your Project
Before you start, you need to gear up. This isn’t like painting a bedroom; the chemicals involved in how to reglaze tile are potent.
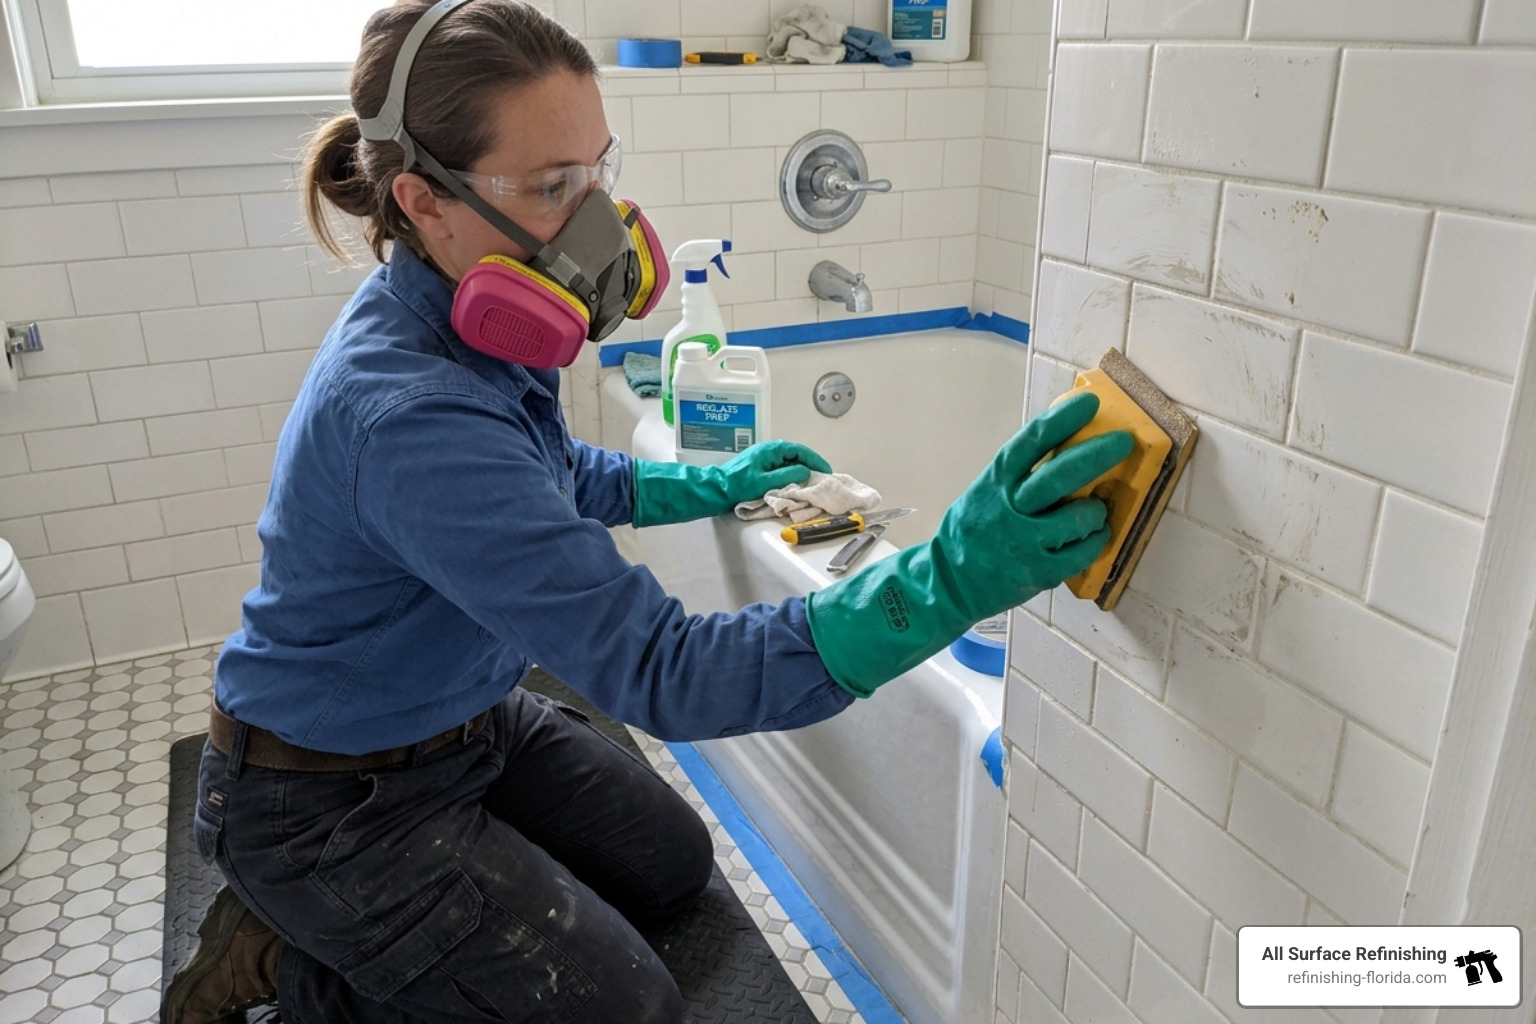
Here is your shopping list for a successful project:
- P100 Respirator: This is non-negotiable. The fumes from epoxy coatings are strong and can cause headaches or dizziness.
- Safety Goggles and Chemical-Resistant Gloves: Protect your eyes and skin from splashes.
- Fine-Grit Sandpaper: Use 400-grit to 600-grit. You want to scuff the surface, not gouge it.
- Tack Cloth: To remove every single speck of dust before you prime.
- High-Quality Foam Rollers and Brushes: These help avoid brush marks and ensure a smooth finish.
- Painter’s Tape and Plastic Sheeting: To protect your tub, fixtures, and walls.
- Ceramic-Specific Primer and Epoxy Kit: Look for “Tough as Tile” or similar professional-grade resins.
For those working on floors, you might also want to look into The Ultimate Guide to Anti-Slip Floor Coatings for Tiles and Treatments to ensure your new surface isn’t a skating rink when wet.
Safety Precautions for Handling Toxic Fumes
We cannot stress this enough: ventilation is king. When we perform professional services in Fort Lauderdale or Boca Raton, we use high-powered exhaust fans to pull vapors out of the house.
If you are doing this yourself:
- Open every window in the bathroom and surrounding rooms.
- Use a box fan in the window, facing outward, to create a vacuum effect.
- Keep pets and children away from the area for at least 24 hours.
- If you start to feel lightheaded, leave the room immediately.
For more on staying safe, read our Professional Bathroom Reglazing Guide.
Step-by-Step Instructions on How to Reglaze Tile
Ready to get to work? Follow this Step-by-Step Guide to Tile Reglazing Florida style to ensure your kitchen or bathroom goes from “drab” to “fab.”
Preparation and Deep Cleaning
The secret to a finish that doesn’t peel is 90% preparation. If you leave even a tiny bit of soap scum, your new finish will eventually slide right off.
- Scrape and Clean: Use a putty knife to remove old caulk and any stubborn debris. Clean the tiles with a heavy-duty, abrasive cleaner (like Comet or a specialized surface prep solution).
- Acid-Etching (Optional but Recommended): For very glossy tiles, an etching compound helps “open up” the surface so the epoxy can grab hold. Be extremely careful with these chemicals!
- Sanding: Once the tiles are dry, sand them thoroughly with your 400-grit sandpaper. You are looking for a dull, matte finish.
- Rinse and Dry: Rinse away all the dust. Then, wait. Then wait some more. Any moisture trapped in the grout will cause bubbles. Use a hairdryer on the grout lines if you’re in a humid area like Miami or West Palm Beach.
Learn more about getting that surface ready in our guide on how to Reglaze and Renew: How to Resurface Your Shower Like New.
Applying the Epoxy and Curing
Now for the fun part!
- Masking: Tape off everything you don’t want to turn white (or whatever color you chose). Use plastic to cover the tub and vanity.
- Priming: Apply a thin, even coat of ceramic primer. This acts as the “glue” between your tile and the epoxy.
- Mixing: Most reglazing kits come in two parts (a base and an activator). Once you mix them, you usually have about a 6-hour “pot life” before the product hardens in the tray.
- Application: Start with a foam brush in the corners and edges. Then, use a foam roller for the large flat areas. Work in small sections and maintain a “wet edge” to avoid overlap marks.
- The Second Coat: Wait the recommended time (usually 1–2 hours) and apply a second coat. If you are changing a dark color to white, you might even need a third.
Once finished, the curing process begins. While the surface might feel dry to the touch in a few hours, it needs a full 24–48 hours before you even think about turning on the shower. For a truly professional result, we recommend waiting 3–4 days for a full cure. You can read more about the intricacies of Professional Tile Resurfacing to see how the pros handle this delicate phase.
Durability, Maintenance, and Common Mistakes
A well-done reglazing job can last 10 years or more if you treat it right. However, it is not as indestructible as the original factory finish.
Maintenance Tips:
- No Abrasives: Throw away the steel wool and the gritty cleaners. Use mild dish soap or a non-abrasive bathroom cleaner.
- Keep it Dry: Don’t let water sit on the surface for days. A quick squeegee after a shower goes a long way.
- Repair Chips Early: If you drop a heavy glass bottle and chip the finish, use a touch-up kit immediately to prevent water from getting under the coating.
If you are working on a kitchen space, check out this One Simple Way to Refinish Tile Countertops for specific kitchen advice.
Avoiding Peeling and Bubbling in Your Finish
The most common “DIY fails” we see in South Florida usually involve moisture or poor cleaning. Here’s how to avoid them:
- Humidity: If the humidity is over 85%, don’t do it. The moisture in the air will interfere with the chemical bond.
- Overspray/Drips: Don’t rush. Thin coats are always better than one thick, saggy coat.
- Improper Sanding: If you skip the sanding, the epoxy will peel off in sheets within months.
If you’re tackling a shower, be extra careful with the grout lines, as they are the most common failure points. See our tips on how to Reglaze Shower Tile for more help.
Frequently Asked Questions about Tile Refinishing
Can I reglaze floor tiles or just walls?
You can reglaze both! However, we generally recommend reglazing floor tiles in low-traffic areas like guest bathrooms. For high-traffic entryways in places like Coral Gables or Jupiter, the constant grit from shoes can scratch the finish over time.
How long does the reglazing process take to cure in 2026?
Modern resins have improved, but the laws of chemistry remain the same. While some “quick-dry” kits claim 12 hours, we always recommend a minimum of 24 hours for light use and 48–72 hours before heavy scrubbing or soaking.
Is DIY reglazing cheaper than hiring a professional?
Initially, yes. A DIY kit is about $100. However, if the DIY fails and needs to be stripped and redone, you’ll end up paying a professional more to fix the mess. Professionals also use HVLP (High Volume Low Pressure) sprayers, which provide a much smoother finish than a roller ever could.
Conclusion
Learning how to reglaze tile is an empowering way to reclaim your home’s aesthetic without breaking the bank. Whether you are in Miami, Fort Lauderdale, West Palm Beach, or Boca Raton, a fresh tile surface can breathe new life into your kitchen or bathroom.
At All Surface Refinishing, we’ve spent over 30 years perfecting the art of the “makeover miracle.” With over 14,000 projects under our belt, we know exactly how to handle the unique humidity and conditions of South Florida to ensure a finish that lasts.
If you’ve decided that the P100 respirator and acid-etching are a bit more than you want to handle this weekend, we are here to help. We offer fast, high-quality transformations that will leave your neighbors wondering when you had time for a full renovation.
Ready to get started? More info about tile services is just a click away!
