Planning and Sizing Simple Kitchen Cabinets for Your Space
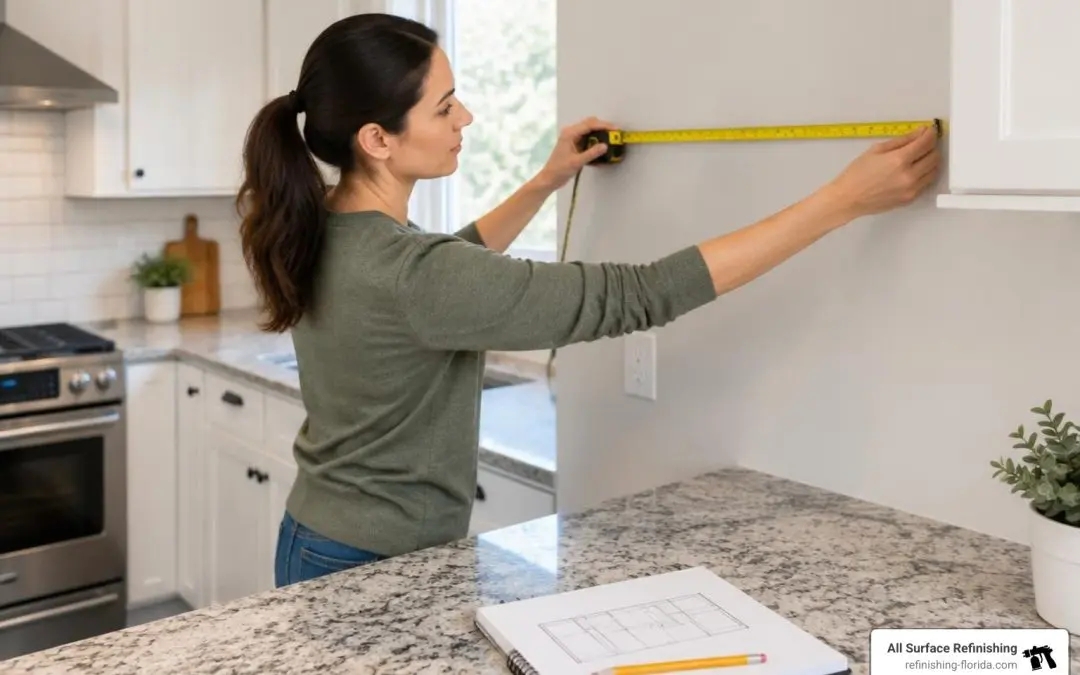
Every successful kitchen project begins with precise measurements. When setting up a kitchen layout in homes across Miami, Fort Lauderdale, or Coral Gables, uneven walls and floors are common realities. Taking accurate measurements prevents costly errors during assembly and installation.
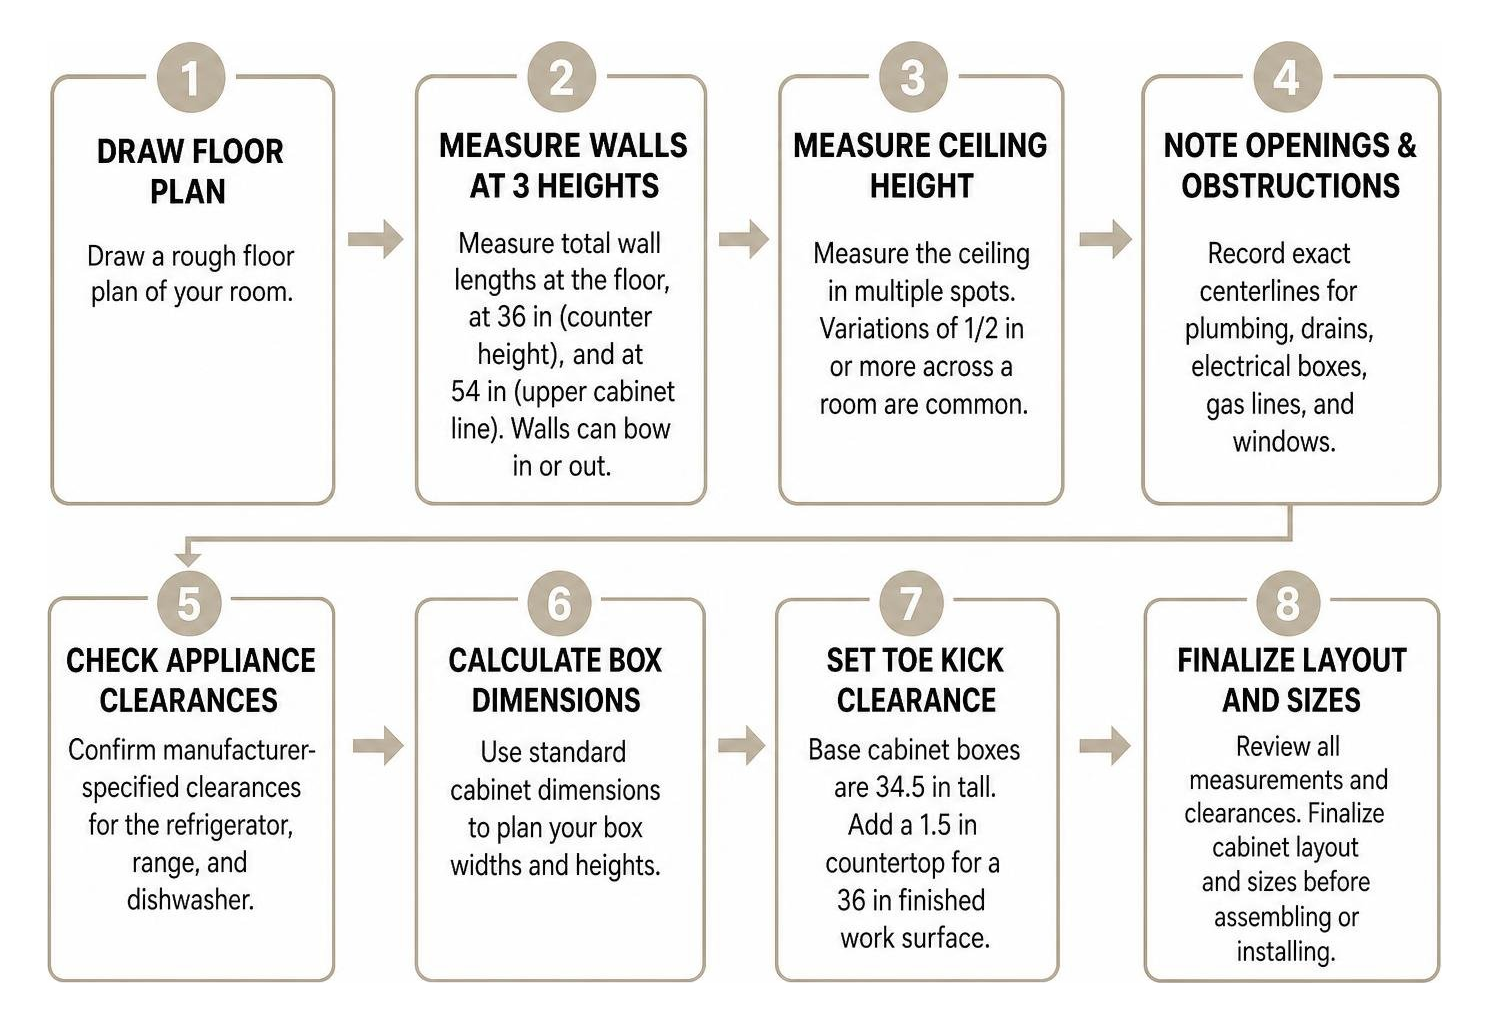
Start by drawing a rough floor plan of your room. Record the following critical dimensions:
- Total Wall Lengths: Measure at the floor, at standard counter height (36 inches), and at the upper cabinet line (54 inches). Walls often bow inward or outward.
- Ceiling Height: Measure in multiple spots. Variations of 1/2 inch or more across a single room are common.
- Rough Openings and Obstructions: Note the exact centerlines for plumbing supply pipes, drain lines, electrical boxes, gas lines, and windows.
- Appliance Clearances: Confirm manufacturer-specified clearances for your refrigerator, range, and dishwasher before setting final box widths.
Calculating Box Dimensions and Toe Kick Clearances
Kitchen ergonomics rely on established industry standards. Adhering to these standard measurements ensures that off-the-shelf appliances, countertops, and accessories integrate seamlessly.
- Base Cabinet Height: Standard base cabinet boxes are built 34.5 inches tall. Adding a standard 1.5-inch countertop brings the finished work surface to an ergonomic 36 inches off the floor.
- Base Cabinet Depth: The standard box depth is 24 inches. With a 1.5-inch countertop overhang, the total finished depth reaches 25.5 inches.
- Toe Kick Dimensions: The toe kick allows you to stand close to the work surface without stubbing your toes. Plan for a 4-inch height and a 3-inch horizontal recess at the base of the cabinet.
- Upper Wall Cabinets: Upper boxes are typically 12 inches deep (or up to 15 inches for larger modern storage) and range from 30 to 42 inches tall depending on your ceiling height. Maintain an 18-inch clearance between the top of the countertop and the bottom of the upper wall cabinets.
- Corner Clearances: When planning L-shaped or U-shaped layouts, always allow clearance for drawer pulls and appliance handles so intersecting doors and drawers do not collide.
Choosing Face Frame or Frameless Designs
Deciding between face frame and frameless (European style) construction affects both your build difficulty and the final look.
For DIY builders, face frame construction is significantly more forgiving. Adding a solid hardwood face frame (such as 1×2 poplar) hides exposed plywood plies, conceals minor box squaring errors, and provides a sturdy mounting base for hinges. Frameless cabinets, while sleek, demand exact cutting tolerances and meticulous edge banding on every exposed core edge. If you prefer a clean, modern look without building from scratch, you can also explore modular setups or pre-assembled options that match your cabinet dimensions and door style.
Materials, Costs, and Tools for Budget Cabinet Construction
Material selection balances project budget, structural durability, and workability. In coastal South Florida environments like West Palm Beach, Boca Raton, and Key Biscayne, choosing moisture-stable materials is vital for long-term performance.
Building simple kitchen cabinets yourself offers dramatic savings compared to retail options. Buying raw plywood for a 10-foot run runs between $200 and $800. In comparison, a standard flat-pack setup for a 10×10 kitchen costs $3,000 to $6,500, big-box store installations run $14,000 to $21,000, and full custom cabinetry shops charge anywhere from $26,000 to $42,000 (often upwards of $2,000 for a single wall).
Selecting Plywood Grades and Hardwood
For cabinet carcases, cabinet-grade hardwood plywood (such as formaldehyde-free PureBond birch) provides flat, stable panels that hold screws securely without excessive splitting. Avoid standard particleboard or low-density MDF for base boxes in humid areas, as unexpected moisture exposure can cause swelling.
Use 3/4-inch plywood for all primary structural panels: sides, bottoms, and structural stretchers. Use 1/4-inch plywood for the back panel, which locks the box square and stops racking under load. For face frames and door frames, 1×2 solid poplar is ideal for paint-grade builds because of its smooth grain, tight pores, and affordability.
Essential Tools for Cutting and Pocket-Hole Joinery
You do not need an industrial woodshop to build quality cabinets. A solid set of basic tools will yield professional-grade results:
- Cutting Tools: A standard circular saw paired with a clamped straightedge guide or track rail delivers clean, splinter-free sheet cuts. A table saw speeds up repetitive cuts but is not mandatory.
- Joinery: A pocket-hole jig (such as a Kreg system) allows strong, hidden mechanical joints without complex dado routing.
- Drilling & Driving: A cordless drill for boring pilot and pocket holes, plus an impact driver for driving 1-1/4-inch coarse-thread pocket screws.
- Clamping & Measuring: At least two 24-inch or 36-inch bar clamps, a reliable combination square, and a 6-foot level.
For comprehensive dimension templates and cut-sheet calculations, review the reference plans in How to Build Basic Kitchen Cabinets: Cut List and Dimensions .
Step-by-Step Construction Guide for DIY Cabinetry
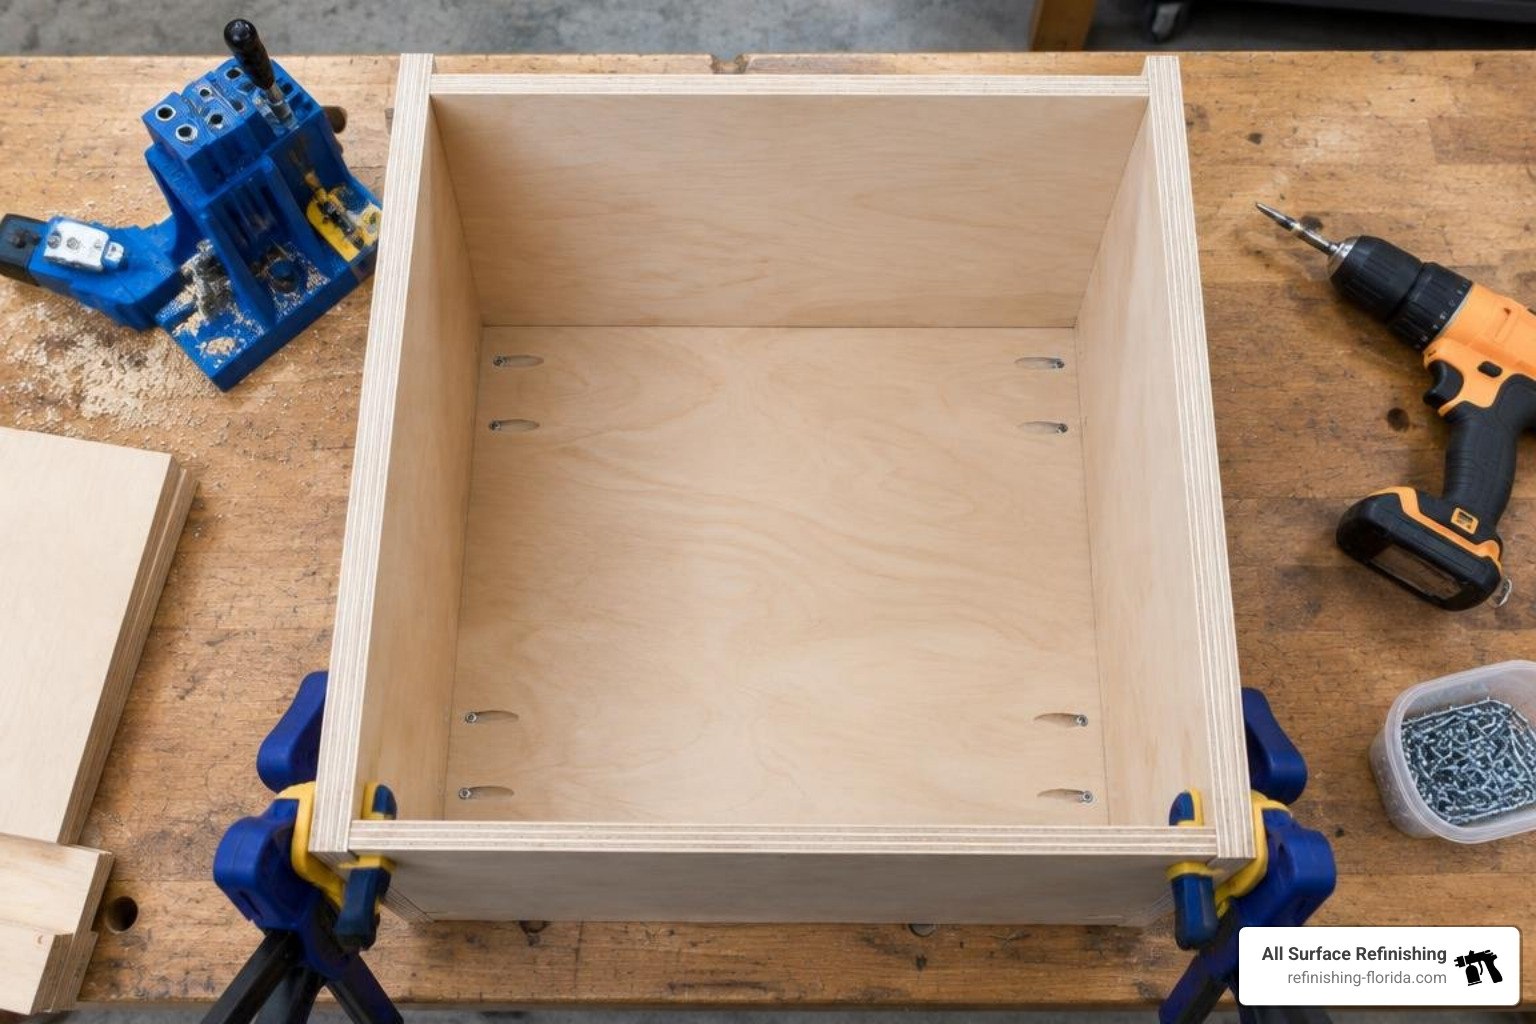
Building a sturdy box requires methodical assembly. Work on a flat, clean surface to ensure panels do not twist during fastening.
Assembling the Box for Simple Kitchen Cabinets
For a standard 24-inch base cabinet, cut two side panels at 34.5 inches by 24 inches, one bottom panel at 22.5 inches by 24 inches, and two top mounting stretchers at 22.5 inches by 4 inches.
- Drill Pocket Holes: On the underside of the bottom shelf and outer faces of the upper stretchers, drill pocket holes spaced 6 to 8 inches apart using a 3/4-inch material setting.
- Pre-Drill Shelf Pin Holes: If you want adjustable interior shelving, use a shelf-pin jig to drill 1/4-inch pin holes along the inside faces of both side panels before assembly.
- Join Side and Bottom Panels: Apply a thin, even bead of quality wood glue along the joint line. Clamp the bottom shelf flush with your side panels (elevated 4 inches if building an integrated toe kick, or flush if building a separate platform base) and drive 1-1/4-inch pocket screws.
- Install Top Stretchers: Secure one stretcher across the top front and one across the top back. These keep the top of the box rigid and provide screw anchoring points for countertops.
- Fasten the Back Panel: Check the diagonals of your box with a tape measure. When both diagonal measurements match exactly, the box is square. Apply wood glue along the rear edge, lay your 1/4-inch plywood back panel flush with the outer perimeter, and secure it with 3/4-inch brad nails or screws every 6 inches.
If you are constructing matching wall storage, the same box method can be adapted for overhead mounting rails.
Constructing Shaker Doors for Simple Kitchen Cabinets
Shaker-style doors remain a timeless, practical choice for Florida kitchens from Hollywood to Coconut Creek. They require four frame pieces (two vertical stiles, two horizontal rails) and a flat 1/4-inch center panel.
- Calculate Sizing: For a 1/2-inch overlay door on a face-framed opening, add 1 inch to both the width and height of the inner frame opening.
- Cut Frame Components: Cut stiles and rails from 1×3 poplar boards (actual width 2.5 inches). Stiles match the full door height. Rail length equals the total door width minus 5 inches (the combined width of both stiles) plus the depth of both tongue cuts (typically 1/2 inch total).
- Cut Grooves and Tenons: Run a 1/4-inch wide by 1/4-inch deep groove down the inside edge of all stiles and rails using a table saw or router table. Cut matching 1/4-inch tenons on each end of the rails to seat into the stile grooves.
- Assemble and Clamp: Fit a 1/4-inch birch plywood panel inside the frame grooves. Do not glue the center panel; allow it to float freely inside the frame to accommodate temperature changes. Apply wood glue strictly to the tenon-and-groove corner joints, clamp square, and let dry for at least 2 to 3 hours.
- Mount Hinges: Use 35mm concealed cup hinges (with a 1/2-inch overlay spec) for clean lines and smooth, soft-closing operation.
For compact layout variations, narrow pre-built units can serve as useful references for narrow door and frame proportions.
Modifying the Frame for Sink Base Cabinets
A sink base cabinet requires distinct internal modifications:
- Open Top Design: Replace the standard solid top or wide front stretcher with a narrow, vertically oriented 1×3 stretcher. This leaves the cabinet interior open to accommodate deep undermount or drop-in sink basins.
- False Drawer Front: Install a stationary false drawer front at the top of the face frame to conceal the sink basin bowl while preserving exterior alignment with adjacent drawer runs.
- Plumbing Wall Access: Either leave the lower back panel open or cut oversized access holes for hot and cold supply lines and the main P-trap waste drain before sliding the cabinet into position.
Professional Finishing, Leveling, and Installation
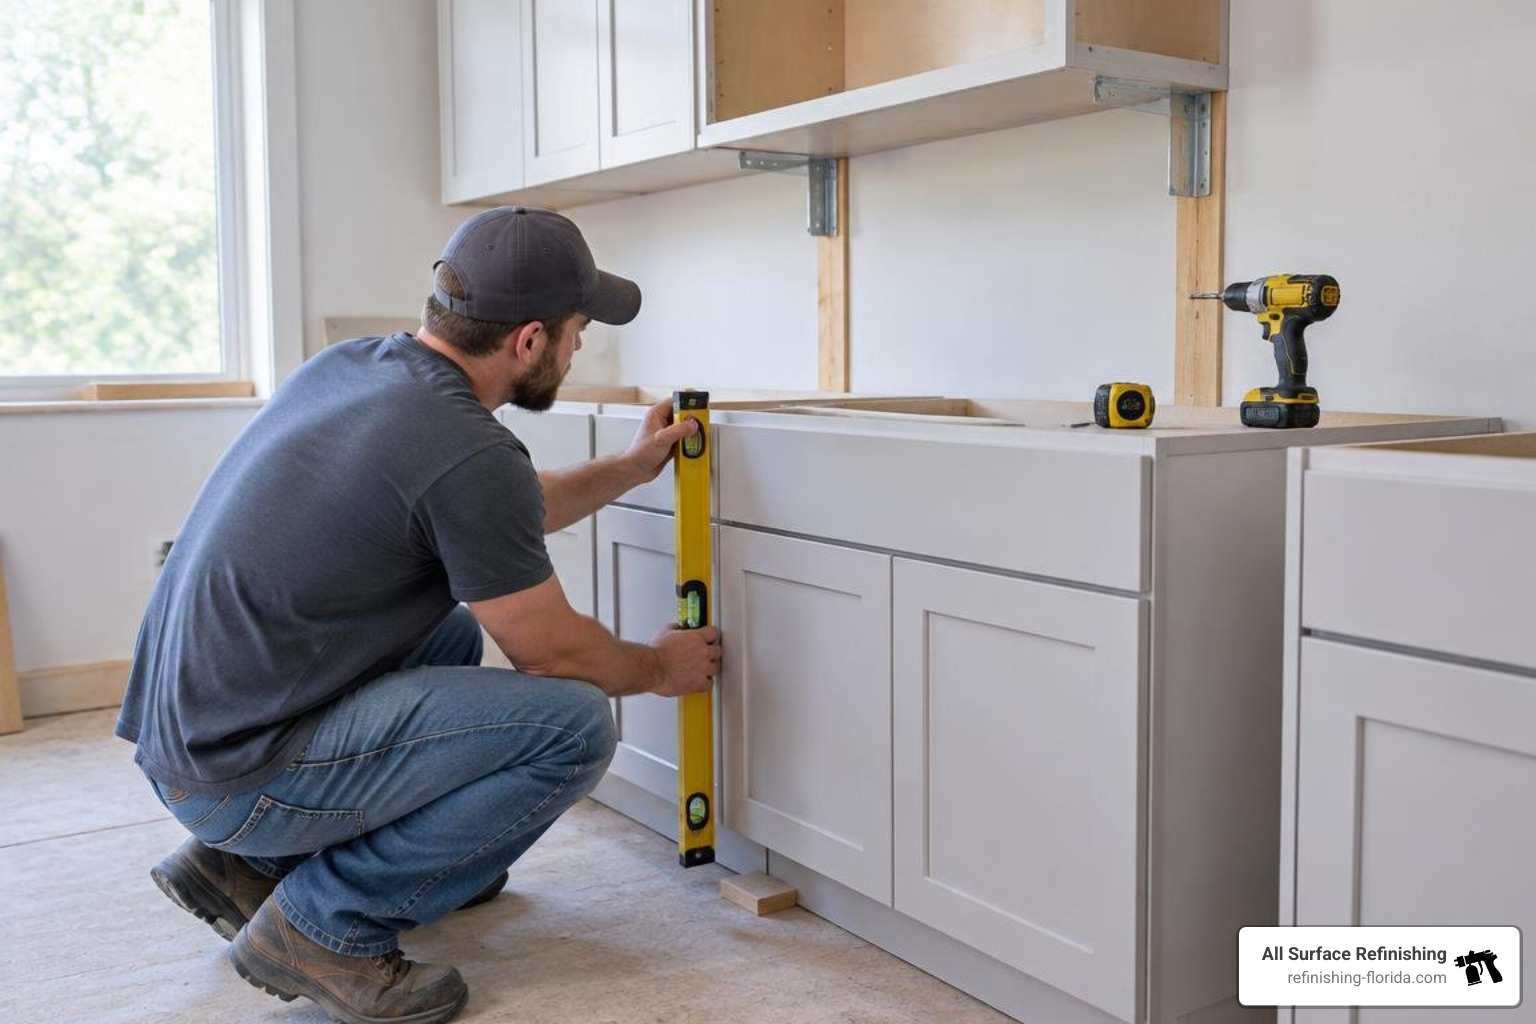
A well-built cabinet can look amateurish if the finish is rough or the installation is out of level. Professional finishing and precise installation make all the difference.
Applying a Factory-Smooth Cabinet Finish
Achieving a durable, smooth painted finish on raw wood requires patience and proper layering:
- Surface Prep: Fill all nail holes and pocket-hole seams with wood filler. Sand all surfaces thoroughly in the direction of the wood grain, progressing from 120-grit to 180-grit, and finishing with 220-grit paper.
- Dust Removal: Vacuum all surfaces with a soft brush attachment and wipe down with a tack cloth or lint-free microfiber rag.
- Priming: Apply a high-adhesion shellac-based or bonding oil primer (such as Zinsser BIN). This seals wood tannins, stops sap bleed through poplar knots, and creates an anchor for the topcoat. Sand the dried primer lightly with 220-grit paper to remove raised wood fibers.
- Topcoating: Apply two thin coats of a specialized waterborne urethane enamel (such as Sherwin-Williams Emerald Urethane Enamel or Benjamin Moore Advance). Use a high-density foam roller or HVLP paint sprayer.
- Cure Time: While urethane enamel is dry to the touch in hours, allow 7 to 14 days for a full structural cure before subjecting shelves and doors to heavy kitchen use.
Shimming, Wall Anchoring, and Alignment
Kitchen floors are rarely perfectly flat. Follow this sequence to align base cabinets correctly:
- Find the High Point: Use a 6-foot level or laser level to locate the highest spot along your floor run. Set your reference line 34.5 inches up from this highest point along the back wall.
- Locate Wall Studs: Use a stud finder and mark all wall stud locations with vertical pencil lines above the 35-inch mark.
- Position the First Box: Start with a corner cabinet or the box positioned at the floor’s highest point. Set the box in place and use cedar or composite shims underneath to bring the top edge flush with your level line.
- Fasten to Studs: Drive 2-1/2-inch washer-head cabinet installation screws through the upper structural rail of the cabinet into the wall studs. Never rely on drywall anchors for cabinet boxes.
- Join Adjacent Boxes: Clamp adjacent face frames together using T-track or face-frame clamps until the faces are perfectly flush. Drill pilot holes and drive 2-1/2-inch trim screws through the sides of the face frames to lock the run into a single rigid assembly.
Frequently Asked Questions About Kitchen Cabinets
How much does it cost to build simple kitchen cabinets?
Building your own basic paint-grade base cabinet costs roughly $70 to $95 in plywood, poplar, and fasteners for a standard 24-inch box. Outfitting a full 10-foot run of basic base and wall cabinets yourself generally costs between $500 and $1,200 for raw materials, depending on the plywood grade and hardware selected. This yields massive savings compared to big-box store cabinets ($14,000 to $21,000 installed) or custom shop cabinetry ($26,000 to $42,000).
Do you need a permit to install kitchen cabinets?
Replacing kitchen cabinets in the exact same footprint without altering infrastructure does not typically require a building permit in South Florida municipalities such as Palm Beach County, Broward County, or Miami-Dade County. However, if your cabinet project involves moving water supply lines, relocating electrical outlets, modifying drain stacks, or taking down load-bearing walls, you must pull the appropriate plumbing, electrical, or structural permits from your local building department.
How long does it take to build kitchen cabinets?
For an experienced DIY woodworker, cutting, assembling, and squaring a single cabinet box takes approximately 2 to 4 hours. Building a set of shaker doors, installing hardware, sanding, and applying multi-coat finishes adds another 3 to 6 hours per box spread over several days for drying. Building an entire kitchen run from scratch typically takes 3 to 5 weekends of dedicated work.
Conclusion
Building your own cabinets from raw plywood is a rewarding, cost-effective way to get exact dimensions and solid construction on a budget. However, building full kitchen suites from scratch requires dedicated tools, workspace, and weeks of careful carpentry.
If your existing cabinet boxes in South Florida are structurally sound, square, and well-anchored, building entirely new units may not be necessary. At All Surface Refinishing, our expert cabinet refinishing and painting services can transform your kitchen cabinets in a fraction of the time and at a fraction of the cost of total replacement. With over 30 years of experience and more than 14,000 projects completed across South and Southwest Florida—from Miami Beach, Aventura, and Fort Lauderdale to Delray Beach, West Palm Beach, and Stuart—we apply durable, factory-grade finishes that revitalize your kitchen layout without the mess of structural demolition. Contact us today to explore your options and give your kitchen cabinets a fresh, lasting update.
