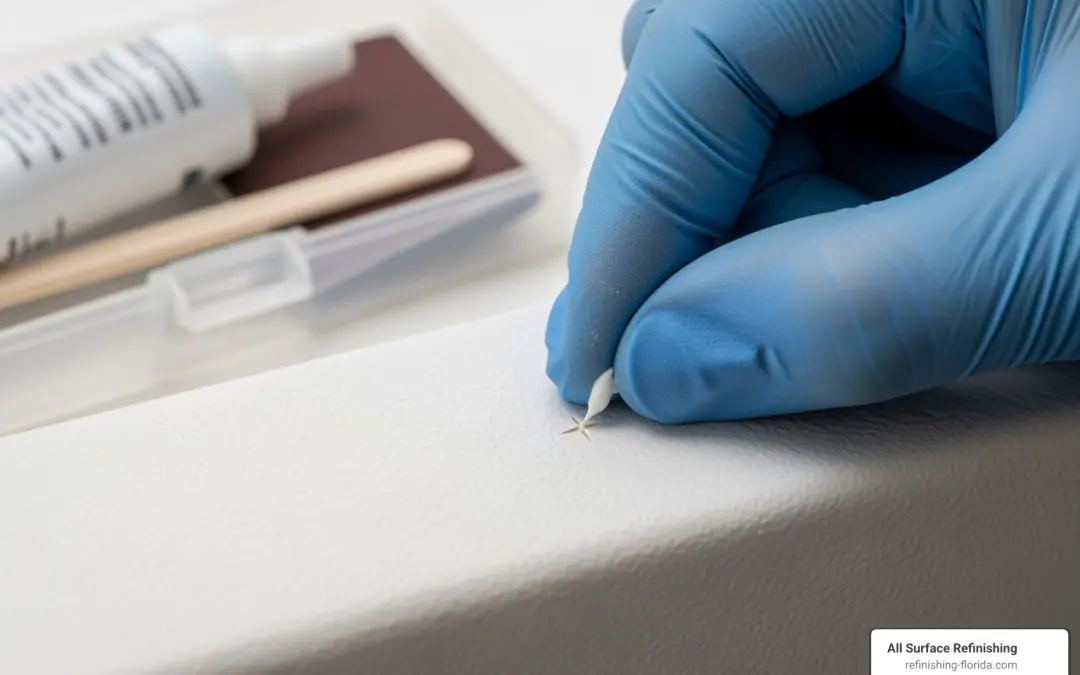
Why an Acrylic Shower Repair Kit Is Your First Line of Defense
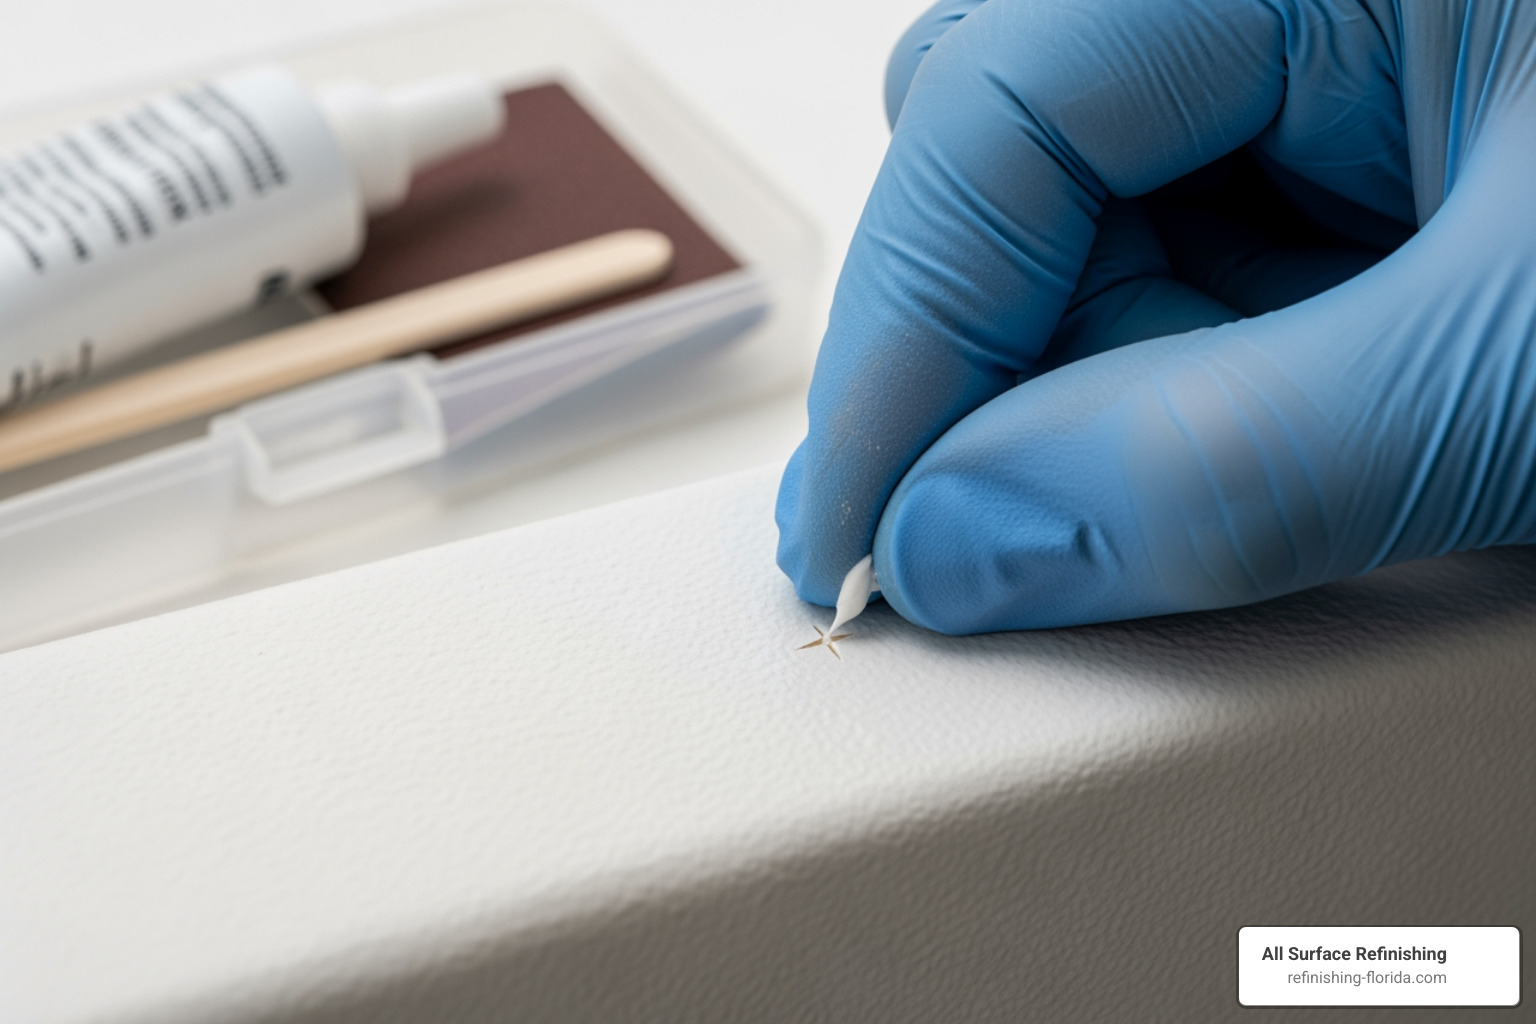
An acrylic shower repair kit is a cost-effective DIY solution designed to fix common damage like chips, cracks, scratches, and small holes in acrylic shower surfaces. These kits typically include repair compound, hardener, sandpaper, and polishing materials—everything you need to restore your shower’s appearance without the expense of replacement.
What you can fix with an acrylic shower repair kit:
- Chips and nicks smaller than 1/2 inch
- Surface scratches and scuffs
- Small cracks (under 1/4 inch)
- Minor holes and gouges
- Cosmetic damage that doesn’t affect structural integrity
Cost comparison at a glance:
| Repair Method | Cost Range | Time to Complete |
|---|---|---|
| DIY Repair Kit | $50-$75 | 2-4 hours (plus curing) |
| Professional Repair | $150-$200 | Same day |
| Full Replacement | $1,000+ | Several days |
According to industry data, DIY home improvement spending reached $450 billion in 2022, with acrylic shower repair kits representing a growing segment as homeowners seek affordable alternatives to costly replacements. Most kits today use advanced Light Cure Acrylic (LCA) technology that cures with LED light and can withstand moisture, cleansers, and heat up to 285°F—making repairs far more durable than older epoxy-based solutions.
The key is knowing when a DIY repair makes sense and when to call in professionals. Repairs smaller than a quarter are typically perfect for DIY kits, while larger structural damage or leaks near drains require expert attention.
I’m Frank Hernandez, President of All Surface Refinishing, and I’ve spent over a decade helping South Florida homeowners restore their bathroom surfaces. While professional services remain our specialty, I’ve seen countless successful DIY repairs using a quality acrylic shower repair kit for minor damage—and I’m here to guide you through the process.
What an Acrylic Shower Repair Kit Can Fix
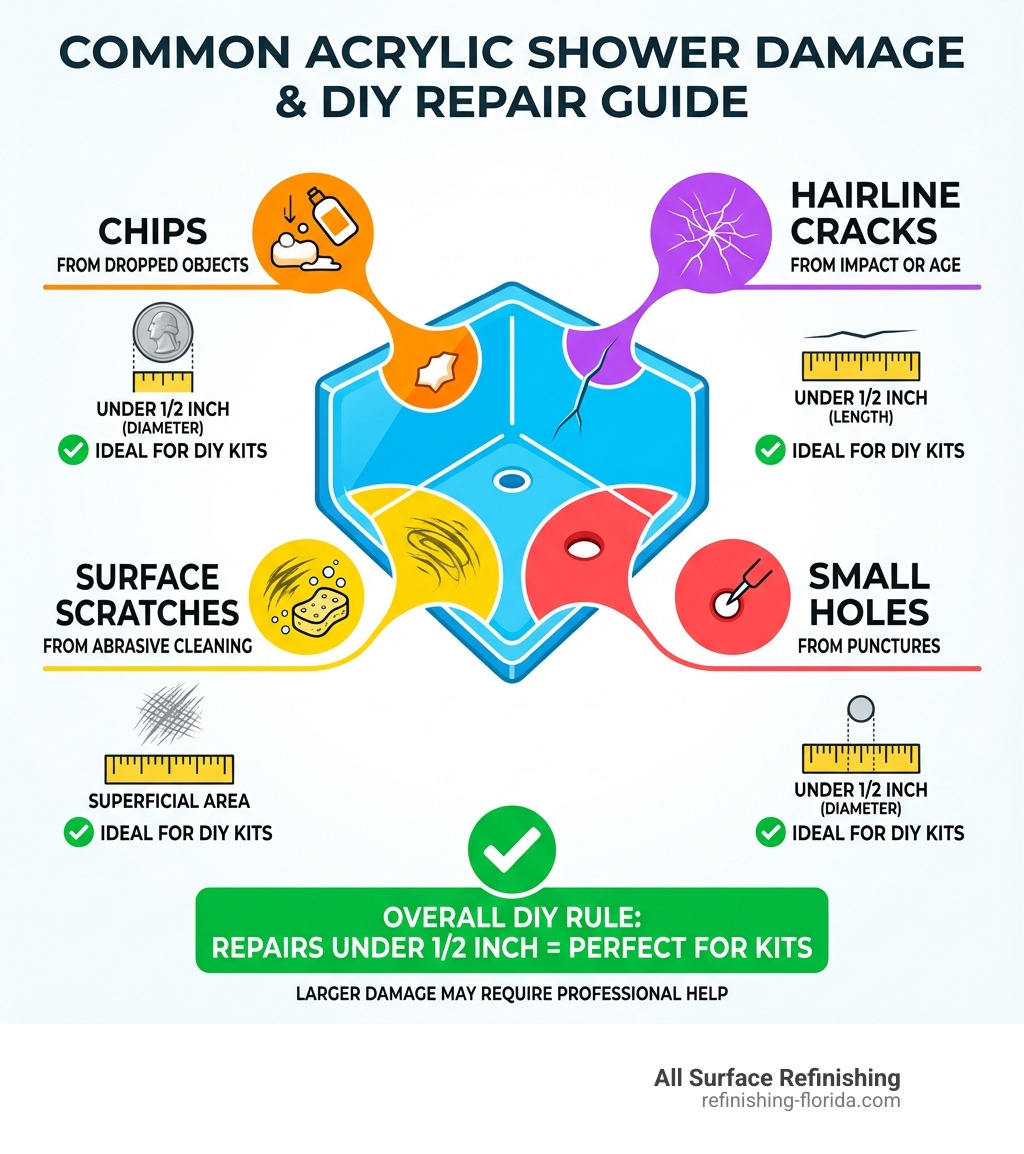
Acrylic showers are popular in homes across South Florida, from the vibrant communities of Miami-Dade County to the tranquil shores of Palm Beach. Their smooth, non-porous surface is generally durable, but accidents happen, leading to various forms of damage. The good news is that many of these common issues can be effectively addressed with an acrylic shower repair kit.
Let’s explore the types of damage we can typically mend:
- Chips: These are often caused by dropping a heavy object, like a shampoo bottle or a showerhead, onto the acrylic surface. Chips create small indentations, sometimes revealing the material beneath. A quality acrylic shower repair kit is excellent for filling these, especially if they’re smaller than 1/2 inch or 12mm.
- Cracks: Hairline cracks can appear due to stress on the shower base or impact. If a crack is superficial and not extending through the entire material, and ideally under 1/4 inch or 6mm, a DIY kit can often seal it. Cracks near the drain or along a seam, however, tend to be more complex and might indicate a structural issue, making them less suitable for DIY.
- Scratches: From abrasive cleaning tools to stray grit, scratches are a common cosmetic issue. Minor surface scratches are among the easiest damages to fix with a repair kit, restoring the smooth finish of your shower.
- Small Holes: While less common, small punctures or gouges can occur. If the hole is not too large (again, typically under 1/4 inch or 6mm, or smaller than a quarter coin), a repair kit can fill and seal it, preventing further damage and potential leaks.
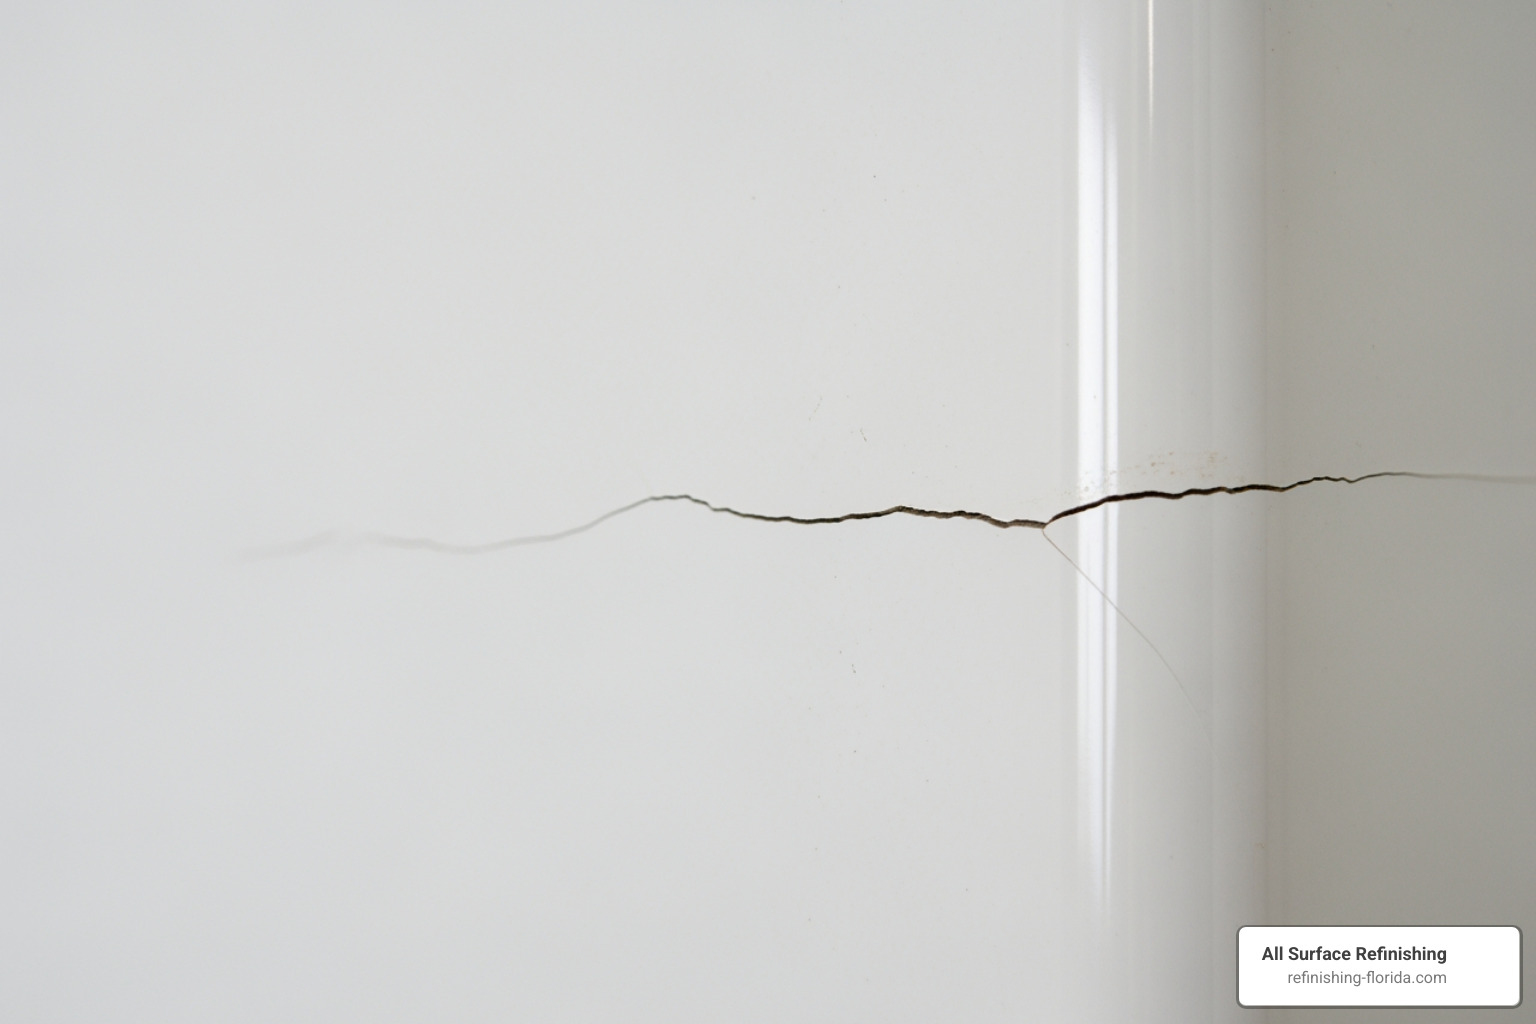
It’s important to understand the limitations. An acrylic shower repair kit is primarily designed for cosmetic damages or minor structural flaws. If your shower has extensive spiderweb cracks, a large hole, significant water damage, or if the damage is causing persistent leaks, a DIY kit might only be a temporary band-aid. In such cases, the damage might be too deep or widespread, or you might have underlying issues that require professional attention to prevent further deterioration or water intrusion into your home’s structure. Knowing when to repair versus when to replace, or when to call in a professional, is key to a lasting solution. For example, a minor chip in your Fort Lauderdale bathroom shower is a perfect DIY job, but a leaking shower pan in your Miami-Dade County home would warrant professional intervention.
Choosing the Right Acrylic Shower Repair Kit
Selecting the appropriate acrylic shower repair kit is crucial for a successful repair. Just like choosing the right tool for any home improvement project in your Boca Raton or West Palm Beach residence, understanding the different types and components can make all the difference.
Most kits will include a few core materials:
- Repair Compound: This is the main filler material that you’ll use to patch the damage.
- Hardener: Often mixed with the repair compound, this activates the curing process.
- Sandpaper: Various grits are typically included for smoothing the repaired area.
- Polishing Compound: Used to restore the shine and blend the repair seamlessly.
- Colorants: Some kits allow for custom color matching, while others are pre-tinted.
- Applicators: Spatulas, mixing sticks, and sometimes even brushes for precise application.
- Curing Aids: For light-cure kits, this will be an LED light and curing strips.
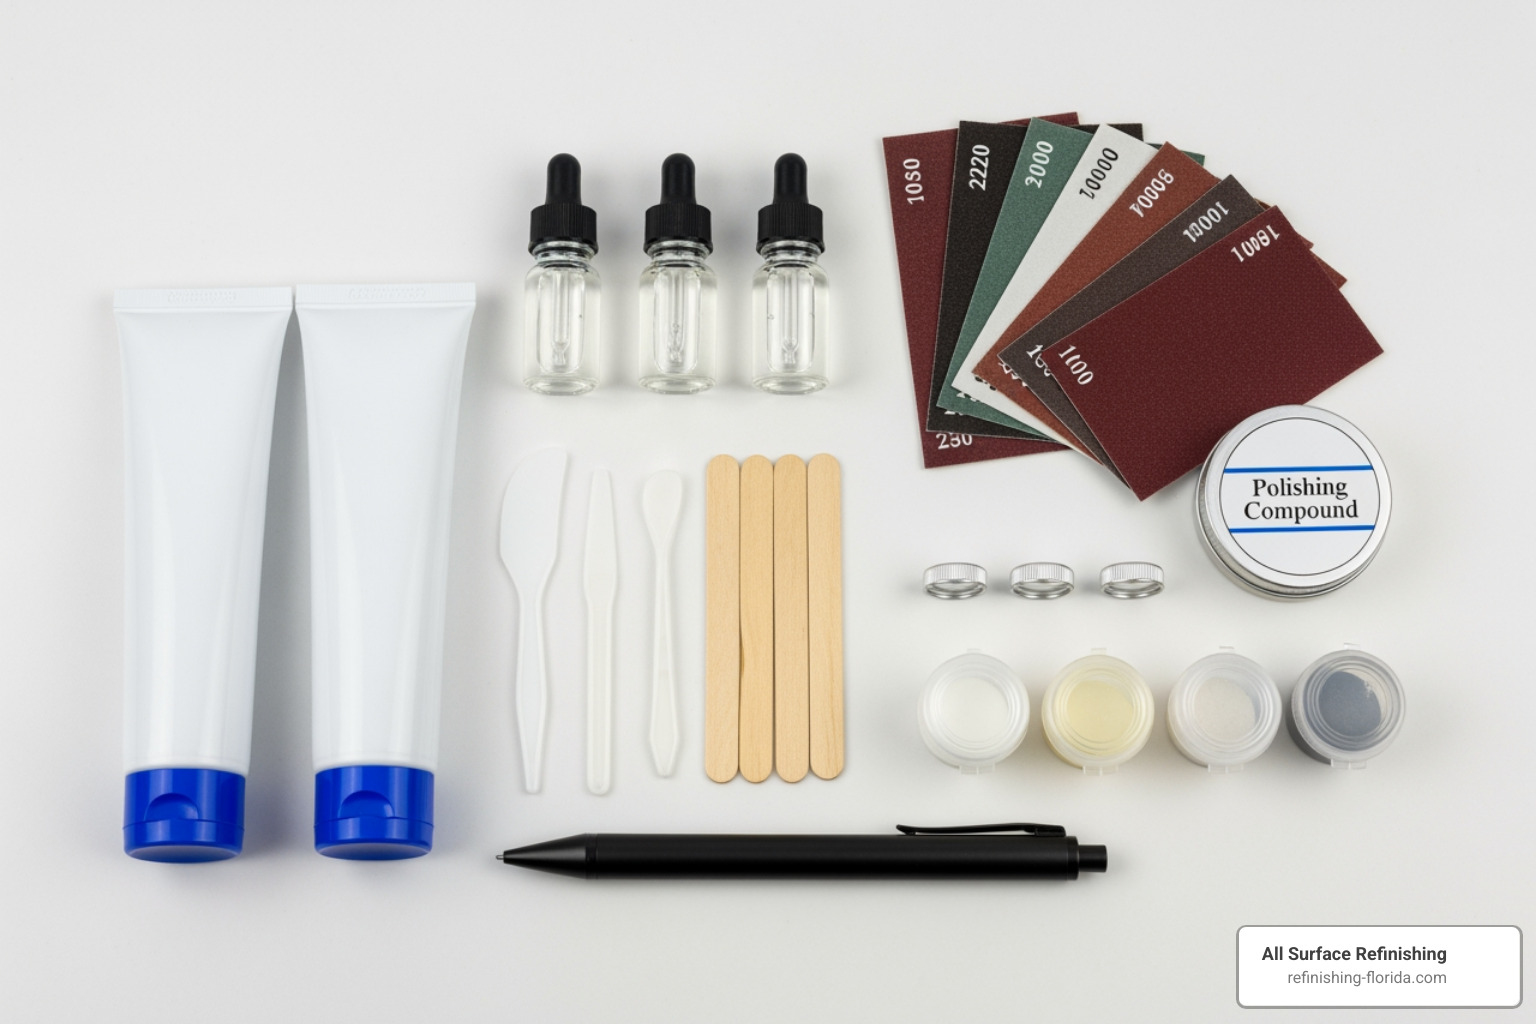
When we look at the types of kits available, two main technologies stand out:
- Epoxy-based Kits: These are older technologies. While effective for some repairs, they often have limited color choices, can take a long time to dry (sometimes days), and may not achieve the same glossy, uniform appearance as newer options. They also usually require careful ventilation due as the fumes can be quite strong.
- Light-Cure Acrylic (LCA) Kits: This is where modern innovation shines. Kits utilizing LCA technology, like some we’ve seen, cure with a specific spectrum of blue light (often provided by a small LED pen light). This means much faster curing times—often just 5-7 minutes! LCA material is non-toxic, odorless, and can withstand moisture, cleansers, and heat up to 285°F, making for a durable, long-lasting repair. They are also often a safer alternative to epoxy, requiring less stringent ventilation.
How to ensure the best color match
Achieving a seamless repair means the color of your repair material needs to blend perfectly with your existing acrylic shower surface. This can be one of the trickiest parts of the DIY process, but it’s not impossible!
- Pre-tinted Kits: Many acrylic shower repair kit options come in standard colors like white, almond, or biscuit. If your shower is a common color, a pre-tinted kit might be a perfect match. For instance, the Mirolin Miracle Acrylic Shower Stall and Tub Repair Kit is specifically designed for a perfect color match for white Mirolin acrylic bathtubs and showers.
- Custom Color Mixing: Some advanced kits include various colorants that allow you to mix and match to achieve a custom shade. This requires a keen eye and patience. Always mix small amounts and test on an inconspicuous area of your shower (like the underside of a lip or a hidden corner) to ensure the match is satisfactory before applying it to the damaged spot.
- Achieving a Seamless Finish: Beyond color, the finish matters. Once cured and sanded, polishing is key. A well-polished repair will reflect light like the surrounding acrylic, making it virtually disappear. For larger or more complex repairs, sometimes a slight difference in shade is less noticeable than a mismatched texture or sheen.
What to Look for in an Acrylic Shower Repair Kit
When you’re shopping for an acrylic shower repair kit for your home in Coral Springs or Pembroke Pines, consider these factors to ensure you pick the best one for your needs:
- Material Compatibility: Ensure the kit explicitly states it’s for acrylic surfaces. Many kits are multi-surface, suitable for enamel, fiberglass, porcelain, and acrylic, which is a good sign of versatility.
- Waterproof Properties: Your shower is constantly exposed to water. The repair material must be completely waterproof to prevent moisture ingress and further damage. Light Cure Acrylic (LCA) technology, for example, is known to withstand moisture effectively.
- Curing Time: For those of us with busy lives in Miami, a fast curing time is a huge plus. LCA kits, with their LED light curing, can significantly reduce the waiting period compared to epoxy-based kits that might require days to fully harden.
- Non-toxic Options: Safety is paramount. Look for kits that advertise themselves as non-toxic and odorless. LCA materials are often highlighted for these benefits, making the repair process safer for you and your family, especially in enclosed bathroom spaces.
- Durability: A repair should last. Check reviews and product descriptions for claims about the repair’s longevity and resistance to heat and common cleansers. A repair that can withstand heat up to 285°F and regular cleaning is ideal.
Your Step-by-Step Guide to a Flawless Repair
Ready to tackle that chip or crack in your acrylic shower? Great! We’ve put together a step-by-step guide to help you achieve a flawless repair. Patience and attention to detail are your best friends here.
Step 1: Prepare the Damaged Area
Preparation is the foundation of any good repair. Don’t skip these crucial steps!
- Safety First: Even with non-toxic kits, it’s always wise to wear gloves and eye protection. If you’re using an epoxy-based kit, ensure adequate ventilation by opening windows and running the bathroom fan. With Light Cure Acrylic (LCA) kits, strong ventilation isn’t typically required for the product itself, but fresh air is always a good idea.
- Cleaning the Surface: The repair area must be pristine. Clean the defect and the surrounding area thoroughly with rubbing alcohol or a mild, non-abrasive cleaner. This removes soap scum, oils, and any residue that could prevent the repair material from bonding properly.
- Drying Completely: This cannot be stressed enough. The surface must be bone dry before you apply any repair compound. Use a clean cloth, and if necessary, a hairdryer on a cool setting, to ensure there’s no moisture left.
Step 2: Apply the Repair Compound
Now for the main event! Applying the repair compound requires a steady hand and a light touch.
- Mixing the Filler: If your kit requires mixing a compound and hardener, follow the instructions precisely. Incorrect ratios can lead to improper curing or a weak repair. Mix thoroughly but avoid introducing too many air bubbles. For LCA kits, the material usually comes pre-mixed.
- Applying with a Spatula: Use the provided applicator or a small, flexible spatula to apply a small amount of the repair material directly into the damaged area.
- Overfilling Slightly: It’s generally better to slightly overfill the defect. This allows for sanding down to a perfectly flush surface later. However, don’t go overboard; a massive mound of repair material will be harder to sand down smoothly.
- Leveling the Surface: For LCA kits, often a clear curing strip is placed over the uncured acrylic and gently pressed into the damage. This helps to level the surface and create a smooth finish, minimizing the need for extensive sanding.
Step 3: Cure and Sand the Repair
This is where the magic happens, turning that gooey compound into a solid, repairable surface.
- Curing Process:
- Air-dry (Epoxy-based kits): These kits rely on chemical reactions and air exposure to cure. Drying times can range from several hours to a few days. Follow the kit’s instructions for specific waiting periods before proceeding.
- LED Light (Light-Cure Acrylic kits): For LCA kits, you’ll use the provided LED pen light. Focus the blue LED light just above the curing strip (if used) for 5-7 minutes. For deeper damages, you might need to cure for longer or apply the material in thin layers, curing each layer separately. After the initial curing, gently test the material with a toothpick or fingernail to ensure it’s hard. If it’s still tacky, cure for a few more minutes. If a curing strip was used and the repair is tacky after removal, you can gently wipe it with rubbing alcohol.
- Wet Sanding: Once the repair material is fully cured and hard, it’s time to smooth it out.
- Start with a coarser grit sandpaper (e.g., 220 grit, often yellow in kits) to level any overfilled material. Sand gently and evenly, using water as a lubricant (wet sanding) to prevent scratching the surrounding acrylic and to keep dust down.
- Progress to a finer grit (e.g., 2000 grit, often grey) for a smoother finish. Continue wet sanding until the repaired area is perfectly flush with the original surface and feels smooth to the touch. Be extremely careful when sanding softer acrylic surfaces to avoid hazing or scratching the good areas.
Step 4: Polish for a Professional Finish
The final touch! Polishing is what truly makes a DIY repair look professional.
- Polishing Compound: Apply a small amount of the polishing compound to the sanded area.
- Buffing to a High Gloss: Using a soft cloth (often provided in the kit) or a buffing pad, gently rub the compound into the repair in small, circular motions. Continue buffing until the repaired area matches the sheen of the surrounding acrylic. This step helps to blend the repair visually and restore its original luster.
- Blending the Repair: The goal is to make the repair virtually invisible. Step back and examine the area from different angles and in various lighting conditions. If you’ve done it right, you’ll be hard-pressed to find the original damage!
DIY vs. Professional Acrylic Shower Repair: Making the Right Call
We understand the satisfaction of a successful DIY project, especially when it saves you money. However, knowing when to grab your acrylic shower repair kit and when to call in the professionals is key to long-term satisfaction and preventing costly mistakes.
| Feature | DIY Repair Kit | Professional Repair |
|---|---|---|
| Cost | $50-$75 (for materials) | $150-$200+ (for minor repairs) |
| Time | 2-4 hours active work, plus curing (can be days for epoxy) | Usually same day for repair |
| Skill Level | Basic DIY experience, patience, attention to detail | Expert knowledge, specialized equipment, guaranteed results |
| Best For | Small chips, shallow cracks (<1/4″), surface scratches, minor holes | Large cracks, structural damage, leaks, extensive cosmetic issues, full aesthetic updates |
The Pros and Cons of a DIY acrylic shower repair kit
Pros:
- Cost Savings: A DIY acrylic shower repair kit is significantly cheaper than hiring a professional or replacing your shower. For small repairs, you can expect to spend around $50 to $75 on materials, compared to $150 to $200 for a professional to fix a chip or crack. This makes it a very cost-effective solution for minor damages in your Aventura or Delray Beach bathroom.
- DIY Satisfaction: There’s a real sense of accomplishment in fixing something yourself. You control the timeline and the process.
- Quick Fix: For small damages, you can often complete the active repair work in a few hours, especially with fast-curing LCA kits.
Cons:
- Limitations: DIY kits are best for small, cosmetic damages (typically under 1/2″ or 12mm). For anything larger or structural, the repair might not hold or could look subpar.
- Color Matching Challenges: While some kits offer colorants, achieving a perfect, invisible color match can be difficult for an untrained eye. You might end up with a noticeable patch if the colors don’t blend perfectly.
- Risk of Imperfect Results: Without professional experience and tools, the finish might not be as smooth, glossy, or durable as a professional repair. An uneven texture or visible repair line can detract from your shower’s appearance.
- Time Commitment: While active repair time is short, some kits (especially older epoxy types) require significant curing time, making your shower unusable for days.
When to Call a Professional for Bathtub, Tub, or Shower Repair
While we champion the DIY spirit, there are definitely times when calling in the experts is the smartest move. For residents in Aventura, Boca Raton, Fort Lauderdale, Miami, West Palm Beach, and surrounding South Florida areas, All Surface Refinishing offers expert bathtub, tub, and shower repair services.
Consider professional help if:
- Large or Structural Cracks: If a crack is deep, long, or appears to be affecting the structural integrity of your shower base, it’s beyond the scope of a DIY kit. These can lead to leaks and significant water damage if not properly addressed.
- Leaks Near the Drain or Along Seams: These areas are complex, and a DIY patch might not adequately seal the leak. Professionals have the expertise to diagnose the source of the leak and apply a durable, watertight repair.
- Extensive Damage: If your shower has multiple chips, wide cracks, or a large hole, a DIY kit won’t be sufficient. You’ll likely need a more comprehensive solution to restore the entire surface.
- Desire for a Guaranteed Professional Finish: If you want your shower to look brand new with a perfectly smooth, glossy, and color-matched finish, a professional service is your best bet. Experts use specialized equipment and high-quality materials to offer a superior and longer-lasting result than most DIY kits. This can extend the life of your bathtub or shower and save you significant costs over a full replacement.
- Time or Skill Constraints: If you lack the time, patience, or confidence to execute a flawless DIY repair, or simply want to avoid the hassle, a professional can get the job done efficiently and effectively.
Post-Repair Care and Frequently Asked Questions
You’ve successfully repaired your acrylic shower – congratulations! Now, let’s talk about how to keep that repair looking great and answer some common questions. Proper post-repair care and maintenance are crucial for the long-term durability of your efforts.
How long does an acrylic shower repair take to complete?
The total time for an acrylic shower repair kit project can vary widely depending on the type of kit and the extent of the damage.
- Active Work Time: For a small chip or scratch, the actual hands-on work (cleaning, mixing, applying, sanding, polishing) might only take 1 to 2 hours.
- Curing Duration: This is the biggest variable.
- Light-Cure Acrylic (LCA) kits cure rapidly under an LED light, often within 5-7 minutes per layer. This means you could potentially use your shower again within a few hours of completing the repair.
- Epoxy-based kits, however, require chemical curing that can take much longer. You might need to wait 24-72 hours, or even longer, before the repair is fully hardened and safe to expose to water.
- Total Project Time: Considering preparation, application, and curing, a DIY repair typically takes anywhere from 2-4 hours of your time spread over a day or two, assuming you use a fast-curing kit and have small damage. If you use an epoxy kit, this could stretch to several days before the shower is fully usable.
What are the safety precautions when using a repair kit?
Safety should always be a priority, whether you’re working on a small project in your Jupiter home or a larger one in your Wellington bathroom.
- Ventilation: While Light Cure Acrylic (LCA) materials are often non-toxic and odorless, good ventilation is always recommended when working with any chemicals. Open windows, turn on exhaust fans, and ensure fresh air circulation. If you’re using an older epoxy-based kit, strong ventilation is absolutely critical due to potential fumes.
- Personal Protective Equipment (PPE): Always use appropriate Personal Protective Equipment (PPE). This includes wearing gloves to protect your hands from direct contact with the repair materials. Eye protection (safety glasses or goggles) is also highly recommended to prevent splashes or dust from getting into your eyes during application or sanding.
- Chemical Handling: Read the instructions carefully for safe handling and disposal of any unused materials or waste. Avoid skin and eye contact, and do not ingest. Keep kits out of reach of children and pets.
How do I clean my repaired shower?
Maintaining your repaired acrylic shower is straightforward, but it requires using the right products to protect the repair and the surrounding surface.
- Non-Abrasive Cleaners: Acrylic surfaces, whether repaired or not, respond best to mild cleaners. Opt for non-abrasive, non-acidic bathroom cleaners. Natural solutions like a paste of baking soda and water are also very effective and safe.
- Soft Cloths: Always use soft cloths, sponges, or microfiber towels for cleaning. Avoid harsh scrub brushes, steel wool, or abrasive pads, as these can scratch both the repaired area and the original acrylic, potentially causing new damage.
- Avoiding Harsh Chemicals: Stay away from strong chemical cleaners, acetone, paint removers, or products containing ammonia, as these can damage the acrylic finish and compromise the repair.
- Post-Repair Cleaning Schedule: Regular, gentle cleaning is better than infrequent, aggressive scrubbing. Wipe down your shower after each use to prevent soap scum and mildew buildup, which reduces the need for heavy-duty cleaning.
Conclusion: A New Look for Your Shower
We’ve walked through the ins and outs of using an acrylic shower repair kit, empowering you to tackle those pesky chips, cracks, and scratches that can mar the beauty of your bathroom. For minor damages, these DIY kits offer a cost-effective and satisfying solution, allowing you to restore your shower’s appearance and prolong its life. It’s a fantastic way to keep your bathroom looking fresh without breaking the bank, especially for small, cosmetic fixes in your Homestead or Port Saint Lucie home.
However, it’s crucial to remember the distinction between minor touch-ups and more extensive issues. While an acrylic shower repair kit is perfect for small imperfections, there are times when professional expertise is simply indispensable. Large structural cracks, persistent leaks, or widespread damage often indicate deeper problems that require specialized knowledge and equipment to resolve effectively and durably.
For extensive damage, a complete bathroom change, or if you simply prefer a guaranteed, flawless finish for your bathtub, tub, or shower in Aventura, Boca Raton, Fort Lauderdale, Miami, West Palm Beach, and throughout South Florida, trust the experts at All Surface Refinishing. With over 30 years of experience and 14,000+ projects under our belt, we offer high-quality, cost-effective repair services that will make your bathroom sparkle like new.
Learn more about our professional bathtub, tub, and shower repair services in Florida
