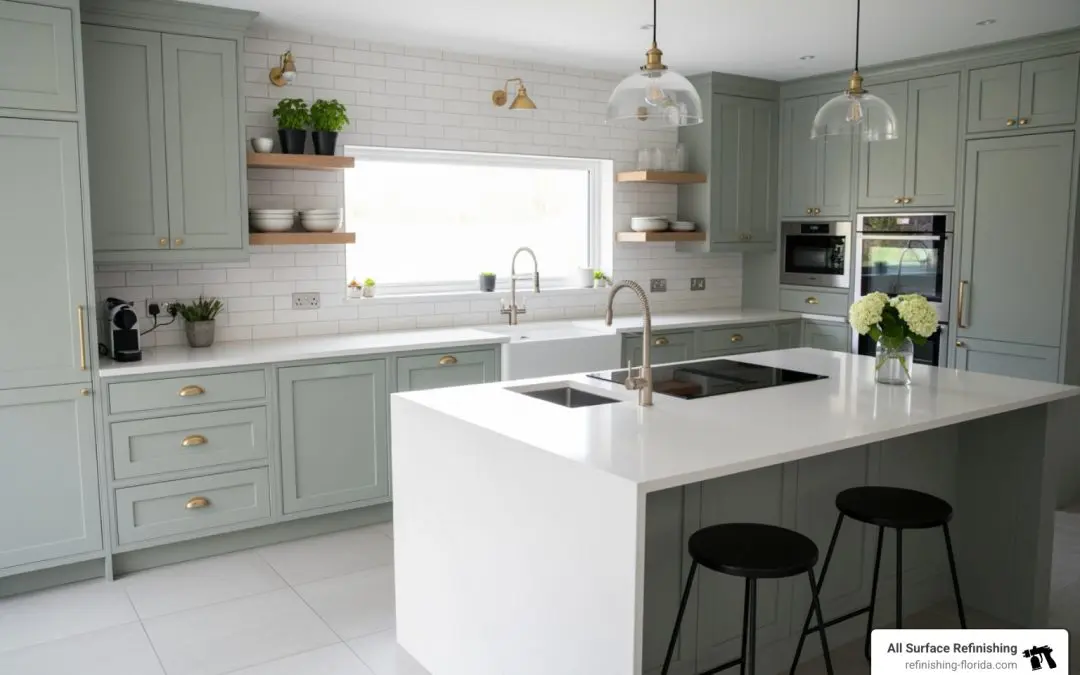
Why a Fresh Coat of Paint is Your Kitchen’s Best Friend
Paint kitchen cabinets is one of the most cost-effective ways to transform your kitchen without the expense of a full remodel. Here’s what you need to know:
The Cabinet Painting Process at a Glance:
- Prep – Remove doors, clean, sand, and fill imperfections
- Prime – Apply a high-quality bonding primer for adhesion
- Paint – Apply 2-3 thin coats with proper drying time between each
- Cure – Allow 7-30 days for paint to fully harden before heavy use
Key Benefits:
- Costs a fraction of cabinet replacement ($170-$300 DIY vs. thousands for new cabinets)
- Dramatically updates your kitchen’s look in less time than you think
- Adds value to your home with a professional-looking finish
- Achievable as a DIY project with proper preparation and patience
Painting your kitchen cabinets is about creating the space you’ve always wanted. With the right materials and a free weekend (plus drying time), you can achieve professional results. Modern paints designed for cabinets make DIY results more durable than ever.
The secret to success? Preparation is 90% of the job. Most failures happen because homeowners skip crucial prep steps. When done correctly, painted cabinets can last for years.
As Frank Hernandez, President of All Surface Refinishing, I’ve helped South Florida homeowners transform their kitchens since 2011. We specialize in durable, professional-quality finishes that last. Whether you’re tackling this as a DIY project or considering professional help, this guide will walk you through every step.

Pre-Painting Essentials: Gathering Supplies and Choosing Your Finish

Before opening a paint can, gathering the right tools and choosing the best paint and primer is crucial. This foundational work ensures a smooth process and a beautiful, long-lasting finish.
Essential Tools and Supplies for Cabinet Painting
Having the right tools is half the battle for a professional-looking finish. Skimping on supplies can lead to frustration and subpar results. Here’s what you’ll need:
- Degreaser / Cleaner: A heavy-duty cleaner like TSP (Trisodium Phosphate) Cleaner or a liquid deglosser is essential for removing grease and grime.
- Sandpaper: Various grits: 100- to 150-grit for initial scuff sanding and 220-grit for sanding between coats. Sanding sponges are great for contoured areas.
- Tack Cloth: These sticky cloths pick up fine dust particles after sanding, ensuring a clean surface for paint.
- Painter’s Tape: Protects adjacent surfaces and creates crisp lines.
- Drop Cloths: Use drop cloths or rosin paper to protect countertops, floors, and surrounding areas.
- High-Quality Angled Brush: A good 2-inch angled brush is perfect for cutting in and detailed areas. A quality brush makes a difference.
- Mini Foam Roller: For flat surfaces, a 4-inch or 6-inch foam roller helps achieve a near-spray finish.
- Paint Tray: For your rollers.
- Wood Filler & Putty Knife: For filling dings, holes, or imperfections.
- Drill or Screwdriver: For removing hardware and doors. An electric drill saves time.
- Painter’s pyramids: Highly recommended for supporting doors and drawers while painting, allowing you to paint both sides and edges without waiting for one side to dry.
Choosing the Best Paint and Primer for Cabinets
The type of paint and primer is paramount for durability in a high-traffic kitchen.
Best Paint Types for Kitchen Cabinets:
We recommend water-based, latex paints formulated for cabinets or trim. They offer excellent durability and a smooth finish.
- Water-based enamel: Products like Benjamin Moore Advance or Sherwin-Williams Emerald Urethane Trim Enamel are top choices that cure to a hard, furniture-like finish.
- Acrylic latex: Look for fully acrylic latex paints for the best durability.
- Alkyd paints (oil-free): These offer great durability and are easier to clean up than traditional oil-based paints.
While oil-based paints were once standard, modern water-based formulations offer superior performance without the strong odor, difficult cleanup, and yellowing.
Best Primer Types for Cabinets:
Primer is your secret weapon for adhesion and a uniform base. Do not skip this step!
- High-quality, all-surface primer: Products like Zinsser B-I-N Shellac-Base Primer or Benjamin Moore Fresh Start are excellent.
- Stain-blocking primer: Crucial for painting over dark wood or stains to prevent bleed-through.
- Bonding primer: Essential for challenging surfaces like laminate to ensure paint adhesion.
- Fast-drying enamel underbody primers: These can speed up the process and sand beautifully for a super smooth base.
Painting Different Cabinet Materials:
- Wood Cabinets: Most common. Require thorough cleaning, sanding (100-150 grit), and a good primer. For open-grain woods like oak, you may need to fill pores with a high-build primer for a smooth finish.
- Laminate Cabinets: Require a specialized bonding primer for their slick surface. Light scuff sanding is still recommended.
- Previously Painted Cabinets: If in good condition, clean, light sand (220-grit), and prime. If the old paint is chipping, scrape and sand smooth first.
Selecting the Perfect Color and Sheen for Kitchen Cabinets
Choosing the right color and sheen dramatically impacts your kitchen’s look and feel.
Color Selection Tips:
- Test, Test, Test: Purchase pint-sized samples and paint test swatches on your cabinets or poster board. This shows how the color looks in your kitchen’s light throughout the day.
- Consider Your Existing Elements: Think about your countertops, backsplash, flooring, and wall color. Do you want the cabinets to blend in or contrast?
- Popular Kitchen Cabinet Colors: Timeless choices include shades of white (like Benjamin Moore Cloud Cover), light grays, and deeper blues or greens. For a bold splash, Benjamin Moore’s Blueberry Hill 812 is an excellent choice.
Sheen Guide:
The sheen refers to how shiny the paint finish is. For kitchen cabinets, durability and cleanability are key.
- Matte/Flat/Eggshell: Not recommended for cabinets as they are harder to clean and show imperfections.
- Satin: Offers a subtle glow, is durable, and easy to clean. A popular choice that hides minor imperfections.
- Semi-gloss: Provides a noticeable shine and is very durable and easy to clean. A common and excellent choice for a crisp, professional look.
- Hi-gloss: Creates a highly reflective, modern finish. Extremely durable but highlights every imperfection, requiring meticulous prep.
For most projects, satin or semi-gloss finishes strike the perfect balance between aesthetics and functionality. For more on updating your kitchen’s style, explore our guide to Modern Cabinet Painting.
The Critical Prep Work: How to Prepare Cabinets for a Flawless Finish

This is the most important phase for a long-lasting, professional-quality finish. We can’t stress this enough: proper preparation is the single biggest factor in the success and longevity of our painted cabinets. Skipping steps here will lead to peeling, chipping, and frustration down the line.
Step 1: Disassemble and Label Everything
Our first task is to clear out and break down the kitchen.
- Removing Cabinet Doors and Drawers: Carefully unscrew all cabinet doors from the frames using a drill or screwdriver. Remove all drawer fronts and any pull-out shelves.
- Removing Hinges and Hardware: Take off all existing hinges, knobs, pulls, or other hardware. If we plan to reuse them, collect them in labeled bags or boxes.
- Labeling System: This is crucial for easy reassembly. Use painter’s tape to label each door and drawer front with a corresponding number or location (e.g., “upper left stove cabinet”). We like to write these numbers on the tape and stick them in a discreet spot, like inside the hinge location. Label the hardware bags with the same numbers.
- Protecting Surrounding Kitchen Areas: Once everything is removed, it’s time to protect our kitchen.
- Countertops: Tape rosin paper or old cardboard over all countertops.
- Floors: Lay down drop cloths or rosin paper to cover the entire floor area.
- Backsplash, Appliances, and Walls: Tape plastic tarps or painter’s plastic over the backsplash, windows, fixed appliances (like the refrigerator or stove), and any adjacent walls we don’t want to get paint on. This prevents overspray and drips.
Step 2: The Ultimate Cleaning and Sanding Method
This step ensures our paint has a perfectly clean and etched surface to adhere to.
- Grease and Grime Removal: Kitchen cabinets accumulate years of cooking grease, dirt, and dust. We need to remove all of this. Use a heavy-duty degreaser like TSP (Trisodium Phosphate) cleaner, a liquid deglosser, or even a strong solution of dish soap and warm water. Wipe down every surface we intend to paint (cabinet boxes, door fronts and backs, and drawer fronts) thoroughly. Rinse with clean water and let dry completely.
- Sanding vs. Deglossing: For existing glossy finishes, we need to etch the surface. A liquid deglosser can help with this, but for wood cabinets, we find doing both deglossing and light sanding provides the best adhesion.
- Scuff Sanding Technique: Using 100- to 150-grit sandpaper or a sanding sponge, lightly scuff sand all surfaces. The goal is not to remove the existing finish entirely or get down to bare wood, but simply to dull the glossy surface and create “tooth” for the primer to grip. For intricate areas or molded profiles, a green abrasive pad works wonders where sandpaper can’t conform. This light sanding can take as little as 30 minutes for an average kitchen.
- Filling Holes and Imperfections: Now is the time to address any dings, dents, or holes from old hardware. Use wood filler and a putty knife to fill these areas. Once dry, sand them smooth with 220-grit sandpaper.
- Dust Removal: After all sanding is complete, vacuum every surface thoroughly. Then, use a tack cloth to wipe down everything. This step is critical; even tiny dust particles can show up under paint.
For detailed instructions on preparing your cabinet components, visit our guide on Cabinet Doors Painting.
Step 3: Priming for a Perfect Base
Priming is the bridge between our prepped surface and the final paint. It ensures adhesion, blocks stains, and provides a uniform base for our chosen color.
- Importance of Primer: Primer is a critical element for good coverage and a long-lasting finish. It helps the paint adhere better, especially when going from a dark color to a light one, or painting over challenging materials like laminate. It also helps to seal the wood and prevent bleed-through from tannins.
- Applying Primer: We’ll apply our chosen high-quality primer. For detailed areas and cutting in, use our angled brush. For larger, flat surfaces, a mini foam roller will provide a smooth, even application. Apply thin, even coats to avoid drips and pooling, especially in corners. Feather out edges for a seamless look.
- How to Prime for a Smooth Finish: After the primer is dry (check manufacturer’s instructions, usually at least 1 hour), we’ll lightly sand all primed surfaces with 220-grit sandpaper. This removes any slight imperfections or grain raise, creating an incredibly smooth base for our paint. Vacuum and wipe with a tack cloth afterward.
- Recommended Drying Times for Primer: While primer may be dry to the touch in an hour, always consult the product label for specific recoat times. Benjamin Moore’s Fresh Start primer, for instance, typically allows recoat after 1 hour.
For professional priming tips and services in your area, check out our insights on Cabinet Painting Palm Beach.
The Ultimate Guide to How You Paint Kitchen Cabinets
This section details the application process for achieving a professional look. With our cabinets prepped and primed, we’re ready for the exciting part: applying the paint! Patience and thin coats are our best friends here.
Step 4: Painting Cabinet Frames and Boxes
We’ll start with the fixed parts of our kitchen.
- Painting Technique: Using our angled brush, we’ll “cut in” along the edges, corners, and detailed areas of the cabinet frames. Once the edges are done, we’ll switch to our mini foam roller for the larger, flat surfaces.
- Following the Wood Grain: Always apply paint in the same direction as the wood grain for the smoothest finish.
- Applying Thin Coats: This is crucial! Two to three thin coats are always better than one thick coat. Thick coats are prone to drips, uneven drying, and an unprofessional appearance.
- How Many Coats of Paint: Most cabinet paints will require at least two coats for full, even coverage. If we’re making a drastic color change, especially from dark to light, a third coat might be necessary. Allow each coat to dry completely according to the manufacturer’s instructions before applying the next. Lightly sand with 220-grit sandpaper between coats, then vacuum and tack cloth.
Step 5: How to Paint Kitchen Cabinet Doors and Drawers
This is where our workspace setup and specific techniques truly shine.
- Workstation Setup: Lay our cabinet doors and drawer fronts flat on painter’s pyramids or DIY screw standoffs. This lifts them from the work surface, allowing us to paint edges more easily and often paint both sides without waiting for one to dry (paint the back, let it dry, then flip and paint edges/front).
- Painting the Back First: We recommend painting the back of the doors and drawers first. This way, if there are any minor imperfections as we’re getting the hang of it, they’ll be on the less visible side.
- Painting Detailed Areas: For doors with raised panels or intricate details, use our angled brush first to paint these areas. Ensure the paint doesn’t pool in corners.
- Achieving a Smooth, Professional Finish:
- Foam Roller for Flat Surfaces: After brushing details, use the mini foam roller for the larger, flat panels. Roll with light, even pressure.
- Feathering: When brushing, use light strokes and “feather out” the edges to blend seamlessly and avoid harsh brush marks.
- Roll, Then Brush: For an ultra-smooth finish, some pros recommend rolling the paint on and then immediately following up with a light pass of a high-quality brush to “lay off” the paint and eliminate roller texture.
- Paint Conditioner: If our paint seems a bit thick or isn’t leveling out well, we can add a paint conditioner like Floetrol. Always read the instructions for the correct proportion.
- Strain Paint: Even fresh paint can have tiny lumps. Strain our paint through a mesh filter before use for the smoothest application.
- Preventing Drips and Brush Marks: The key here is thin coats and proper application. If we see a drip, catch it immediately with our brush or roller. If it dries, we’ll need to sand it down before the next coat.
- How to Prevent Drawers from Sticking: To prevent drawers from sticking after painting, we advise painting only the front piece of the drawer. Painting the sides or bottom of the actual drawer box can add enough thickness to cause friction and make them difficult to open and close. The drawer box itself is typically unfinished or has a thin, smooth coating that doesn’t need painting.
Comparing Painting Techniques: Brush vs. Roller vs. Sprayer
When it comes to applying paint, we have a few options, each with its own advantages.
| Technique | Pros | Cons | Best For |
|---|---|---|---|
| Brushing | Excellent control for details and edges; good for small projects; requires minimal equipment. | Can leave brush marks; slower for large, flat surfaces. | Cutting in, intricate details, small touch-ups, edges. |
| Rolling | Achieves a smooth finish on flat surfaces; faster than brushing for larger areas; relatively easy to learn. | May leave a slight texture (orange peel); not ideal for intricate details. | Large, flat surfaces like cabinet door panels and cabinet box sides. |
| Spraying | Factory-smooth, flawless finish; very fast for large projects; excellent for intricate profiles and raised panels. | Requires specialized equipment (HVLP or airless sprayer); learning curve for technique; significant masking/prep needed to prevent overspray; uses more paint. | Achieving a professional, factory-like finish, especially on new or complex cabinet styles. |
For most DIY projects, a combination of brushing and rolling offers the best balance of control, speed, and a smooth finish. However, for those seeking the absolute smoothest, factory-like finish, spray painting is the way to go, though it requires more practice and equipment. If we’re looking for professional results without the DIY effort, our team of Local Cabinet Painters at All Surface Refinishing can deliver.
The Final Stretch: Curing, Reassembly, and Long-Term Care
This final stage ensures our hard work lasts for years to come. We’re almost there! The drying and curing phase is just as important as the painting itself, as it dictates the long-term durability of our beautiful new cabinets.
Step 6: Drying, Curing, and Reassembly
This is the phase where patience truly pays off.
- Drying vs. Curing Time: It’s important to understand the difference. “Dry to the touch” means the surface isn’t tacky, but the paint hasn’t fully hardened. “Curing” is the chemical process where the paint reaches its maximum hardness and durability. While paint may be dry to the touch in a few hours, full hardness and adhesion can take anywhere from 7 to 30 days, depending on the paint type, humidity, and temperature.
- How Long Between Coats: Always follow the manufacturer’s recommendations on the paint can. Typically, this is a few hours. Rushing this can lead to adhesion issues and an uneven finish.
- When to Reassemble: We recommend waiting at least 24 hours after the final coat before reassembling cabinet doors and drawers. However, for heavy use, it’s best to wait 2-3 days before returning items to the cabinets and being less gentle.
- Reinstalling Hardware: Once the cabinets are dry enough for reassembly, carefully reattach our hinges, knobs, and pulls. If we opted for new hardware, a hardware template can be incredibly helpful for precise installation.
For a comprehensive timeline and more details, consult our Cabinet Painting Complete Guide 2025.
Maintaining Your Newly Painted Cabinets
With our cabinets looking fresh and new, we want to keep them that way!
- Cleaning Best Practices: For daily cleaning, simply wipe our cabinets with a soft cloth dampened with mild soap and water. Avoid abrasive cleaners, harsh chemicals, or bleach, as these can damage the paint finish.
- Gentle Cleaners: A gentle dish soap solution is usually all we need.
- Touch-Up Kits: Keep a small amount of our leftover paint (labeled with the color and date) for any future touch-ups. Small dings or scratches can be easily repaired.
- Avoiding Damage: During the first 5-7 days after painting, avoid heavy abrasion or vigorous cleaning. Be gentle when opening and closing doors and drawers. Use cabinet bumpers to prevent doors from slamming.
- Long-Term Durability: With proper preparation, high-quality paint, and careful maintenance, our newly painted kitchen cabinets can last for many years, providing a beautiful and functional heart to our home.
Frequently Asked Questions about Painting Kitchen Cabinets
What are the most common mistakes to avoid when I paint kitchen cabinets?
The most common mistakes often stem from rushing or cutting corners. We frequently see issues from:
- Skipping Prep Work: Not thoroughly cleaning, sanding, or degreasing surfaces leads to poor adhesion, chipping, and peeling. This is perhaps the biggest mistake.
- Using Cheap Paint or Tools: Low-quality paint offers poor coverage and durability, while cheap brushes and rollers leave streaks and lint. Invest in quality materials.
- Applying Thick Coats: This causes drips, uneven drying, and brush marks. Thin, even coats are always superior.
- Rushing Drying and Curing: Not allowing enough time between coats or before reassembly can lead to paint damage, sticking, and a less durable finish. Patience is a virtue in cabinet painting!
As we’ve emphasized, proper preparation is 90% of the job and ensures a durable, beautiful finish.
How does painting kitchen cabinets compare in cost and effort to replacing them?
Painting our kitchen cabinets is a significantly more affordable option than replacing them entirely. A DIY paint job can cost as little as $170 – $230 for materials (paint, primer, sandpaper, rollers, brushes), not including power tools like an electric sander or drill. In contrast, replacing kitchen cabinets can easily cost thousands of dollars.
While painting requires considerable time and effort for a DIY project (often 15 days including extensive drying and curing times, though individual painting sessions are shorter), the financial savings are substantial. It’s a rewarding project that offers a high return on investment in terms of aesthetic improvement. For a detailed breakdown of costs, see our Kitchen Cabinet Painting Cost Guide.
How long until my cabinets are fully cured and ready for normal use?
While paint may be dry to the touch in a few hours, and we can typically reassemble cabinets after 24 hours, a full cure takes much longer. Most modern cabinet paints need anywhere from 7 to 30 days to fully harden and reach their maximum durability. During this curing period, be gentle with the surfaces to avoid scratches, dings, or premature wear. We don’t recommend exposing newly painted cabinets to heavy abrasion or cleaning for at least five to seven days.
Your Dream Kitchen is a Paintbrush Away
Painting your kitchen cabinets is a rewarding project that dramatically transforms your space without the cost of a full remodel. By following these steps—from meticulous prep to patient curing—you can achieve a stunning, durable finish. For homeowners in Aventura, Boca Raton, Boynton Beach, Broward County, Coral Gables, Coral Springs, Dade County, Delray Beach, Fort Lauderdale, Hialeah, Hollywood, FL, Jupiter, Kendall, Key Biscayne, Lake Worth, Miami, Miami Beach, North Miami, Palm Beach, Palm Beach County, Palm Beach Gardens, Pembroke Pines, Port Saint Lucie, Stuart, Wellington, FL, West Palm Beach, Weston, and surrounding South Florida areas who want a flawless, guaranteed result without the time and effort, the experts at All Surface Refinishing are here to help. Explore our professional kitchen and bathroom cabinet painting services to see how we can bring your vision to life. Learn more about our bathroom and kitchen painting services.
