Why Upgrading Your Kitchen With Epoxy Laminate Countertops Is Worth It
Epoxy laminate countertops are one of the most cost-effective ways to give your kitchen a high-end stone look — without tearing anything out.
Here’s a quick snapshot of what you need to know:
| Question | Quick Answer |
|---|---|
| What is it? | A poured resin coating applied over existing laminate surfaces |
| Can it go over Formica? | Yes, with proper sanding and bonding primer |
| How much does it cost (DIY)? | As little as $800 for 100 sq ft |
| How long does it last? | 6–8 years before re-coating is needed |
| Heat resistant? | Up to 450–500°F with trivets recommended |
| How long to cure? | Touch-dry in 24 hours, full cure up to 30 days |
| Best for? | Property owners who want stone looks without full replacement |
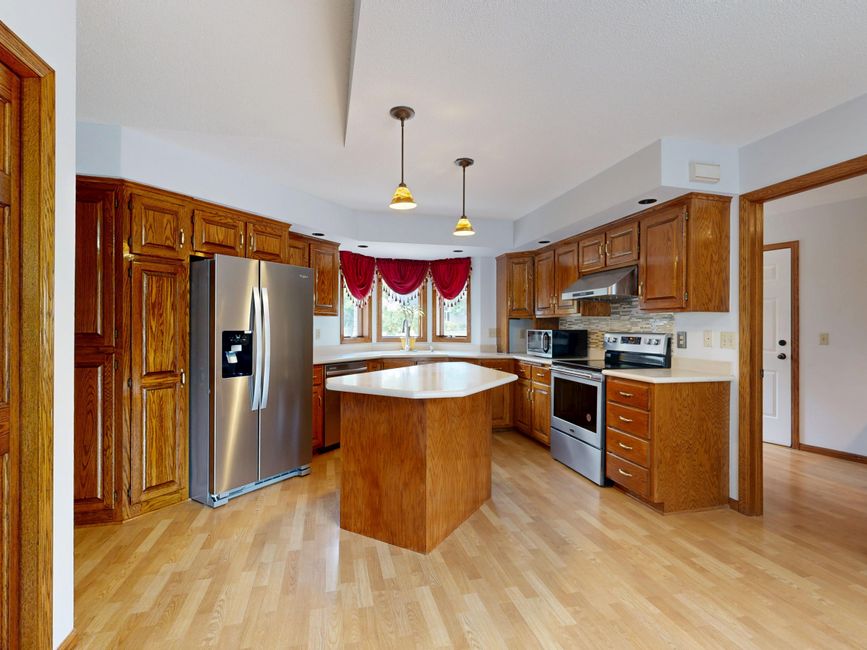
If your laminate countertops look dated, chipped, or just plain tired, epoxy refinishing lets you skip the demolition and still walk away with a surface that looks like polished marble or granite.
No jackhammers. No contractors hauling slabs through your front door. No weeks of kitchen downtime.
The transformation can be dramatic. Many first-timers have pulled off stunning black marble or Carrara white finishes — and guests can rarely tell the difference from the real thing.
I’m Frank Hernandez, President of All Surface Refinishing, and with over a decade of hands-on refinishing experience across South Florida, I’ve seen countless kitchens transformed with epoxy laminate countertops — from outdated Formica to finishes that look like they belong in a design magazine. Let’s walk you through exactly how it’s done.
What Are Epoxy Laminate Countertops?
An epoxy laminate countertop isn’t a pre-made slab you buy at a big-box store. Instead, it is a custom-created surface achieved by applying a liquid kitchen countertop resin coating directly over your existing laminate, Formica, or Arborite counters.
When you mix epoxy resin (Part A) with a hardener (Part B), a chemical reaction occurs. This liquid mixture self-levels, flows over the edges, and cures into a rock-hard, high-gloss solid plastic surface. Because it starts as a liquid, you can add pigments, metallic powders, and dyes to mimic high-end natural stones like Carrara marble, granite, soapstone, or even deep-sea quartz.
While industrial settings use heavy, monolithic laboratory-grade solid epoxy tops for chemical resistance, a residential epoxy laminate countertop is all about combining that structural toughness with incredible visual design. It is the ultimate Formica kitchen countertop upgrade, giving homeowners a way to completely redesign their space without the cost, mess, and waste of traditional demolition.
If you are curious about the sheer variety of finishes you can achieve, from solid colors to intricate stone imitations, check out more info about kitchen countertop refinishing possibilities.
Why Choose Epoxy Laminate Countertops Over Replacement?
The most compelling reason to choose epoxy over slab replacement is simple: budget and convenience.
A complete kitchen remodel is notorious for dragging on. Replacing countertops means disconnecting plumbing, tearing out old heavy slabs, potentially damaging your drywall or cabinets, and waiting weeks for custom-cut stone to arrive. During that time, your kitchen is a construction zone.
With a professional epoxy resurfacing project, your existing layout remains completely intact. The old laminate acts as a stable, structural sub-base. We simply repair any minor chips or burns, seal the seams, and pour the new surface right on top. It is incredibly fast, clean, and leaves your cabinets completely undisturbed.
This process works beautifully not just in the kitchen, but also on bathroom vanities, bar tops, and dining tables. Whether you are looking to update a vacation home in Boynton Beach or a sleek condo in Miami, this method keeps your home functional while delivering a luxury aesthetic. To see how we handle these high-end transformations, explore our Professional Kitchen Countertop Refinishing Services.
The Pros and Cons of Epoxy Laminate Countertops
Before diving into a project, it is important to weigh the advantages and drawbacks of choosing an epoxy coating over traditional materials.
The Pros:
- Stunning Aesthetics: You can achieve highly customized, realistic stone veining, metallic effects, and three-dimensional depth that is virtually impossible to find in standard laminate sheets.
- Seamless and Non-Porous: Unlike tile or sectioned stone slabs, a poured epoxy countertop has no seams or grout lines. This non-porous kitchen countertop surface does not trap dirt, moisture, or bacteria, making it exceptionally hygienic and easy to clean.
- Excellent Moisture and Stain Resistance: Once fully cured, high-quality epoxy resists spills from wine, coffee, mustard, and oils.
- High Durability: Rated around 60 to 80 on the Shore D hardness scale, cured epoxy is highly impact-resistant and won’t chip easily if you accidentally drop a coffee mug.
The Cons:
- Tricky Application Process: Epoxy is unforgiving. Once mixed, you are “on the clock.” You have roughly 40 to 50 minutes of working time before it begins to set. If you work too slowly, you can end up with lumps, brush marks, or a sticky, uncured mess.
- Susceptibility to UV Yellowing: Standard epoxies can yellow over time when exposed to direct sunlight. While high-quality kits include UV inhibitors, it is still a factor to consider for kitchens with massive, sun-drenched windows.
- Scratch and Heat Limits: While epoxy has good kitchen countertop scratch resistance and can handle temporary heat up to 450°F, it is not indestructible. Sliding cast-iron pans or placing boiling pots directly on the surface can cause permanent scratches or scorch marks.
| Feature | Epoxy Coating | Traditional Laminate | Natural Quartz / Granite |
|---|---|---|---|
| Average Cost | Low to Moderate | Low | High to Very High |
| Seams | Seamless | Visible Seams | Minimal Seams |
| Customization | Unlimited (Faux Stone, Metallics) | Limited to Factory Prints | Natural Variations Only |
| Porosity | Non-Porous | Non-Porous | Non-Porous (Quartz) / Porous (Granite) |
| Repairability | Easy to patch/re-coat | Hard to repair chips | Requires professional stone repair |
For a deeper dive into how refinishing stacks up against other surface options, take a look at this more info about kitchen countertop refinishing and resurfacing.
Planning Your Professional Project: Costs and Materials
When planning an upgrade, you will need to choose between buying a DIY kit or hiring a professional refinishing team.
A standard DIY countertop epoxy kit typically costs between $100 and $200 and covers about 40 square feet at a standard 100-mil thickness. When you factor in the cost of specialty tools, bonding primers, undercoats, and protective topcoats, a complete DIY project for a 100-square-foot kitchen usually totals around $800.
In comparison, professional epoxy installation ranges from $100 to $200 per square foot. While this is higher than a DIY kit, it is still a fraction of the cost of new quartz or granite installations, which can easily exceed $8,000 to $10,000 when you factor in demolition, fabrication, and plumbing hookups.
If you do decide to tackle this as a DIY project, having the right professional kitchen refinishing safety gear and mixing tools is non-negotiable.
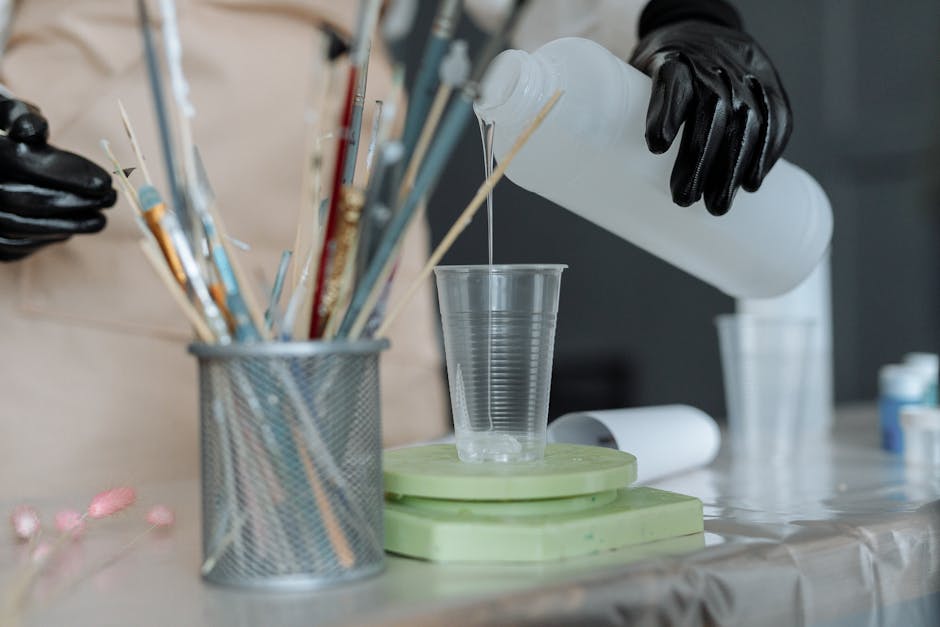
Here is a checklist of the essential materials and tools you will need:
- High-Quality Countertop Epoxy Kit: Look for a 100% solids, zero-VOC, food-safe formula (such as those offered by Countertop Epoxy).
- Sanding Equipment: A random orbital sander with 60-grit, 80-grit, and 120-grit sandpaper.
- Bonding Primer and Undercoat: Specifically formulated to stick to slick laminate surfaces.
- Personal Protective Equipment (PPE): A respirator mask (essential for fumes), nitrile gloves, and safety goggles.
- Application Tools: High-density foam rollers, high-quality paintbrushes (with secure bristles that won’t shed into your wet epoxy), plastic spreaders, and a propane torch or heavy-duty heat gun to pop air bubbles.
- Prep Supplies: Heavy-duty plastic sheeting (7-mil), rosin paper to protect floors, delicate-release painter’s tape, and 91% isopropyl alcohol for cleaning.
For more details on budget planning and selecting the right materials for a flawless finish, read this more info about kitchen countertop refinishing and resurfacing.
How Professionals Prep and Pour Your New Kitchen Countertops
The secret to a flawless, long-lasting epoxy countertop lies almost entirely in the preparation. If you pour high-end epoxy over a dirty, greasy, or slick laminate surface, it will eventually delaminate and peel off.
When we handle a project professionally, we follow a strict preparation protocol to guarantee a permanent bond:
- Deep Cleaning: We scrub the entire laminate surface with a heavy-duty degreaser or TSP (trisodium phosphate) to remove all cooking grease, wax, and dirt.
- Sanding the Laminate: We thoroughly sand the kitchen laminate using 60-grit to 80-grit sandpaper. This step is crucial because it scratches up the slick factory wear-layer of the laminate, creating a “mechanical profile” for the new coatings to grip onto.
- Repairing Damage: We fill any deep knife cuts, burns, or chipped edges with a high-strength polyester body filler, sanding it perfectly flush once cured.
- Backsplash and Edge Prep: If the countertop has a separate laminate backsplash, we score the silicone seam and carefully pry it off. We also use a router to round over any sharp 90-degree edges. Epoxy is a liquid; if edges are too sharp, the epoxy will run off too quickly, leaving the corners dangerously thin. Rounded edges allow for an even, thick flow.
- Final Solvent Wipe: We wipe down the entire surface with 91% isopropyl alcohol to remove every trace of sanding dust. We never use acetone, as it can leave a residue that interferes with epoxy adhesion.
- Applying the Bonding Primer: We apply two thin, even coats of a specialized bonding primer, followed by a tinted undercoat. This acts as the canvas for our color pour.
For a comprehensive breakdown of how we prep different types of surfaces, check out our Professional Kitchen Countertop Refinishing Guide.
Step-by-Step Guide to Professional Kitchen Epoxy Laminate Countertops
Once the prep work is complete and the undercoat is dry, the artistic magic begins. Here is how we execute a professional faux-stone pour:
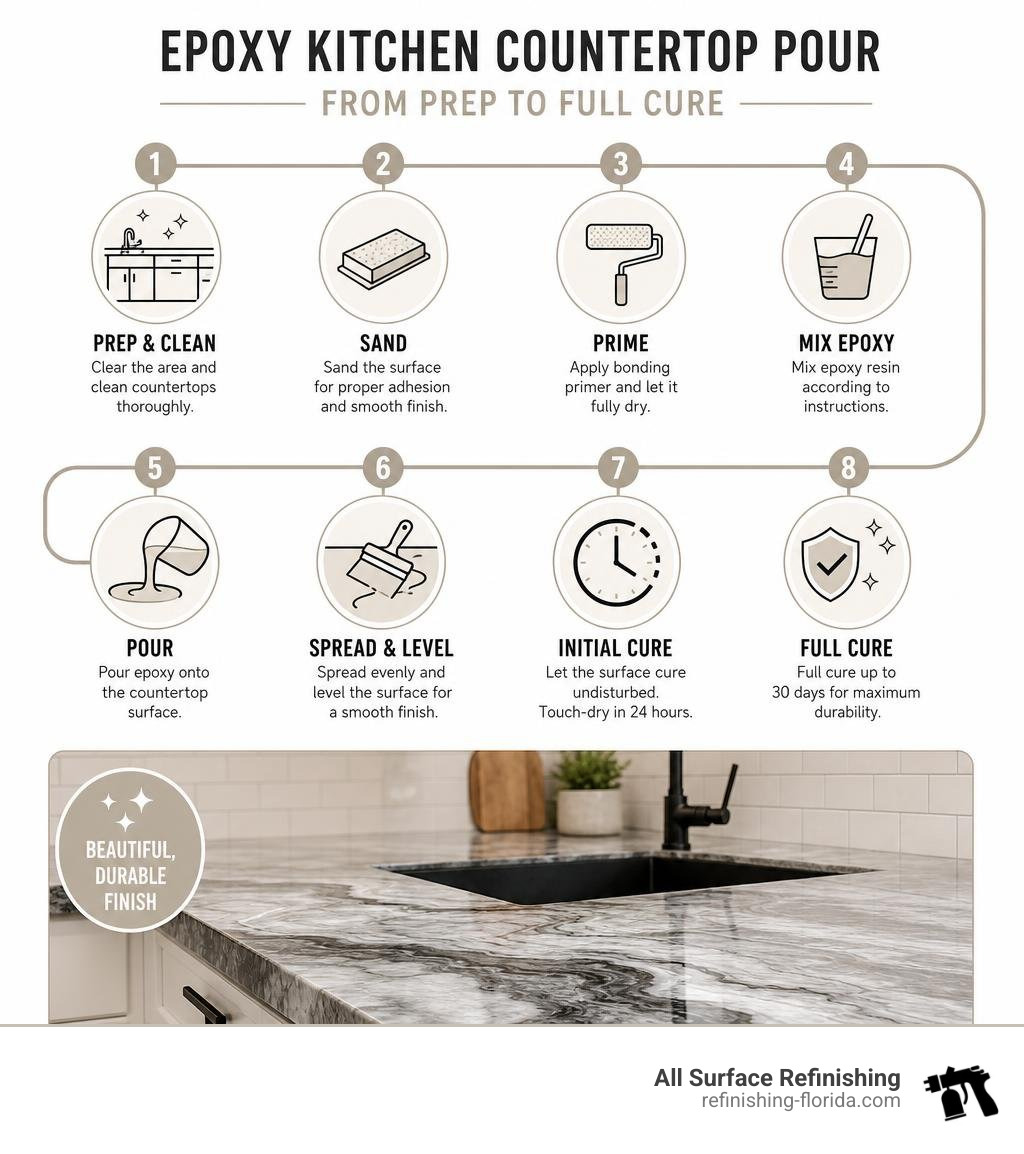
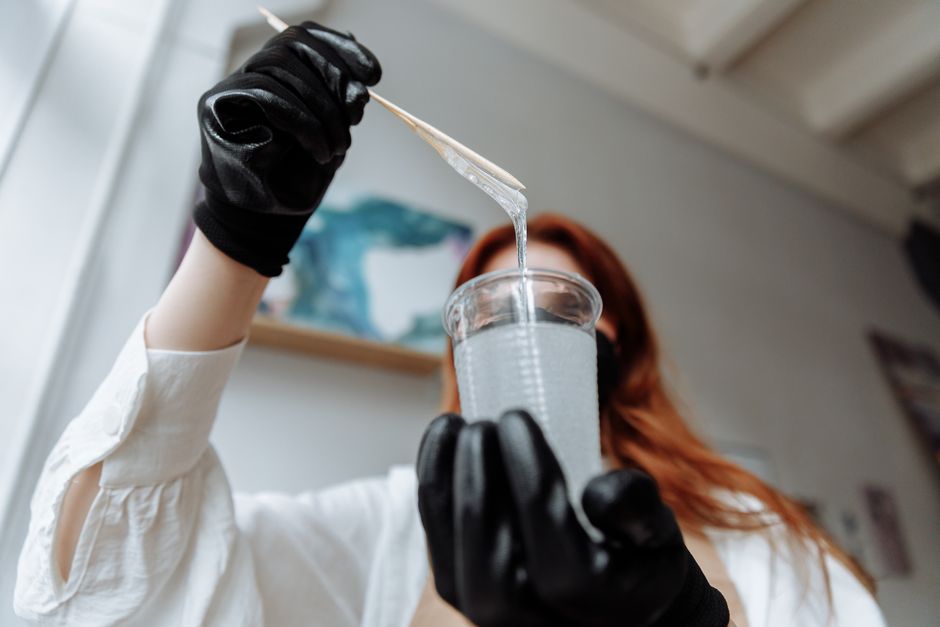
- Step 1: Mixing the Base Coat: We measure out the epoxy resin and hardener in a precise 1:1 or 2:1 ratio (depending on the manufacturer’s specifications). We mix thoroughly for three minutes, transferring the mixture to a second clean bucket to ensure there is absolutely no unmixed material left on the sides.
- Step 2: Pouring the Base: We pour the tinted base coat epoxy onto the counter in an S-pattern, using a plastic notch trowel or foam roller to spread it evenly to a thickness of about 1/8 inch. We let it flow naturally over the rounded edges.
- Step 3: Creating the Stone Effects: To create a realistic faux marble or granite look, we mix metallic powders, pigments, and dyes into smaller, separate cups of epoxy. We drizzle these highlight colors across the wet base coat, using a brush or a piece of plastic to lightly drag and soften the lines into realistic veins. You can find excellent inspiration and visual guides on this process by reading a DIY Faux Marble Epoxy Countertop Tutorial or checking out real-world community designs in the Epoxy Resin Kitchen Countertop Redesign Facebook group.
- Step 4: Popping the Bubbles: As the epoxy sits, tiny air bubbles will rise to the surface. We sweep a propane torch or a heavy-duty heat gun lightly over the wet epoxy. The heat instantly pops the bubbles, leaving a glass-smooth finish.
- Step 5: Managing the Drips: As the epoxy self-levels, it will drip off the bottom edges. We scrape the underside of the countertop edges at regular intervals (1 hour, 2 hours, and 3 hours post-pour) to keep the bottom edge clean and smooth.
- Step 6: Curing: The surface will be dry to the touch in 24 hours, but it remains soft. We advise keeping all items off the counters for at least 3 days, with a full cure taking up to 7 to 30 days depending on the specific epoxy system used.
Frequently Asked Questions About Kitchen Epoxy Countertops
How long do epoxy countertops last?
With proper care, a high-quality epoxy laminate countertop will last between 6 and 8 years before it requires a fresh clear topcoat to restore its original luster.
To maximize your kitchen epoxy lifespan, regular kitchen countertop maintenance is key. Clean the surface daily using a soft microfiber cloth and mild dish soap. Avoid abrasive scrubbers, bleach, or highly acidic cleaners, which can dull the glossy finish over time.
If your counters do eventually get covered in fine micro-scratches from daily use, you don’t have to tear them out. You can simply sand the surface lightly with fine-grit sandpaper and apply a fresh clear flood coat or a polyurethane topcoat to make them look brand new again. For more care tips, explore more info about kitchen countertop refinishing and resurfacing.
Can you put hot pans directly on epoxy?
The short answer is no. While high-quality countertop epoxies boast impressive heat limits (often rated to withstand temperatures up to 450°F or even 500°F temporarily), they are still plastic-based resins.
Placing a boiling pot or a hot cast-iron skillet directly onto the surface can cause immediate, permanent thermal damage. This can show up as a yellow scorch mark, a dull ring, or even a slight physical indentation in the resin.
To protect your investment, we always recommend using trivets, hot pads, or thick cutting boards. Treat your epoxy counters with the same heat-conscious care you would give to a high-end laminate or solid-surface countertop.
What are the best alternatives to DIY epoxy?
While a DIY project sounds exciting, it can easily go wrong. Common beginner mistakes include mixing the epoxy in incorrect ratios (leading to sticky, uncured spots), pouring in a dusty room (trapping hair and dust in the wet resin), or overworking the highlights until the beautiful marble veins turn into a muddy, single-colored blur. For a cautionary look at how tricky this can be, you can read Caesarstone’s guide on what to know before buying.
If you want the gorgeous look of stone without the high risk of a DIY disaster, the best alternative is professional kitchen countertop refinishing.
At All Surface Refinishing, we use advanced, multi-coat aliphatic acrylic polyurethane finishes rather than standard poured epoxies. This high-tech process gives you a flawless, stone-like appearance (including granite and quartz looks) with superior UV stability, scratch resistance, and a lifespan of up to 15 to 20 years with proper care.
We can also handle kitchen tile refinishing and bathroom vanity refinishing at the very same time, creating a cohesive, modern look throughout your home without the mess of demolition. To see how we achieve these ultra-durable stone styles, check out more info about affordable stone-look kitchen countertop options.
Conclusion
Upgrading to epoxy laminate countertops is a brilliant, budget-friendly way to breathe new life into an outdated kitchen. Whether you attempt a DIY project using specialized kits or decide to leave it to the experts, the visual payoff of a faux-stone glow-up is undeniable.
However, if you want guaranteed, factory-smooth results without the stress, mess, and risk of handling sticky resins yourself, we are here to help.
All Surface Refinishing is South Florida’s trusted expert in professional kitchen and bathroom transformations. With over 30 years of experience and more than 14,000 successfully completed projects, we specialize in high-quality, cost-effective countertop, bathtub, and cabinet refinishing.
We proudly serve homeowners and property managers across South and Southwest Florida, including:
- Miami-Dade County: Miami, Aventura, Bal Harbor, Coral Gables, Hialeah, Key Biscayne, and West Miami.
- Broward County: Fort Lauderdale, Coral Springs, Hollywood, FL, Pembroke Pines, Davie, Weston, and Miramar.
- Palm Beach County: West Palm Beach, Boca Raton, Boynton Beach, Delray Beach, Jupiter, and Wellington, FL.
Ready to skip the demolition and give your kitchen the beautiful stone-look upgrade it deserves? Contact us today to request a free quote, and let’s plan your dream kitchen transformation!
