How to Redo Kitchen Cabinets for a Fast, High-Impact Kitchen Update
To redo kitchen cabinets on a budget, start by checking that the cabinet boxes are solid, dry, and firmly attached. Then remove and label doors and hardware, clean away grease, scuff-sand glossy areas, apply the right bonding primer, and finish with two thin, durable paint coats.
Painting is usually the best choice when you like your kitchen layout and the cabinet doors are in good shape. It can give an outdated kitchen a major visual reset with far less mess and cost than a major kitchen tear-out. The key is not rushing the prep work: grease, dust, and slick finishes are the main reasons cabinet paint chips or peels early.
A DIY cabinet paint project may take a weekend of active work, but treat the finish gently while it cures. Painted cabinets generally need about 30 days before normal scrubbing is safe.
I am Frank Hernandez, President of All Surface Refinishing, and I have worked in surface refinishing since 2011. With decades of combined hands-on experience serving South Florida properties, our team understands how to redo kitchen cabinets with careful prep and durable results.
How to Redo Kitchen Cabinets Step-by-Step
Giving your kitchen a fresh, vibrant aesthetic does not require thousands of dollars in construction demolition or weeks of living without a functional cooking space. In our work completing more than 14,000 surface transformations, we have seen dated, worn kitchens completely brought back to life in just days. The secret lies entirely in the preparation.
Taking shortcuts during cleaning or skipping the primer might save an hour today, but it leads to peeling, chipped doors within months. Approaching each phase methodically guarantees a factory-level finish that withstands daily wear and tear.

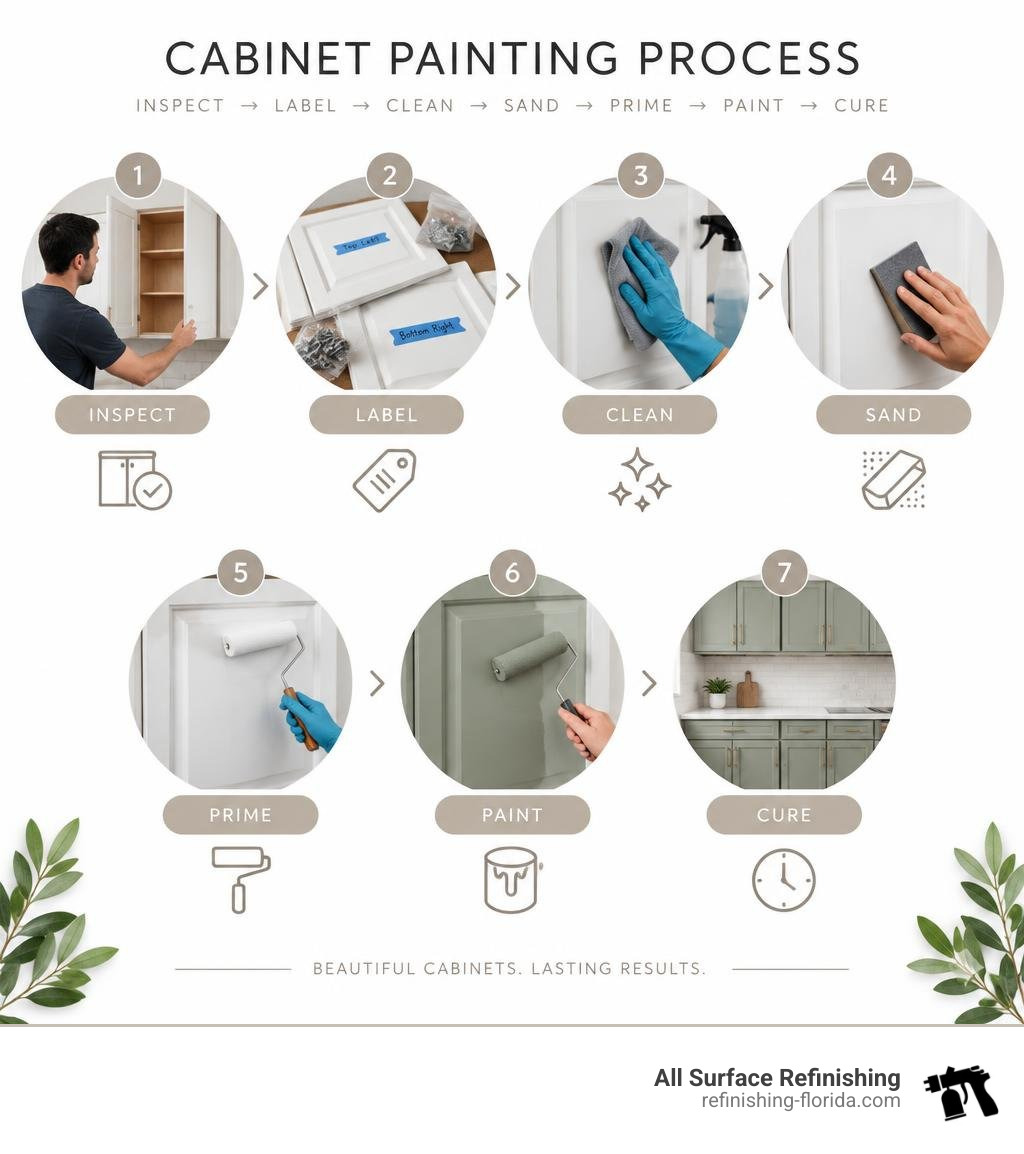
Step 1: Door Removal and Hardware Organization
Never attempt to paint cabinets while the doors are hanging on their hinges. Doing so leads to drips, pooling paint around hardware, and unpainted gaps near the seams.
- Empty the Cabinets: Clear out the front edges of your shelves to give yourself room to work without knocking over dishes or spices.
- Create a Detailed Map: Draw a rough sketch of your kitchen layout on paper and assign a number to every cabinet door and drawer front.
- Label Every Piece: As you unscrew each door, place a piece of painter’s tape in the hinge cup or on the back edge with its corresponding number.
- Bag the Hardware: Put hinges, handles, and screws into individual labeled plastic bags matching the door numbers. Reusing the exact screws in their original holes prevents stripped wood later.
Step 2: Thorough Cleaning, Degreasing, and Sanding
Kitchen cabinets accumulate invisible layers of aerosolized cooking grease, hand oils, and food splatter over years of use. If you paint directly over grease, your primer will not bond.
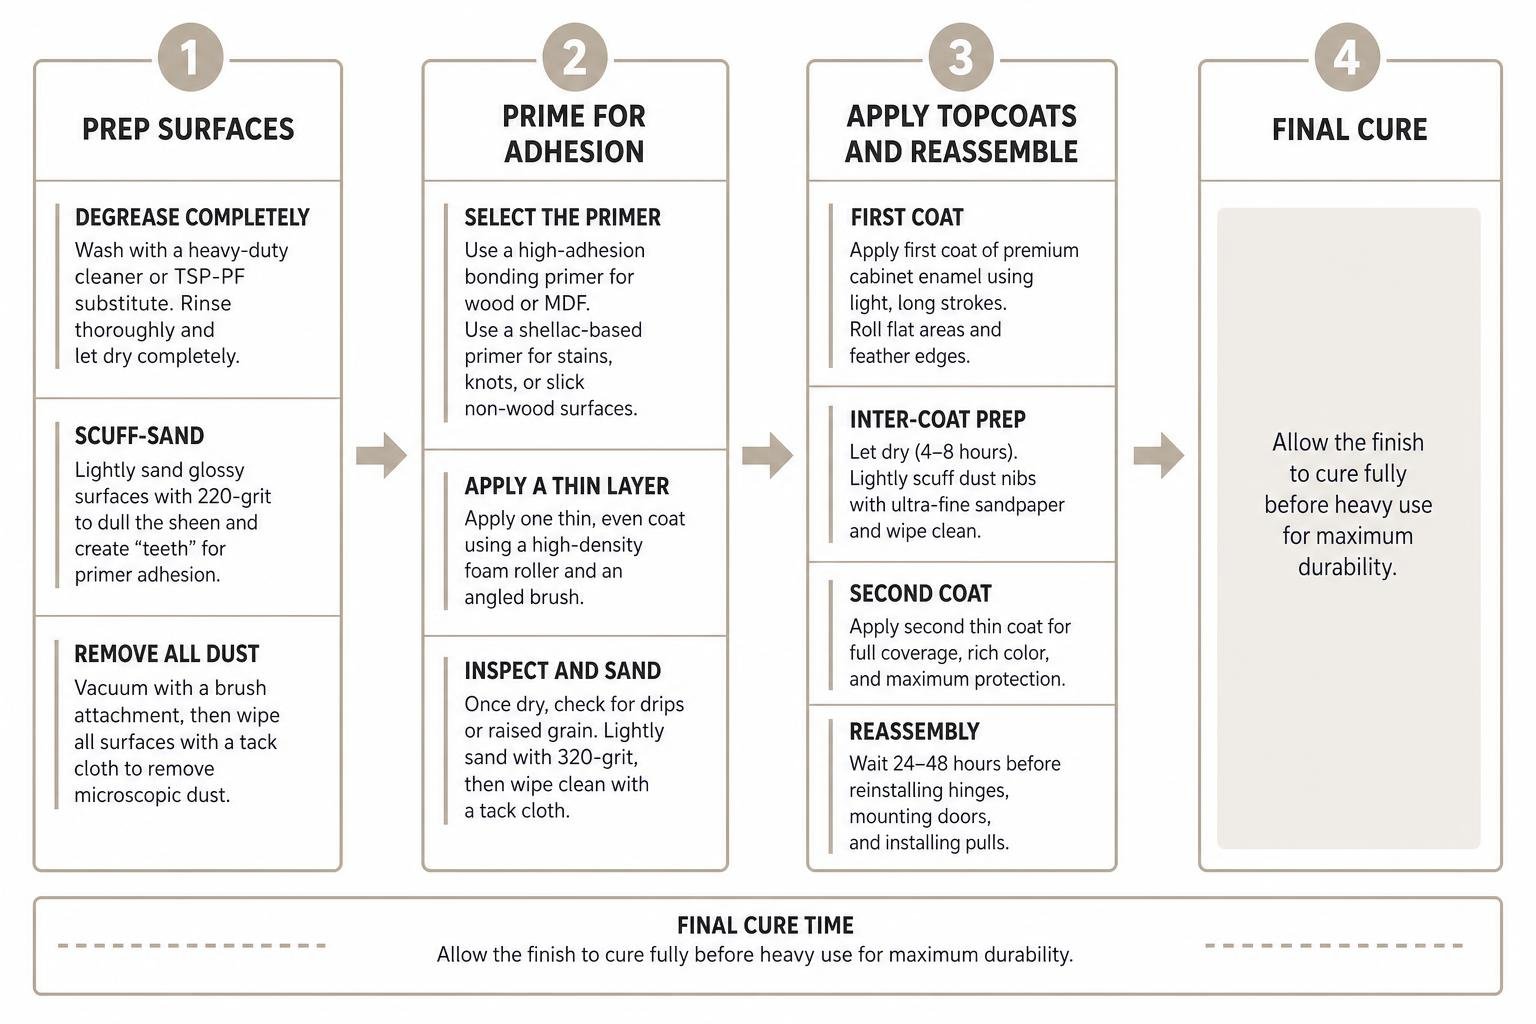
- Degrease Completely: Wash every square inch of the cabinet boxes, doors, and drawer fronts using a heavy-duty cleaner or trisodium phosphate (TSP) substitute. Rinse thoroughly with a clean, damp sponge and allow the surfaces to dry completely.
- Scuff-Sand: Take a 220-grit sanding sponge or fine sandpaper and gently rub down all glossy exterior surfaces. You do not need to strip the wood down to bare timber; you simply want to dull the existing sheen to create mechanical “teeth” for the primer.
- Remove All Dust: Vacuum the surfaces thoroughly using a brush attachment, then wipe every piece down with a tack cloth or microfiber towel to eliminate microscopic dust particles.
Step 3: Priming for Maximum Adhesion
Primer acts as the permanent bridge between your cabinet substrate and the topcoat enamel.
- Select the Primer: For standard solid wood or MDF, use a high-adhesion bonding primer. If you are painting over heavy grease stains, knots, or slick non-wood substrates, use a shellac-based primer to lock out stains and guarantee adhesion.
- Apply a Thin Layer: Lay your doors flat on worktables or painter’s pyramids. Apply one thin, even coat of primer using a high-density foam roller for flat areas and an angled brush for recessed panels.
- Inspect and Sand: Once dry, inspect the surface for drips or raised grain. Give the primed surface a very light pass with 320-grit sandpaper, then wipe clean with a tack cloth.
Step 4: Applying Smooth Topcoats and Reassembling
The final finish demands patience and the right application technique.
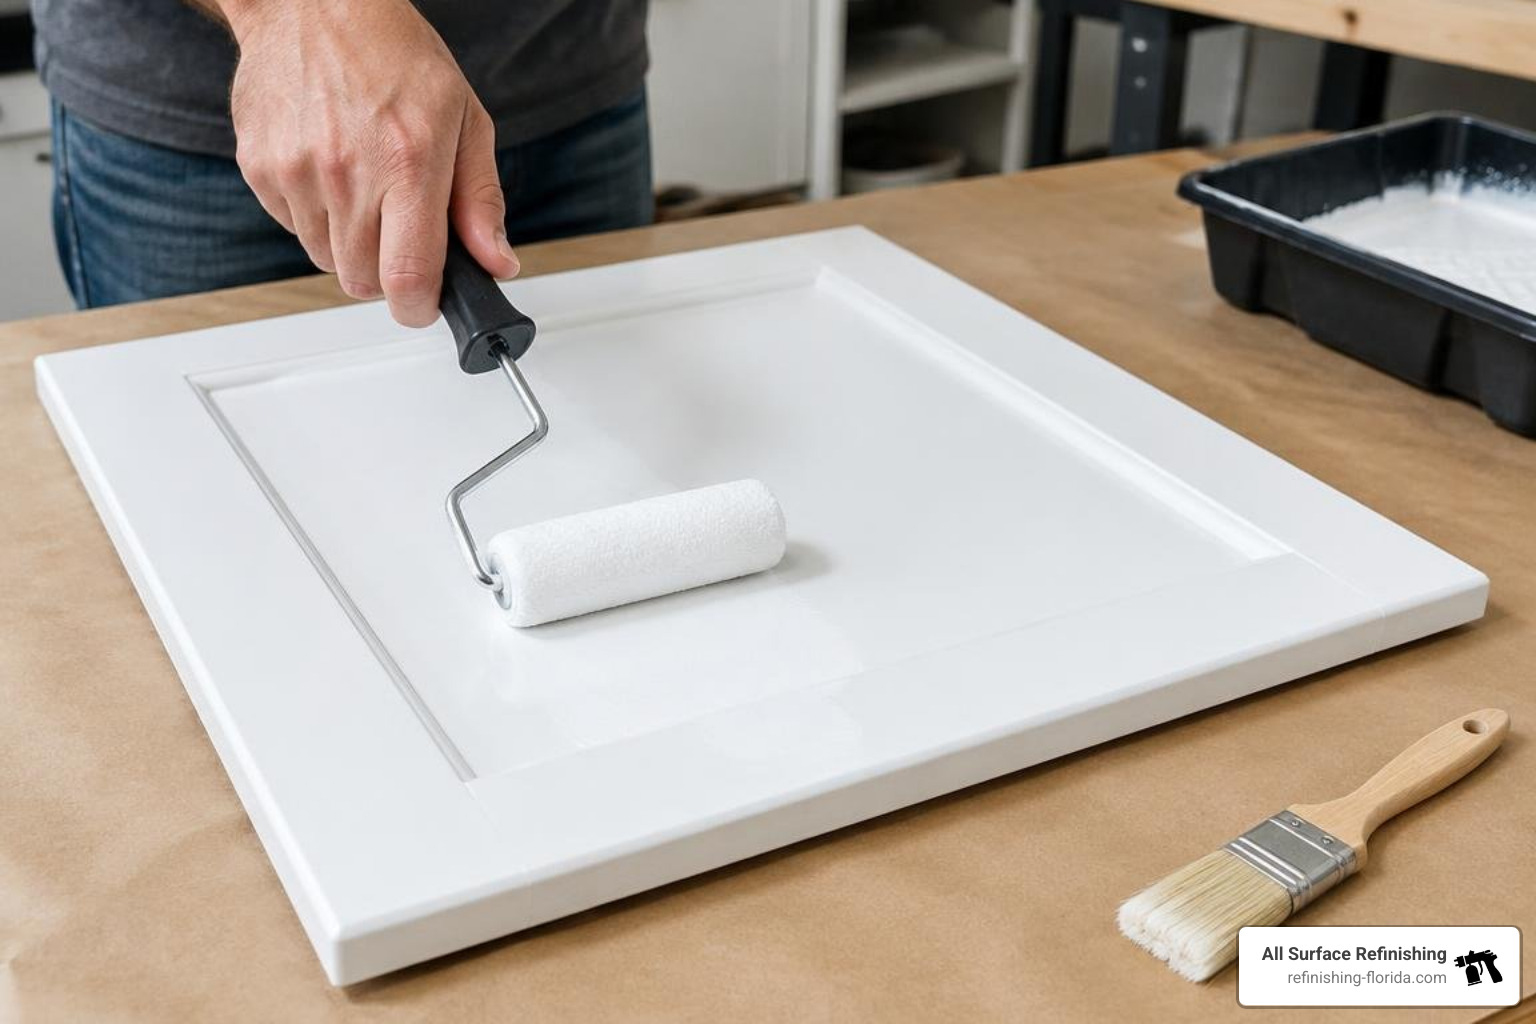
- First Coat: Apply your first coat of premium cabinet enamel, such as a waterborne alkyd or urethane enamel. Work in light, long strokes, rolling flat panel centers and feathering edges with your brush. Avoid overworking the paint; premium cabinet enamels are self-leveling and smooth out as they settle.
- Inter-Coat Prep: Let the first coat dry according to manufacturer guidelines (typically 4 to 8 hours). Lightly scuff any dust nibs with ultra-fine sandpaper and wipe clean.
- Second Coat: Apply the second thin coat for complete coverage, rich color depth, and maximum protection.
- Reassembly: Wait at least 24 to 48 hours before reattaching hinges, mounting doors to their corresponding numbered boxes, and installing pulls. Handle everything with clean hands and gentle care.
Choosing Materials and Tools for Your Makeover
A flawless cabinet finish relies on having the right gear before you pop open your first can. Using cheap brushes or standard wall rollers will leave texture, brush marks, and loose fibers embedded in your kitchen surfaces.
Essential Tools for How to Redo Kitchen Cabinets
Gather these supplies to ensure your project runs smoothly from start to finish:
- High-Density Foam Rollers (4-inch): Ideal for laying down glass-smooth paint layers on flat door faces and cabinet frames without leaving stipple.
- Angled Sash Brush (2-inch to 2.5-inch): A premium synthetic brush (such as nylon/polyester blend) provides sharp cutting lines along detailed profiles.
- Cordless Drill/Driver: Speeds up the removal and reinstallation of cabinet doors and hinges.
- Sanding Sponges (220-grit and 320-grit): Flexible sponges contour easily around decorative moldings and detailed edge profiles.
- TSP-PF Substitute and Microfiber Rags: Essential for deep degreasing and surface prep.
- Painter’s Pyramids & Drop Cloths: Keep doors elevated off your work surfaces while protecting countertops and flooring.
Selecting the Right Primer and Finish for Different Substrates
Different cabinet materials react differently to coatings. Choosing the right combination ensures long-lasting adhesion without peeling:
- Solid Hardwood (Oak, Maple, Cherry): Sand lightly to open the grain. If painting over open-grained oak, apply a grain filler first if you prefer a completely smooth, modern texture. Use a bonding primer followed by a satin or semi-gloss waterborne alkyd.
- MDF (Medium Density Fiberboard): Highly stable, but raw edges absorb moisture rapidly. Seal raw MDF edges with an oil-based or shellac primer before applying water-based topcoats.
- Laminate and Melamine: These slick, non-porous surfaces require deep cleaning, thorough scuffing with 220-grit sandpaper, and a high-adhesion specialty bonding primer to prevent peeling.
- Thermofoil: If the vinyl coating is peeling, it must be gently heated with a heat gun and stripped away to reveal the underlying MDF core, which is then sealed with shellac primer.
(Note: We do not sell paint; we recommend sourcing high-grade coatings from reputable local paint suppliers for DIY projects.)
Cost and Timeline: DIY Cabinet Painting vs. Professional Cabinet Refinishing
Deciding whether to take on a kitchen cabinet makeover yourself or partner with experienced professionals comes down to your budget, available free time, and desired level of durability.
DIY cabinet painting is among the most cost-effective home improvement projects available. Homeowners typically spend around $445 on quality primers, enamels, rollers, brushes, sandpaper, and prep supplies. In comparison, full kitchen demolition and rebuilding easily surpass $15,000 in larger kitchens.
| Feature / Metric | DIY Cabinet Painting | Professional Cabinet Refinishing |
|---|---|---|
| Average Material/Project Cost | ~$445 (tools, primer, enamel) | $4,000 – $8,000 (turnkey labor & materials) |
| Active Labor Time | 12–16 hours (over 2–3 weekends) | 2–4 days (handled entirely by pros) |
| Finish Texture | Smooth (brush & foam roller) | Ultra-smooth factory spray finish |
| Mess & Kitchen Downtime | Moderate to high; kitchen out of commission | Minimal; professional masking & containment |
| Full Cure Duration | 30 days before heavy scrubbing | 30 days before heavy scrubbing |
Deciding How to Redo Kitchen Cabinets: DIY Painting vs. Professional Refinishing
When choosing your project route, evaluate the following factors:
- Condition of Cabinet Boxes: If your cabinet boxes are structurally solid, plumb, and free of internal water rot, refinishing or painting preserves your investment perfectly.
- Kitchen Layout Satisfaction: If your current floor plan works well and you do not need to move plumbing or knock down walls, refinishing delivers the visual impact of a brand-new kitchen without the demolition timeline.
- Equipment and Space Constraints: Painting doors requires a clean, well-ventilated staging area (such as a garage or patio) free of airborne dust, pets, and yard debris. If space is tight, professional refinishers can handle off-site door spraying with specialized ventilation.
Frequently Asked Questions About Kitchen Cabinet Makeovers
Can I paint kitchen cabinets without sanding?
While some bonding primers claim you can skip sanding entirely, light scuff-sanding is always recommended for kitchen cabinets. Kitchen surfaces endure constant friction, moisture, and temperature fluctuations. A quick 5-minute scuff-sand with a 220-grit sponge breaks the surface glaze of the old finish and creates microscopic grooves that guarantee your primer bonds securely. Skipping this step significantly increases the risk of premature chipping around handles and door edges.
How long does cabinet paint take to fully cure?
There is an important difference between paint being “dry to the touch” and being “fully cured.” While modern waterborne alkyd enamels dry to the touch in just a few hours and can be carefully rehung after 24 to 48 hours, the paint film takes approximately 30 days to reach maximum hardness and chemical resistance. During this initial 30-day window, avoid harsh chemical cleaners, do not scrub the surfaces, and close doors gently.
What is the most durable paint for kitchen cabinets?
The most durable option for DIY kitchen cabinets is a waterborne alkyd enamel. These advanced coatings offer the self-leveling smoothness, hardness, and scratch resistance of traditional oil-based paints, but clean up easily with water and emit very low VOCs during application.
Conclusion
A thoughtful kitchen cabinet makeover brings fresh energy, brightness, and value to your entire home. By taking the time to properly degrease, sand, prime, and apply durable topcoats, you can achieve a showroom-quality kitchen update on a weekend schedule.
If you love the idea of transformed cabinets but prefer factory-grade durability without spending your weekends sanding and painting, our experienced team at All Surface Refinishing is ready to help. Discover more expert tips in our kitchen cabinet refinishing guide to see how fast and seamless a professional kitchen update can be for Miami homeowners and properties across South Florida.
