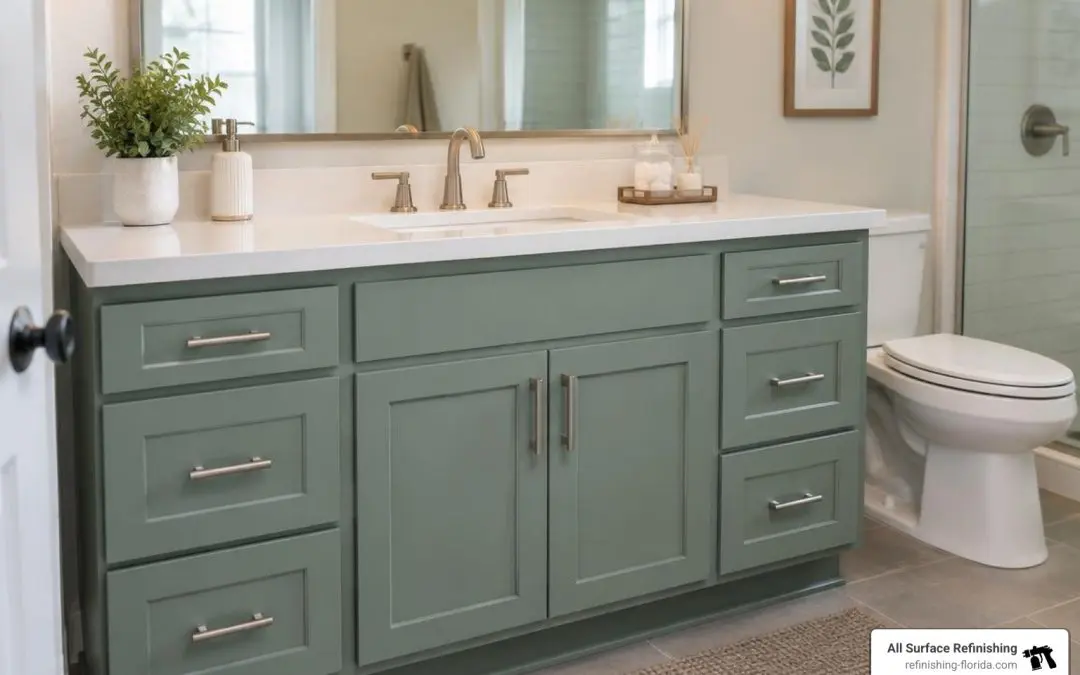
Repainting a Bathroom Cabinet Starts With Good Prep
For a finish that lasts, start by removing the doors, drawers, and hardware. Label each piece so it goes back in the right place. Clean away soap residue and grease, repair any damage, and lightly sand glossy surfaces. Then apply a primer suited to the cabinet and two thin coats of durable cabinet enamel. Follow the product’s drying times, and let the finish cure before heavy use.
Repainting a bathroom cabinet can refresh the room without the mess of a full remodel. The key is giving each coat a clean, sound surface to grip.
I’m Frank Hernandez, president of All Surface Refinishing, and I’ve worked in surface refinishing since 2011. I’ve seen how careful prep makes the difference when repainting a bathroom cabinet, so let’s walk through each step.
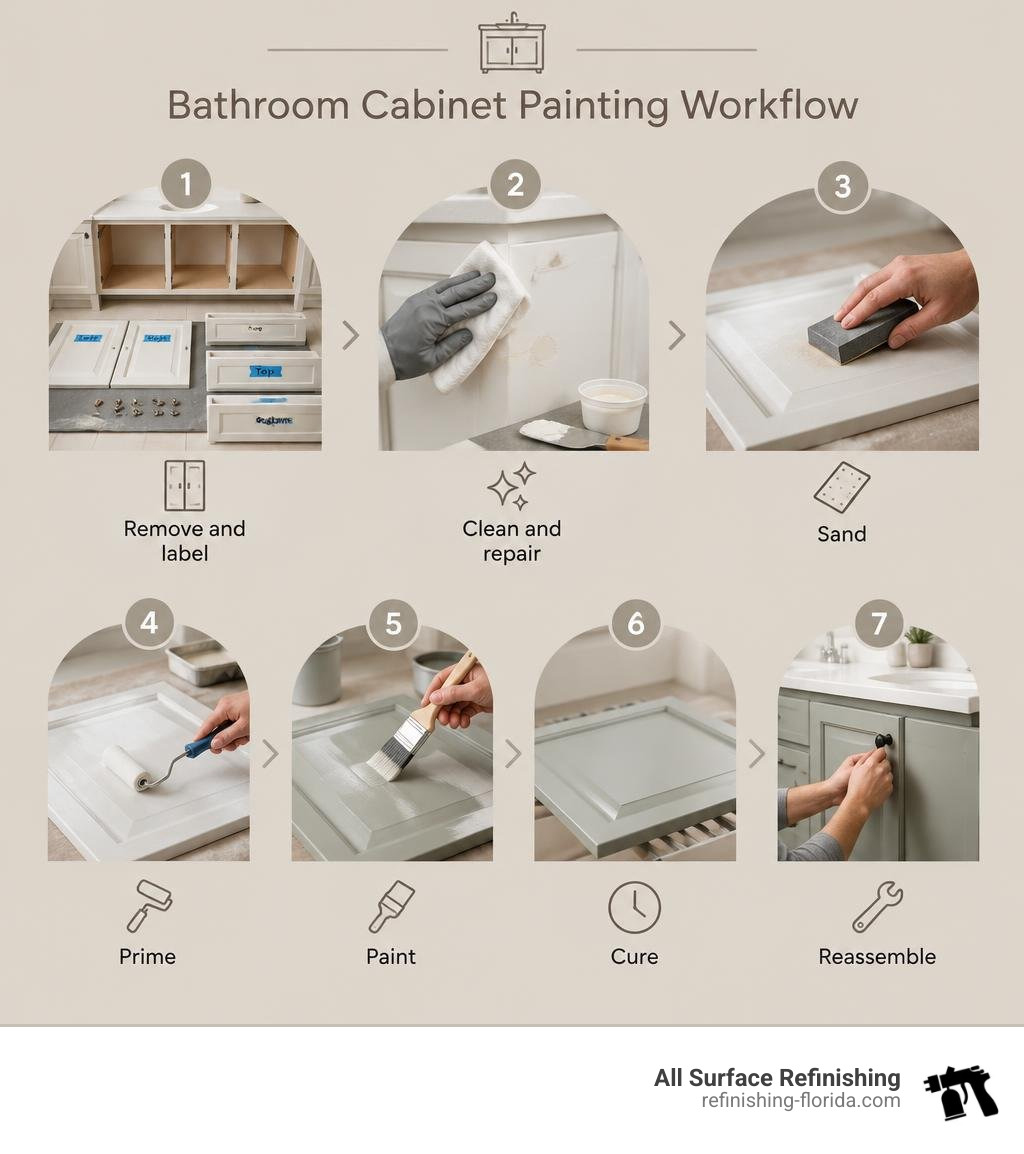
Repainting a bathroom cabinet terms simplified:
Choosing the Right Primer and Paint for Bathroom Vanities
A bathroom is one of the toughest environments in any home. Daily steamy showers, water splashes from the sink, hair products, and frequent cleaning put constant pressure on cabinet surfaces. Standard wall paint simply cannot withstand this level of moisture and wear.
To achieve a long-lasting factory finish, you must build a strong foundation. Using a dedicated primer selection for high-moisture vanities ensures the topcoat adheres securely to slick wood, laminate, or engineered surfaces. Bonding primers—especially shellac-based or high-adhesion oil formulas—create a tight mechanical grip while sealing away tannin stains, previous dyes, and water spots.
When choosing the topcoat, look for dedicated cabinet enamels designed to form a hard, scrubbable film. Water-based urethane-modified alkyds and 100% acrylic cabinet enamels are the gold standard. They provide the rock-hard resilience of traditional oil-based paints while offering low VOCs, easy soap-and-water cleanup, and non-yellowing durability. You can explore durable paint formulas for bathroom cabinetry to decide which chemistry fits your setup best.
| Paint Type | Moisture Resistance | Durability & Hardness | Dry Time to Recoat | Cleanup Method |
|---|---|---|---|---|
| Acrylic Enamel | High | Moderate to High | 2 to 4 hours | Soap and Water |
| Traditional Alkyd (Oil-Based) | Very High | High (Rock Hard) | 8 to 24 hours | Mineral Spirits |
| Urethane Alkyd Hybrid | Superior | Superior (Scratch-Resistant) | 2 to 4 hours | Soap and Water |
Selecting Durable Sheens and Trendy Colors
The sheen you select plays a direct role in how well your cabinet resists water damage and everyday wear. Flat or matte finishes absorb moisture and hold onto oils from fingers, making them difficult to wipe down. For bathroom cabinetry, semi-gloss and satin finishes are the top performers. A smooth semi-gloss repels splashing water and stands up to regular sanitizing without dulling.
Color choice sets the mood for the entire space. Crisp off-whites, warm greys, moody navies, and muted forest greens with grey undertones remain timeless favorites that match diverse tile patterns. If you need inspiration, check out our favorite popular bathroom vanity colors to find a shade that complements your fixtures and lighting.
Essential Tools, Budget, and Timeline for Repainting a Bathroom Cabinet
The average bathroom remodel spend is $12,061, with a median cost of $7,800. If you are exploring inexpensive bathroom remodel ideas for 2026, repainting existing cabinetry is one of the most cost-effective upgrades available. Completing this project on your own typically costs around $200 in materials. For context, swapping out hardware lands between $100 and $400, while adding a new faucet and lighting fixture pushes that total by another $250 to $700. In contrast, moving plumbing fixtures like a shower or toilet can quickly add $2,000 or more to a remodel.
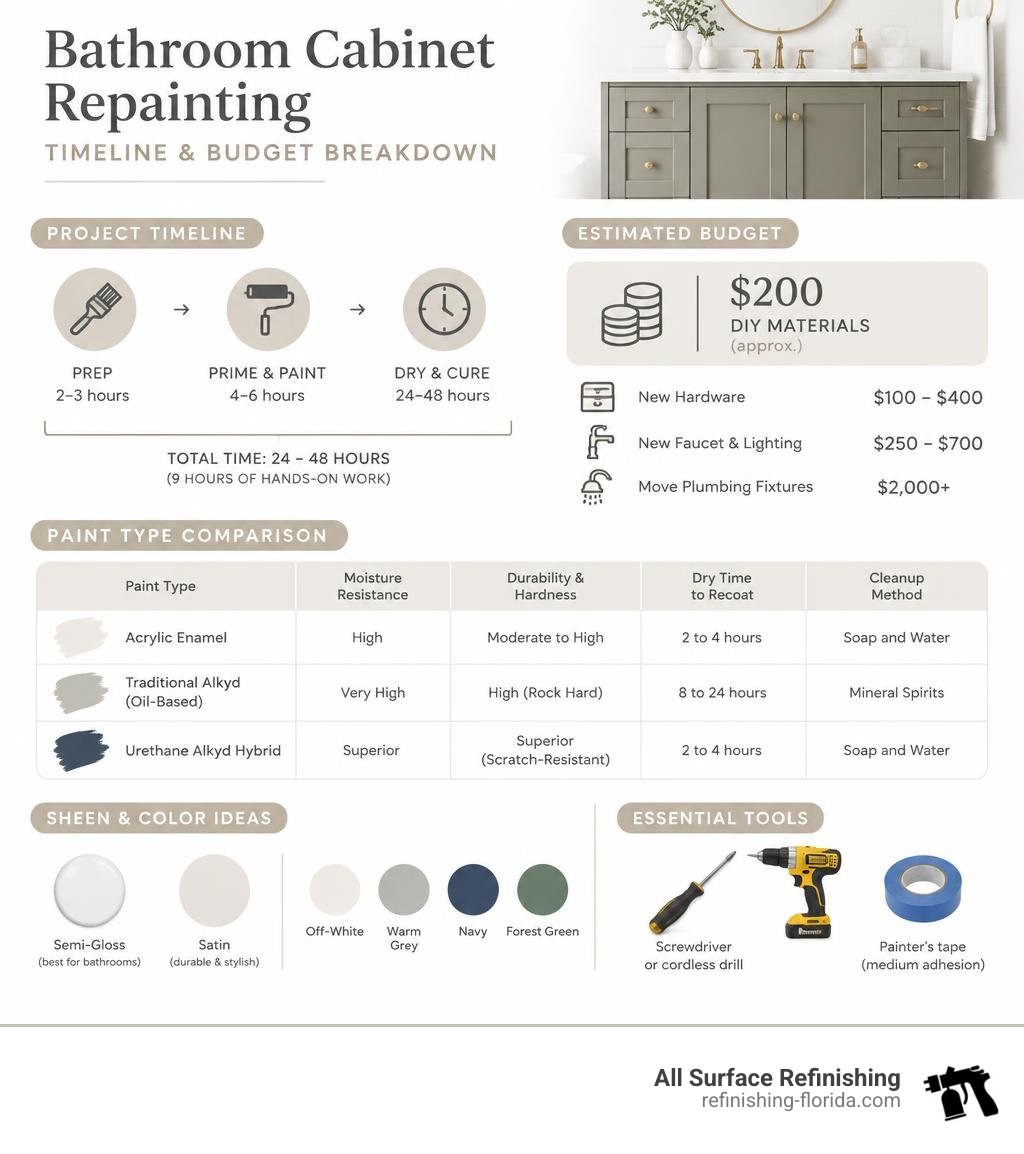
A standard DIY vanity repaint requires approximately 9 hours of hands-on working time, spread over a total timeline of 24 to 48 hours to accommodate proper drying and curing. You can check a realistic cost breakdown for cabinet painting to see how DIY materials compare against full professional surface refinishing.
To get the job done right, gather the following essential tools:
- Screwdriver or cordless drill
- Painter’s tape (medium adhesion)
- Trisodium phosphate (TSP) or grease-cutting cleaner
- Sanding block, 150-grit sandpaper, and 220-grit finishing paper
- Tack cloths and microfiber rags
- Premium angled sash paintbrush (2-inch or 2.5-inch synthetic bristle)
- High-density foam or microfiber mini roller (4-inch) with tray
- Wood filler or wood putty
- Bonding primer and cabinet-grade enamel paint
Step-by-Step Bathroom Vanity Painting Process
A flawless result comes from patient execution. By treating every step as part of a careful sequence, your vanity will look smooth, clean, and factory-fresh.
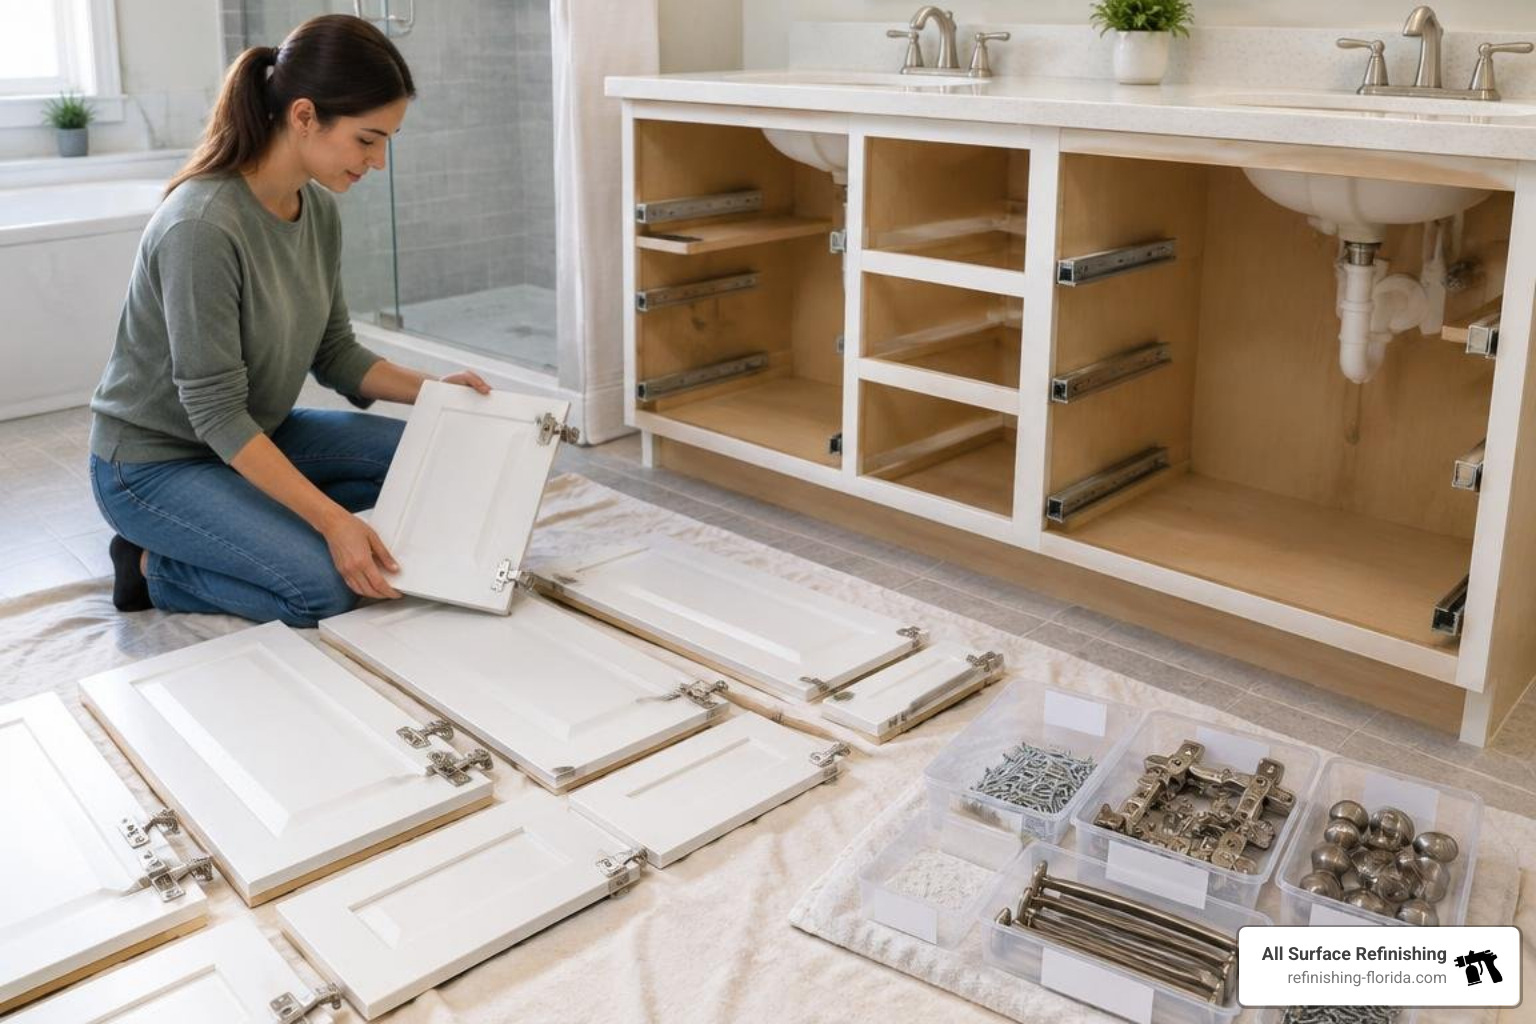
Begin by completely clearing out the vanity and removing all doors, drawer fronts, and hardware. Never paint around hinges or knobs; paint will inevitably pool around the metal, leading to chipping and peeling later.
- Remove and Label: Unscrew hinges from the face frame, remove the drawers, and place all screws, hinges, and pulls into labeled plastic bags. Number each door and matching opening with painter’s tape (for example, “Door 1 – Left Upper”) so reinstallation is seamless. Review these detailed vanity makeover steps to keep your parts organized.
- Protect the Space: Cover floors and nearby fixtures with drop cloths, and tape off the vanity edges along the walls and floor using painter’s tape.
Prep Work Required Before Repainting a Bathroom Cabinet
Prep work accounts for the vast majority of your project’s success. Skipping thorough cleaning or sanding will cause the paint to bubble or peel away under humid conditions.
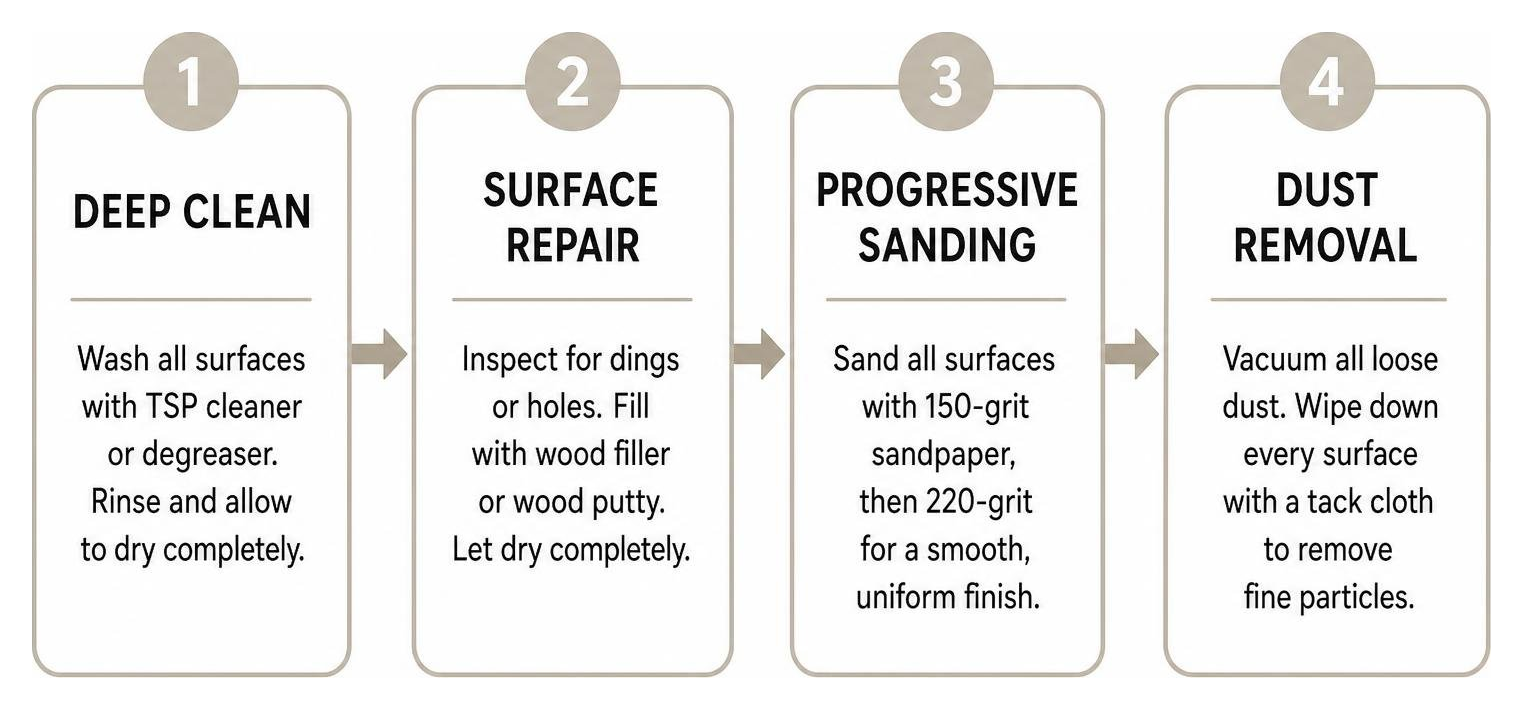
First, wash all surfaces with a solution of TSP cleaner or heavy-duty degreaser to eliminate oils, soap residue, and hair products. Rinse thoroughly with clean, damp rags and allow the wood to dry completely. Inspect the cabinet frame and doors for dings, gouges, or unwanted hardware holes. If your cabinet has suffered moisture damage or gouges, addressing fixing bathroom vanity damage with wood filler before priming is critical.
Once patches are dry, sand all surfaces with 150-grit sandpaper to remove surface gloss and smooth out repairs. Follow up with 220-grit sandpaper for a uniform, satiny feel. Sand in the direction of the wood grain to avoid deep cross-grain scratches. Once finished, vacuum up all loose dust and wipe down every inch with a tack cloth to catch micro-particles.
Priming, Painting, and Reassembly Techniques
With the surface bare and clean, lay doors and drawer fronts flat on a workbench or sawhorses. Keeping them horizontal prevents runs and drips.
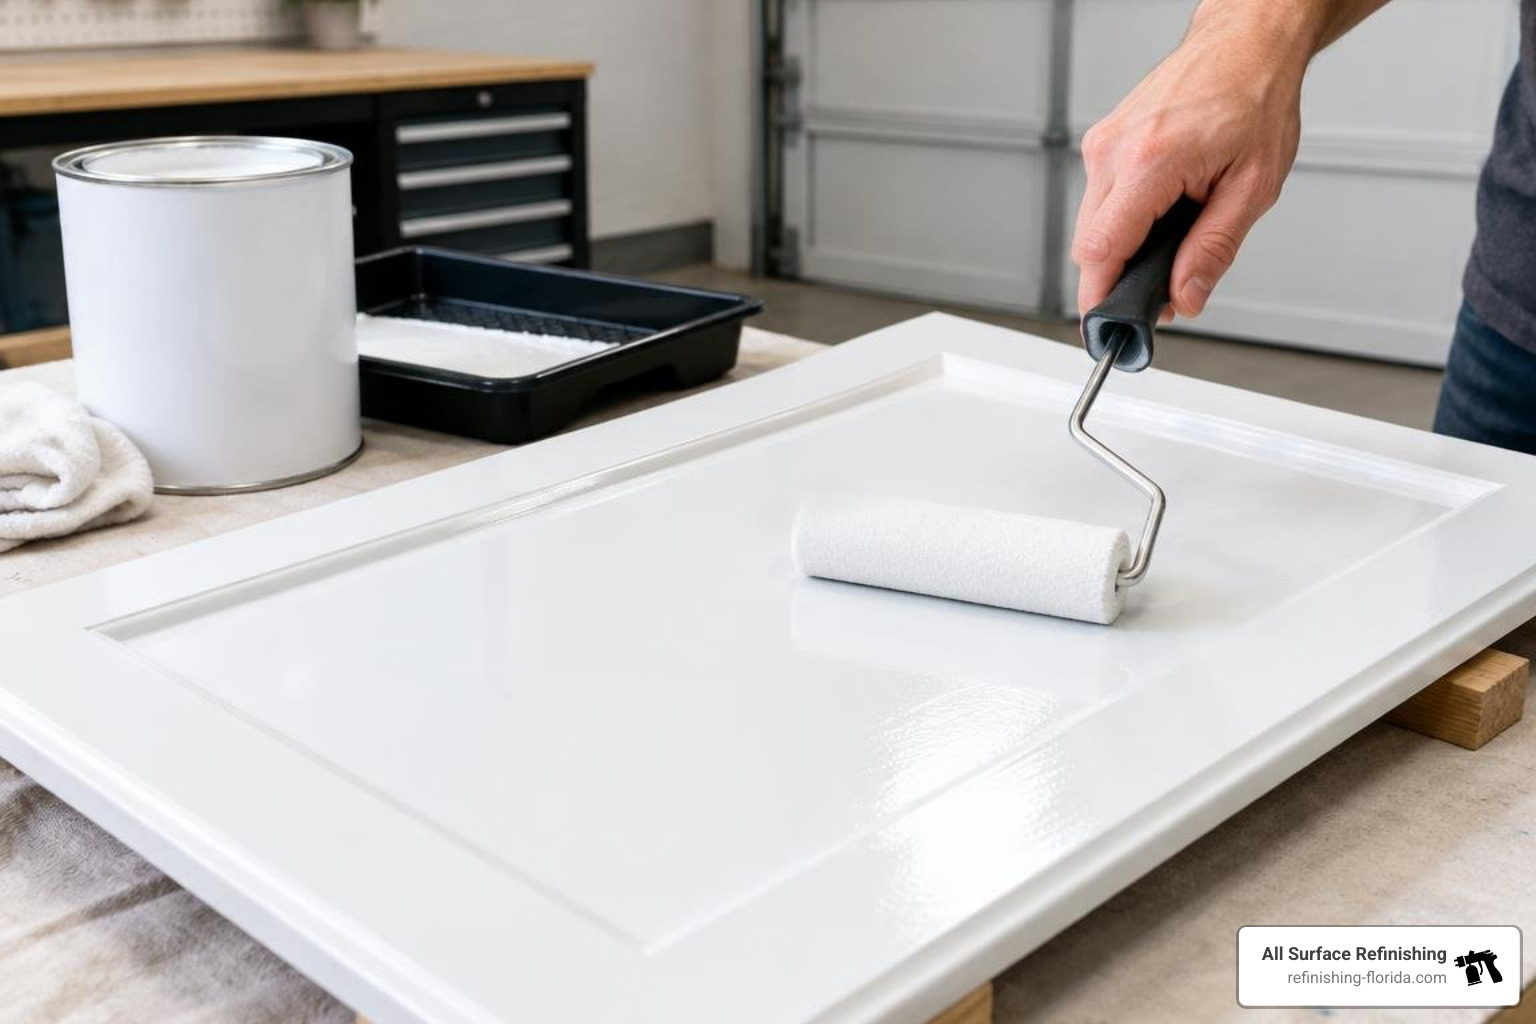
- Apply the Primer: Brush a thin coat of bonding or shellac primer into the recessed profiles with an angled sash brush, then smooth flat panels using a high-density foam roller. Allow the primer to dry for 2 to 3 hours, then lightly sand with 220-grit paper to knock down any raised grain. Wipe clean with a tack cloth.
- Apply the First Coat of Enamel: Apply your cabinet paint in thin, even coats. Work from the inner panels outward to the outer frames. Maintain a wet edge and avoid over-brushing areas that have already started to set.
- Sand and Recoat: Allow the first coat to dry for at least 2 to 4 hours (or overnight if humidity is high). Sand very lightly with 220-grit sandpaper, clear away dust, and apply a second thin coat. Many standard guides, like Bob Vila’s guide to painting cabinets, note that two thin coats create a far stronger film than one heavy coat.
- Cure and Reassemble: Wait at least 24 to 48 hours before reattaching doors, drawers, and hardware. Paint may feel dry to the touch within a few hours, but it requires several days to fully cure and harden against moisture and impact.
Special Surface Considerations and Pitfalls
Different vanity materials require specialized techniques to ensure proper adhesion:
- Stained and Varnished Wood: Heavy tannins in dark stains can bleed through water-based topcoats. Always seal stained wood with a stain-blocking shellac or oil primer before painting.
- Laminate and Melamine: These slick, non-porous surfaces lack natural texture. Use a liquid deglosser or scuff thoroughly with 150-grit sandpaper, followed by a dedicated extreme-bond primer.
- Thermofoil Surfaces: Inspect edges for peeling. If the vinyl film has pulled away from the underlying MDF core, carefully re-glue it with heat-resistant contact adhesive, or strip loose sections back to sound material before priming.
Common Mistakes to Avoid When Repainting a Bathroom Cabinet
Avoid these frequent missteps that compromise cabinet durability:
- Skipping Primer: Applying topcoat directly to unprimed wood or laminate guarantees early peeling.
- Applying Thick Coats: Heavy layers trap solvents underneath, leading to wrinkling, drips, and a soft, easily scratched surface.
- Rushing Reassembly: Hanging doors before the paint has fully cured can cause the finish to stick to face frames and tear away.
- Inadequate Bathroom Ventilation: High humidity slows drying times. Keep exhaust fans running or use an open window and portable fan while working.
- Ignoring Past Blunders: Review our guide to common DIY cabinet painting mistakes to sidestep peeling and streaking.
Frequently Asked Questions About Bathroom Vanity Painting
Can you paint a bathroom vanity without sanding?
While no-sand products and bonding primers exist, skipping sanding entirely is not recommended for high-humidity bathrooms. Light scuff sanding with 220-grit paper or treating the surface with a liquid deglosser provides the mechanical texture needed for primer and enamel to bond permanently.
How long should you wait between paint coats in a bathroom?
Allow at least 2 to 4 hours between coats when using modern urethane alkyds or acrylic enamels. In humid environments, waiting 6 to 8 hours (or overnight) ensures underlying moisture evaporates before the next coat seals the surface.
What is the most durable paint finish for high-humidity bathrooms?
A semi-gloss or satin urethane-modified alkyd enamel offers the best durability. It forms a hard, water-resistant barrier that withstands steam, splashing water, and regular cleaning without peeling or staining.
Conclusion
Transforming a dated bathroom vanity with a fresh, durable finish is one of the most rewarding home improvement projects you can tackle. By taking the time to remove hardware, clean thoroughly, sand correctly, and apply premium primers and enamels, you can achieve a factory-grade result that lasts for years while saving thousands over full replacement.
If your vanity features heavy wood grain, damaged laminate, intricate routing, or if you prefer a seamless, factory-sprayed finish without the DIY hassle, All Surface Refinishing is here to help. With over 30 years of experience and more than 14,000 successful projects, our family-owned team delivers fast, cost-effective, and long-lasting transformations. We serve homeowners across South and Southwest Florida, including Miami, Fort Lauderdale, Boca Raton, West Palm Beach, Coral Gables, Hollywood, FL, Boynton Beach, Delray Beach, and surrounding communities.
Reach out to Frank Hernandez and the team today to explore our professional bathroom vanity refinishing services and discover how easy refreshing your bathroom can be!
