Your Guide to a Flawless Hot Tub Finish
Hot tub acrylic repair is often a manageable DIY project for minor damage like surface scratches and small cracks, but deeper structural damage requires professional expertise to ensure a durable, leak-free fix.
Quick Answer for Hot Tub Acrylic Repair:
- Minor scratches: Clean, apply acrylic filler from a repair kit, sand smooth, and buff to restore shine
- Small cracks: Drain tub, clean area, create V-shape groove for deeper cracks, fill with epoxy, cure, sand, and polish
- Large or structural cracks: Call a professional – damage beyond the acrylic layer requires specialized skills and materials
- Cost: DIY kits run $25-$50; professional repairs range from $200-$1,000+ depending on severity
- Time: DIY repairs take 1-2 days including curing; professional repairs are typically completed in one visit
Finding a crack or scratch on your hot tub can feel like finding a scratch on a new car – disappointing and frustrating. The good news? Most acrylic hot tub damage is repairable, and many smaller issues can be fixed by a handy homeowner with the right materials and guidance.
This guide walks you through the entire process of diagnosing and repairing hot tub acrylic damage, from surface scratches to deeper cracks. We’ll cover what you can tackle yourself, what materials you’ll need, and when it’s time to call in a professional. For homeowners across South Florida – including Aventura, Boca Raton, Fort Lauderdale, Miami, Palm Beach, and surrounding areas – understanding your repair options can save you time, money, and the hassle of full replacement.
The reality is simple: address damage promptly, and it won’t spread. Left untreated, a small crack can grow, allowing water to seep into the hot tub’s internal components and causing far more expensive problems down the road.
I’m Frank Hernandez, President of All Surface Refinishing, and I’ve been repairing acrylic surfaces across South Florida since 2011. Over the years, our team has handled countless hot tub acrylic repair projects, from simple surface scratches to complex structural cracks, and we’ve seen what works and what doesn’t.

Understanding Hot Tub Damage: Causes and Diagnosis
It’s a common sight across South Florida: a beautiful hot tub, once a guide of relaxation, now sporting an unsightly scratch or crack. We’ve seen it all, and in our 30+ years of experience, we’ve identified several common culprits behind hot tub acrylic damage. Understanding these causes is the first step in effective hot tub acrylic repair and prevention.
One of the primary causes is sunlight exposure. Our beautiful Florida sun, while perfect for tanning, can be harsh on acrylic surfaces. Excessive UV exposure leads to expansion and contraction of the hot tub’s surface, weakening the material over time and making it more prone to cracking. Another factor is water pressure issues. Sometimes, problems with water pressure can stress the acrylic, leading to expansion of existing issues or new damage.
Direct impact from objects is another frequent cause. This can range from accidentally dropping something heavy into the tub to fallen tree branches during a storm. Even objects like toys or shoes left in the tub can cause damage. We’ve also observed cases where improper installation plays a significant role. If a hot tub isn’t placed on a level, stable surface that can adequately support its weight, the shell can experience undue stress, leading to cracks, particularly at the bottom. The research also highlights that poor material quality from manufacturers can contribute to cracks and holes, which have reportedly tripled in recent years.
The importance of prompt attention to any damage cannot be overstated. A small, seemingly insignificant scratch can deepen, or a hairline crack can expand, especially with the constant presence of water and temperature fluctuations. Addressing these issues quickly prevents them from worsening and potentially leading to more extensive, costly repairs or even water seeping into the hot tub’s internal workings.
Scratch vs. Crack: Diagnosing the Damage
Before you can begin any hot tub acrylic repair, you need to accurately diagnose the type and severity of the damage. Is it a superficial scratch, or a deeper, more structural crack? This distinction is crucial for determining the appropriate repair method.
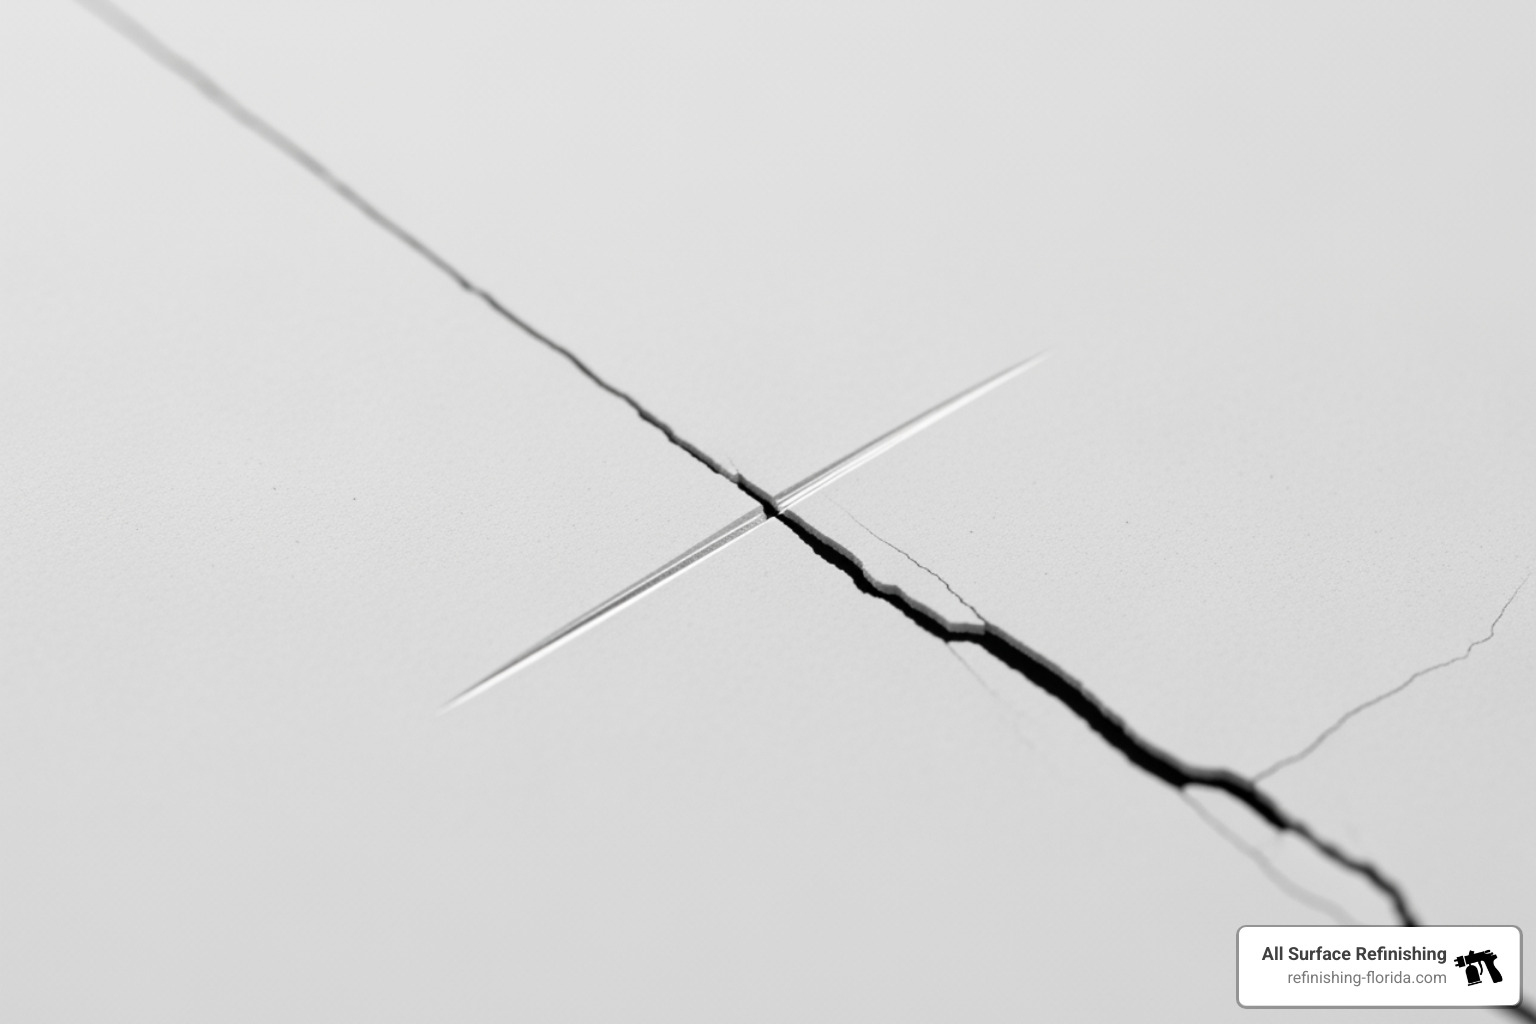
A surface scratch is generally just an aesthetic flaw that has etched the top layer of the acrylic. You can often feel it with your fingernail, but it doesn’t penetrate through the material. These are typically easier to repair yourself.
A crack, however, is more serious. It indicates a separation in the acrylic material itself. You can perform a simple “fingernail test” to gauge depth: if your nail catches significantly in the groove, it’s likely deeper than a surface scratch. Cracks can range from hairline cracks, which are thin and might not be immediately obvious, to structural cracks that penetrate deeper or even go through the acrylic layer into the underlying fiberglass or ABS backing.
Assessing for leaks is critical. If water is seeping out, you definitely have a structural crack that requires immediate attention. It’s also important to understand when damage goes beyond the acrylic layer. If you see signs of moisture or damage to the fiberglass or ABS backing, or if the crack is particularly long (more than a few inches), the repair becomes more complex and may require professional intervention.
Is the Damage Covered by Warranty?
Before you even think about starting a DIY hot tub acrylic repair, we strongly recommend checking your hot tub’s manufacturer’s warranty. This is a crucial step that many homeowners overlook, and it can save you a lot of headache and expense.
Many hot tub warranties cover specific types of shell damage for a certain period. However, it’s equally important to understand what voids a warranty. Often, attempting DIY repairs, especially extensive ones, can immediately void your warranty. Using unapproved components or accessories, or failing to follow manufacturer guidelines for draining and cleaning, can also lead to warranty invalidation.
We’ve seen instances where a homeowner in, say, Jupiter or Delray Beach, attempted a repair only to find out later that the original damage would have been covered, but their DIY effort negated that coverage. Always read your hot tub’s manual thoroughly before starting any work. It will provide specific instructions, warnings, and details about your warranty coverage. When in doubt, contact the manufacturer or a certified service technician first.
DIY Hot Tub Acrylic Repair: A Step-by-Step Guide
The good news is that for many common issues like minor scratches and small cracks, hot tub acrylic repair is indeed a manageable DIY project. We empower homeowners across South Florida to tackle these fixes themselves, but always with a strong emphasis on safety and proper technique.
Before you begin, remember to prioritize safety. Always disconnect the hot tub from its power source at the breaker before starting any work. This eliminates the risk of electrical shock. Additionally, when dealing with repair materials, sanding, or grinding, wear protective gear like gloves and safety glasses to protect your hands and eyes.
Step 1: Gather Your Materials and Prepare the Tub
Proper preparation is half the battle in any successful repair. For your hot tub acrylic repair, you’ll need to gather the right tools and ensure your hot tub is ready for the process.
Here’s a list of necessary supplies:
- Acrylic repair kit: Look for kits specifically designed for hot tubs or even automotive acrylic repair kits, as suggested by some experts, if a spa-specific one isn’t readily available. These kits typically contain fillers, hardeners, and sometimes colorants.
- Hot tub cleaner: A non-abrasive cleaner suitable for acrylic surfaces.
- Soft microfiber towels: To clean and dry the area without causing further scratches.
- Fine-grit sandpaper: A range from 2400 to 6000 grit for smoothing and polishing.
- Drill with rotary bit: Essential for preparing deeper cracks (more on this in Step 2).
- Polishing compound: To restore the shine to the repaired area.
- Protective glasses and gloves: For safety.
Once you have your materials, the next crucial step is to drain the hot tub completely. You cannot effectively repair a hot tub shell while it’s full of water. After draining, use your hot tub cleaner and soft towels to thoroughly clean and dry the damaged area. Any dirt, grime, or moisture will compromise the adhesion of your repair materials, leading to a failed fix. Ensure the area is bone dry before proceeding.
Step 2: The Repair Process for Your Hot Tub Acrylic Repair
Now that your hot tub is prepped and ready, it’s time to get to the heart of the hot tub acrylic repair process. The technique you use will depend on the type of damage you’re addressing.
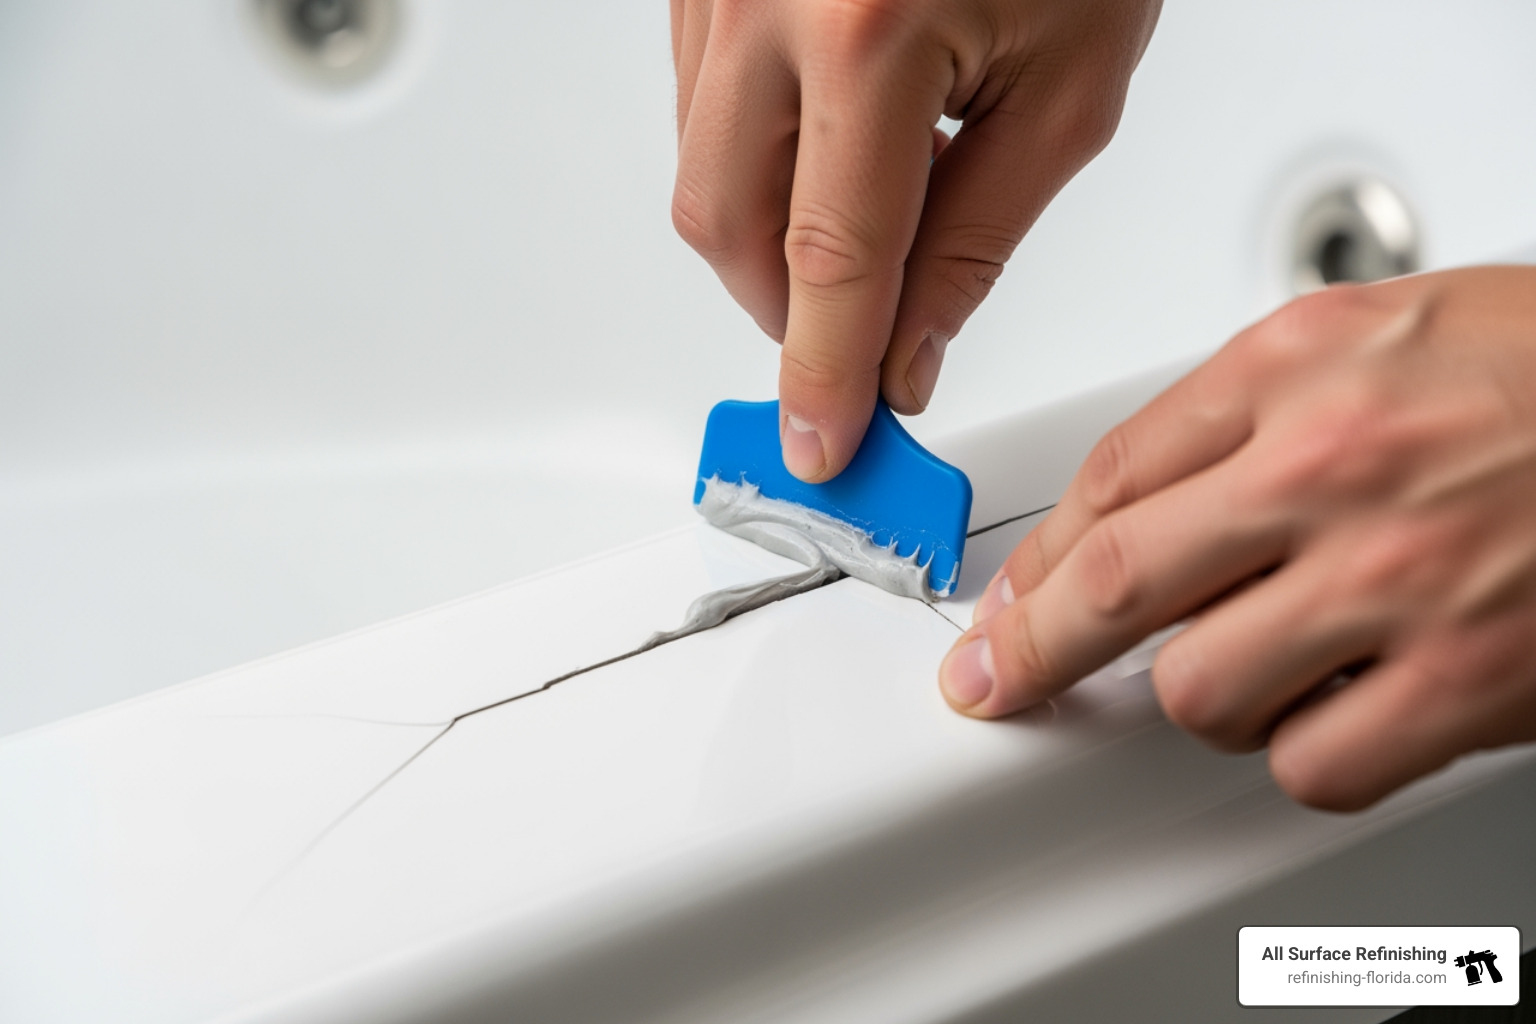
For scratches:
If you’re dealing with superficial scratches, the process is relatively straightforward. After cleaning and drying the area, you’ll typically apply the filler or epoxy from your acrylic repair kit directly into the scratch. Use a small applicator or a plastic spreader to ensure the material fills the scratch completely and is smoothed flush with the surrounding surface. Follow the kit’s instructions for application thickness and drying times. Many smaller scratches won’t require the entire kit, while larger ones may.
For deep cracks:
Deeper cracks require a bit more preparation to ensure a strong, lasting repair. This is where your drill with a rotary bit comes in handy. The goal is to create a ‘V’ shape along the edges of the crack. This process, sometimes called “V-shaping” or “grinding the edges,” provides a wider surface area for the repair material to adhere to, significantly improving adhesion and the overall strength of the repair. Think of it like creating a channel for the epoxy to sit securely.
Once the crack is V-shaped and thoroughly cleaned of any dust or debris, you can begin applying the repair material. For deeper cracks, it’s often best to apply the epoxy or filler in thin layers, allowing each layer to cure partially before adding the next. This helps prevent shrinkage and ensures a solid fill. Always follow the specific instructions provided with your acrylic repair kit for application, layering, and curing times. Patience here is key to a successful, durable repair.
Step 3: Curing, Sanding, and Finishing
After applying the repair material, the next critical phase in your hot tub acrylic repair is allowing it to cure properly, followed by meticulous sanding and finishing to blend the repair seamlessly.
Curing time is not a step to rush. The repair material needs adequate time to harden and bond completely. Rushing this can lead to a weak repair that fails prematurely. Always adhere strictly to the curing times specified in your repair kit’s instructions, which can range from several hours to a full day or more, depending on the product and environmental conditions.
Once fully cured, the repaired area might feel slightly raised or rough. This is normal and where wet sanding comes in. Start with a medium-fine grit sandpaper (e.g., 2400 grit) from your kit, keeping the area and the sandpaper wet. Sand in small, circular motions, gradually working your way to progressively finer grits (e.g., 3200, 4000, and finally 6000 grit). The goal is to create a smooth, level surface that is flush with the surrounding acrylic. This graduated sanding process removes imperfections and prepares the surface for polishing.
Finally, to restore the original luster and shine, you’ll buff the area with a polishing compound. Apply a small amount of compound to a clean, soft cloth (like a microfiber towel) and gently buff the repaired spot. This will remove any remaining haze from sanding and bring back the glossy finish of your hot tub. After buffing, give the area one last clean to remove any residue.
For more information about tub repair services, see All Surface Refinishing’s tub repair page.
DIY Pitfalls and When to Call a Professional
While tackling a hot tub acrylic repair yourself can be satisfying and cost-effective for minor issues, it’s crucial to recognize the limits of a DIY fix. We’ve seen homeowners in places like Fort Lauderdale and Miami attempt repairs that, while well-intentioned, ended up causing more problems.
One of the significant potential risks or downsides of DIY hot tub acrylic repair is the possibility of worsening the damage. Improper grinding, using the wrong materials, or failing to clean the area thoroughly can expand a small issue into a larger, more complex problem. Another risk is creating a weak spot that fails later. If the repair material doesn’t bond correctly or isn’t strong enough, it can crack again, potentially leading to leaks or further structural damage. Amateur repairs often fail shortly after completion, according to experts.
The Challenge of a Perfect Color Match
One of the most artistic and challenging aspects of hot tub acrylic repair, especially for DIYers, is achieving a perfect color match. Hot tub shells come in a vast array of colors, patterns, and finishes, from solid hues to speckled or marbled designs.
The difficulty in matching multi-colored or patterned acrylic shells is immense. A standard DIY repair kit might come with a basic white or off-white filler, but trying to blend that seamlessly into a “Sahara” speckled finish or a “Midnight Canyon” swirl is nearly impossible for an untrained eye. This is why DIY kits can be hard to blend perfectly; they rarely account for the nuanced pigments and textures of modern hot tub acrylics.
The importance of a seamless look for aesthetic value cannot be overstated. A poorly color-matched repair sticks out like a sore thumb, diminishing the visual appeal of your entire hot tub. While the repair might be structurally sound, if it’s visually jarring, it detracts from the relaxation experience. Professional repair specialists, like us at All Surface Refinishing, have access to a wider range of manufacturer coatings and possess the expertise and artistic eye for precise color matching, even for complex patterns.
Signs You Need an Expert for Your Hot Tub Acrylic Repair
You should definitely consult a professional if:
- Cracks are longer than a few inches: Small hairline cracks can be DIY-friendly, but longer cracks indicate more significant stress on the shell and require specialized techniques and materials to ensure a durable, leak-free seal.
- Damage penetrates the fiberglass backing: If the crack has gone through the acrylic and into the underlying fiberglass or ABS backing, the structural integrity of your hot tub is compromised. This level of damage requires expertise in both acrylic and fiberglass repair.
- Multiple cracks or widespread crazing: A single crack might be an isolated incident, but multiple cracks or a network of fine cracks (crazing) suggests a systemic issue with the acrylic, possibly due to age, material quality, or prolonged stress. This needs a comprehensive assessment.
- Blistering or delamination: Blisters occur when water gets trapped in air voids beneath the surface, causing the acrylic to bubble out. This can be a sign of deeper issues and requires specialized repair to prevent recurrence.
- You’re not confident in your DIY skills: There’s no shame in admitting a job is beyond your comfort level. Attempting a complex repair without the necessary skills can lead to more damage and higher costs in the long run.
In our experience across South Florida, from Pembroke Pines to Port Saint Lucie, homeowners often save money and stress by calling us for these more challenging hot tub acrylic repair jobs. We have the specialized tools, materials, and expertise to handle complex repairs, ensuring a lasting and aesthetically pleasing result.
Prevention: Keeping Your Hot Tub Shell Pristine
An ounce of prevention is worth a pound of cure, especially when it comes to hot tub acrylic repair. By adopting a few proactive measures, you can significantly reduce the likelihood of developing cracks and scratches, keeping your hot tub looking pristine for years to come.
Here are our top tips for preventing hot tub damage:
- Use a quality, well-fitting hot tub cover: This is your first line of defense. A good cover protects your hot tub from UV rays, which, as we mentioned, can cause the acrylic to expand and contract, leading to weakening. It also prevents debris, leaves, and accidental impacts from objects that could scratch or crack the surface. Always keep the hot tub covered when not in use.
- Avoid harsh cleaning chemicals: While it’s important to keep your hot tub clean, using abrasive cleaners or harsh chemicals not specifically designed for acrylic surfaces can degrade the material over time. Always opt for manufacturer-approved, non-abrasive cleaners and soft cloths.
- Prevent objects from falling into the tub: Be mindful of what’s around your hot tub. Ensure no heavy items are stored above it, and be careful when carrying tools or equipment nearby. Keep only human bodies, swimwear, and approved accessories in the hot tub.
- Ensure the tub is on a stable, level surface: This is critical for preventing structural stress. If your hot tub is not properly supported, the shell can flex and crack. Make sure it rests on a concrete slab or a specially engineered surface designed to bear its weight.
- Follow manufacturer guidelines for draining and cleaning: Stagnant water can deteriorate acrylic over time. Regular draining and cleaning, as specified by your hot tub’s manufacturer, helps maintain the integrity of the shell.
- Check components: Ensure you only use manufacturer-approved components and accessories. Incompatible parts can sometimes lead to issues that stress the acrylic.
By following these simple preventative measures, you can enjoy your hot tub in Aventura, Boca Raton, or any of our South Florida locations, with less worry about expensive hot tub acrylic repair down the line.
Frequently Asked Questions about Acrylic Hot Tub Repair
How long does a professional hot tub acrylic repair last?
A professionally executed repair using high-grade materials can last for many years, often for the remaining life of the hot tub, as it bonds chemically with the original shell. Our team at All Surface Refinishing in South Florida uses specialized techniques and materials that create a durable, seamless fix designed to withstand the unique environment of a hot tub, including temperature fluctuations and water exposure. DIY repairs, on the other hand, vary significantly based on the kit quality, the skill of the application, and the severity of the initial damage. While a DIY fix might hold for a while, it often lacks the longevity and aesthetic perfection of a professional job.
What is the cost difference between DIY and professional repair?
The cost difference between DIY and professional hot tub acrylic repair can be substantial, reflecting the difference in complexity, materials, and expertise. A DIY kit for minor scratches or small cracks typically costs between $25 and $50. This is an attractive option for budget-conscious homeowners in areas like Fort Lauderdale or West Palm Beach.
However, for more significant cracks, especially those causing leaks or penetrating deeper layers, professional repairs are a worthwhile investment. These can range from $200 to over $1,000, depending on the severity of the damage, the hot tub’s location (e.g., Miami vs. a more remote area), and the complexity of color matching. While seemingly higher upfront, professional repairs offer a permanent, color-matched solution that DIY efforts rarely achieve, preventing future problems and preserving your hot tub’s value. Experts note that professional repairs are generally at least 70% cheaper than the option of full replacement.
Can I use super glue or a generic epoxy for a quick fix?
While super glue might offer a very temporary seal for a tiny, non-structural hairline crack above the waterline, it is generally not a recommended or durable solution for hot tub acrylic repair. Super glue lacks the flexibility and strength required to withstand the constant temperature changes, water pressure, and chemical exposure inherent in a hot tub environment. It will likely degrade quickly, becoming brittle and failing, potentially turning a small problem into a larger one.
Similarly, generic epoxies not specifically formulated for acrylic or hot tub use may not bond properly or withstand the conditions. They often lack UV resistance, can discolor, or become brittle over time. For any repair, especially one involving water containment, it’s crucial to use products specifically designed for acrylic hot tubs or, better yet, consult with professionals who use industry-grade materials and techniques. Attempting a quick fix with unsuitable materials can lead to bigger problems and more costly repairs down the line.
Your Local Solution for a Perfect Hot Tub Finish
In summary, while minor scratches are often a manageable DIY task for homeowners in South Florida, significant cracks and achieving a flawless finish require expertise. For residents in Aventura, Boca Raton, Fort Lauderdale, Miami, Palm Beach, and across South Florida, attempting a complex hot tub acrylic repair can lead to bigger problems, such as voiding warranties, creating weak spots, or simply an unsightly patch.
At All Surface Refinishing, we provide expert repair services, ensuring a durable and beautiful result that DIY kits can’t match. With over 30 years of experience and thousands of projects completed, our team has the specialized knowledge and materials to restore your hot tub to its original glory. Don’t risk your investment; trust a professional to bring your hot tub back to life. Contact us for your hot tub repair needs today.
