
A Pro-Quality Start for Cabinet Painting Shaker Cabinets
For smooth, durable shaker cabinets, remove and label the doors and hardware, clean away grease, scuff-sand the finish, use a cabinet-grade bonding primer, then apply two thin coats of durable cabinet enamel. Paint the recessed panel edges first, then the flat rails and stiles, keeping a wet edge to reduce brush marks.
Shaker doors are a smart surface to refinish because their simple recessed panels and flat frames are easier to prep and coat than detailed cabinet styles. Painting can also be a far lower-cost kitchen update: materials often stay under $1,000, while replacing custom cabinets may cost $15,000 to $30,000. The result can deliver much of the visual change of a replacement without the disruption.
I’m Frank Hernandez, President of All Surface Refinishing, and I have worked in surface refinishing for more than a decade, serving South Florida property owners since 1996 through our team’s combined experience. In this guide to cabinet painting shaker cabinets, I’ll walk you through the preparation and finish details that help cabinets look great and hold up in a busy kitchen.
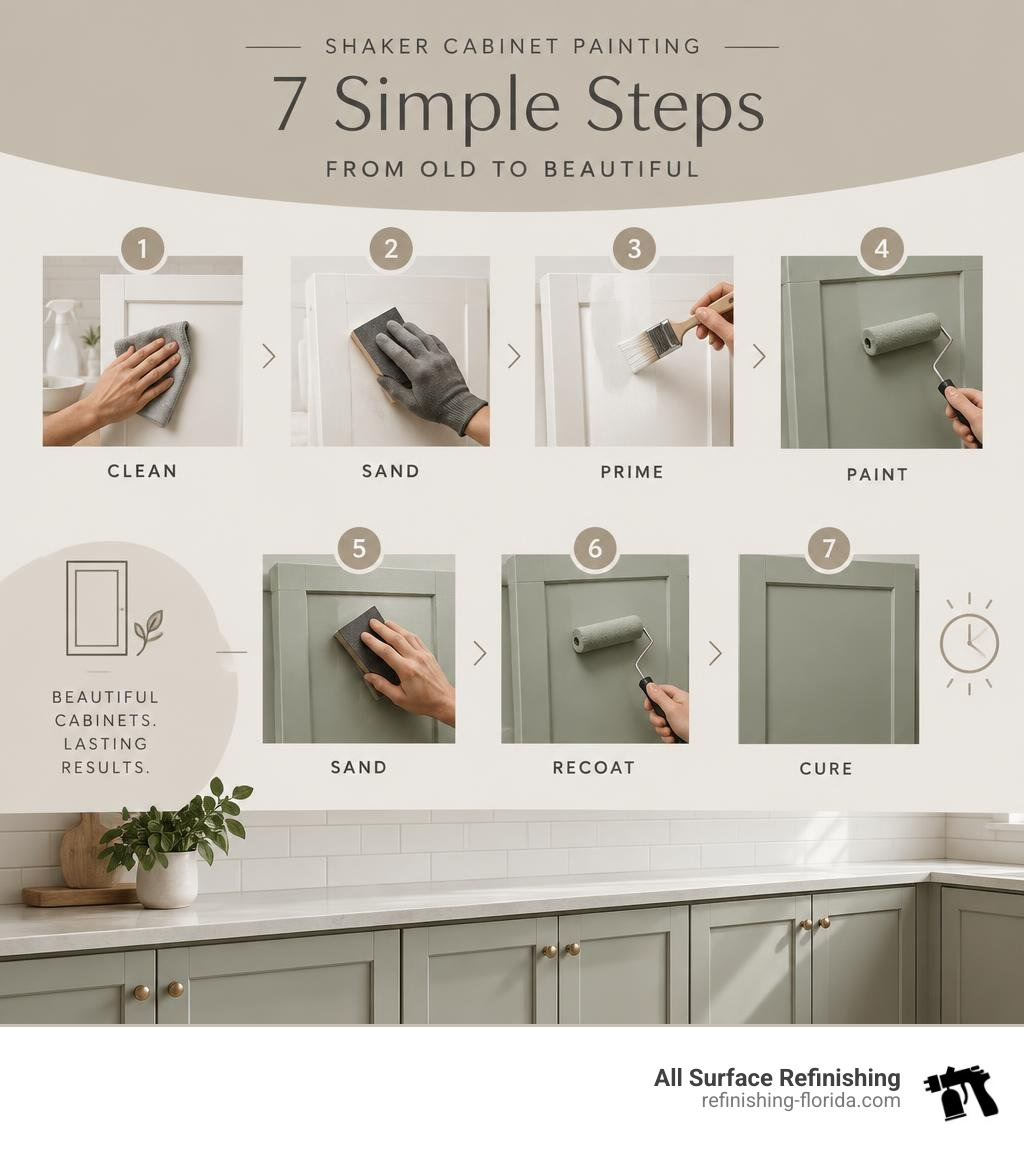
Cabinet painting shaker cabinets vocab explained:
Essential Preparation for Cabinet Painting Shaker Cabinets
Achieving a factory-grade finish on shaker cabinetry comes down to 80% prep work and 20% application. If you try to cut corners before touching a paintbrush, the best paint in the world will peel, chip, or show every imperfection underneath.

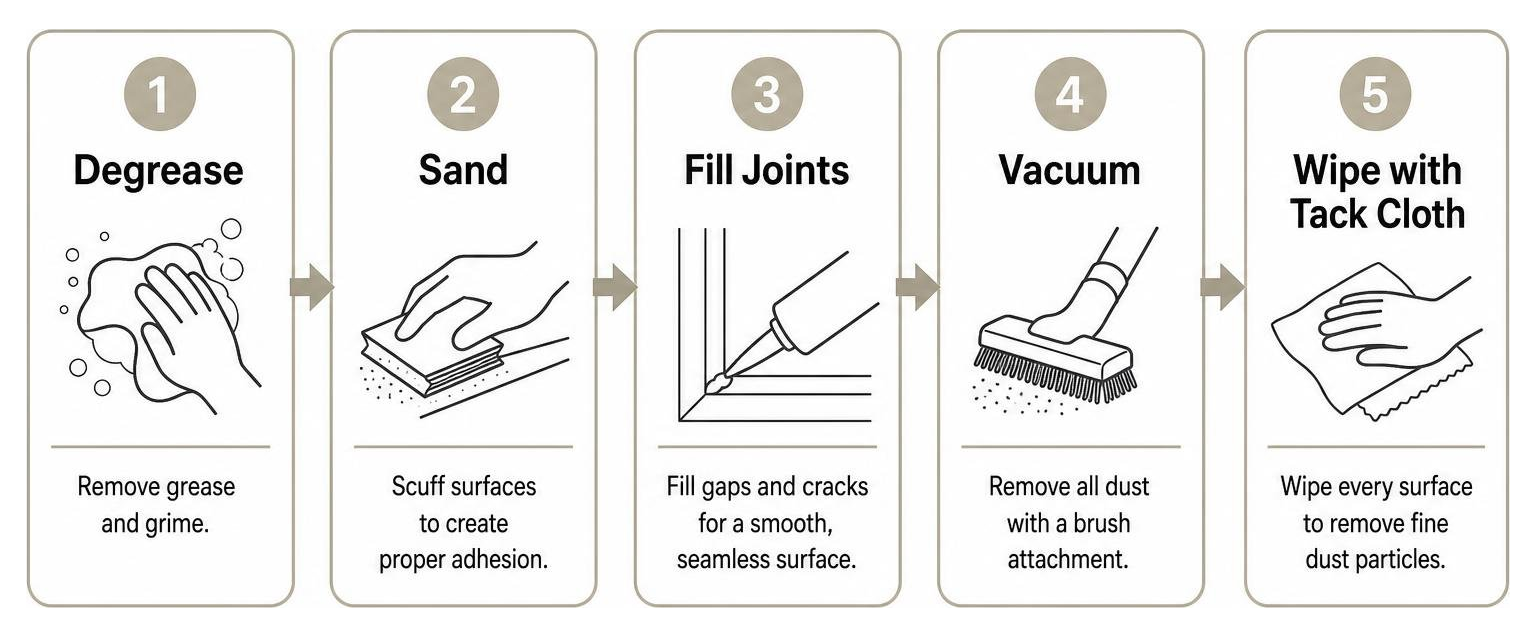
Start by establishing an organized workspace. Remove every cabinet door, drawer front, hinge, and pull. Trying to paint around hinges or leaving doors hung vertically invites drips, uneven coverage, and messy hardware. Number each door and drawer using painter’s tape on the back, and sketch a quick map of your kitchen layout. Place all matching screws and hinges into labeled plastic bags so reassembly doesn’t turn into a frustrating puzzle.
Next, address kitchen grime. Cooking grease, cooking oils, and skin oils settle into the inner corners of shaker recessed panels. Wash every surface thoroughly using a heavy-duty degreaser or Trisodium Phosphate (TSP) solution mixed in warm water. Scrub the recessed corners with a soft nylon brush, rinse with clean water, and let everything dry completely.
Once dry, begin the sanding sequence:
- Initial Scuff Sanding: Use 120-grit sandpaper or sanding sponges to break through the factory clear coat and create mechanical tooth.
- Intermediate Smoothing: Follow up with 220-grit sandpaper across the broad rails, stiles, and flat center panels to smooth out any heavy scratch marks.
- Dust Removal: Vacuum all surfaces with a brush attachment, then wipe down every square inch with a clean tack cloth or microfiber rag to eliminate microscopic dust particles.
Essential Tools and Materials Checklist
- Degreasing cleaner (TSP substitute or heavy-duty cleaner)
- 120-grit, 220-grit, and 320-grit sandpaper or sanding sponges
- Angled sash paintbrushes (2-inch to 2.5-inch synthetic bristles)
- 4-inch high-density foam or microfiber mini rollers
- High-adhesion bonding primer
- Premium water-based urethane or hybrid alkyd cabinet enamel
- Tack cloths and microfiber towels
- Painter’s tape, drop cloths, and painting pyramids/stands
Primer Selection for Cabinet Painting Shaker Cabinets
Applying primer is a mandatory bonding step, not an optional suggestion. Modern cabinetry is made from a mix of solid hardwoods and medium-density fiberboard (MDF) center panels. Without a dedicated bonding primer, topcoats cannot properly adhere to slick factory clears or bare MDF cores.
For raw oak or stained cherry where tannins easily bleed through light colors, choose a high-performance stain-blocking shellac-base primer. For standard painted surfaces and factory MDF, a high-adhesion acrylic bonding primer creates an indestructible foundation for the enamel topcoat. Consult this helpful DIY shaker cabinet guide for detailed step breakdowns on establishing uniform bonding across different wood species.
Surface Smoothing and Repair
Before laying down your primer coat, inspect the joints where the vertical stiles meet the horizontal rails. Over years of seasonal humidity changes, these wood joints naturally shift, opening small hairline cracks.
Fill any deep dents or gouges with a premium sandable wood filler. Sand the repaired spots flush with 220-grit paper. For tiny hairline separations inside the inner profile bevels, apply a thin bead of paintable acrylic latex caulk, smoothing it with a damp finger to ensure the recessed border looks clean and seamless. Vacuum away all sanding residue one final time before priming.
Step-by-Step Application and Finishing Techniques
Shaker doors have distinct geometry: a large flat outer frame (stiles and rails) surrounding a recessed center panel. Painting these surfaces requires a deliberate sequence so you maintain a wet edge and avoid thick pooling in the inner corners.
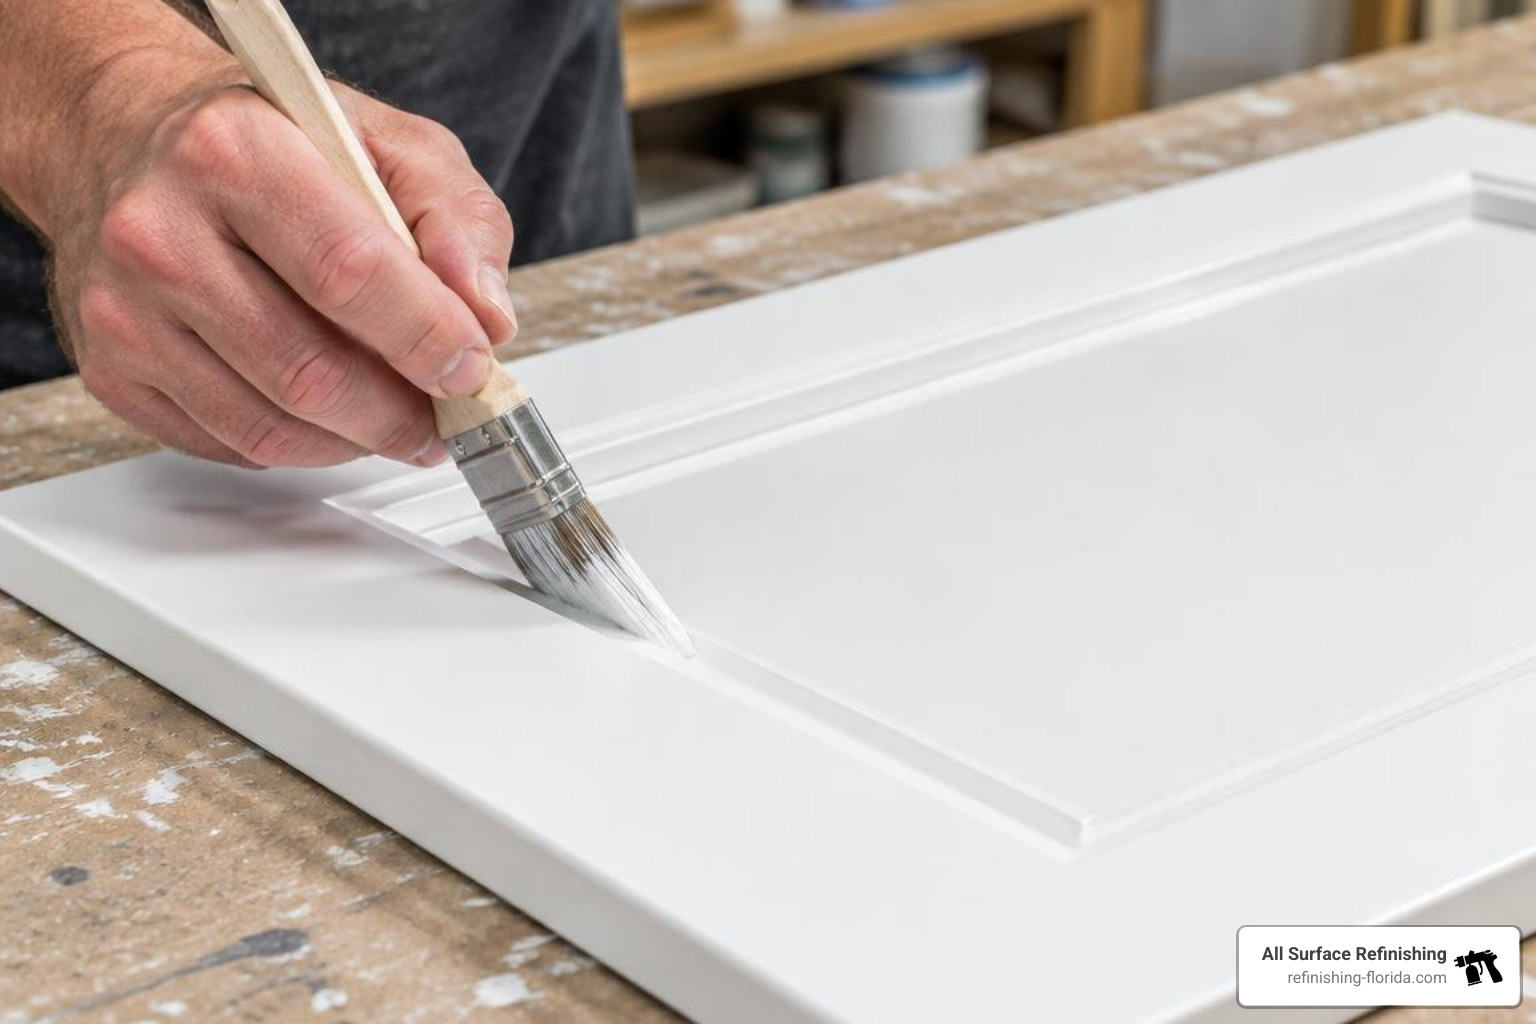
Work on doors laid flat horizontally across sawhorses or painter’s pyramids. Begin by cutting into the inner recessed edges using a high-quality 2-inch angled sash brush. Lay down a thin coat along the interior profile, brushing outward into the center panel. Immediately roll the broad center panel with a 4-inch microfiber mini roller to eliminate brush strokes.
Finish by coating the horizontal rails and vertical stiles with smooth, continuous roller strokes in the direction of the wood grain. Always feather out your edges to prevent lap marks. Adding a small amount of paint conditioner can extend the open wet time, allowing the enamel to level out flat like glass.
| Paint Type | Durability | Dry Time | Leveling Quality | Best Application Method |
|---|---|---|---|---|
| Water-Based Urethane Enamel | Superior (Scratch & chemical resistant) | 2–4 hours | High (Self-levels smoothly) | Spray or Microfiber Mini Roller |
| Waterborne Alkyd (Hybrid) | High (Hard enamel cure) | 4–8 hours | Exceptional (Oil-like flow) | High-Quality Brush & Roller |
| Standard Acrylic Latex | Moderate (Softer finish) | 1–2 hours | Low (Prone to brush marks) | Brush (Not recommended for cabinets) |
Application Techniques for Cabinet Painting Shaker Cabinets
For the smoothest possible finish, an HVLP (High Volume Low Pressure) paint sprayer provides a flawless factory look without leaving a single brush stroke. If spraying is not an option in your space, you can still achieve a professional result using the “roll and tip” brush-and-roller method. Roll on a thin layer of enamel with a dense foam roller, then lightly drag the tips of a dry synthetic brush over the wet paint in long, straight passes.
Modern water-based urethane finishes provide the durability of classic oil paint combined with low VOCs and easy soap-and-water cleanup. Always apply two to three ultra-thin coats rather than one heavy layer to prevent sagging, drips, and extended drying times.
Intermediate Sanding and Topcoats
Never apply a second coat of paint directly over an unsanded first coat. Intercoat sanding is the secret to achieving that smooth, velvety feel found on high-end custom cabinetry.
Allow your first topcoat to dry according to the manufacturer’s directions (usually 4 to 8 hours depending on humidity). Take a sheet of 320-grit sandpaper or an ultra-fine sanding pad and lightly scuff every surface with featherlight pressure. This removes dust nibs, roller texture, and raised grain. Wipe the door clean with a tack cloth, then apply your second coat.
For high-traffic kitchens, a satin or semi-gloss sheen offers the ideal balance—providing enough light reflection to brighten the room while easily repelling moisture, sauce splatters, and greasy fingerprints.
Troubleshooting, Durability, and Long-Term Maintenance
Even careful painters run into occasional runs or drips, especially in the 90-degree corners of shaker panel recesses. If you catch a drip while the paint is still wet, gently smooth it out with a damp brush tip. If the drip has already begun to skim over or dry, let it cure completely for 24 hours. Once fully hard, shave the drip flat using a razor blade or 320-grit sandpaper on a hard backing block, wipe away the dust, and touch up the spot with a light pass of paint.
Curing requires patience. While modern enamels feel dry to the touch within a few hours, they require 14 to 30 days to reach full structural hardness. In warm, humid coastal climates, this chemical cross-linking process takes a bit longer. Keep doors handled gently during the first month, and install clear silicone bumper pads on the back corners of all doors to cushion closures against the cabinet frames.
To clean painted shaker doors without damaging the finish:
- Wipe spills immediately using a soft microfiber cloth dampened with warm water and a drop of mild dish soap.
- Avoid abrasive scrubbing sponges, ammonia-based cleaners, or harsh chemical degreasers.
- Dry the flat bottom ledge of the recessed panel after cleaning, as standing water can soften paint edges over time.
Frequently Asked Questions About Shaker Cabinet Painting
Do I need to prime previously painted shaker cabinets?
Yes. Even if your shaker cabinets already have paint on them, applying a bonding primer is crucial. Previous paint finishes often retain traces of grease, wax, or gloss clears that prevent new topcoats from bonding mechanically. Lightly scuff-sanding with 220-grit paper followed by a coat of bonding primer prevents chipping and stops older dark pigments or wood tannins from bleeding into your fresh color.
How long should I wait before reinstalling doors and hardware?
Wait at least 48 to 72 hours before rehanging doors and reinstalling drawer pulls. Although paint dries within hours, the finish remains soft and vulnerable to pressure dents from hinges and hands during early drying stages. When reinstalling hardware, screw everything in by hand rather than using high-torque power drills to avoid stripping screw holes or marring the fresh paint.
What does shaker cabinet painting cost?
A DIY shaker cabinet painting project typically runs between $300 and $800 for high-grade primers, urethane enamels, abrasives, brushes, and masking supplies. In contrast, replacing full kitchen cabinetry with new custom units costs between $15,000 and $30,000. Refinishing your existing shaker cabinets delivers 70% to 80% of the aesthetic impact of a full kitchen remodel at a tiny fraction of the cost.
Conclusion
Transforming dated kitchen or bathroom cabinetry into crisp, modern shaker cabinets completely changes the look and feel of your living space. By taking your time through degreasing, sanding, priming, and applying thin, leveled coats of durable enamel, you can achieve a factory-smooth finish that stands up to years of daily family use.
If you are located in South Florida—from Miami, Fort Lauderdale, and Hollywood up through Boca Raton, West Palm Beach, Vero Beach, and Port Saint Lucie—and prefer having seasoned professionals handle your kitchen transformation, our team is ready to help. Discover how our professional cabinet refinishing services can revitalize your kitchen cabinets, bathtubs, and countertops quickly, affordably, and with lasting quality.
