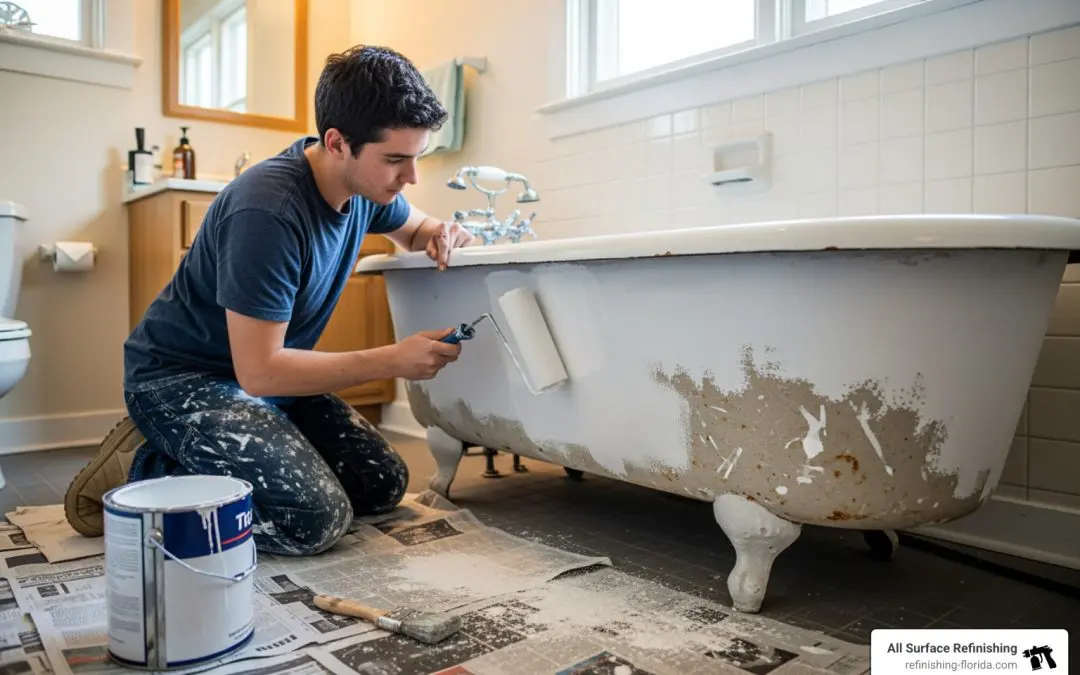
Why Bathtub Repainting Makes Sense
Bathtub repainting is a cost-effective way to transform your bathroom without the expense and mess of a full replacement. Here’s what you need to know:
Key Facts About Bathtub Repainting:
- Cost: $300-$700 for professional service, $50-$150 for DIY kits (vs. $2,500-$5,000 to replace)
- Time: 3-5 hours to complete, ready to use in 24-72 hours
- Lifespan: Can extend your tub’s life by 10-15 years
- Materials: Works on porcelain, fiberglass, acrylic, and cast iron
- Process: Clean, sand, prime, apply epoxy/acrylic coating
If your bathtub has surface stains, minor chips, a peeling finish, or an outdated color, repainting is an excellent choice. However, deep cracks, leaks, or severe structural damage mean replacement is necessary.
For most homeowners, the cost and disruption of replacing a bathtub are simply too high. Repainting offers a better solution. For a fraction of the cost, you can transform your tub’s appearance in just a few days. Most people can’t tell the difference between a professionally refinished tub and a new one, as modern coatings create a glossy, durable finish that lasts over a decade.
But here’s the catch: shortcuts don’t work. The most common DIY mistake is rushing preparation, which leads to peeling and bubbling within months.
I’m Frank Hernandez, President of All Surface Refinishing. Since 2011, I’ve refinished countless bathtubs across South Florida, seeing both successful changes and failed DIY attempts. I know what works.
This guide walks you through our proven 7-step process. Whether you’re planning a DIY project or considering professional help, you’ll understand exactly what’s involved.
Deciding to Repaint: When to Refinish Your Bathtub
Faced with a dingy bathtub, many South Florida homeowners think of replacement, which can cost $2,500 to $5,000. However, bathtub repainting is a compelling alternative. Professional refinishing costs just $300 to $700, while a DIY kit is $50 to $150. This significant saving, plus extending your tub’s life by 10-15 years, makes refinishing an attractive option.
When is bathtub repainting the right choice?
Bathtub repainting is an excellent solution for cosmetic flaws that don’t affect the tub’s structure. Consider refinishing for:
- Surface-level issues: A dull finish or loss of the original luster.
- Stains and discoloration: Stubborn stains can be completely covered for a fresh, bright look.
- Small chips and scratches: Minor imperfections can be repaired and seamlessly blended into the new finish.
- Peeling finish: A proper refinishing process strips the old glaze and applies a new, durable coating.
- Desire for color change: Update an outdated color to a crisp, modern white or bone.
- Budget constraints: Get a dramatic update for a fraction of the cost of a full renovation.
When should you consider replacing your bathtub instead?
While versatile, bathtub repainting can’t fix everything. Replacement is the only option if your tub has:
- Major cracks: Deep, structural cracks that risk leaks cannot be fixed by refinishing.
- Leaks causing water damage: An active leak damaging your subfloor or walls indicates a major problem requiring replacement.
- Severe rust: Extensive, deep rust, especially in cast iron tubs, suggests material degradation that refinishing can’t solve.
- Warped tub material: A warped or deformed tub has compromised structural integrity.
- Widespread mold issues: Persistent mold may point to moisture problems beneath the tub, requiring removal.
- Major structural problems: Any issue affecting the tub’s ability to hold water safely, like a compromised base.
Be honest about the damage. Bathtub repainting is for cosmetic issues, not fundamental structural problems.
Essential Prep: Tools, Materials, and Safety
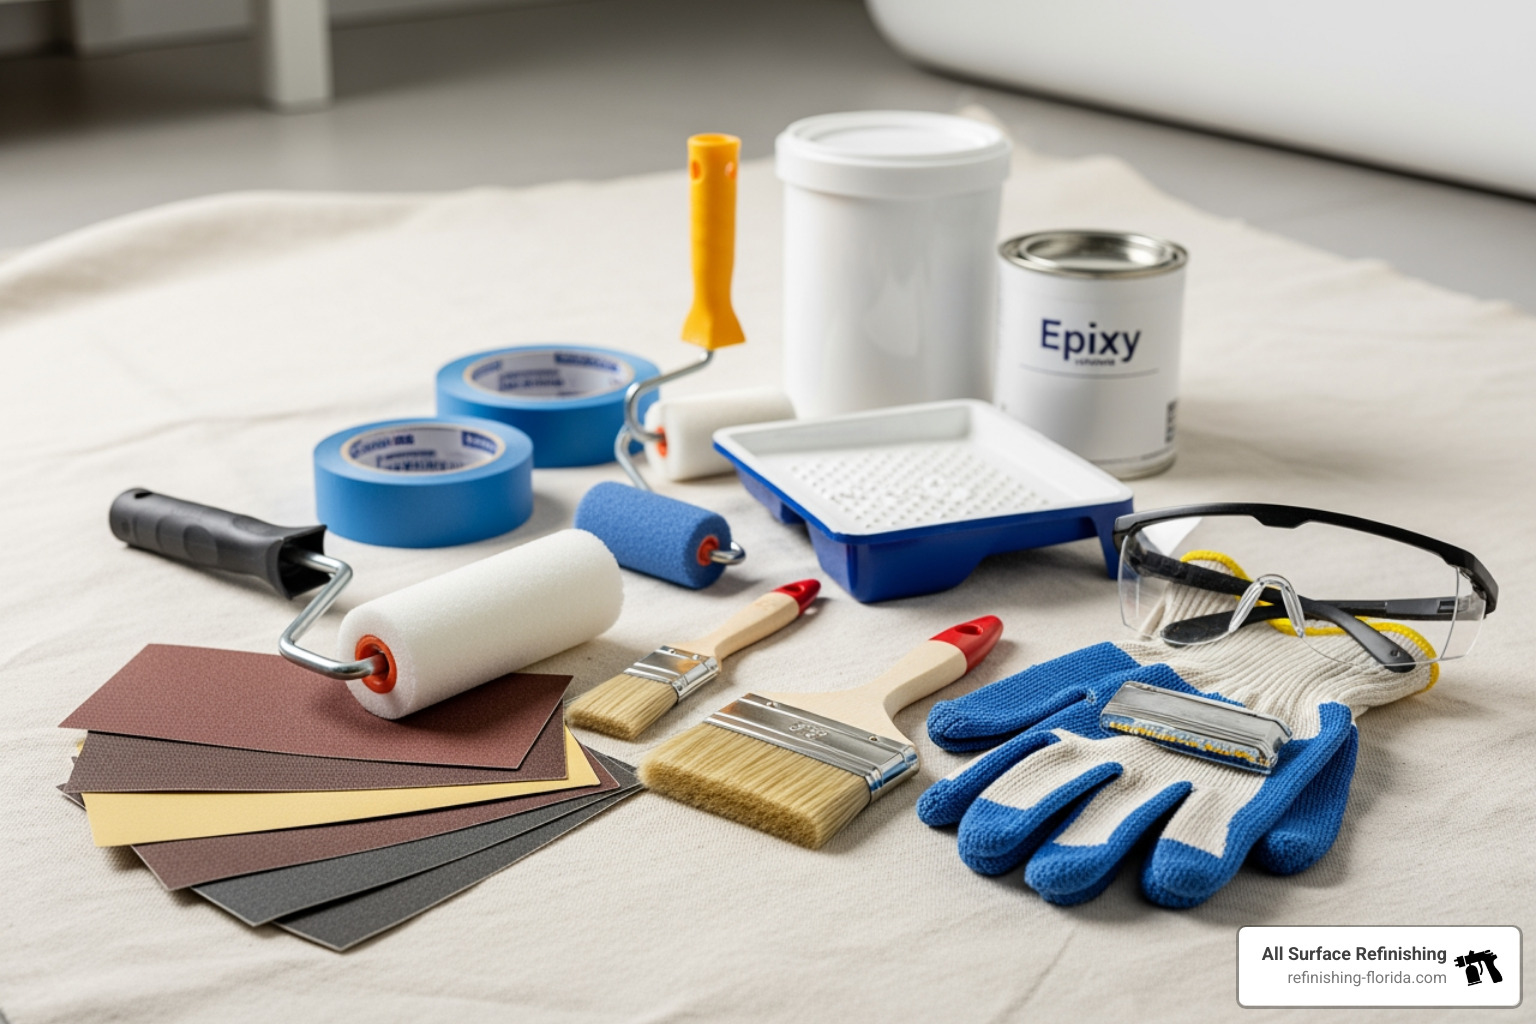
Proper preparation is the most critical part of any bathtub repainting project. Rushing this stage is the most common DIY mistake and guarantees a poor result. The success of your new finish hinges entirely on how well you prepare the surface.
Gathering Your Supplies
Gather all necessary tools and materials before you begin to save time and frustration. For a DIY project, you’ll need:
- Professional-grade bathtub refinishing kit: A two-part epoxy or acrylic coating system.
- Abrasive cleaners: Such as Comet or Bar Keeper’s Friend, plus bleach for mildew.
- Putty knife and utility knife for removing old caulk.
- 400-600 grit wet/dry sandpaper to scuff the surface for adhesion.
- High-quality painter’s tape for masking.
- Drop cloths to protect your floor.
- Tack cloth to remove dust after sanding.
- High-quality foam roller (1/4-inch nap) and a small paintbrush.
- Caulk gun and silicone caulk for re-sealing.
- Screwdriver for removing hardware.
- Abrasive pads, sponges, and clean cloths.
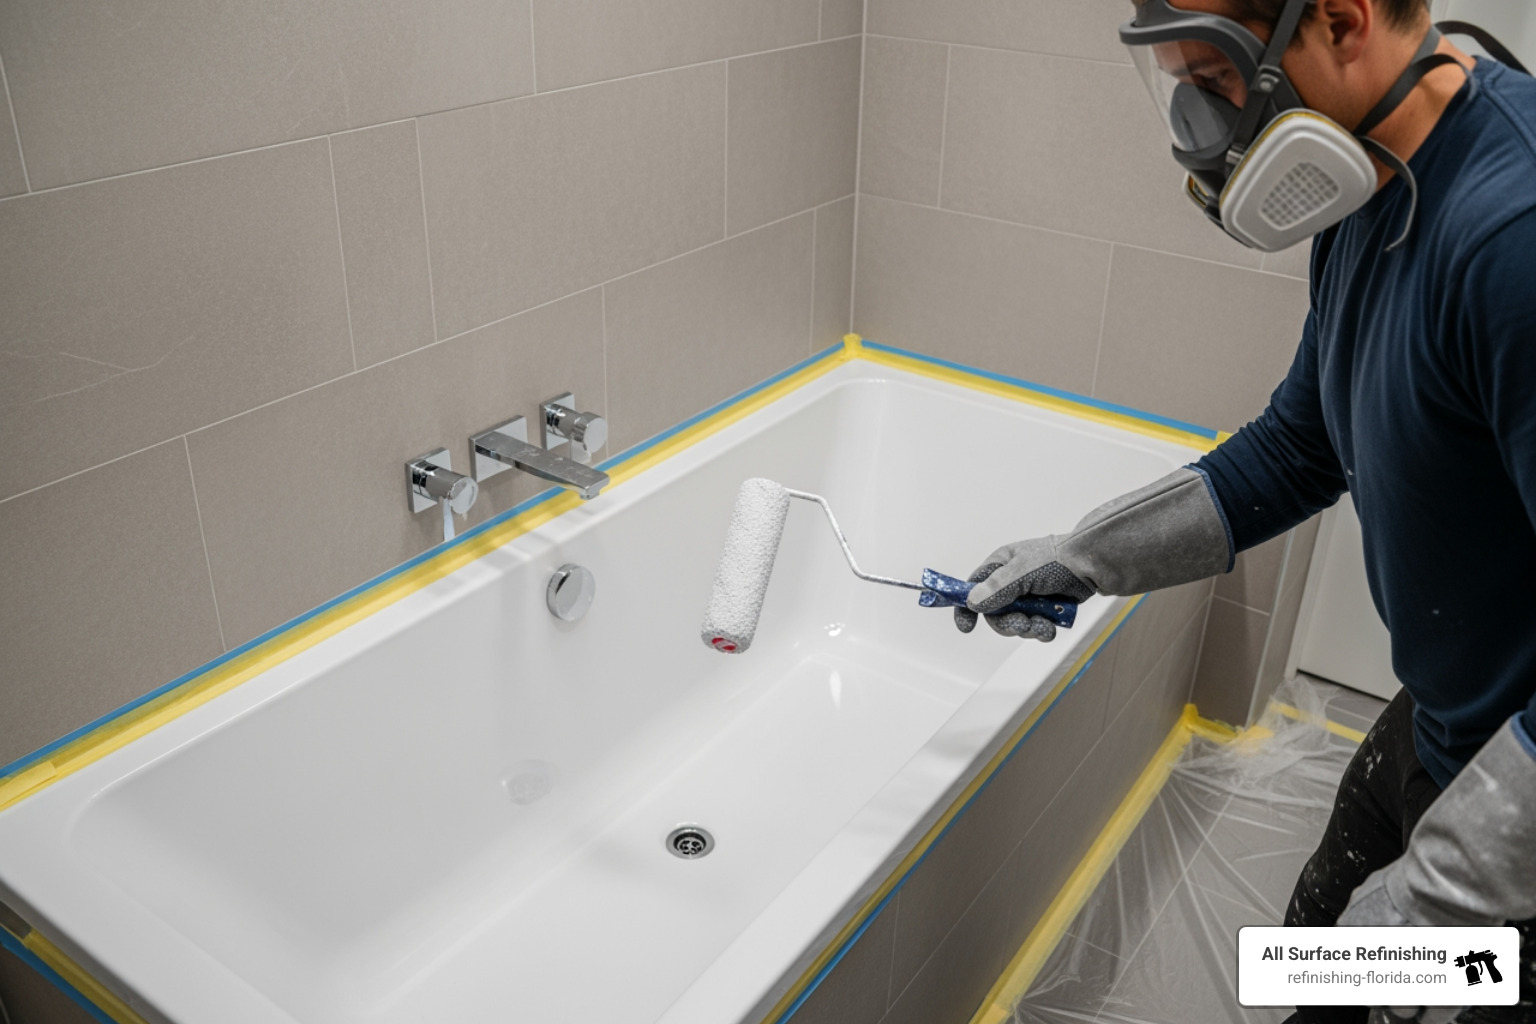
Safety First: Protecting Yourself and Your Home
Refinishing chemicals produce strong, harmful fumes, so safety is critical. We prioritize safety on all our professional bathtub repainting jobs and urge you to do the same.
- Ventilation is paramount: The bathroom must be extremely well-ventilated. Open windows, use the exhaust fan, and place a box fan in the window blowing out to draw fumes away.
- Protective gear is non-negotiable:
- Respirator: A respirator with appropriate cartridges is essential. A dust mask is not sufficient.
- Safety glasses: Protect your eyes from splashes.
- Gloves: Wear chemical-resistant gloves.
- Clothing: Cover your skin with long pants and a long-sleeve shirt.
- Protect your bathroom: Use painter’s tape to mask off tiles, faucets, and drains. Cover the floor with drop cloths.
The CDC emphasizes the importance of proper ventilation and protective gear when working with these chemicals. We take these recommendations seriously to ensure everyone’s safety.
The 7-Step Process for Bathtub Repainting
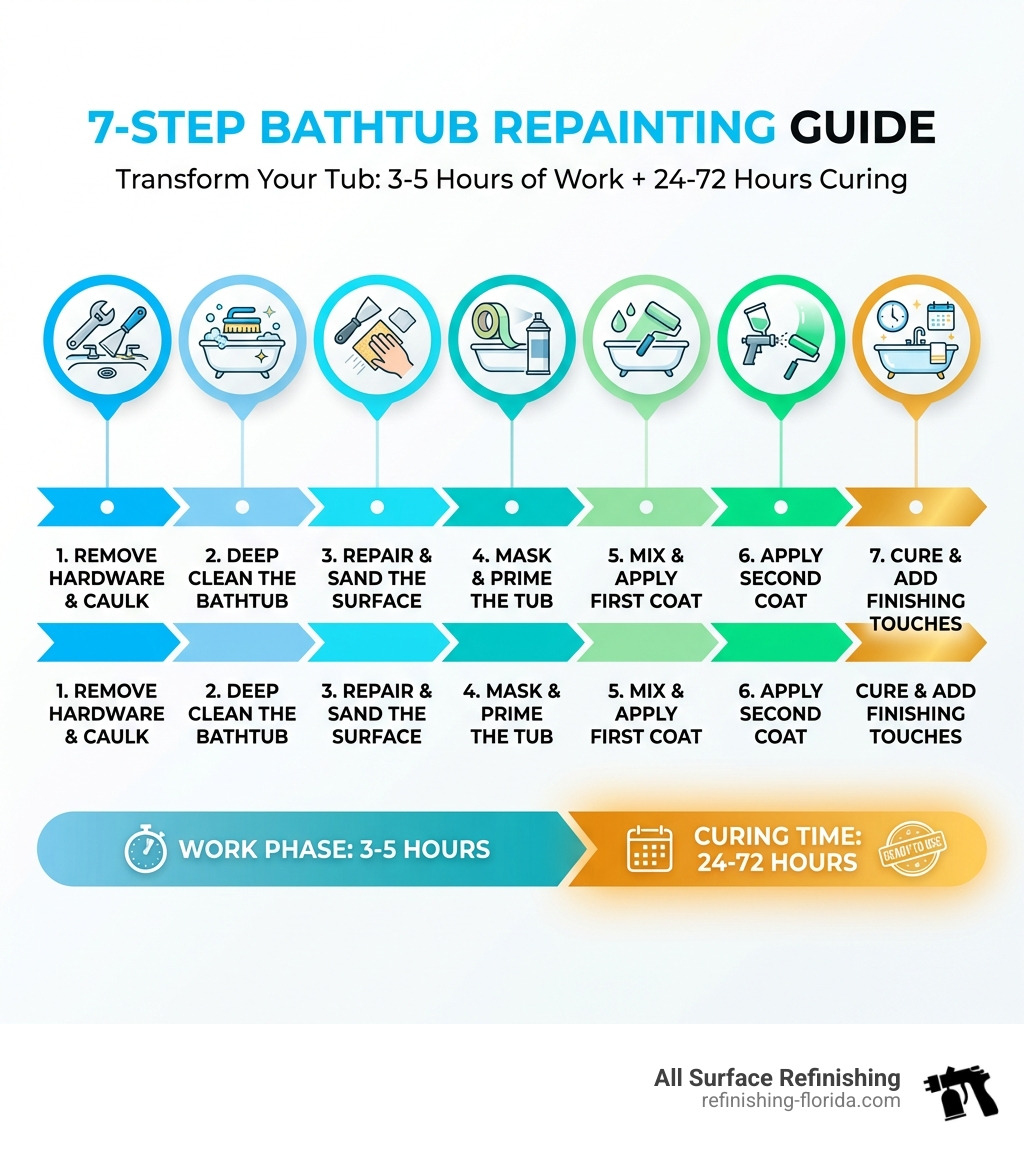
With your space prepped and safety gear on, you’re ready to begin. Follow these seven steps, honed over 30 years of bathtub repainting in South Florida, for a professional-quality finish.
Step 1: Remove Hardware and Caulk
For a seamless finish, start by using a screwdriver to remove the drain cover, faucet handles, and overflow plate. Next, use a putty or utility knife to scrape away all old silicone caulk from the tub’s perimeter. New paint won’t adhere to old caulk, so be thorough to prevent peeling.
Step 2: Deep Clean the Bathtub
The tub must be exceptionally clean for the new coating to bond.
- Scrub: Use an abrasive cleaner (like Comet) and a scouring pad to scrub away all soap scum, oils, and grime.
- Treat Mildew: Apply a 1:1 bleach and water solution to any mildew, let it sit, then scrub and rinse.
- Rinse and Dry: Rinse the tub thoroughly to remove all residue, then dry it completely. Use a fan to ensure no moisture remains, as dampness will compromise adhesion.
Step 3: Repair and Sand the Surface
Address imperfections to create a surface the new paint can grip.
- Repair Damage: Use epoxy putty to fill any chips or cracks, following the product’s instructions. Sand the repair smooth and flush with the tub surface once dry.
- Sand for Adhesion: This is a critical step. Use 400-600 grit wet/dry sandpaper to scuff the entire tub surface. The goal is a dull, rough texture for the paint to adhere to. Some kits include an etching powder for this.
- Final Clean-up: Rinse away all sanding dust. Once dry, wipe the entire surface with a tack cloth to pick up any fine particles for a flawless finish.
Step 4: Mask and Prime the Tub
Protect surrounding areas and apply the bonding agent.
- Masking: Use high-quality painter’s tape to carefully mask off all fixtures and the surrounding tile or wall. Press the tape firmly to prevent bleed-through.
- Apply Primer: Apply the bonding agent or primer included in your kit according to the instructions. This layer is crucial for creating a strong bond between the old surface and the new topcoat. Apply it thinly and evenly.
Step 5: Mix and Apply the First Coat
Now the change begins.
- Mixing: Carefully follow the mixing instructions for your two-part epoxy or acrylic kit. Precise ratios and thorough stirring are essential. Once mixed, you have a limited “working time” (usually 4-6 hours).
- Application: Use a high-quality foam roller for large surfaces and a small paintbrush for corners. Apply a thin, even first coat, maintaining a “wet edge” to avoid lap marks. The first coat may look transparent; this is normal.
Step 6: Apply the Second Coat
Follow your kit’s instructions for drying time between coats (typically 1-2 hours), when the surface is tacky but not wet. Apply the second coat using the same technique, focusing on full, even coverage. Modern coatings are often self-leveling, which helps minimize roller marks.
Step 7: Curing and Finishing Touches
Patience is key in this final stage.
- Remove Tape: About an hour after the final coat, carefully remove all painter’s tape at a 45-degree angle.
- Cure: The tub needs 24-72 hours to cure fully before use. Using it too soon will permanently damage the new finish.
- Re-install Hardware: Once cured, re-install the drain cover, faucet handles, and overflow plate.
- Apply Caulk: Apply a fresh bead of silicone caulk around the tub’s perimeter to seal the joint. Let it cure before exposing it to water.
DIY vs. Professional Bathtub Repainting
For bathtub repainting, you can use a DIY kit or hire a professional. Both have merits, and this comparison will help South Florida homeowners make an informed decision.
| Feature | DIY Bathtub Repainting (with kits) | Professional Bathtub Repainting (All Surface Refinishing) |
|---|---|---|
| Cost | $50 – $150 (for kit, excluding tools/safety gear) | $300 – $700 (all-inclusive, for a standard tub) |
| Time | 3-5 hours active work; 24-72 hours cure time before use | 3-5 hours active work; 12-24 hours cure time before use |
| Durability | Varies greatly; 1-5 years typical, prone to peeling/yellowing | 10-15 years with proper maintenance; highly durable, scratch-resistant |
| Finish Quality | Can be uneven, brush/roller marks, limited gloss, color matching issues | Smooth, glossy, like-new appearance, unlimited color options |
| Equipment Needed | Kit, plus separate purchase of safety gear, tools, ventilation | All specialized equipment and materials provided by professional |
| Warranty | Often none, or very limited (product defects only) | 5-year adhesion guarantee (All Surface Refinishing) |
| Color Options | Limited (usually white, bone) | Unlimited spectrum, custom color matching available |
| Chemicals | Strong fumes, requires careful handling | Strong fumes, handled by trained professionals with commercial ventilation |
The Pros and Cons of DIY Bathtub Repainting
The main appeal of DIY bathtub repainting is the low upfront cost. However, the risks often outweigh the benefits.
Pros:
- Low cost: Kits are significantly cheaper than professional services.
- DIY satisfaction: The pride of completing a project yourself.
Cons:
- High risk of mistakes: Poor prep or application leads to peeling, bubbling, and an uneven finish, often costing more to fix.
- Uneven finish: It’s difficult for an amateur to achieve a smooth, glossy finish without brush or roller marks.
- Strong fumes: DIY kits produce potent fumes that require serious ventilation and safety gear.
- No warranty: You are responsible if the finish fails prematurely.
- Limited color options: Kits usually only come in white or bone.
When to Hire a Professional in South Florida
For a flawless, long-lasting finish, hiring a professional service like All Surface Refinishing is the superior choice, especially for properties in Aventura, Miami, Fort Lauderdale, and beyond.
Consider hiring a professional if:
- You need complex repairs: Professionals can seamlessly repair significant chips and cracks.
- You want a perfect, glossy finish: We use commercial-grade coatings and spray equipment for a factory-like finish.
- You lack time or experience: A pro can do the job quickly and correctly.
- You want guaranteed results: We offer a 5-year adhesion guarantee for your peace of mind.
- You want more options: We provide higher-quality coatings and can match any color.
Our 30+ years of experience and 14,000+ projects across South Florida mean we deliver a beautiful, durable result every time.
Maintaining Your Newly Repainted Bathtub
To ensure your newly repainted bathtub lasts for 10-15 years, proper care is essential. The durability of the new surface depends heavily on how you maintain it.
Cleaning and Care Tips
Maintaining a refinished tub is easy, but you must avoid certain products and habits:
- Use non-abrasive cleaners: Stick to mild, non-abrasive liquid cleaners like general bathroom cleaners or mild detergents. Avoid harsh chemicals, acids, ammonia, or bleach, which can damage the finish.
- Use soft sponges and cloths: Always use a soft sponge or microfiber cloth for cleaning. Never use abrasive scouring pads, steel wool, or stiff brushes.
- Clean regularly: Clean your tub often to prevent soap scum and mineral buildup, which makes cleaning easier and gentler on the finish.
- Repair nicks quickly: Address any small nicks or scratches promptly with a touch-up kit to prevent moisture from getting under the finish.
- Avoid bath mats with suction cups: Suction cups can trap moisture and lift the finish. If you use a mat, choose one without suction cups and remove it after each use to let the tub dry.
Following these simple instructions will keep your repainted bathtub looking glossy and new for years.
Frequently Asked Questions about Bathtub Repainting
Here are answers to common questions we get about bathtub repainting from our South Florida clients.
What types of bathtubs can be repainted?
Yes, most common bathtub materials can be successfully repainted, including:
- Porcelain
- Fiberglass
- Acrylic
- Cast Iron
The key is using the correct preparation process and a specialized coating for the specific material. The All Surface Refinishing team is equipped to handle all these tub types.
How long does a repainted bathtub last?
A professionally repainted bathtub can last 10 to 15 years with proper care. DIY results vary widely, from 1 to 5 years, depending on the kit and application skill. This longevity makes professional bathtub repainting a wise long-term investment.
What are the most common mistakes to avoid?
The biggest mistakes in DIY bathtub repainting are:
- Inadequate preparation: This is the #1 cause of failure. Not cleaning, sanding, and priming properly will cause the new finish to peel or bubble.
- Poor ventilation: Refinishing fumes are strong and harmful. Not ensuring excellent airflow can cause health issues.
- Rushing the process: Not allowing proper drying time between coats or full curing time (24-72 hours) before use will ruin the finish.
- Improper application: Applying coats too thickly leads to drips and an uneven finish. Using cheap tools can also ruin the look.
- Skipping repairs: Painting over chips or cracks without filling them first results in an unsightly, weak finish.
Get a Flawless Finish for Your Bathtub in South Florida
Bathtub repainting is a fantastic, budget-friendly project that dramatically updates your bathroom. Whether you choose DIY or a guaranteed professional result, a sparkling new tub surface is within reach.
For homeowners and property managers in Aventura, Bal Harbor, Boca Raton, Boynton Beach, Broward County, Carol City, Coconut Creek, Coconut Grove, Cooper City, Coral Gables, Coral Springs, Cutler Ridge, Dade County, Dania Beach, Davie, Deerfield Beach, Delray Beach, Fisher Island, Fort Lauderdale, Fort Pierce, Gold Coast, Golden Beach, Greenacres, Hallandale Beach, Hialeah, Hillsboro Beach, Hobe Sound, Hollywood, FL, Homestead, Indian River County, Indiantown, Islamorada, Ives Estates, Jensen Beach, Jupiter, Jupiter Island, Kendall, Key Biscayne, Key Largo, Key West, Lake Worth, Lauderdale By The Sea, Lauderdale Lakes, Lauderhill, Lazy Lake, Lighthouse Point, Loxahatchee, Marathon, Margate, Martin County, Miami, Miami Beach, Miami Lakes, Miami Shores, Miami Springs, Miami-Dade County, Miramar, North Bay Village, North Lauderdale, North Miami, North Miami Beach, North Palm Beach, Oakland Park, Palm Beach, Palm Beach County, Palm Beach Gardens, Palm City, Parkland, Pembroke Pines, Perrine, Port Saint Lucie, Port Salerno, Saint Lucie County, Sea Ranch Lakes, Sebastian, Southwest Ranches, Stuart, Sweetwater, Tamarac, Vero Beach, Wellington, FL, West Miami, West Palm Beach, Weston, and Wilton Manors looking for a perfect, long-lasting finish without the hassle, All Surface Refinishing provides expert bathtub repainting services. We bring our 30+ years of expertise and 14,000+ completed projects to your door, offering cost-effective, fast, and high-quality changes.
Get a free quote for your bathtub repainting project today and find out how we can revitalize your bathroom!
