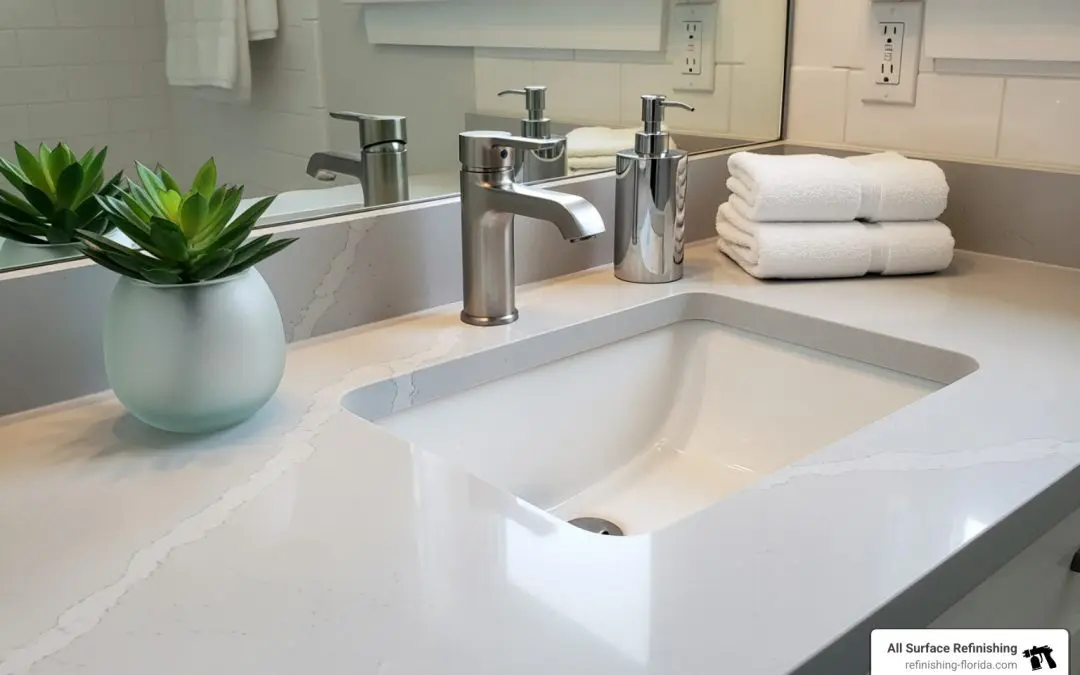
Why a Bathroom Counter Makeover is the Smartest Upgrade You Can Make
A Bathroom counter makeover is a cost-effective way to dramatically update your space without the expense of a full replacement. You have multiple options for changing dated laminate, chipped tile, or worn cultured marble.
Quick Answer: Your Bathroom Counter Makeover Options
- Painting with epoxy or marine enamel – Lasts 2-5 years, costs $25-50
- Faux marble or granite finishes – High-end look for under $30
- Contact paper application – Renter-friendly, costs $10-20 per roll
- Wood butcher block – Farmhouse style for $50-200
- Concrete overlay – Modern industrial look for under $50
- Professional refinishing – Saves 50% vs. replacement, lasts 10-15 years
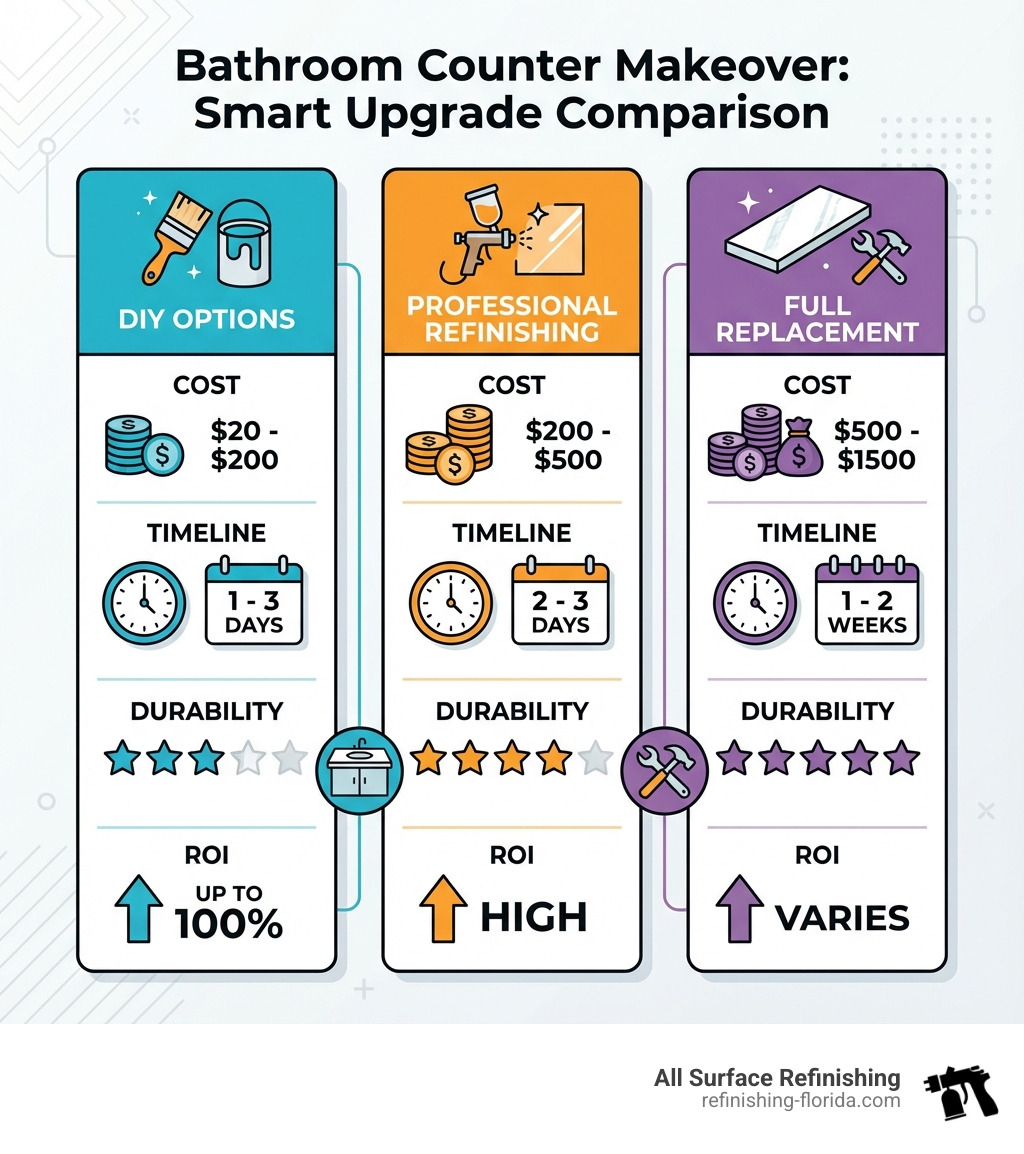
DIY makeovers can save homeowners up to 70% compared to professional installations, while countertop updates often deliver up to 100% ROI. While replacement costs $200 to $1,500, DIY options can transform your space for as little as $20.
Over 60% of homeowners now tackle DIY bathroom projects, with countertop makeovers topping the list. You can achieve results that rival expensive materials like granite or quartz without the demolition mess or four-figure price tags.
I’m Frank Hernandez, President of All Surface Refinishing. I’ve spent over a decade helping South Florida homeowners with professional refinishing. While DIY Bathroom counter makeover projects can deliver impressive results, understanding all your options helps you choose the best approach for your situation.
Bathroom counter makeover terms explained:
- Countertop Refinishing & Resurfacing Services
- countertop refinishing Coral Springs
- countertop resurfacing Miami
Preparing Your Countertop for Any Makeover
Before choosing colors and finishes, proper preparation is the most critical step in any bathroom counter makeover. Without it, even the best materials will fail. Think of it as priming a canvas before painting.

Here’s how to get your countertop ready:
- Clear the Deck: Remove everything from the countertop, including toiletries and decor. For a professional finish, remove the faucet and drain hardware to ensure complete coverage without awkward cut-ins.
- Deep Clean and Degrease: Scrub the surface thoroughly with a strong cleaner like Comet or baking soda to remove invisible grime and soap scum. Use products like Lime Away for tough stains. Rinse well and wipe clean. This step is non-negotiable for adhesion.
- Repair Imperfections: Fill any chips, scratches, or holes with wood filler or spackling compound. Once dry, sand them smooth for an even surface. Caulk any gaps along the sink or between the countertop and wall.
- Sand for Adhesion: This is crucial for glossy surfaces like laminate or cultured marble. Use 120-200 grit sandpaper to lightly scuff the entire surface until it’s dull. This creates a texture for the new coating to grip. Wipe away all dust with a tack cloth.
- Masking Off: Use painter’s tape and plastic sheeting to protect your sink (if not painting it), walls, vanity cabinets, and flooring from paint or coatings.
For more detailed information on preparing your surfaces, you can explore our Countertop Refinishing & Resurfacing Complete Guide.
Your Step-by-Step Guide to a DIY Bathroom Counter Makeover
With your countertop prepped, let’s explore popular and budget-friendly DIY bathroom counter makeover options. We’ll walk you through the general steps for each method.

Painting: The Easiest Bathroom Counter Makeover
Painting is the quickest, most budget-friendly way to achieve a dramatic change, perfect for covering outdated colors.
How to Paint Your Existing Bathroom Vanity Countertop:
- Choose Your Paint: Use specialized paints for high-moisture areas.
- Rustoleum Marine Topside Paint: An oil-based enamel that is self-leveling and dries to a hard, durable finish.
- Rust-Oleum Tub And Tile Refinishing Kit: A two-part epoxy that creates a very hard, glossy finish.
- Application is Key: Use a high-density foam roller for flat surfaces and foam brushes for edges. Apply multiple thin coats (2-4) rather than one thick coat to avoid bubbles and drips.
- Drying and Curing: Be patient. Dry time is when the paint is no longer tacky (hours to days). Cure time is when it fully hardens for maximum durability (a week or more). Wait the full cure time before normal use.
- Painting the Sink: You can paint an integrated sink to hide scratches or discoloration. Be aware that constant water exposure may cause paint to wear faster than on the countertop, but touch-ups are usually easy.
For a comprehensive guide, check out A guide to painting countertops. For a professional touch, All Surface Refinishing offers Sink Vanity Refinishing & Repair services.
Faux Finishes: A High-Impact Bathroom Counter Makeover
Faux finishes mimic natural stone like marble or granite for a fraction of the cost.
What materials can be used to create a faux marble countertop effect?
To create a faux marble look, you’ll need primer, latex paints (white, grays, black), a sea sponge, a feather, small brushes, and a two-part epoxy sealant like SuperGlaze or EnviroTex Lite.
- Build Your Base: After prep, apply a base coat of white or light gray paint.
- Create the Veins: Use a feather dipped in darker gray paint to lightly drag thin, irregular lines across the surface. Mist with water and use a brush to soften and spread the lines for a natural look. Dab with a damp sponge to soften any harsh lines.
- Add Depth: Use a sea sponge to dab lighter shades of gray or white around the veins.
- Seal with Epoxy: This step is key for durability and a high-gloss finish. Ensure the paint is completely dry (24-48 hours).
- Prep: Protect your workspace and ensure the counter is level.
- Mix: Warm the epoxy bottles in water to reduce bubbles. Follow mixing instructions precisely to ensure proper curing.
- Pour and Spread: Pour the epoxy and spread it evenly with a putty knife, letting it run over the edges.
- Finish: Use a small brush for edges and a torch or your breath to pop bubbles. Allow the epoxy to cure for a full 3 days before use.
For more inspiration, see this DIY Faux Marble Countertop to Fit $30 Budget | Remodelaholic.
Using Contact Paper for a Quick, Reversible Update
Contact paper is the ultimate budget-friendly, commitment-free solution for a bathroom counter makeover, ideal for renters.
Pros of Using Contact Paper:
- Budget-Friendly & Reversible: Cheap and won’t damage the underlying surface.
- Easy & Quick: Can be applied in a few hours with no special skills.
- Variety: Available in countless patterns like faux marble, granite, and wood.
Cons of Using Contact Paper:
- Durability: Prone to scratches, tears, and peeling at the edges.
- Heat Sensitivity: Hot tools can melt or scorch the surface.
- Water Resistance: Standing water can cause the adhesive to loosen.
- Imperfections Show: Deep scratches or grout lines may show through.
Application Tips for Contact Paper:
- Prep: Ensure the countertop is clean, dry, and smooth. Fill any deep flaws.
- Apply: Measure and cut the paper. Slowly peel the backing while smoothing the paper onto the surface with a squeegee to push out air bubbles. A light mist of soapy water on the counter can help with positioning.
- Curves: Use a hairdryer to gently heat the paper around curves and corners, making it more pliable.
- Trim & Seal: Use a craft knife to trim excess paper. Apply a thin bead of waterproof caulk around the sink and wall edges to prevent water from seeping underneath.
Achieving a High-End Look: Wood and Concrete Styles
For a more substantial aesthetic, materials like butcher block or a faux concrete finish can provide a custom, high-end look on a budget. These are great options for adding modern, industrial, or farmhouse charm to South Florida bathrooms.
Incorporating Butcher Block
Butcher block countertops offer warmth and a natural feel that complements many styles.
How can I incorporate butcher block into a bathroom countertop design on a budget?
- Source Wood: Find butcher block panels at home improvement stores or IKEA. Wood veneer plywood or poplar boards are even more budget-friendly options.
- Cut to Size: Measure your vanity and cut the panel. If using boards, glue and clamp them together. Use a jigsaw and your sink’s template to cut the sink opening.
- Stain (Optional): Apply a wood stain like Minwax Provincial to change the tone. Use a pre-stain conditioner for even absorption.
- Seal for Moisture (CRITICAL!): This step is non-negotiable in a bathroom. Apply 3-4 coats of a waterproof sealant like water-based Minwax Polycrylic or marine-grade Waterlox Finish, which is extremely durable and waterproof.
- Installation: Secure the top to the vanity with construction adhesive or screws. Apply clear silicone caulk where the wood meets the sink and walls to create a watertight seal.
For a detailed guide, check out DIY Wood Bathroom Countertop.
Creating a Faux Concrete Finish
A faux concrete finish offers a modern, industrial look and is surprisingly affordable.
How can I incorporate concrete into a bathroom countertop design on a budget?
- Choose Your Mix: Use a concrete overlay mix like Ardex or Henry’s Feather Finish. This project can often be done for under $50.
- Prepare the Surface: Your existing countertop must be clean, dry, and lightly sanded for good adhesion.
- Apply in Thin Layers: Mix the product and apply it in very thin layers with a trowel, building up the surface gradually.
- Sand Between Coats: Let each layer dry, then sand it smooth before applying the next for a polished look.
- Seal for Protection: Once you achieve the desired smoothness, apply a high-quality concrete sealer to protect the surface from moisture and stains.
Common Mistakes to Avoid (and How to Fix Them)
A bathroom counter makeover is exciting, but a few common missteps can ruin your project. Here’s how to avoid them.
- Improper Surface Preparation: Skipping cleaning, sanding, or repairs will cause poor adhesion and peeling.
- Fix: The only real fix is to strip the coating and start over. Don’t skip prep!
- Rushing the Process: Applying coats too quickly or not allowing proper dry/cure times leads to bubbles, drips, and a weak finish.
- Fix: Slow down and follow all product instructions for timing.
- Using the Wrong Sealant or Paint: Standard wall paint won’t hold up in a bathroom. It will quickly deteriorate.
- Fix: Use products made for the job: marine enamel, two-part epoxies, or marine-grade wood sealants.
- Ignoring Cure Times: Dry time is not cure time. Using the counter before it’s fully cured can cause permanent scratches and dents.
- Fix: Plan ahead and wait the full recommended cure time (often 3-7 days).
- Uneven Epoxy Application: Improper mixing or spreading of epoxy can lead to sticky spots or a dull finish.
- Fix: Mix precisely per instructions. If you have sticky spots, you may need to sand down and reapply.
- Unrealistic Durability Expectations: A DIY finish is not as tough as granite. Expecting it to be can lead to disappointment.
- Fix: Understand your chosen method’s limitations. Be gentle, use trivets for heat, and clean with mild products.
DIY vs. Professional Refinishing
You’ve seen the incredible possibilities for a DIY bathroom counter makeover, but sometimes, a professional touch is exactly what you need. When should you tackle it yourself, and when is it best to call in the experts? Let’s compare.
| Feature | DIY Makeover (Paint, Faux, Contact Paper) | Professional Refinishing (e.g., All Surface Refinishing) |
|---|---|---|
| Cost | $20 – $200 (materials only) | $200 – $500 (saves 30-50% vs. replacement) |
| Durability | 2-5 years (paint), Temporary (contact paper), 1-5 years (faux epoxy) | 10-15 years with proper care |
| Time Investment | 1-3 days (DIY labor + cure time) | 1-2 days (service), 24-72 hours (light use) |
| Finish Quality | Good to excellent (depends on skill) | Factory-smooth, consistent, high-end look |
| Longevity | Moderate, may require touch-ups | Excellent, long-lasting |
| Mess & Hassle | Moderate (DIY prep, fumes, cleanup) | Minimal (professional masking, contained process) |
| Warranty | None | Often includes adhesion warranty |
| Materials | Specialized paints, epoxy, contact paper, wood, concrete mix | Proprietary bonding agents, durable acrylic coatings |
| Expertise | Requires learning, trial & error | Decades of experience, specialized techniques |
When to DIY:
If you’re on a tight budget, enjoy hands-on projects, or need a temporary solution (for a rental or until a full remodel), DIY options are fantastic.
When to Call a Professional (like us!):
For maximum durability, a flawless factory-like finish, and long-term value, professional refinishing is the superior choice. Our team at All Surface Refinishing uses proprietary bonding agents and durable acrylic coatings to give your countertop a stunning, like-new appearance that lasts 10-15 years. This process saves 30-50% compared to replacement, avoids demolition mess, and allows light use within 24-72 hours.
If you’re in Miami, Coral Springs, or anywhere across South Florida, and looking for a truly lasting and beautiful bathroom counter makeover, consider professional Countertop Resurfacing Miami.
Frequently Asked Questions about Bathroom Counter Makeovers
Here are answers to the most common questions we get about DIY bathroom counter makeover projects.
How long do DIY bathroom countertop makeovers typically last?
The lifespan depends on the method, prep quality, and maintenance.
- Painted Countertops (Epoxy/Marine Enamel): Can last 2 to 5 years if prepped and cured properly. They are generally a temporary fix until a full remodel.
- Faux Finishes with Epoxy Resin: When sealed with a quality two-part epoxy, these are very durable and can last for several years.
- Contact Paper: The least durable option, lasting a few months to a year or two. Best for temporary updates.
- Wood (Butcher Block): If sealed with a marine-grade sealant and maintained, wood can last many years. Vigilant sealing against moisture is key.
- Faux Concrete Overlay: Properly sealed overlays are quite durable and can last several years.
Daily use, cleaning habits, and protecting the surface from heat and sharp objects will significantly impact longevity.
What are the best types of paint or sealants for bathroom countertops?
For durability in a humid bathroom, use products designed for moisture resistance:
- Epoxy-Based Paints: Kits like the Rust-Oleum Tub And Tile Refinishing Kit create a hard, glossy, water-resistant surface.
- Marine Enamel: Products like Rustoleum Marine Topside paint are oil-based enamels known for an extremely hard, durable finish.
- Pour-On Two-Part Epoxy Resin: For faux finishes, a clear epoxy like SuperGlaze or EnviroTex Lite provides a thick, high-gloss, durable protective layer.
- Waterproof Sealants for Wood: For wood countertops, marine-grade sealants like Waterlox or multiple coats of Polycrylic are essential to prevent water damage.
The key is their superior water resistance and ability to form a hard, protective shell.
Can I paint my integrated sink and countertop unit?
Yes, you can paint an integrated sink and countertop unit, but there are important considerations:
- Prep is Key: The sink needs the same thorough cleaning, degreasing, and sanding as the countertop for proper adhesion.
- Durability Concerns: The sink bowl experiences constant water and scrubbing, making the paint more prone to wear and chipping over time compared to the countertop. Touch-ups may be needed.
- When to Paint: Painting is great for improving the appearance of a discolored or scratched sink. If your sink is in good condition, you might choose not to paint it, as the original finish is often more durable.
- Product Choice: Use the same specialized epoxy or marine enamel paints recommended for the countertop.
Conclusion
A bathroom counter makeover is a powerful tool for changing your bathroom’s look and feel without breaking the bank. From painting and faux finishes to contact paper, wood, and concrete overlays, the options for a budget-friendly DIY update are vast and inspiring. We hope this guide has equipped you with the knowledge and confidence to tackle your next home improvement project.
While DIY methods offer incredible savings and personal satisfaction, for a truly flawless, durable, and long-lasting finish, professional refinishing is an investment that pays dividends. At All Surface Refinishing, we are Florida’s trusted expert in bathtub, countertop, and cabinet refinishing, resurfacing & painting. With 30+ years experience and 14,000+ projects, we offer cost-effective, fast, and high-quality changes for kitchens and bathrooms across South and Southwest Florida, including Aventura, Boca Raton, Coral Springs, Fort Lauderdale, Miami, Pembroke Pines, and West Palm Beach.
Ready to explore how we can bring your bathroom vision to life with a stunning, professional finish? Learn more about our professional countertop services today!
