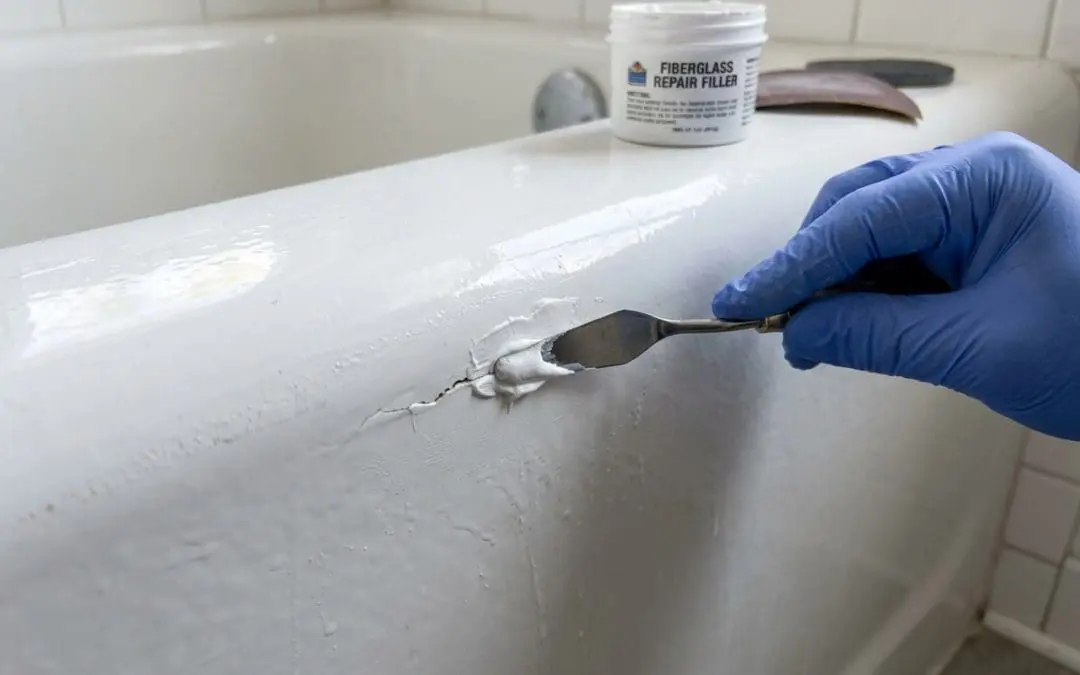
Identifying the Damage: Is Your Tub Crack Superficial or Structural?
Before you run to the hardware store in Boca Raton or Fort Lauderdale, you need to know what kind of monster you’re fighting. Not all cracks are created equal. Some are just “wrinkles” in the tub’s skin, while others are “broken bones” that threaten your home’s subfloor. Fiberglass units are essentially a composite sandwich. The base is a mixture of polyester resin and glass fibers, which provides the structural “bones.” On top of that is the “gel coat,” a thin layer of pigmented resin that gives the tub its color and smooth, waterproof finish.
In the humid climate of South Florida—from the coastal homes in Bal Harbor to the suburban estates in Parkland—this gel coat is under constant stress from temperature fluctuations and the weight of daily use. Most damage starts in that outer layer, but if left unaddressed, it can compromise the entire fixture.
| Damage Type | Visual Characteristics | Severity | Cause |
|---|---|---|---|
| Hairline Cracks | Thin, single lines; barely catch a fingernail. | Superficial | Thermal expansion or aging gel coat. |
| Spiderweb Cracks | A cluster of tiny cracks radiating from a center point. | Moderate | Impact (dropped a heavy shampoo bottle) or localized stress. |
| Stress Cracks | Long, straight cracks often found near the floor or corners. | High | Lack of support; the tub is flexing under weight. |
| Structural Hole | Visible gap or “spongy” feeling when stepped on. | Critical | Severe impact or long-term fatigue; likely leaking. |
If you step into the tub and hear a “crunch” or feel the floor dip, you aren’t just dealing with a cosmetic issue. That flexing is the #1 reason why repairing crack in fiberglass tub projects fail—if the tub keeps moving, the patch will eventually pop right out. Statistics show that tubs over 10 years old commonly show these stress cracks due to normal wear on the gel coat. This is particularly prevalent in high-traffic bathrooms in busy households in Hialeah or Pembroke Pines.
Essential Tools and Materials for Repairing Crack in Fiberglass Tub
If you’ve decided to tackle this as a DIY bathroom project, preparation is your best friend. You can’t just slap some duct tape on it and call it a day (well, you could, but we wouldn’t be friends anymore).

To do a professional-grade patch, you’ll need:
- Fiberglass Repair Kit: Look for one that includes two-part epoxy or polyester resin, a hardener (catalyst), and fiberglass cloth.
- Abrasives: 80-grit sandpaper for “toothing” the surface and 220-grit (plus 400 or 600-grit wet/dry) for finishing.
- Cleaning Agent: Pure acetone or high-strength rubbing alcohol to remove soap scum and oils.
- The “Stop-Drill” Bit: A small 1/8-inch or 1/4-inch drill bit.
- Safety Gear: Rubber gloves, safety goggles, and a respirator. Fiberglass dust is no joke for your lungs, and the resins have strong fumes. Following OSHA guidance on fiberglass and synthetic vitreous fibers, exposure can irritate the eyes, skin, and upper respiratory tract. Always work in a well-ventilated bathroom, perhaps opening a window to let in that Florida breeze.
- Applicators: A small putty knife and a cheap disposable paintbrush.
Step-by-Step Guide to Patching Your Fixture
Alright, let’s get to work. Whether you’re in a condo in Aventura or a family home in Wellington, FL, the physics of fiberglass remain the same.
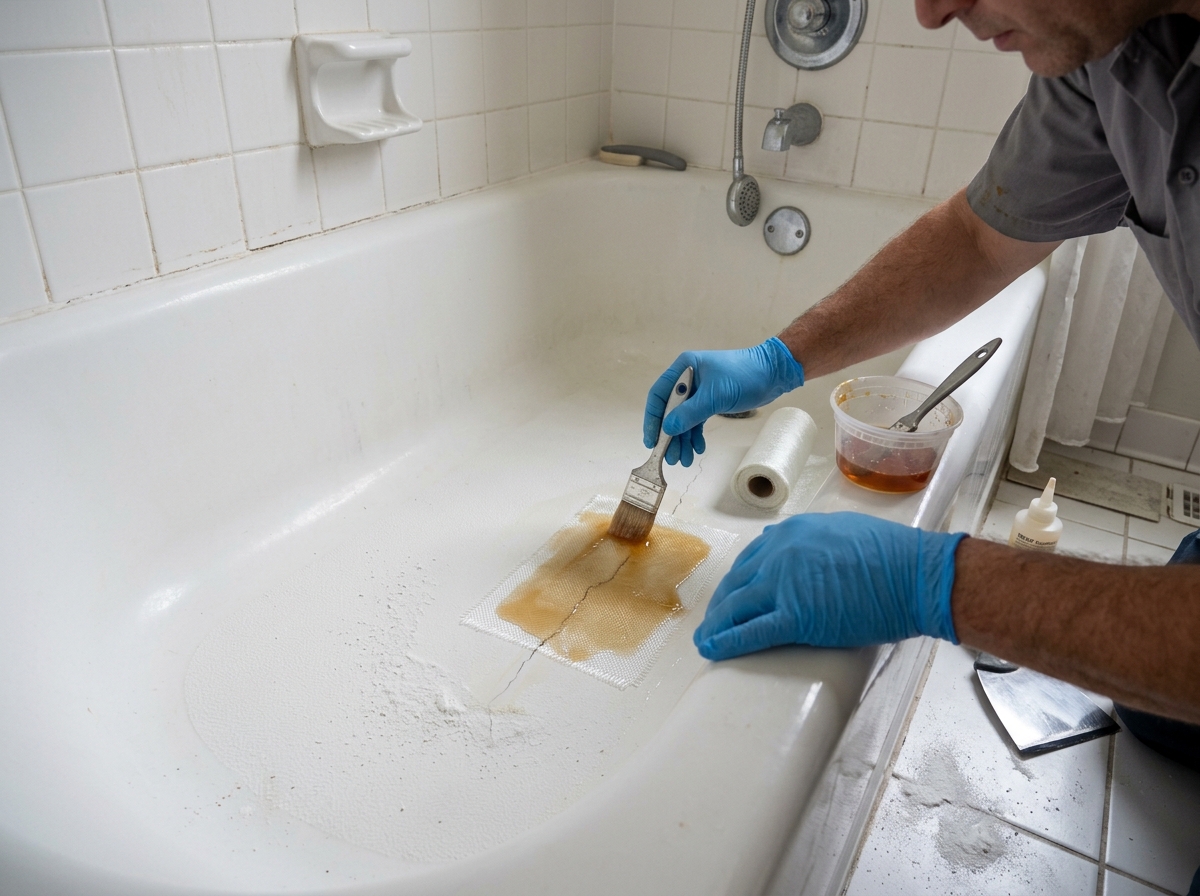
Preparing the Surface for Repairing Crack in Fiberglass Tub
- Dry it Out: This is the step most people skip. If there is water trapped in the crack, your resin won’t stick. Use a hairdryer to ensure the area is bone-dry.
- The Stop-Drill: This is a pro secret. Drill a tiny hole at the very beginning and the very end of the crack. This breaks the “stress line” and prevents the crack from spreading further under the patch. Research shows drilling these holes 1/8 inch beyond the crack ends prevents 90% of future propagation.
- Sand the Zone: Use your 80-grit sandpaper to sand a 2-3 inch radius around the crack. You need to remove the shiny gel coat to reveal the raw fiberglass underneath. If it isn’t rough, the bond won’t hold. Think of it like prepping a wall for paint in a Coral Gables historic home; the surface prep is 90% of the work.
- Clean with Acetone: Wipe the area down with acetone. This removes any lingering dust or body oils that would act as a “release agent” for your glue.
Applying the Patch for Repairing Crack in Fiberglass Tub
- Mix the Resin: Follow the kit instructions exactly. Usually, it’s a specific number of drops of hardener to a pool of resin. If you add too much, it gets brittle; too little, and it stays tacky forever.
- The First Coat: Paint a thin layer of resin over the crack and the sanded area.
- Layer the Cloth: Cut a piece of fiberglass cloth slightly larger than the crack. Lay it into the wet resin. Use your brush to “stipple” more resin over the cloth until it becomes transparent. A single layer of 9 oz fiberglass cloth provides about 0.017 inches of thickness. For floor cracks, we recommend 2-3 layers, alternating the direction of the weave for maximum strength.
- Remove Bubbles: Use your putty knife to gently squeegee out any air bubbles. Bubbles are weak spots.
- Cure and Sand: Let it sit for at least 24 hours. Once hard, sand it with 220-grit until it’s flush with the tub. Feather the edges of the patch so you can’t feel the transition between the old tub and the new material.
- Color Match: Most kits come with white or almond pigment. Mix small amounts to match your tub. For a truly seamless look, you might consider fiberglass-bathtub-resurfacing/ to cover the entire floor.
Addressing the Root Cause: Adding Support to Prevent Future Cracks
If your tub floor feels like a trampoline, your patch is just a band-aid on a broken leg. The crack happened because there’s a void between the tub and the subfloor.
In many South Florida homes, builders didn’t use a proper mortar bed. To fix this from the “top side,” some DIYers drill 1/4-inch holes around the crack and inject high-density, closed-cell expanding foam. Be careful—too much foam can actually lift the tub and cause more cracks! A better method, if you have access through a closet wall, is to slide in 2×4 bracing or pack the void with a stiff mortar mix.
DIY vs. Professional Refinishing: When to Call the Experts
We love a good DIY spirit, but let’s be honest: fiberglass repair is messy, smelly, and hard to make look “invisible.” Whether it’s a residential bathroom or a commercial facility in Fort Lauderdale, we provide the same level of excellence.
The DIY Reality: A kit costs $50, but the patch will likely look like a patch. It might last 2-5 years if you’re lucky. If the crack is structural or on a weight-bearing floor, DIY success rates drop to about 50%. You also have to deal with the risk of the patch failing and water leaking into your subfloor, which can lead to mold and the need to replace floor tiles.
The Professional Advantage: At All Surface Refinishing, we don’t just “patch.” We rebuild the structural integrity of the tub. Our process involves industrial-grade resins, professional color-matching, and a high-gloss finish that makes the repair indistinguishable from the rest of the tub. We serve areas from Jupiter down to Miami, providing a solution that can last 10-15 years.
If you’re dealing with multiple cracks or a tub that is dull and hard to clean, you should look into our services/bathtub/ for a full transformation. It’s significantly cheaper than the $3,000+ cost of a full replacement, which usually involves tearing out tile and plumbing.
Frequently Asked Questions about Fiberglass Tub Repair
How long does a fiberglass tub repair last?
A well-executed DIY repair on a non-structural area can last 2 to 5 years. However, if the tub continues to flex, it may fail in less than a year. Professional repairs, combined with proper support reinforcement, can easily last a decade or more.
Can I use my tub immediately after patching?
No! Most resins require 24 hours to cure to a touch-dry state, but they don’t reach full structural strength for 48 to 72 hours. Using the tub too soon will cause the patch to flex and delaminate.
Is it better to repair or replace a cracked tub?
If the tub is less than 20 years old and the damage is localized, repair and refinishing are almost always better. Replacement is a “nuclear option” that involves demolition, plumbing costs, and often replacing the surrounding tile. Unless the fiberglass is literally crumbling from age, we can usually save it.
What is the difference between a crack in an acrylic tub vs. a fiberglass tub?
While they look similar, acrylic tubs are vacuum-formed sheets of plastic reinforced with fiberglass, whereas fiberglass tubs are sprayed or molded resin. Acrylic is generally more durable, but when it cracks, it often requires a different type of structural adhesive. Fiberglass is more prone to “spiderwebbing” in the gel coat. Both can be professionally refinished by All Surface Refinishing to look like new.
Can this process be used for a jacuzzi or whirlpool tub?
Yes! We can repair cracks in jacuzzis and whirlpool jacuzzi tubs. The process is similar, though we take extra care around the jets and intake valves to ensure the structural integrity is restored without interfering with the plumbing components.
Quick Fiberglass Tub Crack Repair: DIY vs Professional Help
Repairing a crack in a fiberglass tub doesn’t have to be a nightmare. Whether you decide to try a DIY kit this weekend or call in the experts at All Surface Refinishing, the key is to act fast. Small cracks turn into big leaks, and leaks turn into expensive mold remediation.
If you’re in Boynton Beach, Delray Beach, or anywhere in Palm Beach, Broward, or Miami-Dade counties, we’re here to help. We’ve completed over 14,000 projects since 2011, and we’d love to make your bathroom look brand new again.
Ready for a permanent fix? Check out our Professional Bathtub Services and let’s get that tub back in tip-top shape!
