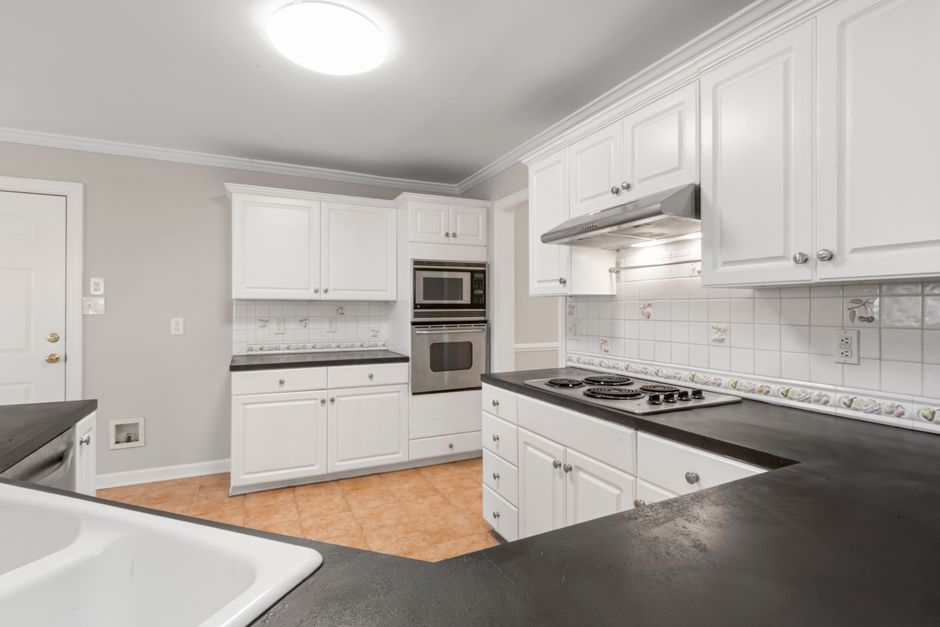
Is a Full Countertop Replacement Really Your Only Option?
If you’re wondering how to change kitchen countertops without replacing them entirely, the good news is you have several proven options — and most cost a fraction of full replacement.
Here’s a quick overview of your best choices:
| Method | Avg. Cost | Lifespan | DIY-Friendly? |
|---|---|---|---|
| Professional resurfacing/refinishing | Saves 30-50% vs. replacement | 15-20 years | No — pro recommended |
| Countertop paint or refinishing kit | $40-$150 | 3-10 years | Yes |
| Tile overlay | $20-$80/sq ft installed | 15+ years | Moderate |
| Peel-and-stick vinyl film | $9-$12/sq ft | 3-10 years | Yes |
| Contact paper | $20-$40 total | 1-2 years | Yes |
A full countertop replacement runs $12,800 to $21,200 on average — and that’s before hidden costs like plumbing, backsplash work, and disposal fees. For most homeowners and property managers, that’s simply not the budget they’re working with.
The good news? You don’t need to replace your countertops to make them look new again.
Whether your counters are chipped, stained, outdated, or just tired-looking, there are smart, budget-friendly ways to transform them — without the demolition, the mess, or the weeks of disruption.
I’m Frank Hernandez, President of All Surface Refinishing, and I’ve been helping South Florida homeowners and property managers find better, more affordable alternatives to full countertop replacement since 1996 — which means I know exactly which methods actually hold up and which ones fall short when it comes to how to change kitchen countertops without replacing them. In this guide, I’ll walk you through every option so you can make the best choice for your space and budget.
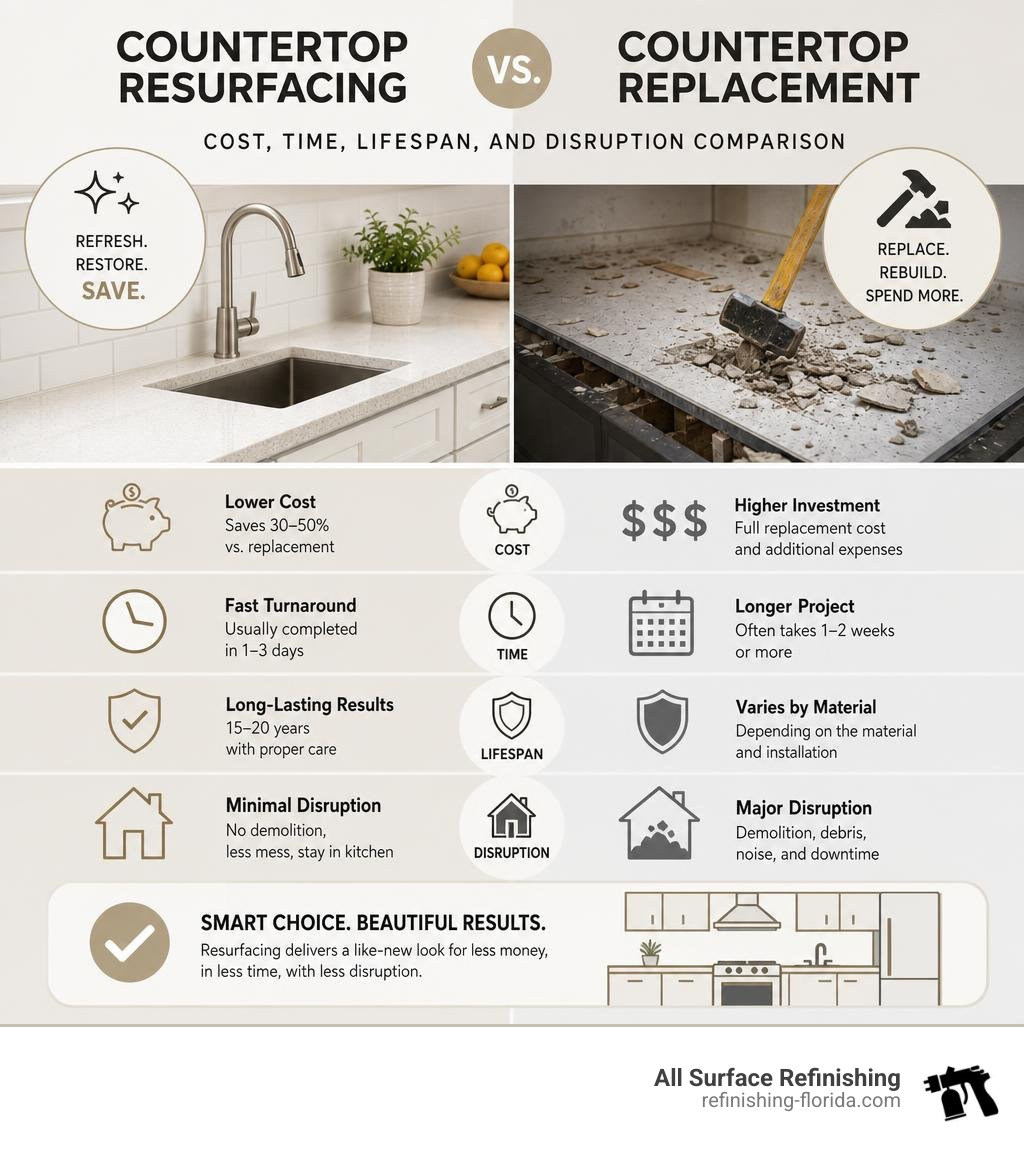
How to Change Kitchen Countertops Without Replacing: The Ultimate Guide
When homeowners in South Florida — from Miami and Fort Lauderdale up to West Palm Beach — think about updating their kitchens, they often jump straight to demolition. We have been conditioned to believe that the only way to get beautiful, modern kitchen surfaces is to rip out the old ones.
However, traditional countertop replacement is a major undertaking. It averages between $12,800 and $21,200, with high-end quartz costing $50 to $150 per square foot and granite running $90 to $150 per square foot. Beyond the sheer financial cost, there are other significant drawbacks to a complete tear-out:
- Landfill Waste: Ripping out perfectly solid laminate, tile, or solid-surface countertops sends hundreds of pounds of non-biodegradable material directly into Florida’s landfills.
- Kitchen Disruption: A complete replacement can leave you without a functioning kitchen sink for days, and the entire lead-time process (from templating to fabrication) often drags on for 3 to 6 weeks.
- Collateral Damage: Removing old countertops frequently damages the existing backsplash and can even compromise the structural integrity of your kitchen cabinets.
Learning how to change kitchen countertops without replacing them allows you to bypass these headaches entirely. By preserving the structurally sound “bones” of your existing counters, you can completely transform their aesthetic in a matter of hours or days rather than weeks. For more creative inspiration, check out these More info about creative countertop transformations.
Top Methods to Refresh Your Kitchen Surfaces
There is no one-size-fits-all solution when it comes to updating your countertops without a full replacement. The right choice for your kitchen depends on your budget, whether you own or rent, your DIY skill level, and the current condition of your surfaces.
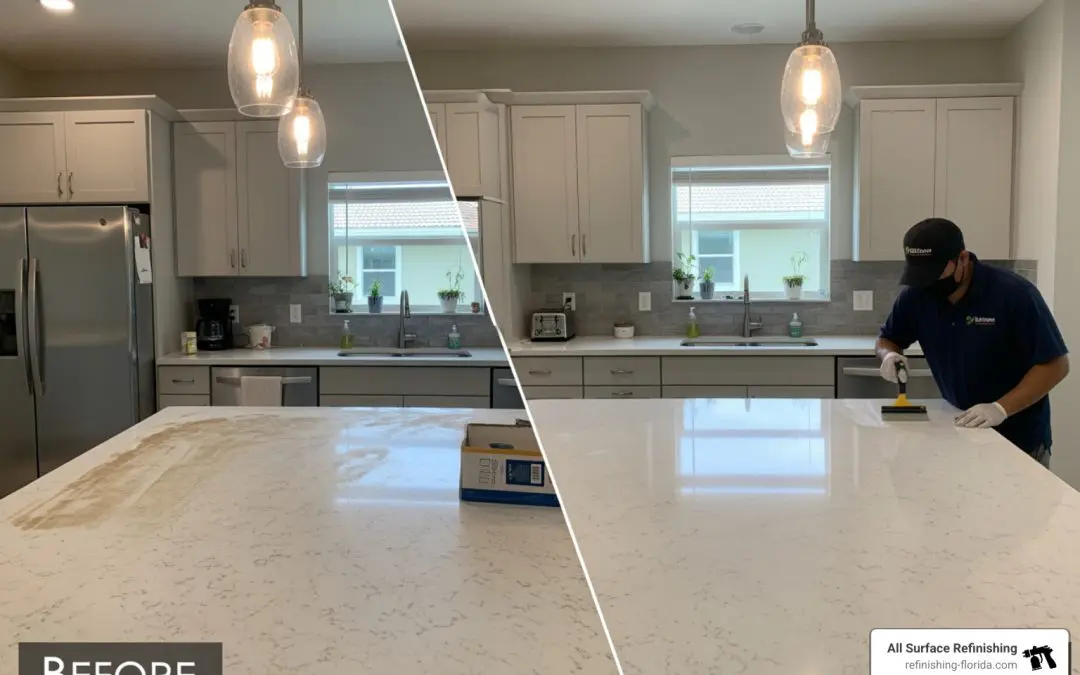
To help you compare your options, let’s break down the four most effective methods:
- Professional Resurfacing and Refinishing: The gold standard for homeowners seeking a permanent, stone-like finish without the stone price tag.
- Countertop Paint and Refinishing Kits: A budget-friendly DIY project that works well for patient weekend warriors.
- Tile Overlays: A highly durable, heat-resistant option that covers up dated laminate.
- Peel-and-Stick Vinyl Films: The ultimate low-cost, temporary fix for renters or those wanting a quick aesthetic change.
1. Professional Countertop Resurfacing and Refinishing
If you want a finish that looks and performs exactly like real stone but costs a fraction of the price, professional countertop refinishing is your best bet.
During this process, specialized technicians repair any existing damage (such as knife marks, burns, or chips) before applying a high-tech, multi-layered acrylic coating. This coating is chemically bonded to your existing surface using proprietary bonding agents. These bonding agents create a molecular fusion between the old countertop and the new finish.
Why It’s the Superior Choice:
- Incredible Durability: Unlike DIY paint, professional resurfacing creates a non-porous, highly durable surface that resists water, heat, and scratches.
- Realistic Stone Aesthetics: Utilizing multi-stone finishes, professionals can mimic the deep, speckled look of premium granite or quartz.
- 15-20 Year Lifespan: With proper care, a professionally refinished countertop will easily last up to two decades.
- Fast Turnaround: The entire process typically takes just 1 to 2 days, and you can return your kitchen to light service within 24 to 36 hours.
If you are a homeowner in Broward County, Palm Beach County, or Miami-Dade County, this method offers the absolute best return on investment. Read The complete guide to professional countertop resurfacing to see how this process can save you thousands of dollars.
2. Applying Countertop Paint and Refinishing Kits
For those who love a weekend DIY project, countertop paint kits have become incredibly popular. Brands offer complete systems that include a primer, mineral-based color paints designed to be sponged on to mimic stone veins, and a protective epoxy or acrylic topcoat.
The Pros:
- Cost-Effective: A complete kit typically costs between $70 and $150. A single kit can cover up to 35 square feet, which is usually enough for a standard kitchen.
- Beginner-Friendly: It requires no specialized tools. If you can use a paint roller and a sponge, you can complete this project.
- Customizable: You can control the veining and color depth to perfectly match your kitchen cabinets.
The Cons:
- Texture and Roller Lines: If the topcoat isn’t applied perfectly, you may end up with visible roller lines or a slightly textured, uneven surface.
- Moderate Lifespan: While it looks great initially, a painted countertop typically only lasts 3 to 5 years before it begins to show wear around high-use areas like the kitchen sink.
Want to learn how to tackle this yourself? Here is a step-by-step guide on How to paint Formica counters easily.
3. Installing Tile Overlays on Existing Surfaces
If you love a rustic, farmhouse, or classic European look, installing a tile overlay directly over your old laminate countertops is an excellent option.
This method involves laying ceramic, porcelain, or natural stone tiles directly over your existing countertop substrate. To ensure success, you must use a decoupling membrane over the laminate before spreading your mortar. This prevents any shifting or cracking in the tile grout lines as your kitchen cabinets naturally expand and contract with South Florida’s high humidity.
The Pros:
- Highly Heat Resistant: You can set hot pots and pans directly on ceramic or porcelain tiles without worrying about burning the surface.
- Excellent Durability: A properly installed and sealed tile countertop can easily last 15+ years.
- Hides Substrate Imperfections: Because tile is rigid, it easily masks minor warping or damage in the underlying laminate.
The Cons:
- Grout Line Maintenance: Grout is naturally porous, meaning it can harbor bacteria and stain easily if it isn’t sealed annually.
- Uneven Surface: Tile countertops do not provide the perfectly flat, smooth surface required for rolling dough or easily sliding heavy kitchen appliances.
If you already have tile counters that are structurally sound but look incredibly dated, you don’t have to tear them out either. Discover One simple way to refinish tile countertops to give them a modern, seamless look.
4. Using Peel-and-Stick Vinyl Films and Contact Paper
If you are renting an apartment in Coral Springs, Miami, or West Palm Beach, or if you simply need an ultra-budget aesthetic fix while saving up for a larger remodel, peel-and-stick architectural vinyl film is your best friend.
Unlike cheap, thin contact paper of the past, modern architectural vinyl films are thicker, heat-resistant up to certain temperatures, and feature realistic, high-definition prints of marble, concrete, and soapstone.
The Pros:
- Extremely Cheap: High-quality architectural vinyl films cost between $9 and $12 per square foot, making it easy to refresh a kitchen for under $150.
- 100% Removable: It can be peeled off without leaving sticky residue behind, making it completely renter-friendly.
- Instant Gratification: There is zero cure time. Once it’s squeegeed into place, your kitchen is ready to use.
The Cons:
- Difficult Installation: Eliminating air bubbles and wrapping seamless corners requires immense patience, a steady hand, and a heat gun.
- Vulnerable Seams: Water can seep under the seams around the kitchen sink, causing the adhesive to fail prematurely.
For more budget-friendly inspiration, check out these Budget-friendly DIY countertop refresh tips.
Step-by-Step Preparation and Application Best Practices
No matter which method you choose for how to change kitchen countertops without replacing them, your final results will live or die by your preparation work. 90% of all DIY countertop failures (such as peeling paint or bubbling vinyl) can be traced back to poor surface prep.
Essential Prep for How to Change Kitchen Countertops Without Replacing
Before you open a single can of paint or unroll any vinyl, you must prepare the surface. Follow these crucial steps:
- Deep Clean and Degrease: Kitchen counters accumulate a microscopic layer of cooking grease, oils, and soap scum over time. Scrub the entire surface twice using a heavy-duty degreaser or TSP (trisodium phosphate) cleaner.
- Remove Old Caulk: Use a utility knife to completely scrape away the old silicone caulk along the backsplash and around the sink. New finishes will not adhere to silicone.
- Repair Damage: Fill any deep scratches, knife marks, or chipped laminate edges using a high-quality polyester patch or epoxy wood filler. Once cured, sand it completely flat.
- Create a “Tooth” (Sanding): Smooth, glossy laminate is the enemy of adhesion. Use 120-grit to 220-grit sandpaper (or a liquid deglosser) to scuff up the surface. This creates a microscopic texture (or “tooth”) that allows primers and adhesives to bond securely.
- The Tape-Pull Test: Before applying your final finish, place a strip of strong painter’s tape on your prepped and primed surface, press down firmly, and pull it off. If the primer peels up with the tape, your surface is not clean enough to proceed.
For more detailed instructions on how to prep like a pro, read these DIY countertop resurfacing tips.
Protecting Your New Finish: Ventilation and Curing
When working with specialty countertop paints, epoxies, or professional-grade acrylic coatings, safety and environmental control are paramount.
Many of these high-performance coatings emit strong fumes (volatile organic compounds, or VOCs) during the application and curing stages. To protect yourself and your family:
- Cross-Ventilate: Set up box fans in your kitchen windows to pull air out of the home, and open doors to create a cross-breeze.
- Wear PPE: Always wear a respirator mask rated for organic vapors, safety goggles, and nitrile gloves.
- Upgrade Your Kitchen Ventilation: If your range hood is old, noisy, or vents directly back into the kitchen (recirculating), this project is the perfect time to upgrade to a ducted range hood with a rating of 600+ CFM. Proper ventilation not only keeps your air clean during the project but also prevents grease and moisture from settling on and damaging your fresh countertop finish in the future.
- Respect the Cure Time: Perhaps the biggest mistake DIYers make is rushing to put their coffee maker or microwave back on the counter. While a painted surface may feel dry to the touch in 24 hours, it can take a full 7 days to cure to its maximum hardness (and up to 30 days for heavy use). Putting heavy items on the surface too early will cause permanent imprints and peeling.
Comparing the Costs and Longevity of Countertop Updates
To help you determine which method offers the best value for your money, let’s look at a realistic breakdown of costs and expected lifespans.
- Contact Paper / Cheap Vinyl: Costs $20 to $40. Lasts 1 to 2 years. Best for temporary rental upgrades.
- DIY Countertop Paint Kits: Costs $70 to $150. Lasts 3 to 5 years. Great for budget-conscious homeowners willing to do the work.
- Professional Resurfacing: Saves 30% to 50% compared to a full replacement (typically costing a fraction of a new stone slab). Lasts 15 to 20 years. Offers the absolute best long-term value, durability, and luxury appearance.
- Tile or Thin Stone Overlays: Costs $25 to $70 per square foot installed. Lasts 10 to 25 years. A solid middle-ground if you want genuine stone or heat-resistant tile but have structurally sound cabinets that can support the extra weight. Learn more in this comprehensive Guide to countertop overlays.
Frequently Asked Questions
What is the most durable way how to change kitchen countertops without replacing?
Aside from a professional overlay, professional acrylic resurfacing is the most durable method. Because it utilizes industrial-grade bonding agents and hard acrylic coatings, it creates a seamless, non-porous surface that resists water, heat, and scratches for up to 20 years. For DIYers, a high-quality epoxy kit or a porcelain tile overlay offers the best durability.
Can you apply a new finish over laminate or tile countertops?
Yes! Laminate is actually one of the best substrates for resurfacing, painting, or tiling because it is incredibly stable and rigid. Tile countertops can also be professionally refinished; the process fills in and seals the porous grout lines, leaving you with a smooth, modern, easy-to-clean surface.
How long do refinished countertops last compared to replacement?
A professionally refinished countertop will last 15 to 20 years with proper care — which is comparable to the lifespan of laminate or solid surface replacements. DIY paint kits typically last 3 to 5 years, while temporary vinyl wraps last 1 to 3 years. To maximize lifespan, always use cutting boards, avoid placing hot pots directly on the surface, and clean only with non-abrasive liquid cleaners.
Conclusion
You don’t need to spend tens of thousands of dollars or live in a construction zone to get the kitchen of your dreams. Knowing how to change kitchen countertops without replacing them gives you the freedom to achieve a gorgeous, high-end look on a realistic budget.
If you are a homeowner or property manager in South or Southwest Florida — including Fort Lauderdale, Miami, Boca Raton, West Palm Beach, and the surrounding areas — let us do the heavy lifting.
At All Surface Refinishing, we bring over 30 years of experience and more than 14,000 successfully completed projects to your home. We can transform your outdated kitchen countertops, cabinets, and bathroom tiles in just 1 to 2 days, saving you up to 50% or more over replacement costs.
Ready to say goodbye to your dated countertops? Schedule a professional kitchen countertop refinishing service with All Surface Refinishing today, or call us for a free estimate!
