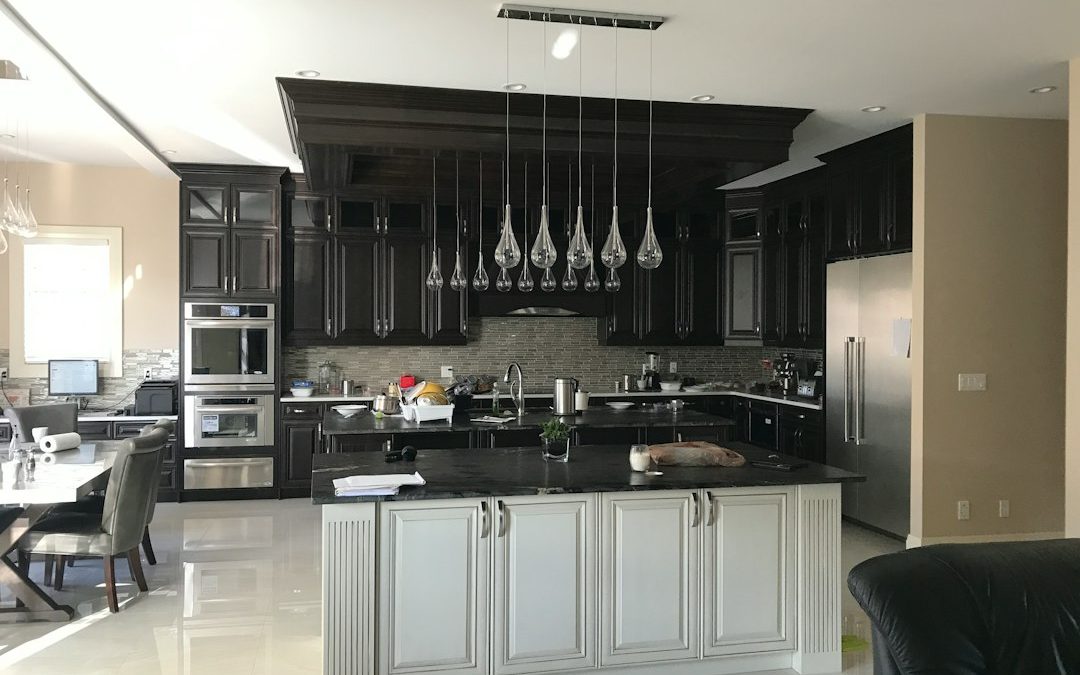
A Kitchen Cabinet Color Change Can Transform Your Kitchen Without Replacement
A kitchen cabinet color change is one of the fastest ways to make an outdated kitchen feel brighter, cleaner, and more current while keeping the cabinet boxes, layout, counters, and flooring you already have.
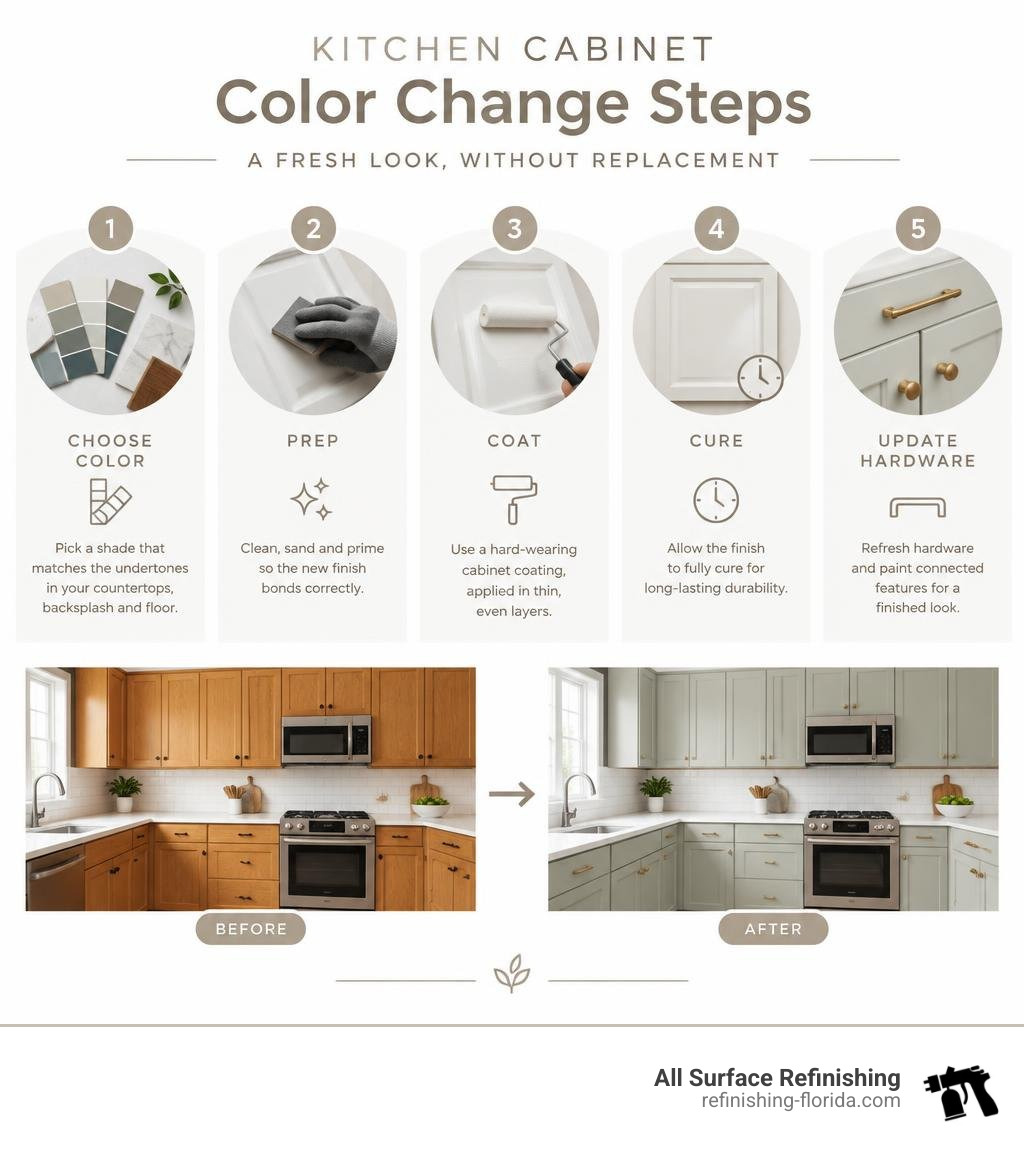
For a durable result, the key steps are simple:
- Choose a color that matches the undertones in your countertops, backsplash, and floor.
- Clean, sand, and prime cabinet doors and frames so the new finish bonds correctly.
- Use a hard-wearing cabinet coating, applied in thin, even layers.
- Update hardware and paint connected features, such as a pantry door or range hood, when needed for a finished look.
Light cabinet colors can reflect available light and open up a darker kitchen. In small kitchens, a lighter color on upper cabinets with a deeper shade on lower cabinets can add visual height while grounding the room. A well-prepared painted finish can also stand up to years of cooking, steam, and everyday use.
I’m Frank Hernandez, President of All Surface Refinishing, and I have more than a decade of hands-on refinishing experience, helping Florida property owners achieve a durable kitchen cabinet color change without the cost and disruption of replacement. In the sections ahead, I’ll explain how to plan the color, prepare the surfaces, avoid common failures, and maintain the finish.
Why a Kitchen Cabinet Color Change Outperforms Full Replacement
When homeowners want a fresh look, ripping out entire cabinet systems is rarely necessary. Full demolition is messy, expensive, and sends hundreds of pounds of solid wood and usable materials straight to local landfills. Deciding to update your cabinet color preserves the existing structural footprint while delivering a factory-smooth, modern look.
Professional refinishing saves between 30% and 50% compared to purchasing new cabinetry. Tearing out boxes often damages adjacent drywall, backsplashes, and expensive countertops. By recoating the existing casework, you eliminate supply-chain delays and avoid turning your home into an unlivable construction zone for weeks on end.
Preserving Functional Layouts and Cabinet Boxes
Many older homes in communities like Fort Lauderdale, Boca Raton, and Coral Gables feature sturdy, well-built solid wood cabinet boxes that outlast builder-grade replacements. If your current footprint works well for meal prep and workflow, throwing away durable casework makes little sense.
A professional cabinet color transformation allows you to maintain your existing footprint while updating the surface aesthetics. Keeping your current configuration minimizes downtime, allowing you to get back to cooking in days rather than waiting months for major kitchen remodeling and permits.
Coordinating Existing Appliance Space and Storage
A color transformation also offers the flexibility to blend modified storage zones into your existing cabinet run. For instance, if kitchen storage configurations are adjusted or updated, applying the same cohesive enamel ties all doors and drawer fronts directly into the surrounding oak frames. The entire layout appears intentionally designed from the start.

How to Choose the Perfect Cabinet Palette and Finishes
Selecting the right shade involves understanding room lighting and undertones. Warm lighting from incandescent fixtures highlights yellow, cream, and beige notes, while cool natural light from north-facing windows can make pure whites look clinical or slightly blue.
Before committing, look at curated palettes from major paint manufacturers to study how pigments react to varied lighting environments.
Planning Your Kitchen Cabinet Color Change Around Existing Surfaces
The golden rule of cabinet design is matching undertones with the fixed surfaces you intend to keep:
- Countertops: Look closely at the subtle veining in quartz or flecks in granite. If your counters have warm gold or taupe flecks, choose warm whites, creamy ivories, or earthy greens. Cool gray veining pairs naturally with crisp whites, charcoal, or deep navy.
- Backsplash & Tile: Avoid competing undertones. A beige travertine backsplash will clash with cool, blue-toned grays, whereas rich olive or warm off-white creates seamless balance.
- Flooring: Warm honey oak flooring benefits from contrasting cool neutrals, deep teals, or soft sage, which temper orange wood tones without clashing.
If you are updating surrounding fixtures, integrating custom design cues from established kitchen design projects can help tie contrasting architectural elements together.
Two-Tone Strategies and Color Trends for 2025 and 2026
Two-tone cabinetry remains one of the most effective ways to add personality and visual space to compact kitchens:
- Light Uppers, Grounded Lowers: Painting upper cabinets in soft white, linen, or warm alabaster while finishing lower base cabinets in deep forest green, navy, or charcoal draws the eye upward, making standard ceilings feel taller.
- Muted, Dusty Tones: Moving through 2025 and into 2026, earthy neutrals have taken center stage. Dusty pink uppers combined with muted olive bases function like neutrals while providing sophisticated, timeless character.
- Accent Islands: For open-concept homes in Delray Beach or Boynton Beach, keeping perimeter cabinets neutral while coating the center island in deep espresso or oceanic teal creates an anchored focal point.
The Step-by-Step Cabinet Preparation and Painting Process
A lasting cabinet finish depends entirely on mechanical prep and professional chemical bonding.

- Disassembly & Tagging: Remove all doors, drawer fronts, and hinges. Number every piece systematically so hinges and doors align back into their exact original frames during reinstallation.
- Decontamination & Degreasing: Kitchens accumulate grease, oils, and cooking residues. Clean every square inch thoroughly with Trisodium Phosphate (TSP) or a specialized surface degreaser. Skipping this step prevents primer from adhering.
- Sanding & Grain Preparation: Scuff-sand the factory clear coat using 150- to 220-grit sandpaper to create a mechanical profile. On open-grain woods like honey oak, apply a grain-filling compound if a modern, glass-smooth texture is desired.
- Adhesion Priming: Apply a high-adhesion bonding primer to seal the wood, block tannin bleed-through, and create an anchor layer for topcoats.
- Topcoat Application: Apply thin, uniform coats of premium cabinet coating using professional HVLP sprayers to eliminate brush strokes and roller stipple.
Surface Preparation and Primer Selection for Durable Adhesion
Using standard wall latex on cabinetry is a recipe for peeling paint. Cabinets need industrial-grade coatings formulated to resist hand oils, moisture, and impact. Applying specialized commercial grade cabinet paint—such as waterborne polyurethanes, conversion varnishes, and catalyzed urethanes—delivers the hard finish required for heavy daily kitchen use.
Hardware Coordination and Existing Built-In Accents
A fresh color palette provides the perfect opportunity to update worn hinges and pulls. Modernizing with matte black bar pulls or brushed champagne bronze hardware instantly updates traditional raised-panel doors. To maintain visual continuity, consider coating surrounding built-ins—such as custom range hoods, pantry doors, or built-in wine racks—in the same durable enamel finish.
Budgeting, Hardware Coordination, and Visualizer Planning
Budgeting for a kitchen refresh requires weighing material costs, professional labor, and the quality of the final finish.
Estimating the Cost of a Kitchen Cabinet Color Change
Professional spray application costs more upfront than attempting the work yourself, but it accounts for specialized sprayers, industrial primers, and commercial-grade coatings applied correctly the first time. A missed prep step can result in peeling doors that require costly chemical stripping and rework.
For homeowners seeking flawless durability without losing weeks of personal time, our cabinet painting cost estimate helps you plan for professional spray application that stands up to South Florida humidity.
| Project Scope | Average Cost Range | Typical Turnaround Time | Finish Longevity |
|---|---|---|---|
| Professional Cabinet Color Transformation | $2,200 – $5,500 | 3 to 5 Days | 8 to 15+ Years |
| Full Cabinet Replacement | $12,000 – $35,000+ | 4 to 8 Weeks | 15+ Years |
Previewing Results with Sample Swatches
Never pick a color solely from a small paper swatch under fluorescent store lights. Using an interactive cabinet color visualizer lets you upload a photo of your actual space to test various color combinations against your existing tile, appliances, and countertops. Once you have shortlisted your favorite shades, ask your refinishing professional for sample boards so you can see how morning and evening light shifts the tone before work begins.
Real-World Transformations: Case Studies in Longevity
Real-world makeovers highlight how durable and cost-effective a color transformation can be when executed with proper technique:
- Long-Term Durability: A documented real-world case proved that a two-tone kitchen makeover using muted pink uppers and green bases remained fully intact after seven years of active family cooking, heat, and steam.
- Functional Repurposing: A smart remodel showed how reconfigured lower cabinetry sections were seamlessly blended into existing oak frames using a vibrant teal coating.
- Maximizing Natural Light: In an editorial makeover, dated faux-wood cabinets were converted to bright white for around $350 in materials, pulling daylight deep into the home and completely transforming the room’s atmosphere.
Frequently Asked Questions About Cabinet Color Transformations
How long does a painted or refinished cabinet finish typically last?
When prepared with industrial degreasers, mechanical sanding, bonding primers, and commercial-grade urethanes, a refinished cabinet surface lasts 8 to 15 years or longer. Regular maintenance requires only wiping surfaces with a soft microfiber cloth and mild, non-abrasive dish soap. Avoid harsh bleach, ammonia, or scouring pads, which can degrade protective clear coats over time.
Can you change the color of dark oak or builder-grade cabinets?
Yes. Oak has an open, deep grain pattern, while builder-grade cabinets often feature smooth synthetic laminates or thermofoil. Both can be recolored successfully. Oak requires high-adhesion stain-blocking primers (and optional grain fillers if a flat modern look is desired) to prevent yellow tannins from bleeding through light paint. Synthetic surfaces require specialty bonding primers that chemically etch into non-porous coatings to ensure permanent adhesion.
What are the most common mistakes to avoid during cabinet painting?
- Skipping Degreasing: Painting over invisible cooking grease causes fish-eyes, bubbling, and premature peeling.
- Failing to Sand Between Coats: Light scuff-sanding between primer and topcoats removes dust nibs and ensures optimal mechanical bonding.
- Applying Heavy, Thick Coats: Thick coats lead to sags, drips, and extended drying times that leave the coating soft and prone to chipping.
- Rushing the Cure Time: While coatings dry to the touch in hours, full chemical cure takes up to 30 days. Treat fresh surfaces gently during the first few weeks of use.
- Leaving Hardware Attached: Painting around hinges and pulls results in messy edges and chipped paint as hardware flexes during daily use.
Transform Your Kitchen with South Florida’s Refinishing Specialists
A kitchen cabinet color change gives your kitchen a designer update without the mess, high expense, or long delays of full cabinet replacement. Whether you want to brighten your space with classic warm whites or make a statement with deep forest greens and teals, proper prep work and industrial coatings ensure a beautiful, long-lasting finish.
With over 30 years of hands-on experience and more than 14,000 successful projects completed, our family at All Surface Refinishing helps homeowners modernize their kitchens and bathrooms across Miami-Dade, Broward, Palm Beach, Martin, St. Lucie, and Indian River counties.
Explore our professional cabinet color change service today to request your free estimate and bring your dream kitchen to life!
