Why Bathtub Peeling Happens and What You Can Do About It
Peeling bathtub repair is one of the most common bathroom issues homeowners face, especially in older homes or after a previous refinishing job. The good news? You have options that don’t involve tearing out your entire tub.
Quick Answer: How to Fix a Peeling Bathtub
- Remove all loose, peeling finish by scraping and sanding down to a solid surface
- Clean thoroughly with an industrial cleaner to remove all dust and residue
- Fill chips and damage with epoxy hardener and let cure for 24-72 hours
- Apply a bonding primer to ensure the new finish adheres properly
- Spray or brush on multiple thin coats of high-quality tub enamel
- Allow 3 days to fully cure before using the tub
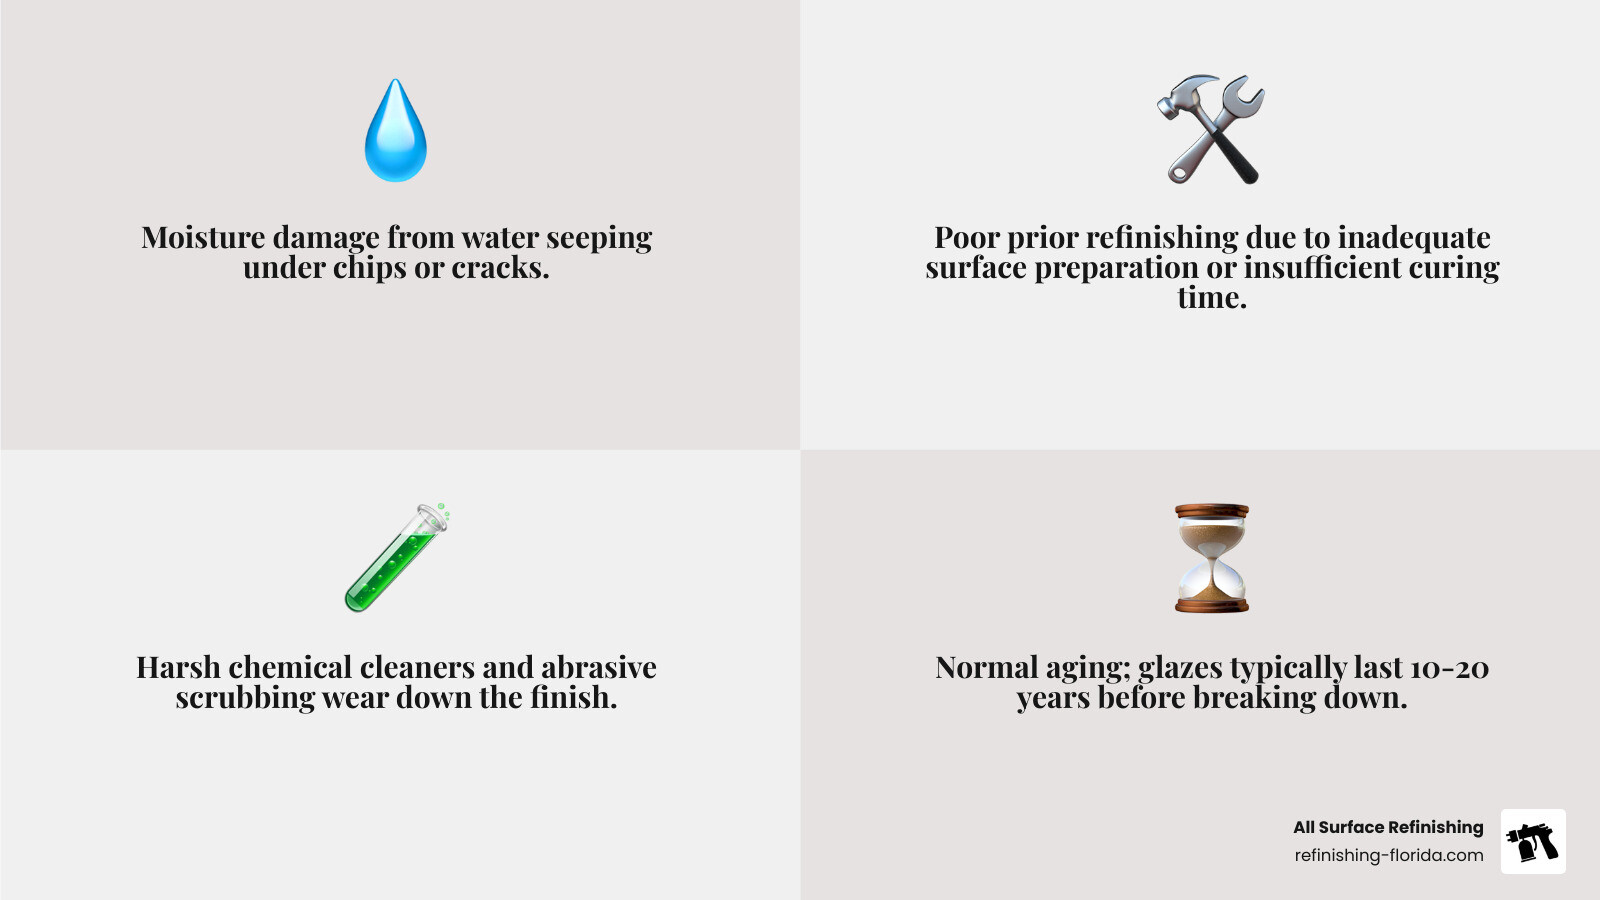
Why does bathtub coating peel in the first place? Most peeling happens because of moisture seeping under the finish through chips, poor surface preparation during a previous refinishing job, or simply age—bathtub glazes typically last only 10 to 20 years. When cast iron or porcelain tubs get old, the glaze wears away and exposes the porous surface beneath, which leads to staining and rusting.
The cost difference is significant. Professional refinishing can save you up to 75% compared to replacement, costing hundreds instead of thousands of dollars. However, DIY attempts often fail—industry data shows that 25% of all professional bathtub work is redoing someone else’s DIY attempt.
I’m Frank Hernandez, President of All Surface Refinishing, and I’ve been refinishing surfaces in South Florida since 2011. Over the years, I’ve repaired countless peeling bathtubs and trained my team to handle peeling bathtub repair with techniques that ensure long-lasting results.
Why Is Your Bathtub Peeling? Common Causes and Telltale Signs
Nobody likes a peeling bathtub. It’s not just an eyesore; it can also be a sign of underlying issues that, if left unaddressed, could lead to more significant damage to your bathroom. So, what exactly causes that once-beautiful finish to bubble, flake, or chip away? And how can you spot the signs early?
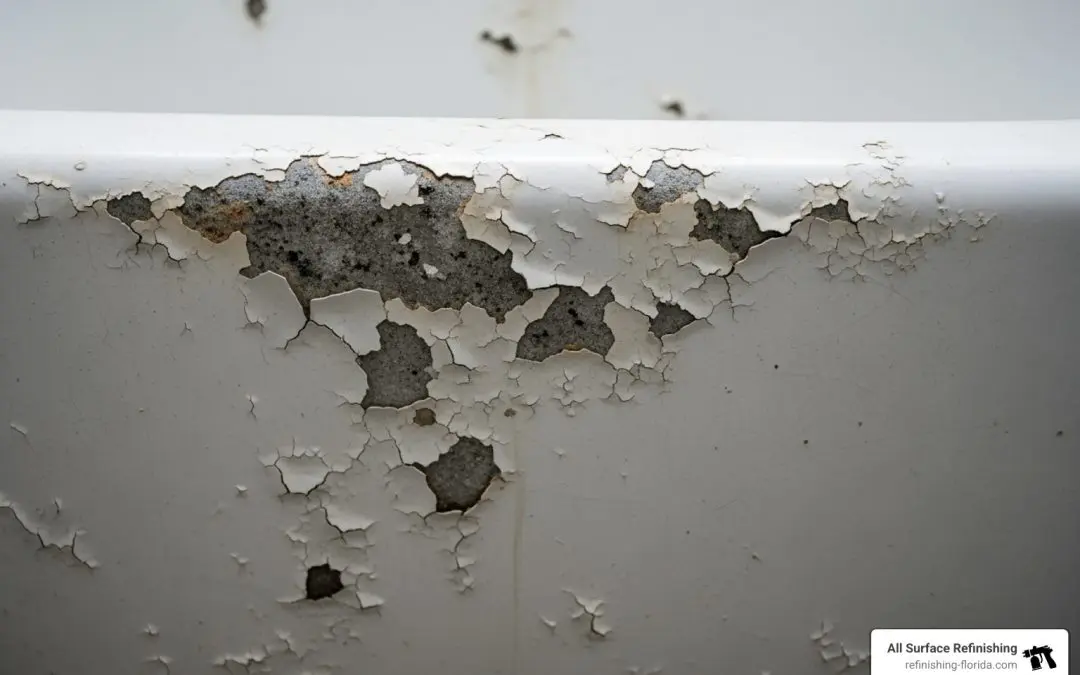
The primary culprit behind a peeling bathtub finish is often moisture damage. Even a tiny chip or crack in the surface can allow water to seep underneath the coating. Once water gets in, it can compromise the adhesion of the finish, causing it to lift and peel away. This is especially true in areas with constant water exposure, such as where a shower curtain hangs or along the bottom of the tub walls where water might pool.
Another significant factor is poor prior refinishing. We’ve seen countless cases where a previous refinishing job lacked proper surface preparation or didn’t allow enough curing time for the glaze. If the surface wasn’t thoroughly cleaned, roughed up, or if the bonding agent wasn’t applied correctly, the new finish won’t adhere properly and will inevitably peel. It’s like trying to paint over a greasy wall – it just won’t stick!
Harsh abrasive cleaners are also major offenders. While you might think you’re doing a good job scrubbing your tub, using abrasive pads, scouring powders, or acid-based products can slowly but surely erode the protective glaze. Over time, this weakens the finish, making it more susceptible to chipping and peeling. Even white vinegar, a common household cleaner, can be too harsh for a reglazed surface.
Then there’s simply age and normal wear and tear. Bathtub glazes, whether porcelain, acrylic, or polyurethane, have a finite lifespan, typically lasting between 10 to 20 years. As a tub gets older, the glaze naturally wears away, exposing the porous surface beneath. For cast-iron tubs, this often leads to unsightly staining and even rusting. Sudden temperature changes and high water pressure can also contribute to the breakdown of the finish over time.
Signs that your bathtub finish is starting to peel can range from subtle to obvious:
- Bubbling paint: Small air pockets forming under the surface, indicating the finish is losing adhesion.
- Flaking finish: Pieces of the coating are visibly lifting or coming off, especially around high-traffic areas like the drain or edges.
- Visible cracks: Hairline or larger cracks can appear, often precursors to peeling as water infiltrates.
- Water damage: Discoloration or soft spots around the peeling areas, suggesting water is seeping into the sub-layers.
- Dullness or staining: A loss of gloss or persistent stains can indicate the protective glaze is compromised, making the surface more vulnerable.
If you spot any of these signs, it’s a clear signal that your tub needs attention. Ignoring it will only lead to further damage and potentially more costly repairs down the line.
Why Professional Bathtub Refinishing Is the Best Solution
When your bathtub starts to peel, you essentially have two main paths: attempt a DIY fix or call in the professionals. While the idea of a cheap, quick DIY solution might be tempting, we’ve learned from years of experience why professional bathtub refinishing is almost always the superior choice for a durable, long-lasting result.
Let’s be clear: we understand the appeal of saving money. DIY bathtub repair kits can cost hundreds of dollars, while professional refinishing might cost a bit more, potentially reaching into the thousands for complex jobs or larger tubs. However, this initial price difference often hides a significant disparity in quality, longevity, and overall value.
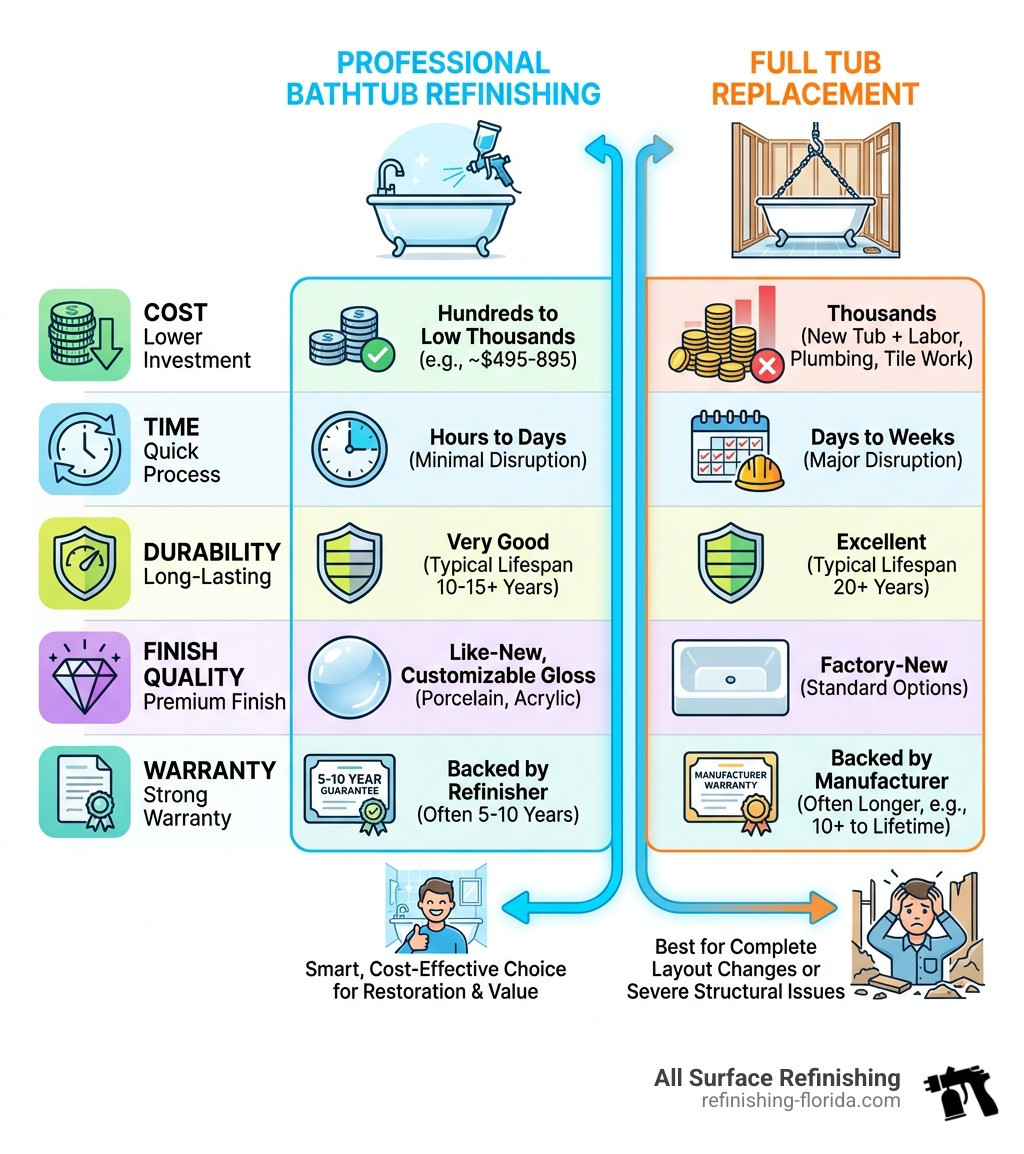
Here’s a comparison to help illustrate the benefits:
| Feature | Professional Bathtub Refinishing | Full Tub Replacement |
|---|---|---|
| Cost | Hundreds to low thousands (e.g., ~$495 for porcelain, ~$895 for fiberglass tub and surround) | Thousands of dollars (new tub cost + demolition, plumbing, tile work, installation labor) |
| Time | Typically 1-2 days, ready to use in 12-24 hours | Weeks of disruption for demolition, installation, and associated renovations |
| Durability | Up to 10-20 years with proper care | New tub durability (can be 20+ years, but overall project is much more involved) |
| Finish Quality | Smooth, glossy, uniform, like-new appearance; often comes with a warranty | Brand new finish, but the overall project is much larger and more invasive |
| Warranty | Often includes a 5-year adhesion guarantee | New tub warranty, but doesn’t cover installation issues or wear and tear |
| Disruption | Minimal mess, no demolition | Major construction, dust, debris, requires plumbers and tile setters |
| Longevity | Can extend tub life by 10-20 years | Starts fresh, but the cost and hassle are significantly higher |
Professional refinishing can save you up to 75% compared to replacing your bathtub. Consider that replacing a tub involves not just the cost of the new tub itself, but also the expenses for demolition, plumbing adjustments, potential tile work, and installation labor. These hidden costs quickly add up, turning a seemingly simple replacement into a budget-busting renovation.
One of the most compelling reasons to choose professionals like us is the adhesion failure risk with improper methods. We often encounter situations where homeowners attempted a DIY refinish, only for the coating to start peeling within months. In fact, a significant portion of our work—about 25%—involves redoing someone else’s failed DIY attempt. These kits often peel because they lack the specialized chemicals, industrial-grade equipment, and, most importantly, the expertise required for proper surface preparation and application.
A good refinishing job requires extensive preparation, including the use of special cleaners, bonding primers, and fillers for cracks and chips. It also demands the skill and experience to spray on fast-drying acrylic coatings evenly and smoothly. You simply won’t get the same glossy, uniform, and durable finish from a DIY kit that a professional can provide.
Our professional reglazing process ensures that the new finish chemically bonds to the old surface, providing superior adhesion and durability. This is a critical difference that prevents future peeling and gives your bathtub, or even your commercial bathtub refinishing, a like-new look and feel that lasts. For more detailed information on professional services, you can explore resources like professional-bathtub-reglazing.
Your Step-by-Step Guide to Peeling Bathtub Repair
When it comes to peeling bathtub repair, a thorough and professional approach is key to achieving a lasting result. While we always recommend professional service for the best outcome, understanding the process can help you appreciate the work involved and even guide you if you’re tackling smaller touch-ups. This guide outlines the detailed process we follow to ensure a high-quality, durable finish.
Step 1: Safety and Preparation
Safety is paramount when dealing with refinishing products and chemicals. We take every precaution to protect both our team and your home.
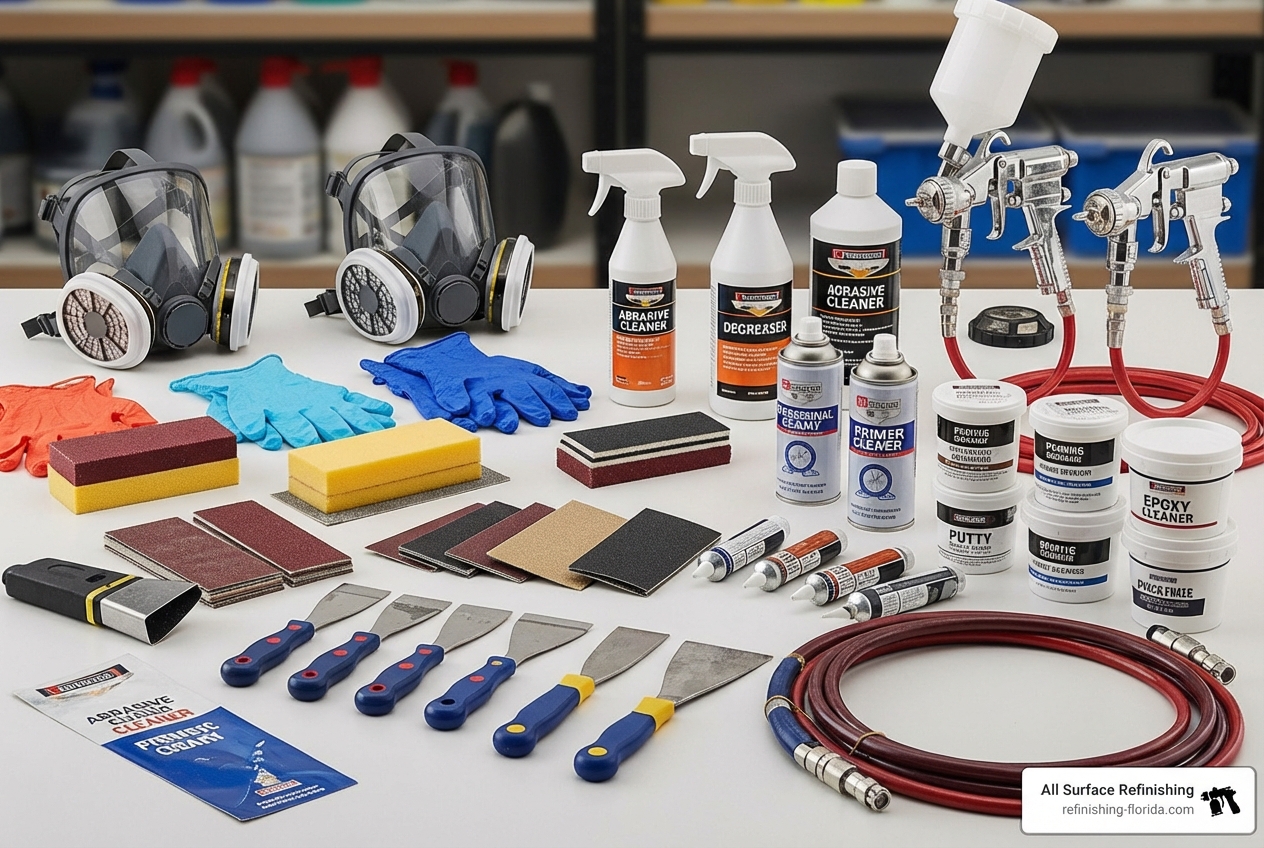
- Ventilation is crucial: We ensure the bathroom is well-ventilated, often using exhaust fans to remove fumes from the workspace. This is especially important as some chemical strippers, if used, can contain hazardous compounds.
- Personal Protective Equipment (PPE): Our technicians wear full PPE, including a fresh air breathing system or a high-quality respirator, safety goggles, and chemical-resistant rubber gloves. This protects against chemical exposure and airborne particles during sanding.
- Masking and Protection: We carefully mask off all surrounding fixtures, walls, and flooring with painter’s tape and plastic sheeting. This prevents overspray and protects your bathroom from any accidental spills.
- Caulk Removal: Old, failing caulk around the tub is carefully removed using a caulk tool. This step is essential as new caulk will be applied after refinishing.
- Thorough Cleaning: The bathtub surface undergoes an extensive, multi-step cleaning process. We use industrial-strength cleaners to eliminate all traces of soap scum, body oils, dirt, and any previous residues. A clean surface is critical for proper adhesion.
- Lead Paint Check (for older tubs): For vintage bathtubs, particularly those from before 1978, there’s a possibility of lead-based paint. We recommend using lead test kits to identify its presence. If lead paint is detected, special precautions are taken to safely manage and contain the dust created during the preparation stages.
Step 2: The Peeling Bathtub Repair Process
This is where we address the damage directly, ensuring a smooth, uniform foundation for the new coating.
- Scraping Loose Paint: All loose, bubbling, or flaking finish is carefully scraped away. We use specialized scrapers to get down to a solid, uncompromised surface. This step is non-negotiable; painting over a failing surface will only lead to quick re-peeling.
- Sanding and Blending: The edges of the scraped areas are then carefully sanded using various grits of sandpaper and steel wool. The goal is to blend the old finish seamlessly with the exposed areas, creating a smooth transition. The entire tub surface is also scuffed up to provide an ideal profile for the new coating to adhere to.
- Dust Removal: After sanding, the tub is wiped down thoroughly with a tack cloth to remove all sanding dust and debris. We may repeat this step multiple times to ensure no particles remain that could interfere with adhesion.
- Filling Chips and Damage: Any chips, cracks, or deep imperfections are filled using a high-quality epoxy filler or polyester filler. This material is carefully applied with a plastic scraper, ensuring it’s flush with the surrounding surface.
- Curing Time for Filler: The epoxy filler is then allowed to cure for the manufacturer-specified time, typically 24 to 72 hours, depending on the product and environmental conditions. Rushing this step can compromise the integrity of the repair.
- Sanding Filler Smooth: Once cured, the filled areas are sanded again until they are perfectly smooth and flush with the rest of the tub, creating a uniform surface for the new finish.
Step 3: Applying the New Finish
With the surface perfectly prepared, we move on to applying the new, durable coating.
- Bonding Agent Application: A proprietary bonding agent is applied. This is a critical step that chemically bonds the new finish to the old surface, providing superior adhesion and durability without the need for corrosive acids. This is what helps prevent future peeling.
- Applying the New Coating: Using professional-grade spray systems (like a fine finish spray compressor), we apply multiple thin, even coats of high-tech acrylic urethane. This specialized enamel or epoxy paint is designed for the rigorous demands of a bathtub environment. Applying thin coats prevents drips and ensures a smooth, glossy finish.
- Drying Between Coats: Adequate drying time is allowed between each coat, typically 24 hours, to ensure proper adhesion and a strong, consistent build-up of the finish.
- Curing Process: Once all coats are applied, the bathtub enters its curing phase. While professional refinished tubs can be ready for light use in 12 to 24 hours, we generally recommend waiting a full 3 days before regular use to allow the finish to achieve maximum hardness and durability.
- Finishing Touches: After curing, the masking materials are removed, and the tub is professionally cleaned. New, high-quality caulk is applied around the edges, completing the change.
This meticulous process ensures that your peeling bathtub repair results in a beautiful, long-lasting surface you can enjoy for years to come. For more information on tub repair, see our guide on tub-repair.
Extending the Life of Your Tub: Maintenance and Replacement Tips
A professionally refinished bathtub isn’t just a quick fix; it’s a long-term solution that significantly extends the life of your existing tub. With proper care, a refinished tub can last anywhere from 10 to 20 years, bringing renewed beauty and functionality to your bathroom for a fraction of the cost of replacement.
The financial benefits are substantial. Refinishing can provide cost savings as high as 75% over full tub replacement. When you opt for refinishing, you avoid the hefty expenses of demolition, hiring plumbers and tile setters, and purchasing a brand-new tub. This makes it a highly attractive option for homeowners in Florida looking to update their bathrooms without breaking the bank.
So, when is it more practical to replace a bathtub rather than repair it? While we firmly believe in the power of refinishing to restore almost any tub, there are rare instances where replacement might be the only viable option. These include:
- Severe structural cracks: If the tub itself has extensive, deep structural cracks that compromise its integrity beyond the surface.
- Extensive rust-through: For metal tubs, if the rust has eaten completely through the material, creating holes that cannot be effectively patched.
However, for most cases of cosmetic damage, surface wear, or even minor chips and cracks, refinishing is the smart choice. As we often say, “Don’t replace, refinish instead!” This applies whether you have an old cast-iron-tub-repair, a fiberglass bathtub refinishing project, or need to reglaze-tub.
Aftercare: Maintaining Your Peeling Bathtub Repair
The longevity of your newly refinished tub largely depends on how you care for it. Following best practices for cleaning and maintenance will prevent future peeling and keep your tub looking pristine for years.
Best Cleaning Practices:
- Use non-abrasive cleaners: Ditch the harsh chemicals, scouring powders, and abrasive pads. These can dull and damage the new finish, leading to premature wear and peeling.
- Gentle cleaners are best: For routine cleaning, a simple grease-cutting dish soap (like Dawn) mixed with hot water and applied with a soft cloth or sponge is highly effective. This removes residues without harming the finish.
- Avoid certain products: Stay away from acid-based products, white vinegar (unless specifically recommended by your refinisher for a particular issue), steel wool, and metal tools.
- For tough stains: A mixture of equal parts baking soda and ammonia, gently scrubbed with a soft sponge, can tackle deeper stains. Table salt with lemon juice can also be effective for very stubborn spots.
- Regular cleaning: Clean your bathtub at least once a week to prevent soap scum and residue buildup, which can become harder to remove and may tempt you to use harsher methods.
Avoiding Bath Mats: If you use a bath mat, opt for one that doesn’t have suction cups. Suction cups can trap moisture and chemicals, and when pulled up, they can sometimes lift the finish. If you must use one, remove it after each use to allow the tub to dry completely. Avoid leaving anything permanently on the refinished surface.
Promptly Repairing New Chips: Accidents happen. If you notice a new chip or nick, address it promptly. Even a small chip can allow water to seep underneath the finish, initiating the peeling process. Contact us for professional touch-ups to prevent the problem from spreading.
By following these simple maintenance tips, you’ll protect your investment and ensure your beautifully refinished bathtub remains a highlight of your bathroom for a very long time. This is part of our commitment to helping you restore-tub and keep it looking great.
Frequently Asked Questions about Bathtub Repair
We get a lot of questions about peeling bathtubs and the best ways to address them. Here are some of the most common inquiries we receive:
How long does a refinished bathtub last?
A professionally refinished tub can last 10-20 years with proper care. The lifespan largely depends on the quality of the preparation and materials used by the refinisher, as well as the homeowner’s adherence to recommended cleaning and maintenance practices. Regular maintenance is key to preventing future peeling and maximizing the durability of the finish. Our methods are designed for longevity.
Can you paint over a peeling bathtub?
No, you should never paint directly over a peeling finish. This is one of the most common mistakes made in DIY attempts. The old, loose, and failing coating must be completely removed, and the underlying surface properly sanded and prepared. Painting over a failing surface is like building a new house on a crumbling foundation; the new coat will quickly lose adhesion and begin to peel itself, often taking the new paint with it. Proper preparation, including scraping, sanding, and cleaning, is essential for any new finish to adhere correctly and last.
Is it cheaper to refinish or replace a bathtub?
Refinishing is significantly cheaper, saving up to 75% compared to the cost of replacement. A full bathtub replacement involves not just the purchase of a new tub, but also substantial costs for demolition, plumbing modifications, potential tile work, and installation labor. These expenses can quickly escalate into thousands of dollars. Professional refinishing, on the other hand, typically costs hundreds, offering a high-quality, like-new appearance without the mess, time, and financial burden of a full replacement. For example, a porcelain-tub-refinishing-cost can be around $495 if not previously refinished, compared to thousands for replacement.
Your Local Florida Bathtub Repair Experts
A peeling bathtub can be an eyesore, but it doesn’t have to mean a costly replacement. Whether you have minor chips or need a durable, long-lasting professional finish, restoring your tub is an achievable project. For homeowners in Aventura, Bal Harbor, Boca Raton, Boynton Beach, Broward County, Carol City, Coconut Creek, Coconut Grove, Cooper City, Coral Gables, Coral Springs, Cutler Ridge, Dade County, Dania Beach, Davie, Deerfield Beach, Delray Beach, Fisher Island, Fort Lauderdale, Fort Pierce, Golden Beach, Greenacres, Hallandale Beach, Hialeah, Hillsboro Beach, Hobe Sound, Hollywood, FL, Homestead, Indian River County, Indiantown, Islamorada, Ives Estates, Jensen Beach, Jupiter, Kendall, Key Biscayne, Key Largo, Key West, Lake Worth, Lauderdale By The Sea, Lauderdale Lakes, Lauderhill, Lazy Lake, Lighthouse Point, Loxahatchee, Marathon, Margate, Martin County, Miami, Miami Beach, Miami Lakes, Miami Shores, Miami Springs, Miami-Dade County, Miramar, North Bay Village, North Lauderdale, North Miami, North Miami Beach, North Palm Beach, Oakland Park, Palm Beach, Palm Beach County, Palm Beach Gardens, Palm City, Parkland, Pembroke Pines, Perrine, Port Saint Lucie, Port Salerno, Saint Lucie County, Sebastian, Stuart, Sweetwater, Tamarac, Vero Beach, Wellington, FL, West Miami, West Palm Beach, Weston, Wilton Manors, All Surface Refinishing provides expert bathtub, tub, jacuzzi, tile, and bathroom surface refinishing and repair services. If you’re facing a peeling tub and want a flawless, guaranteed result, it’s time to call in the professionals. Explore your options for a complete tub-repair.
