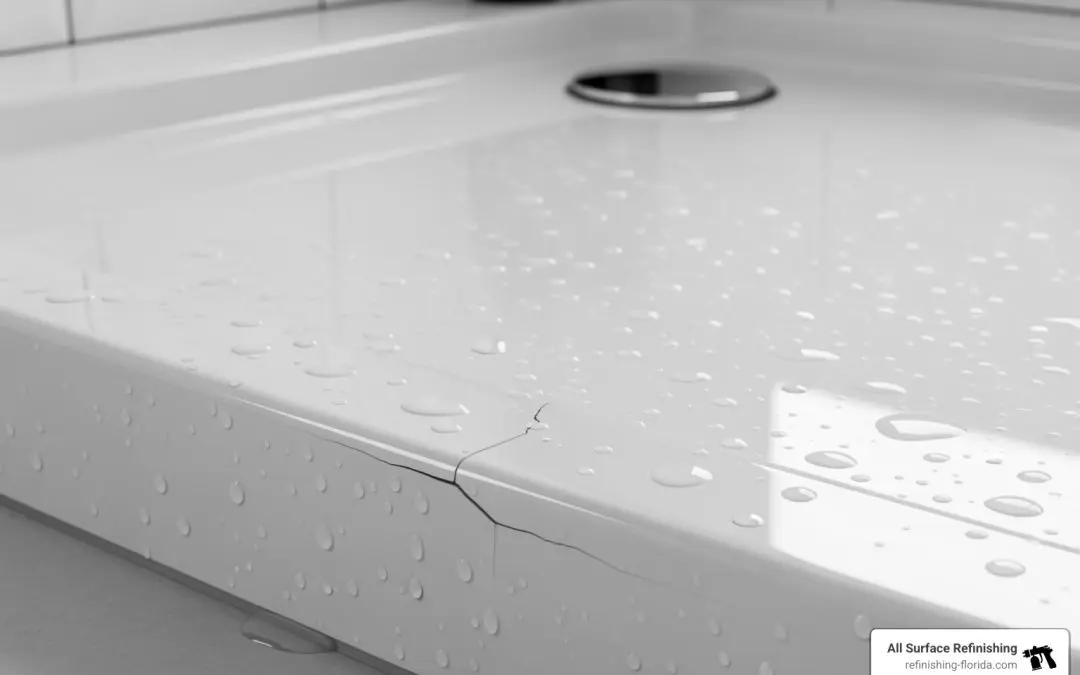
Don’t Let a Crack Ruin Your Day
Repair acrylic shower base issues quickly to prevent leaks, water damage, and costly replacements. Here’s what you need to know:
Quick Repair Overview:
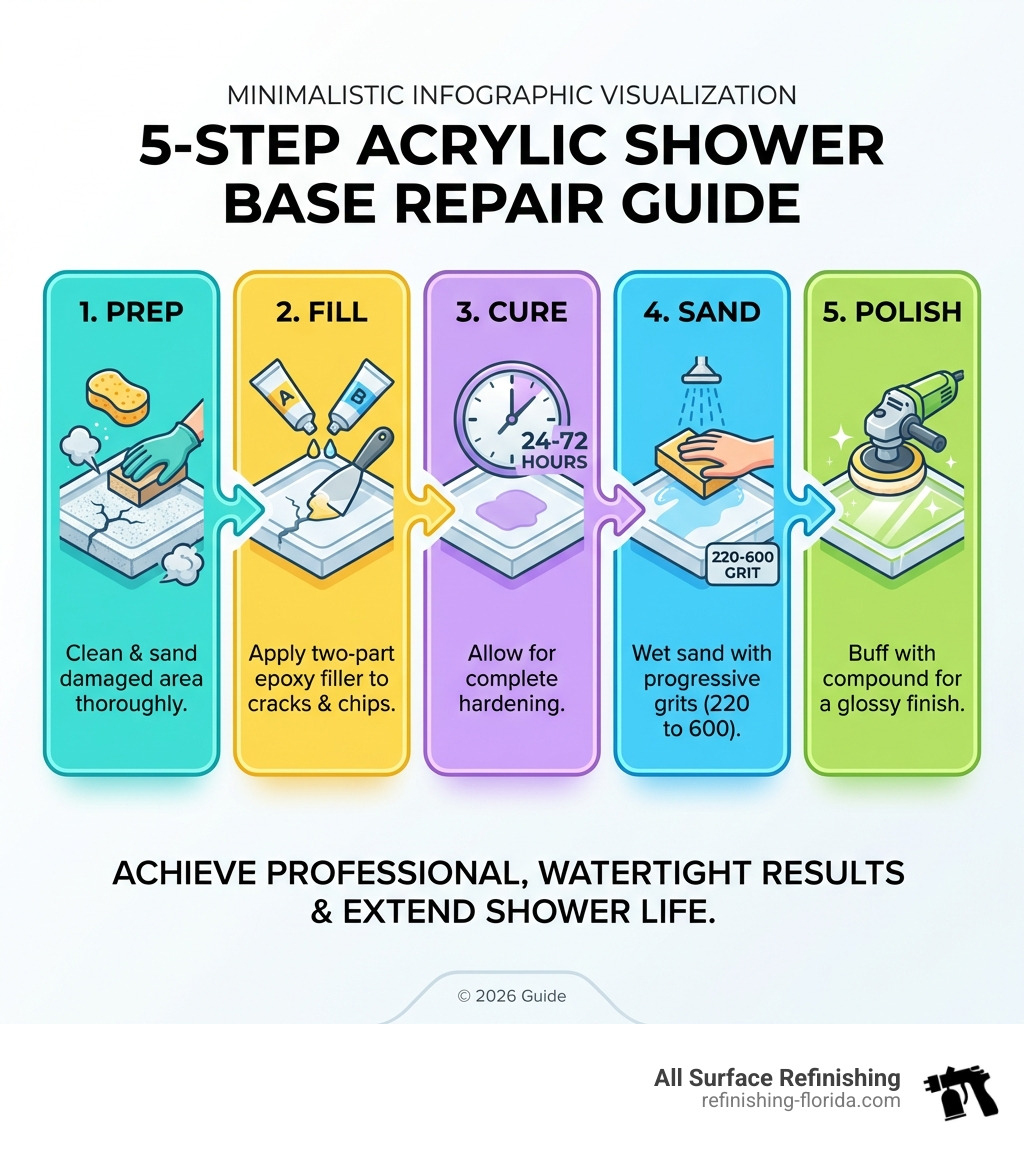
- Clean & Prep – Thoroughly clean and sand the damaged area
- Fill – Apply two-part epoxy or polyester filler to cracks/chips
- Cure – Allow 24-72 hours for complete hardening
- Sand – Wet sand with progressive grits (220 to 600) until smooth
- Polish – Buff with compound for a glossy, blended finish
Cost: DIY repairs typically cost $50-$75 vs. $150-$200+ for professional labor
Time: 1-3 hours active work, 2-3 days total cure time before use
Hearing a crack in your acrylic shower base is a homeowner’s nightmare. It signals potential leaks, subfloor damage, mold, and a costly repair bill.
The good news? Most acrylic shower base damage is repairable. Small cracks and chips don’t automatically mean you need a full replacement. With the right materials, you can restore your shower base to a watertight condition for a fraction of the cost.
Repairs can save you up to 75% compared to replacement, which is especially important in South Florida where improper installation and lack of support cause many of these issues. The repair process typically takes two to three days including curing time, and when done correctly, can last for many years.
But here’s the catch: not all damage is DIY-friendly. Large structural cracks, severely flexing bases, or extensive damage often require professional expertise to ensure a lasting, leak-proof repair.
I’m Frank Hernandez, and since 2011, I’ve helped countless South Florida homeowners repair acrylic shower base damage. From minor chips to major cracks, we save homeowners thousands in replacement costs by providing durable, professional results.
Before You Begin: Assessment and Preparation
Before we dive into how to repair acrylic shower base damage, let’s understand what we’re working with. Proper assessment and preparation are the cornerstones of a successful repair.
Identifying Your Shower Base Material
First, are you sure your shower base is acrylic? It’s often confused with other materials like fiberglass or porcelain, and repair methods differ.
Here’s how to tell the difference:
- Acrylic: Feels warmer than porcelain, has a smooth, consistent color, and flexes slightly under pressure. It doesn’t typically fade or yellow.
- Fiberglass: Looks like acrylic but feels cooler and can be more flexible or “bouncy” if unsupported. Older units may show yellowing.
- Porcelain: Porcelain enamel over cast iron or steel. It feels very cold, hard, and won’t flex. It’s durable but can chip, revealing dark metal underneath.
If you’re still unsure, gently press on the side of the base. Fiberglass tends to give easily, while acrylic flexes slightly. Porcelain will feel rigid.
Assessing the Damage: Chip, Crack, or Catastrophe?
The type and severity of damage will dictate our repair strategy. Some issues are clear indicators that it’s time to call in the professionals.
Common types of damage to acrylic shower bases include:
- Minor Chips and Scratches: Usually superficial and excellent candidates for DIY repair.
- Hairline Cracks: Small, thin cracks that might not yet be leaking. Early repair is key to prevent them from spreading.
- Stress Cracks: Often appear near the drain or corners and can indicate underlying support issues.
- Structural Cracks or Holes: Larger, deeper cracks that penetrate the acrylic, almost always involving water leakage.
Signs of a deeper problem:
- A severely flexing or “spongy” base: If your shower base visibly moves or feels soft, it lacks proper support. A surface repair won’t last on a flexing base and requires professional intervention to stabilize it.
- Persistent leaks: If you’ve noticed water stains on the ceiling below or moisture around the base, you have a leak. A surface patch won’t fix an underlying structural or plumbing issue. For comprehensive guidance, check our guide on Stop the Flood a Comprehensive Guide to Shower Floor Leak Repair.
- Extensive cracking or multiple cracks: A spiderweb of cracks might mean the base is at the end of its lifespan and needs professional assessment or replacement.
For a minor chip or small hairline crack, a DIY repair is a viable solution. For anything more severe, especially with suspected support issues or active leaks, we strongly recommend consulting a professional.
Gathering Your Tools and Materials
Having the right tools and materials is half the battle. Most items can be found at your local hardware store or online.
Here’s what we’ll need:
- Acrylic Repair Kit: Your MVP. Look for a kit designed for acrylic/fiberglass tubs. Many contain a two-part epoxy or polyester filler, hardener, and mixing sticks. A quality tub repair kit will simplify the process.
- Cleaning Supplies: Non-abrasive bathroom cleaner, sponges, clean cloths.
- Solvent: Denatured alcohol or acetone for final cleaning.
- Sandpaper: Various grits (220, 320, 400, 600-800 grit wet/dry).
- Utility Knife or Rotary Tool: For opening up cracks.
- Drill with Small Bit (0.25-inch): For stop-drilling cracks.
- Mixing Tray/Surface: For combining filler.
- Applicators: Small plastic spatulas or craft sticks.
- Polishing Compound: Automotive rubbing compound or plastic polish.
- Buffing Tool or Soft Cloths: For a glossy finish.
- Optional for larger cracks: Fiberglass mesh, two-component insulating foam.
- Painter’s Tape: To protect surrounding areas.
Safety First: Protecting Yourself During the Repair
Working with chemical fillers and solvents requires a commitment to safety.
- Ventilation is Key: Ensure the bathroom is well-ventilated. Open windows and use an exhaust fan. Epoxy and polyester fillers can emit strong fumes.
- Personal Protective Equipment (PPE):
- Gloves: Chemical-resistant gloves (nitrile or rubber) are a must.
- Eye Protection: Safety goggles will shield your eyes from splashes and dust.
- Respiratory Protection: An approved respirator mask is crucial when working with epoxy-type fillers and during sanding. The National Institute for Occupational Safety and Health (NIOSH) provides important safety information on epoxies and resins, highlighting the need for proper protection.
- Workspace Protection: Lay down newspaper or dust sheets to protect your floor and surrounding fixtures.
Your Step-by-Step Guide to Repair Acrylic Shower Base
Now that we’re prepped and protected, let’s get down to business. Follow these steps carefully to repair acrylic shower base damage effectively.
Step 1: Clean and Prepare the Damaged Area
This is arguably the most critical step. Any dirt, grime, or soap scum will prevent the repair material from adhering properly.
- Thorough Cleaning: Start by thoroughly cleaning the entire shower base with a non-abrasive bathroom cleaner and rinse completely.
- Dry Completely: The area must be completely dry. Wipe it down and let it air dry for several hours, or use a hairdryer on a cool setting. Trapped moisture will compromise the repair.
- Roughen the Surface: For chips, use 220-grit sandpaper to gently roughen the damaged area and about an inch beyond. For cracks, use a utility knife or rotary tool to carefully open the crack into a V-shape, then roughen the surrounding area.
- Final Clean with Solvent: Wipe the roughened area with denatured alcohol or acetone to degrease the surface and remove dust. Let it evaporate completely.
- Tape Off: Use painter’s tape to mask off the area immediately surrounding the damage to create a clean edge.
Step 2: Reinforce and Stabilize (For Larger Cracks)
For larger cracks, especially those in a high-stress area, we need to take extra measures to prevent them from returning.
- Stop-Drilling (for spreading cracks): If a crack is lengthening, drill a small (0.25-inch) hole at each end. This dissipates stress and prevents the crack from spreading further.
- Addressing Underlying Support (for flexing bases): If your shower base flexes, patching the surface won’t last. Drill a few 0.25-inch holes around the crack (avoiding plumbing) and inject two-component insulating foam into the cavity beneath. This foam expands to fill voids and provide crucial support. Allow it to cure before proceeding.
- Applying Fiberglass Mesh (for structural cracks or holes): For cracks wider than a quarter-inch or for small holes, fiberglass mesh provides reinforcement. Cut a piece slightly larger than the damaged area to embed in the filler.
Step 3: Mix and Apply the Filler
This is where the magic happens! Follow your repair kit’s instructions precisely.
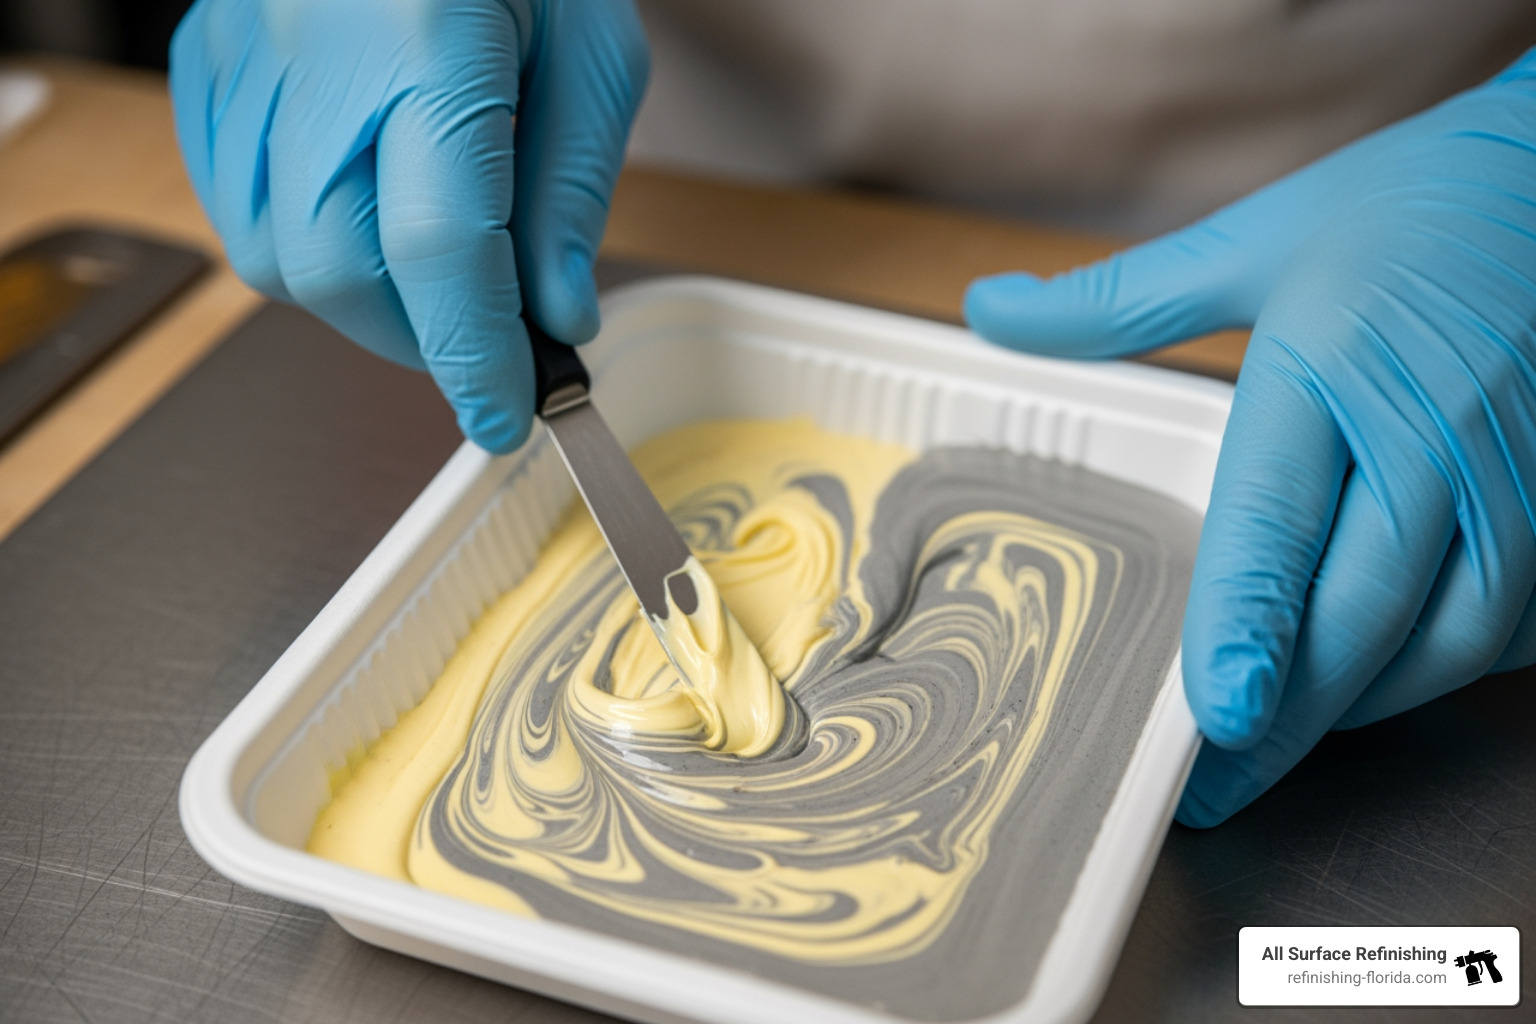
- Mix the Filler: In your mixing tray, combine the two-part filler per the kit’s instructions. Add any included colorants and mix thoroughly, noting that a perfect DIY color match is rare. Mix only what you can apply within the product’s working time (e.g., 30-minute epoxy offers more control than 5-minute).
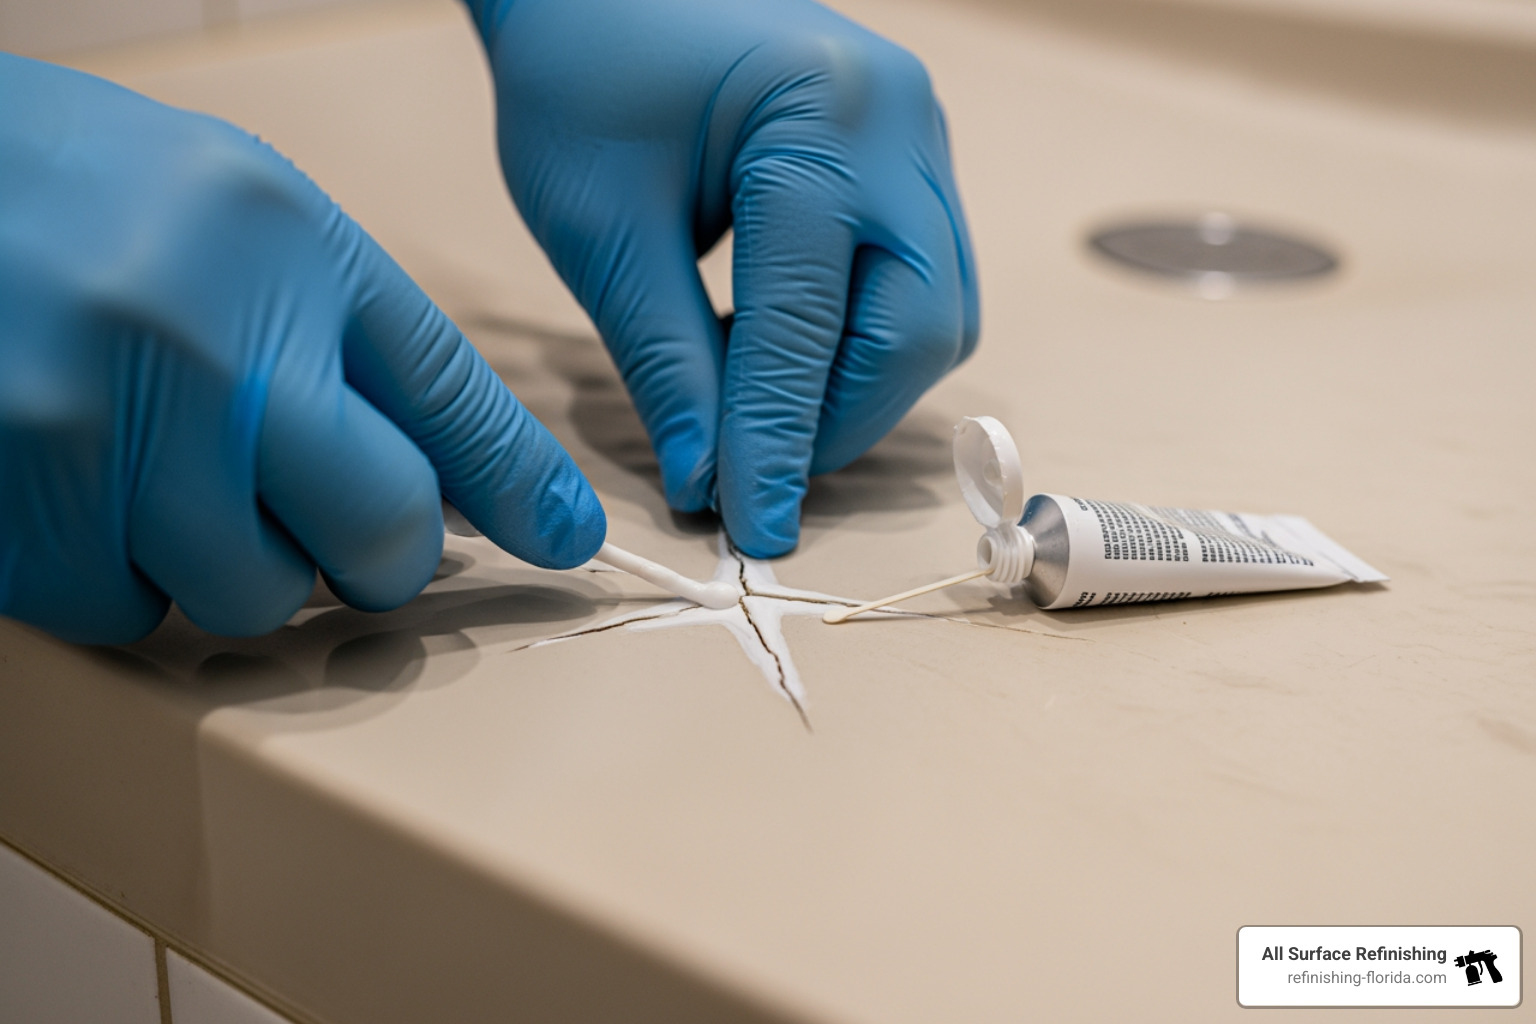
- Apply the Filler: Using a spatula, apply the mixed filler into the crack or chip, ensuring there are no air bubbles.
- For Chips/Scratches: Apply a thin, even layer, slightly overfilling the area.
- For Cracks: Force the filler into the V-groove and stop-drill holes. If using fiberglass mesh, apply a thin layer of filler, lay the mesh over it, press it down, and apply another layer over the mesh, ensuring it’s saturated and slightly overfilled.
- Smooth and Overfill: Smooth the filler with your applicator, making sure it’s slightly mounded above the surface. This overfill accounts for shrinkage and provides material to sand down for a flush finish.
Step 4: Curing, Sanding, and Smoothing
Patience is a virtue. Rushing the curing process can lead to a failed repair.
- Curing Time: Allow the filler to cure completely, which typically takes 4-24 hours (follow kit instructions). The shower should not be used for at least 2-3 days to allow the repair to reach maximum strength.
- Initial Sanding: Once cured, begin wet sanding with 220-grit sandpaper in light, circular motions to bring the repair flush with the surface.
- Progressive Grits: Gradually move to finer wet grits: 320, 400, 600, and finally 800-grit. Each finer grit removes the sanding marks from the previous one.
- Achieve a Flush Surface: The repaired area should feel perfectly smooth and flush with the rest of the shower base, with no bumps or depressions.
Finishing Touches & Long-Term Care
We’re almost there! The final steps ensure your repair is not only strong but also blends seamlessly with your shower base.
How to perfectly finish and polish your repair acrylic shower base
This is where we make the repair disappear, or at least become very difficult to spot.
- Clean Again: Wipe down the sanded area with a clean, damp cloth to remove all sanding residue.
- Apply Polishing Compound: Apply a small amount of automotive polishing compound (or a specialized plastic polish) to the repaired area.
- Buff to a Shine: Using a buffing tool with a foam pad or a soft, clean cloth, buff the area until it matches the sheen of the surrounding acrylic. Work in small sections, applying moderate pressure. This step is crucial for blending the repair and achieving a high-gloss finish.
Ensuring a Watertight and Durable Repair
A successful repair is one that holds up over time and keeps the water where it belongs.
- Clear Top Coat (Optional but Recommended): Some repair kits include a clear top coat. Applying this provides an extra layer of protection and can help achieve a more uniform finish. Follow the kit’s instructions for application and curing.
- Water Testing: After the repair has fully cured (allow the recommended 2-3 days before use), perform a simple water test. Fill the shower base a few inches and let it sit for an hour or two, checking for any leaks underneath or around the repaired area. If you addressed underlying support issues or had a leak, this step is non-negotiable.
- Address Underlying Issues: If the original damage was due to inadequate support, simply patching the surface won’t guarantee long-term durability. Ensuring the base is properly supported from underneath is critical for a truly lasting repair.
Maintenance Tips to Prevent Future Damage
An ounce of prevention is worth a pound of cure! Extend the life of your repaired acrylic shower base with these simple tips:
- Use Non-Abrasive Cleaners: Avoid harsh chemicals, abrasive scrubs, or scouring pads, as these can scratch and dull the acrylic surface, making it more prone to future damage and difficult to clean. Stick to mild soap and water or acrylic-safe bathroom cleaners.
- Avoid Heavy Impacts: Be mindful of dropping heavy or sharp objects into the shower. A simple slip can cause a chip or crack.
- Regular Inspection: Periodically inspect your shower base for any new hairline cracks or signs of wear. Catching small problems early makes them much easier and cheaper to fix.
- Ensure Proper Support: If your shower base feels “bouncy,” consider having a professional assess and reinforce its underlying support to prevent stress cracks from forming.
DIY vs. Professional Repair: Knowing When to Call for Help
Deciding whether to tackle a repair acrylic shower base project yourself or call in the experts can be a tough call. Let’s weigh the options.
The Pros and Cons of a DIY Repair
For minor damage, DIY repair offers several attractive benefits:
Pros:
- Cost Savings: A DIY repair kit typically runs between $50 and $75, far less than professional labor which can start at $150-$200.
- Sense of Accomplishment: There’s satisfaction in fixing something yourself!
- Convenience: You can work on your own schedule.
Cons:
- Skill and Experience: Repairing cracks and achieving a seamless finish requires patience and some DIY experience.
- Color Matching Challenges: Achieving a perfect color match is difficult. The repair kit’s color will be close but rarely an exact match, especially on colored bases.
- Durability Concerns: If an underlying issue like lack of support isn’t addressed, a DIY surface repair might not last.
- Time Commitment: While active work is 1-3 hours, your shower will be out of commission for 2-3 days for curing.
Signs You Need a Professional for your acrylic shower base repair
Sometimes, calling in the pros is the smartest decision. We’ve compiled a table to help you decide.
| Criteria | DIY Repair (Small Chips/Hairline Cracks) | Professional Repair |
|---|---|---|
| Cost | $50 – $75 (materials) | $100 – $350+ (materials + labor) |
| Time | 1-3 hours active, 2-3 days cure | 4-6 hours active, 2-3 days cure |
| Skill Level | Beginner to Intermediate | Expert |
| Finish Quality | Good, but color match may be imperfect | Seamless, factory-new appearance, precise color matching |
| Durability | Good for minor damage | Excellent, addresses underlying issues |
You should call a professional if:
- Extensive Cracking or Large Holes: Cracks several inches long, multiple cracks, or actual holes are often beyond the scope of a DIY kit.
- A Severely Flexing or Spongy Base: If the base moves or feels soft, the problem is structural. A professional can stabilize it by injecting foam or reinforcing the sub-structure. Significant movement may require replacement by a plumber.
- Persistent Leaks After DIY Repair: If you’ve tried a fix and the leak persists, an expert can accurately diagnose the source.
- When a Perfect, Like-New Finish is Required: For an invisible repair with a precise color match, a professional is your best bet. Our Professional Shower Services are designed for just these situations, offering expert results without the hassle.
Frequently Asked Questions about Acrylic Shower Base Repair
We hear a lot of questions about repairing acrylic shower bases. Here are some of the most common ones:
How long does an acrylic shower base repair take?
Active work takes 1-3 hours, but the total process requires two to three days for drying and curing. Do not use the shower during this time, as rushing the cure can cause the repair to fail.
Can you paint over the repaired area to match the color?
Yes, you can use specialized tub and tile paint designed for acrylic surfaces. However, achieving an exact color match is very challenging for DIYers. The color will be close, but rarely perfect. For a seamless, factory-new look, a professional repair is the best solution. A skilled technician can make repairs virtually invisible and restore the original appearance.
What causes an acrylic shower base to crack in the first place?
Several factors can lead to an acrylic shower base cracking:
- Improper Installation with Inadequate Support: This is the most common cause. If the base isn’t fully supported by a level subfloor or mortar bed, it will flex under weight. This constant movement eventually causes stress cracks, often near the drain or in corners.
- Heavy Impacts from Dropped Objects: Accidentally dropping a heavy shampoo bottle or tool can cause chips or cracks.
- Age and Material Fatigue: Like any material, acrylic can become more brittle and prone to cracking over many years of use.
- Use of Harsh, Abrasive Cleaning Chemicals: Harsh cleaning agents can weaken the acrylic surface, making it more susceptible to damage.
Conclusion: A Flawless Floor for Years to Come
A damaged acrylic shower base doesn’t have to be a source of stress or a trigger for an expensive renovation. With the right approach, you can effectively repair acrylic shower base issues and restore your bathroom’s functionality and aesthetic appeal.
For minor chips and hairline cracks, a DIY repair can be a rewarding and cost-effective solution, giving you the confidence of knowing you’ve tackled the problem head-on. Just remember the importance of proper preparation, precise application, and patient curing times.
However, for more complex issues—like extensive cracking, significant flexing, or persistent leaks—the wisdom lies in knowing when to trust an expert. Attempting to DIY a major structural problem can lead to repeated failures, more extensive water damage, and ultimately, higher costs.
At All Surface Refinishing, we bring over 30 years of experience and more than 14,000 successful projects to homeowners across South and Southwest Florida, including Aventura, Boca Raton, Fort Lauderdale, Miami, West Palm Beach, and many other communities. We specialize in repairing and restoring worn-out surfaces, turning them into beautiful, durable fixtures. For a guaranteed, professional result that lasts, especially when dealing with those tricky structural issues or desiring a flawless, factory-new finish, consider reaching out to our team.
Don’t let a cracked shower base dampen your day. Whether you choose to DIY a small fix or call in our experts, you’re on your way to a flawless floor for years to come. Get a free estimate for your tub repair project today!
