
Is Your Fiberglass Tub Worth Saving? Here’s What You Need to Know
Bathtub refinishing for fiberglass surfaces is one of the most cost-effective ways to restore a worn, peeling, or stained tub without tearing out your bathroom. Here’s a quick summary of what it involves:
- What it is: A process of cleaning, sanding, repairing, and applying a new bonding primer and finish coat directly over your existing fiberglass tub
- Who it’s for: Tubs that are structurally sound but look faded, stained, chipped, or peeling
- How long it takes: 3-5 hours to apply, then 24-72 hours before you can use it again
- How long it lasts: 5-10 years with DIY kits; 10-15 years with professional application
- What it costs: $100-$200 for a DIY kit; $300-$679 for a professional service versus thousands for a full replacement
Your fiberglass tub sees daily punishment. Hard water, soap scum, years of scrubbing, and regular bathroom use eventually wear the surface down. In South Florida’s humid climate, that breakdown can happen faster than many homeowners expect.
The good news? A peeling tub does not automatically mean a full bathtub replacement. In many cases, refinishing can restore a clean, glossy surface for a fraction of the cost.
This guide walks you through everything from deciding whether your tub is a good candidate, to understanding the refinishing process, to knowing when hiring a bathtub refinishing professional makes more sense.
I’m Frank Hernandez, President of All Surface Refinishing, and I’ve been working in bathtub refinishing for fiberglass and other bathroom and kitchen surface restoration projects across South Florida since 2011. Everything in this guide comes from real, hands-on experience.
Bathtub refinishing fiberglass terms explained:
What Bathtub Refinishing Fiberglass Really Means
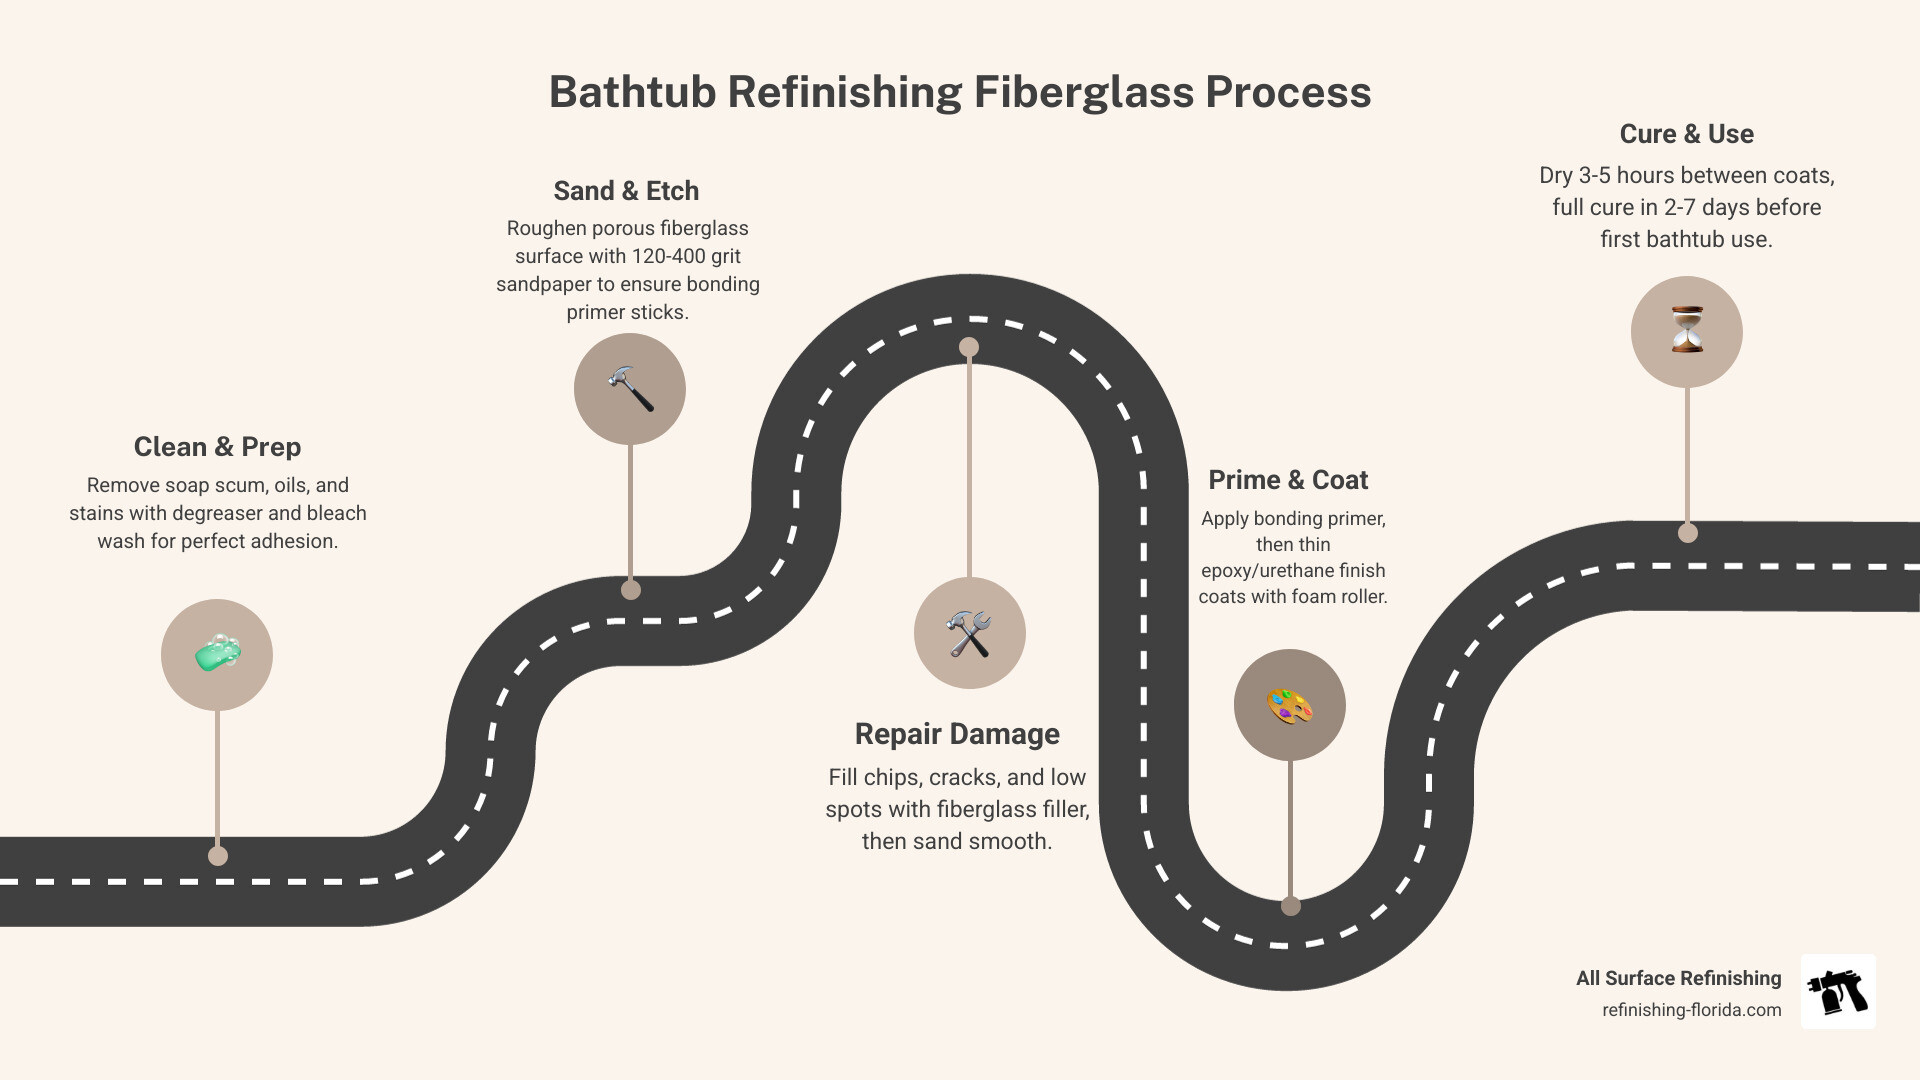
When people say bathtub refinishing fiberglass, they may also mean resurfacing or reglazing. In practical terms, it is a cosmetic restoration process for an existing fiberglass tub. We clean it, sand or etch it so the new coating can grip, repair minor damage, apply a bonding layer, and then apply a durable finish coat.
This is not the same as installing a brand-new shell. It is more like giving your current tub a new skin. That distinction matters because refinishing can dramatically improve looks and usability, but it does not turn a failing tub structure into a miracle bathtub.
For homeowners in Miami, Boca Raton, Boynton Beach, West Palm Beach, Broward County, and throughout South Florida, refinishing is often the smarter first option because replacement usually means demolition, plumbing disruption, tile repair, and much more bathroom downtime.
For a broader background on the material itself, see Fiberglass on Wikipedia.
How bathtub refinishing fiberglass works on a fiberglass tub
Fiberglass is different from cast iron or porcelain. It is lighter, slightly flexible, and more prone to surface wear, stress cracks, and peeling if the coating loses adhesion.
A proper refinishing process usually includes:
- Removing caulk and, where possible, trim or hardware around the drain and overflow
- Deep cleaning to remove soap scum, body oils, silicone residue, and mineral buildup
- Sanding or etching the surface to improve adhesion
- Repairing chips, hairline cracks, and low spots
- Applying a fiberglass-compatible bonding primer
- Applying the finish coat, often epoxy or urethane-based depending on the system
- Allowing enough drying and curing time before water exposure
The key word is adhesion. Most failed DIY jobs do not fail because the topcoat was cursed by bathroom spirits. They fail because the surface was not properly cleaned, sanded, dried, or repaired first.
What results you can realistically expect from a refinished tub
A well-refinished fiberglass tub can look impressively fresh. You can expect:
- A cleaner, glossier appearance
- Coverage of stains, dullness, and minor discoloration
- Smoother feel under normal use
- Improvement in small chips and cosmetic wear
- Color updates, most often to white or soft neutral shades
What you should not expect:
- A brand-new fiberglass shell
- Permanent correction of major structural movement
- A finish that survives abuse, abrasive cleaners, or suction-cup mats forever
Realistically, most refinished tubs last about 5 to 10 years, while professionally refinished tubs can often last 10 to 15 years with proper care. The better the prep, coating, environment, and maintenance, the longer the result usually lasts.
When to Refinish a Fiberglass Tub and When to Replace It
Not every tired-looking tub needs to be ripped out. But not every tub should be refinished either.
Signs your fiberglass bathtub is a good candidate for refinishing
Your tub is usually a solid refinishing candidate if it has:
- Peeling or worn surface coating
- Faded or outdated color
- Light scratches
- Minor cosmetic chips
- Surface stains that no longer clean up well
- A dull, rough-looking bottom
- Small spiderweb cracks that are only surface-level and repairable
- A structurally sound body with no active leaking
If the tub is solid underfoot and the issues are mostly cosmetic, refinishing is often the sweet spot between cost and appearance. It lets us restore the tub in place instead of turning your bathroom into a mini construction zone.
If you want more background on this process, see Fiberglass Bathtub Resurfacing.
Red flags that mean replacement or major bathtub repair is the smarter move
Some issues go beyond normal refinishing. Replacement or more extensive fiberglass repair is usually the better move when you have:
- Deep cracks that go through the tub body
- Soft spots in the tub floor
- A loose or flexing bottom
- Water leaking below or around the tub
- Mold damage in surrounding bathroom materials
- Subfloor damage
- Repeated cracking in the same area
- Severe structural failure
In those cases, applying new coating over the problem is like putting lipstick on a very soggy pig.
Before making a decision, review More info about fiberglass tub crack repair and More info about patching fiberglass tubs and showers.
Tools, Materials, and Safety for a DIY Refinish
DIY tub refinishing is possible, but it is not a casual Saturday craft project. The materials are strong, the prep is fussy, and the fumes are real.
The must-have tools and materials for bathtub refinishing fiberglass
If you plan to do bathtub refinishing fiberglass yourself, gather these basics first:
- Organic vapor respirator
- Nitrile gloves
- Goggles
- Painter’s tape
- Plastic sheeting or masking film
- Drop cloths
- Heavy-duty bathroom cleaner or degreaser
- Mildew remover or bleach solution for mildew areas
- Caulk remover
- Putty knife
- Sandpaper in multiple grits, commonly 120-grit and 400-grit or finer
- Tack cloth or microfiber cloth
- Fiberglass filler or repair compound for chips and cracks
- Bonding primer, if required by your system
- Tub topcoat or complete refinishing kit
- Foam roller and foam brush
- Optional non-slip additive for the floor area
When shopping for kits, look for fiberglass-safe systems made for tubs and tiles, not just general paint marketed with optimistic wording.
Ventilation, fumes, and safe working conditions in bathrooms
This part is not optional. Fiberglass tub refinishing products can release strong VOCs and fumes, especially in small bathrooms.
Use these safety rules:
- Wear an organic vapor respirator, not a paper dust mask
- Open windows if available
- Run the bathroom exhaust fan
- Use a box fan in the window to push fumes outside
- Keep the area sealed off from the rest of the home as much as possible
- Avoid flames, pilot lights, or smoking nearby
- Wear gloves and eye protection
- Keep temperature in the recommended range, often around 70-80°F
- Control humidity as much as possible
Florida humidity matters. In Miami-Dade County, Palm Beach County, and coastal areas like Fort Lauderdale or Key Biscayne, high moisture in the air can interfere with adhesion and curing. That means timing the job and ventilating properly is even more important.
Step-by-Step: How to Refinish a Fiberglass Bathtub
Below is the general process we recommend for a fiberglass tub. Always follow the exact instructions for the kit or coating system you are using.
Clean and prep the tub the right way before coating
Preparation is the whole game.
- Remove old caulk around the tub edges.
- Take off drain trim, overflow cover, and hardware if possible.
- Scrub the tub thoroughly to remove soap residue, body oils, hard water deposits, and silicone contamination.
- Treat mildew areas with bleach or mildew cleaner.
- Rinse completely.
- Sand the entire surface to dull the gloss and help the coating bite.
- Rinse again if your process requires it.
- Dry the tub completely.
- Wipe away dust with a tack cloth or microfiber cloth.
- Mask walls, tile, floors, fixtures, and anything else nearby.
Many DIY peel failures happen around the drain because residue hides there. That area must be especially clean and properly sanded.
Repair chips, cracks, and weak spots before refinishing
Never coat over damage and hope the topcoat will somehow become a structural engineer.
- Fill small chips and surface defects with fiberglass-compatible filler
- Repair stress cracks with a proper patch system or resin repair
- Sand repairs smooth so they blend with the surrounding tub
- Address low spots before coating
- If the tub bottom flexes too much, stop and evaluate whether it needs reinforcement or replacement
For a deeper look at repair-first strategy, see More info about fiberglass bathtub resurfacing.
Apply primer and finish coats without drips or peeling
Once the surface is clean, repaired, dry, and masked:
- Mix the primer or coating exactly as directed
- Pay attention to working time, because some products begin curing quickly after mixing
- Apply thin, even coats rather than one heavy coat
- Use a foam roller for flat areas and a foam brush for corners and edges
- Cross-roll to level the finish
- Watch the drain area and vertical walls for runs
- Apply the second coat only within the timing window specified by the product
Most DIY kits use brush-and-roll application. That can work, but it usually will not look quite as slick as a sprayed professional finish. The biggest causes of rough texture are lint, dust, thick coating, poor mixing, and trying to fix half-dry areas after they have already started setting.
Drying, curing, caulking, and first use timeline
A standard tub usually takes around 3 to 5 hours of active work, depending on repairs and prep. But the real waiting game comes after application.
Typical timeframes:
- Initial project time: 3-5 hours
- Light dry time: product dependent
- No use: usually 24-72 hours
- Full cure: often 2-3 days, and some systems continue hardening for up to 7 days
After the coating has cured enough, apply fresh caulk and reinstall hardware. For first use, be gentle. No hot bath marathons, no scrubbing, no dropping shampoo bottles like they owe you money.
Best Products, Common DIY Mistakes, and Real Cost Expectations
What to look for in a fiberglass tub refinishing kit
There are several DIY kits on the market, and review counts show that some are clearly more popular than others. For example, Rust-Oleum Specialty tub and tile kits have about 4.1 out of 5 stars from roughly 1,790 reviews for Gloss White and about 1,788 reviews for Coastal Fog. Ekopel’s pour-on bathtub refinishing kit has a 4.0 out of 5 rating from 4,363 reviews.
Those numbers tell us two things:
- DIY tub refinishing is very popular
- Even popular products still require careful prep and realistic expectations
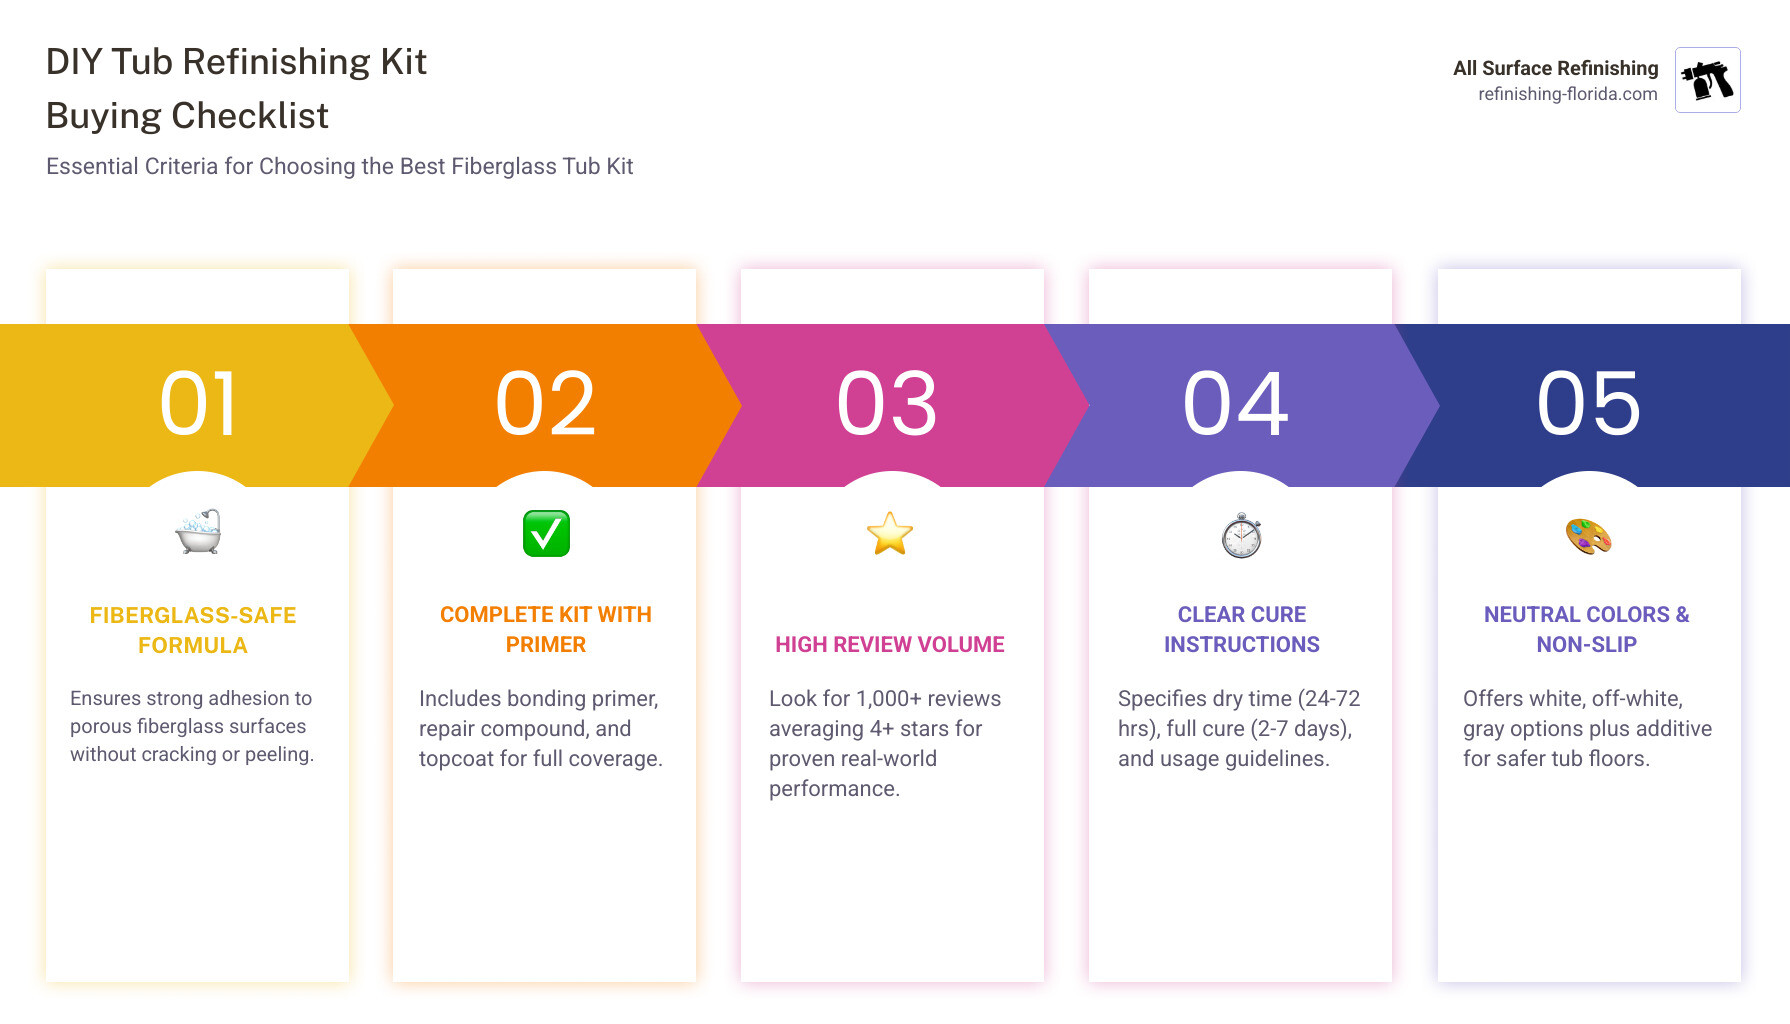
Use this buying checklist:
- Made specifically for fiberglass tubs
- Complete kit with coating components included
- Bonding primer or adhesion system included when needed
- Repair compound available for chips or cracks
- Good review volume, not just a shiny star rating
- Clear cure-time instructions
- Coverage suitable for a standard bathtub
- Neutral color options like white, off-white, or soft gray
- Optional non-slip additive for the tub floor
- Low-VOC option if odor is a major concern
The DIY mistakes that cause peeling, bubbling, and rough texture
The most common DIY mistakes are painfully predictable:
- Incomplete cleaning
- Leaving silicone or soap residue behind
- Skipping sanding or doing too little sanding
- Poor prep around the drain and edges
- Applying coats too thick
- Using cheap rollers that shed lint
- Touching or re-rolling partially cured coating
- Coating in high humidity or wrong temperature
- Poor ventilation
- Rushing cure time and using the tub too soon
If you do go DIY, slow down during prep and speed up only when the product instructions tell you to. The old joke is that 80% of tub refinishing is prep. The not-funny part is that it is mostly true.
DIY vs professional bathtub refinishing fiberglass costs and value
DIY usually costs less upfront, but not always less overall.
Typical ranges from the research:
- DIY bathtub kit: $100-$200
- Professional refinishing: $300-$679, sometimes higher in larger cities
- Replacement: often thousands once demolition, plumbing, disposal, and surrounding repairs are included
Professional services can save up to 75% over replacement cost. That is one reason refinishing is so popular in occupied homes, rental bathrooms, and commercial bathrooms where downtime matters.
| Option | Typical cost | Time to complete | Time before use | Expected lifespan |
|---|---|---|---|---|
| DIY bathtub refinishing | $100-$200 | 1 day | 24-72 hours | 5-10 years |
| Professional bathtub refinishing | $300-$679 | Often 1 day | 24-72 hours | 10-15 years |
| Bathtub replacement | Thousands | Several days or more | Varies | New tub lifespan |
DIY can make sense for a lightly worn tub and a patient homeowner. Professional refinishing makes more sense when you want a smoother finish, better durability, less risk, and less bathroom downtime.
For more on service options and pricing, see More info about professional bathtub refinishing and More info about bathtub refinishing costs.
Maintenance, Colors, and Professional Help in Florida Bathrooms
How to maintain a refinished fiberglass tub so it lasts longer
Maintenance is simple, but it matters.
Follow these rules:
- Clean weekly with a pH-neutral or non-abrasive bathroom cleaner
- Use a soft sponge or cloth
- Rinse away soap and shampoo residue
- Avoid abrasive pads, scouring powders, and harsh scraping tools
- Do not soak the finish with strong bleach solutions
- Avoid suction-cup bath mats, which can pull on the coating
- Repair chips quickly before water gets underneath
- Do not let shampoo bottles, metal razors, or heavy objects bang around in the tub
A refinished surface likes gentle treatment. If you care for it like a nice countertop instead of a garage sink, it will usually reward you.
Color and finish options for refinished bathtubs
Most fiberglass tub refinishing colors are practical neutrals, and that is usually a good thing. White remains the most requested because it looks clean, brightens bathrooms, and tends to have the broadest appeal for resale and rentals.
Common options include:
- Gloss white
- Off-white
- Soft gray or coastal gray
- Other neutral bathroom tones depending on the coating system
Gloss is the most common finish because it gives that refreshed, easy-to-clean look. Satin exists in some product lines, but high-gloss and gloss are generally preferred for tubs.
When hiring a pro makes more sense than doing it yourself
DIY is not always the budget winner if the job fails and has to be redone.
Hiring a pro usually makes more sense when:
- The tub has larger cracks or multiple repairs
- The bottom feels weak or flexes
- You want a sprayed finish
- The bathroom is your only full bath
- The property is occupied by tenants
- You need fast turnaround for rental or commercial bathrooms
- You want help handling South Florida humidity during application and cure
- You want clear warranty and maintenance guidance
At All Surface Refinishing, we handle bathtub, tile, kitchen, bathroom, and commercial refinishing across South and Southwest Florida, including Aventura, Miami, Miami-Dade County, Boca Raton, Boynton Beach, Broward County, Palm Beach County, and West Palm Beach. With 30+ years of experience and more than 14,000 completed projects, we know where fiberglass tubs typically fail and how to help them last.
If you want a broader overview of refinishing methods, see The Ultimate Guide to Bathtub Reglazing.
Frequently Asked Questions About Bathtub Refinishing Fiberglass
Can a peeling fiberglass bathtub be refinished successfully?
Yes, in many cases it can. The key is removing failed coating, cleaning thoroughly, sanding properly, and repairing damage before new coating is applied. If the peeling happened because of a bad earlier DIY job, a proper redo can still work well. But if the tub itself is structurally failing, refinishing alone is not the answer.
How long does bathtub refinishing fiberglass last?
A typical DIY job may last 5 to 10 years if done carefully and maintained well. A professional finish often lasts 10 to 15 years. Lifespan depends on prep quality, coating type, bathroom traffic, humidity, and how gently the tub is cleaned afterward.
Is it safe to use the bathtub right after refinishing?
No. Most tubs need at least 24 to 72 hours before use, depending on the product and conditions. Full cure may continue for several days. Wait until the coating and any fresh caulk have properly cured, and make sure lingering bathroom odor has dissipated before normal use.
Conclusion
A peeling fiberglass tub is frustrating, but it is not always a replacement project. In many Florida bathrooms, bathtub refinishing fiberglass is the faster, cleaner, and more affordable path to a bright, smooth-looking tub again.
The key is knowing which tubs are good candidates, using the right prep and products, respecting cure times, and being honest about when professional bathtub refinishing is the better move.
If your bathtub is peeling, stained, chipped, or simply making your bathroom look older than it is, All Surface Refinishing can help you decide on the smartest next step. Learn more about bathtub services.
All Surface Refinishing serves South and Southwest Florida, including Aventura, Boca Raton, Boynton Beach, Broward County, Coral Gables, Coral Springs, Fort Lauderdale, Hialeah, Hollywood, FL, Jupiter, Kendall, Miami, Miami Beach, Miami-Dade County, North Miami, Palm Beach County, Port Saint Lucie, Stuart, Vero Beach, West Palm Beach, and many surrounding bathroom and kitchen service areas.
