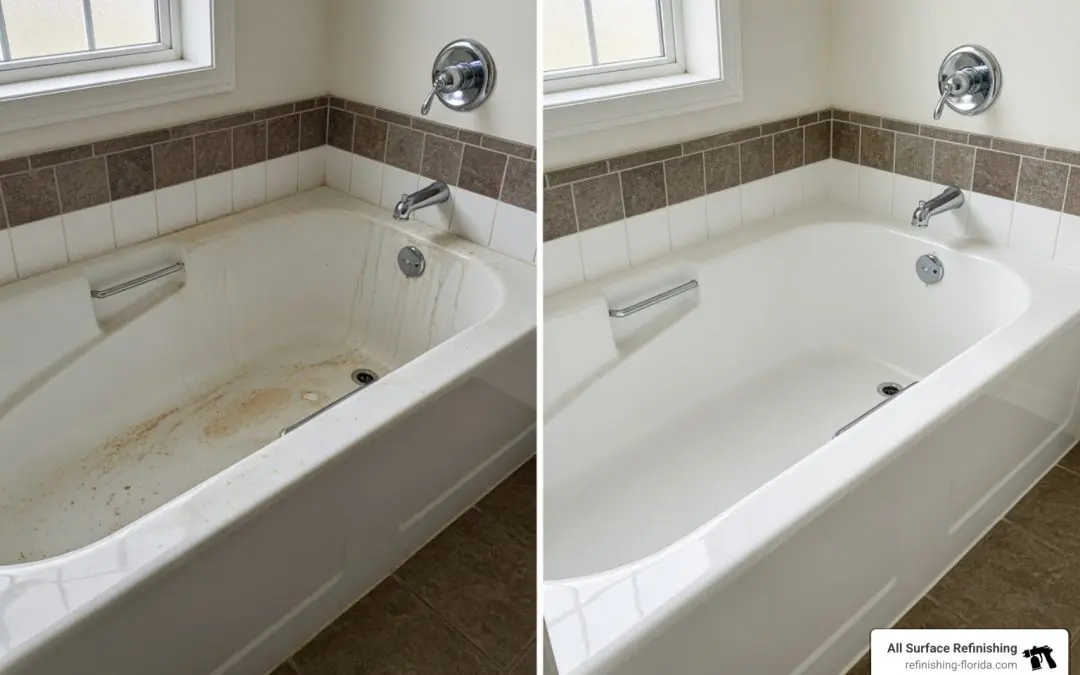
Your Bathtub Looks Rough — Here’s What a Fiberglass Tub Reglazing Kit Can Do About It
A fiberglass tub reglazing kit is one of the fastest, most affordable ways to restore a worn, stained, or dull bathtub — without tearing anything out.
Quick answer: Here are the top things to know before you buy:
| Question | Answer |
|---|---|
| What does it do? | Applies a new epoxy or resin coating over your existing fiberglass tub surface |
| What does it cost? | Roughly $40–$100 for a DIY kit |
| How long does it last? | 3–5 years with proper care |
| How long to cure? | Touch-dry in 10–24 hours; full cure in 3 days |
| Is it worth it vs. replacing? | Yes — replacement can cost several times more |
Fiberglass tubs get dull, stained, and scratched over time. A full replacement means demo work, plumbing disruption, and a big bill. Most homeowners and property managers don’t want any of that.
That’s exactly where a reglazing kit comes in. You can restore the surface in a single day — no contractor needed.
I’m Frank Hernandez, President of All Surface Refinishing, and I’ve been working with fiberglass and other bathroom surfaces since 2011. Over the years, I’ve seen what separates a fiberglass tub reglazing kit that holds up from one that peels within months — and I’ll walk you through everything you need to know to get it right.
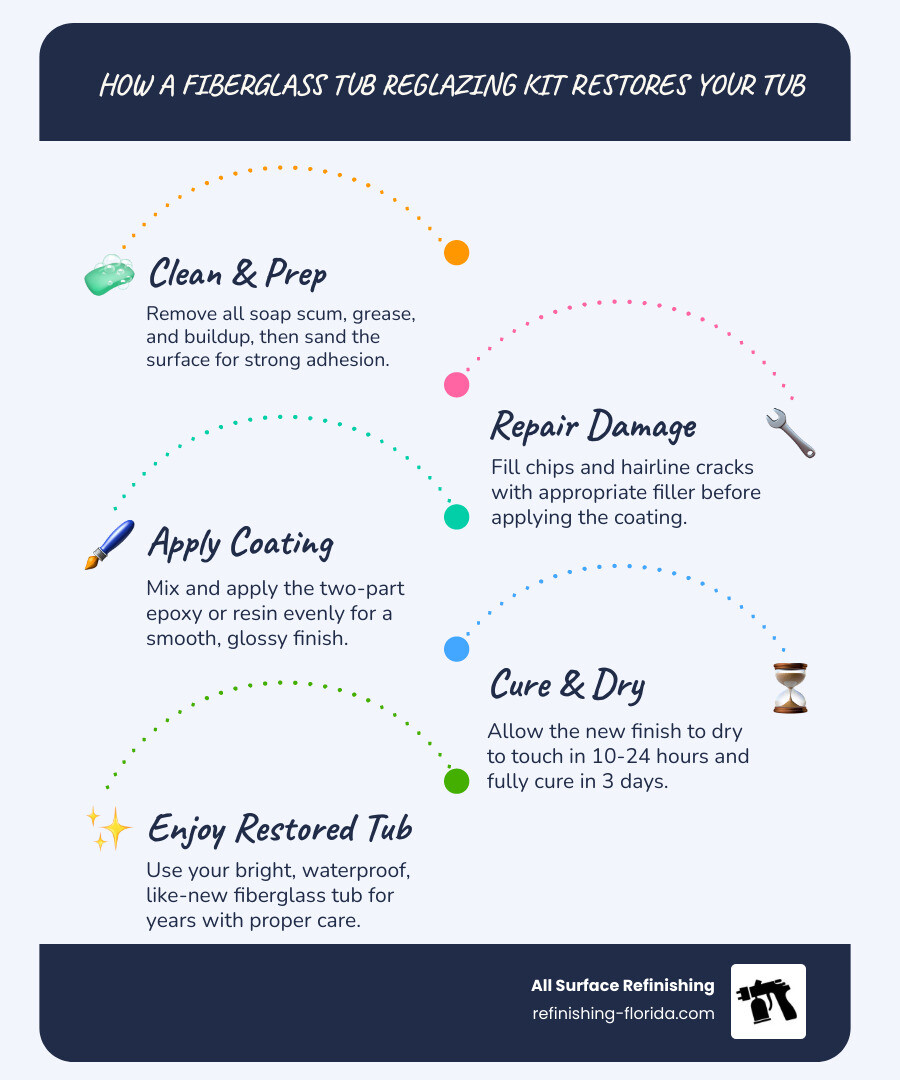
What a Fiberglass Tub Reglazing Kit Is and When It Makes Sense
A fiberglass tub reglazing kit is a DIY bathtub refinishing product designed to coat the existing tub surface with a new finish, usually a two-part epoxy or resin system. Once applied correctly, it creates a hard, glossy, water-resistant layer that can make an old fiberglass bathtub look bright and clean again.
Most kits are built around a few key ideas:
- Bond to the old tub surface
- Cover stains, discoloration, and minor cosmetic wear
- Create a smoother, easier-to-clean finish
- Restore shine without replacing the whole bathtub
Some kits are self-leveling, which means the coating flows out to reduce roller texture or brush marks. Better formulas also resist moisture, wear, and yellowing better than cheap paint. And yes, regular paint is not the move here. Your bathtub deserves better than a weekend craft project.
How a fiberglass tub reglazing kit works
Most kits follow the same basic system:
- Clean and degloss the tub surface
- Sand or etch it so the coating can grip
- Repair chips or small imperfections
- Mix the two-part coating
- Apply the topcoat by rolling, brushing, pouring, or sometimes spraying
- Let it dry and fully cure before water exposure
The coating forms a mechanical and chemical bond with the fiberglass. Some products are marketed as primer-free, but even then, the prep stage still does the heavy lifting. If the tub is not cleaned, sanded, and fully dry, the coating may peel early.
When to reglaze instead of replace your tub
A kit makes the most sense when the tub has:
- Surface stains
- Dullness or fading
- Light scratches
- Minor chips
- Small cosmetic cracks that are not structural
- Old color that makes the whole bathroom feel dated
For many Florida bathrooms, reglazing is attractive because it avoids:
- Bathtub removal
- Plumbing changes
- Tile damage around the tub
- Extra downtime in the bathroom
Professional refinishing services often save up to 75% compared with replacement, and DIY kits can reduce costs even more if the tub is in decent shape. If you want a deeper budget breakdown, see More info about bathtub refinishing cost.
When a kit is not enough
A reglazing kit is not a magic wand. It improves the surface. It does not fix major structural problems.
A kit is usually not enough if your fiberglass tub has:
- Soft spots in the floor
- Flexing under body weight
- Large cracks
- Leaks
- Serious spider cracking
- Damage that goes through the fiberglass layers
Those problems usually need repair before any new coating goes on. If you glaze over them, the finish may fail because the tub underneath is still moving or weakened. If you are dealing with cracks, start here: More info about fiberglass crack repair.
How to Choose the Best Fiberglass Tub Reglazing Kit
Not all kits are equal. Some are budget-friendly and simple. Others are thicker, lower-odor, or designed for a more professional-looking result.
When shopping, compare these factors:
- Coverage area
- Drying time
- Full cure time
- Odor level
- VOC claims
- Application method
- Color options
- Slip resistance
- Durability
- Whether tools are included
Best kit types for fiberglass tubs
There are four common application styles:
- Roll-on kits
- Pour-on kits
- Brush-on kits
- Spray kits
Roll-on kits are usually the most beginner-friendly. They are widely available and practical for one standard bathtub.
Pour-on kits are popular with shoppers who want a thicker, self-leveling coating. Some of these products claim lower odor and a finish that reduces roller marks.
Brush-on kits can work for detail areas, but they are more likely to leave visible strokes on a large bathtub surface.
Spray finishes can look smooth, but they are usually trickier for DIY use because overspray, ventilation, and even coverage become bigger issues.
Fiberglass tub reglazing kit features that matter most
Here is what we look for in a strong bathtub refinishing kit:
- Coverage for one standard bathtub
- Two-part epoxy or resin chemistry
- Thick coating for better hide
- Self-leveling behavior
- Hot-water resistance
- Non-yellowing finish
- Optional non-slip additive for bathtub safety
- Reasonable pot life after mixing
- Clear cure instructions
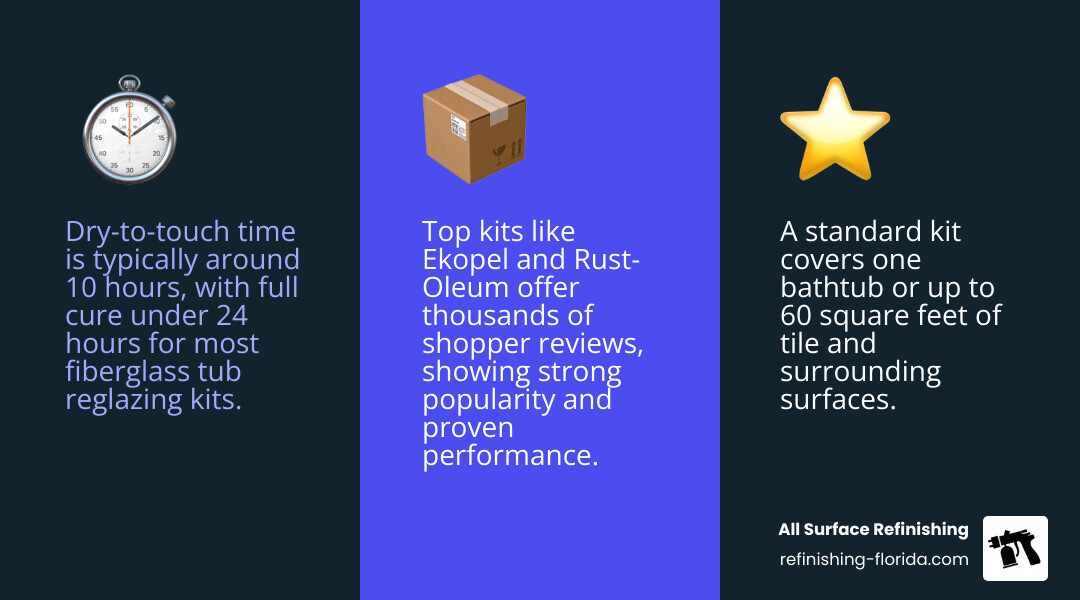
One commonly sold roll-on kit notes coverage for one standard bathtub or up to 60 square feet of tile. Another popular two-part epoxy kit comes in a 32 oz size and is marketed for fiberglass, porcelain, ceramic, cast iron, steel, and some acrylic surfaces. A Home Depot-listed two-part resin kit comes in 20 oz and was priced at $79.00 in the research, with dry-to-touch time around 10 hours and full drying under 24 hours.
Product roundup: most popular options shoppers compare
Below is a simple comparison of popular kit styles and products buyers often look at in 2026.
| Product | Type | Coverage | Dry/Cure Timing | Odor | Notes | Shopper Signal |
|---|---|---|---|---|---|---|
| Tub & Tile 2-Part Epoxy Refinishing Kit, White, 32 oz. | Two-part epoxy | Standard tub / multi-surface use | Apply in 1 day; water exposure often after 3 days | Moderate to strong | Self-leveling, porcelain-like look | Good budget value |
| Browse fiberglass tub refinishing kits on Amazon | Mixed brands | Varies by brand | Varies | Varies | Good for comparing options and reviews | Large selection |
| 20 oz. DIY Bathtub and Tile Refinishing Kit- White – The Home Depot | Two-part resin | Tub, showers, sinks, tile | Dry to touch in about 10 hours; fully dry under 24 hours | Moderate | Durable resin formula | Mid-range option |
A few popularity signals from the research:
- Ekopel has more than 4,363 customer reviews on Amazon
- Rust-Oleum 7860519 has 13,438 customer reviews on Amazon
- Rust-Oleum 384165 has 1,127 customer reviews on Amazon
- BATHWORKS has 306 customer reviews at Home Depot
- NADAMOO has 2,202 customer reviews on Amazon
That review volume does not automatically tell us which kit is best for your bathroom, but it does show which products shoppers most often compare.
Step-by-Step: How to Prep and Apply a Fiberglass Tub Reglazing Kit
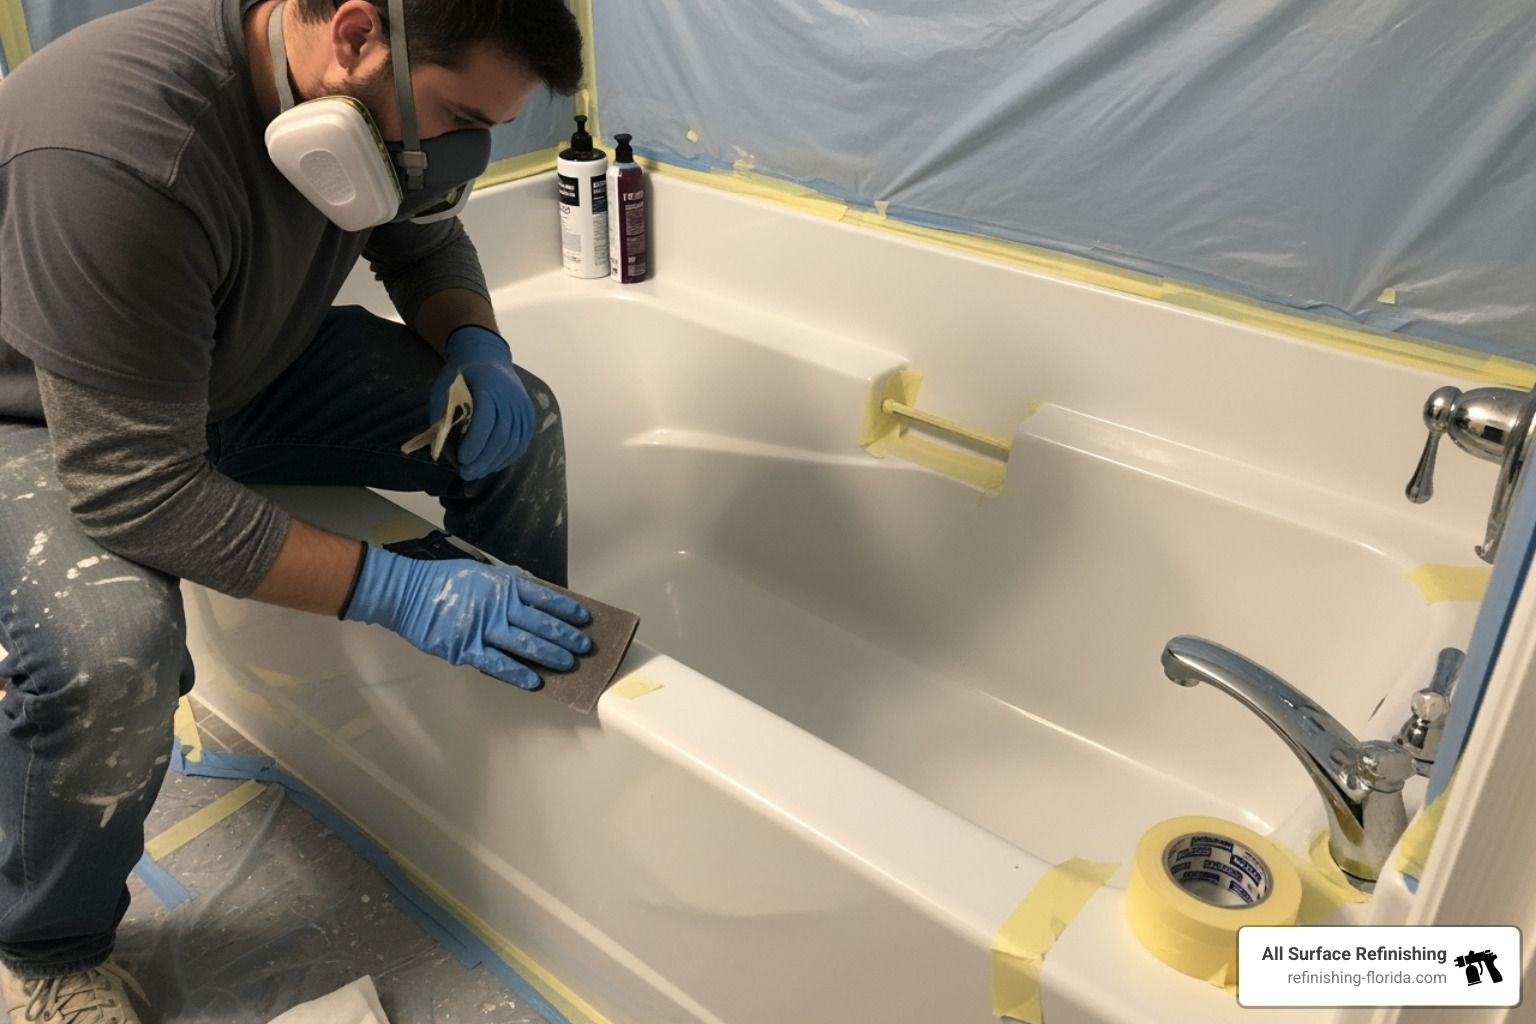
Prep is the entire ballgame. Most peeling problems are prep problems wearing a chemistry costume.
Surface preparation for a fiberglass tub reglazing kit
Before applying any coating, we want the fiberglass surface squeaky clean, dull rather than shiny, and fully dry.
Use this prep checklist:
- Remove soap scum, body oils, and cleaner residue with a strong bathroom-safe degreaser.
- Scrub away calcium and mineral buildup.
- Remove old caulk around the tub edge.
- Repair chips or small defects with the filler recommended by the kit manufacturer.
- Sand the surface with the grit recommended on the product instructions, often using abrasive pads or sandpaper.
- Rinse thoroughly and let the tub dry completely.
- Mask tile, drains, fixtures, walls, and flooring with tape and protective plastic or paper.
- Set up ventilation before mixing the coating.
Silicone residue is one of the biggest troublemakers. If any is left behind, the new coating may fisheye or separate. For more fiberglass-specific background, see More info about fiberglass bathtub resurfacing.
How to apply a fiberglass tub reglazing kit without ruining the finish
Always follow the instructions on the exact kit you buy, but the usual process looks like this:
- Read the full instruction sheet before opening anything.
- Mix the two parts exactly as directed.
- Pay attention to pot life, which is the amount of workable time after mixing. Some products give you around 60 to 90 minutes, depending on temperature.
- Apply thin, even coats rather than one heavy coat.
- Use a smooth foam roller if the kit is roll-on.
- Work from the back wall or top edge down toward the drain area.
- Maintain a wet edge so overlap lines blend together.
- Do not overwork the coating once it starts setting.
- Check corners, around the drain, and the tub floor for pooling.
- Keep dust, hair, and lint out of the bathroom while the coating levels and cures.
For pour-on products, you slowly pour and guide the material so it flows over the surface evenly. For roll-on systems, use light pressure and avoid going back over partially cured sections.
If you want broader bathtub DIY context, these guides help: The Ultimate DIY Bathtub Reglazing Guide From Worn-Out to Wow and Don’t Throw the Tub Out with the Bathwater Use a DIY Kit.
Drying, curing, and first use timeline
Dry time and cure time are not the same thing.
- Dry to touch means the surface is no longer tacky
- Cure time means the coating has hardened enough for use and water exposure
Based on the research, common timeframes are:
- Dry to touch: about 10 hours on some resin kits
- Use after 24 hours: possible for certain fast-curing formulas
- Water exposure after 3 days: common for epoxy bathtub kits
- Full project time: usually one day for prep and coating, plus cure time
Temperature matters too. Some products perform best around 70 to 75 degrees Fahrenheit. In Florida, humidity can slow curing, so if your bathroom is muggy, give the finish extra time. And during the first days:
- Do not leave standing water in the tub
- Do not use bath mats with suction cups
- Do not store bottles on the tub ledge if they can drip
- Avoid hair dye or heavily pigmented bath products for longer than the minimum cure period
Safety precautions during tub reglazing
This is bathroom refinishing, not cookie baking. Take safety seriously.
Use these precautions:
- Wear chemical-resistant gloves
- Wear goggles
- Use a respirator appropriate for fumes and coatings
- Open windows if possible
- Run an exhaust fan if it vents outside
- Keep children and pets away
- Avoid skin contact
- Do not mix or apply near ignition sources
- Dispose of leftover material according to label directions and local rules
Some newer formulas are marketed as lower odor or zero VOC, but that does not mean you should skip ventilation or protective gear. It just means your bathroom may smell less like a chemistry lab.
Benefits, Lifespan, and Maintenance After Reglazing
A good fiberglass tub reglazing job can dramatically improve a bathroom without demolition. That is a big reason these bathtub kits stay popular.
Main benefits compared with replacing the bathtub
The biggest advantages are practical:
- Lower cost
- Less mess
- Faster bathroom turnaround
- No tear-out of the bathtub
- Less chance of damaging surrounding tile
- No major plumbing disruption
- Fresh white or updated finish
For many homes in South and Southwest Florida, that means less disruption in a primary bathroom, guest bathroom, or rental property. If you want more DIY context, see More info about DIY bathtub reglazing.
How long a reglazed fiberglass tub typically lasts
For DIY kits, a realistic expectation is usually around 3 to 5 years with proper care. That lines up with the intro and with real-world product feedback patterns in the research.
Professional refinishing tends to last longer, often around 10 to 15 years with proper maintenance, because professional systems, prep methods, and coatings are generally more robust.
The actual lifespan depends on:
- Surface prep quality
- Coating thickness
- Daily wear
- Cleaning habits
- Constant water exposure
- Whether the tub floor flexes
- Whether chips are repaired quickly
Maintenance tips to make the finish last longer
Once the bathtub is cured, treat it gently if you want the finish to last.
Best practices:
- Clean with non-abrasive bathroom cleaners
- Use mild soap and a soft cloth or sponge
- Rinse residue off regularly
- Avoid bleach soaks unless the product instructions clearly allow them
- Avoid abrasive pads and powdered cleaners
- Do not use suction-cup bath mats
- Repair small chips early before water gets underneath
- Do not drop metal shower heads, tools, or heavy bottles into the tub
For more maintenance and refinishing guidance, see More info about bathtub reglazing.
Common mistakes that cause peeling or bubbles
Most failed bathtub kit jobs can be traced to a few repeat offenders:
- Poor cleaning
- Skipping sanding
- Leaving behind silicone caulk residue
- Bad mixing ratio
- Applying coats too thick
- Over-rolling or over-brushing
- Coating in a dusty room
- Rushing the cure time
- Reintroducing water too soon
One industry source noted that about 25% of professional refinishing work involves redoing failed DIY attempts. That does not mean DIY cannot work. It means shortcuts are expensive.

Frequently Asked Questions About Fiberglass Tub Reglazing Kits
How much does a typical fiberglass tub reglazing kit cost?
Most DIY bathtub kits fall roughly in the $40 to $100 range.
Examples from the research include:
- A 32 oz epoxy kit listed at $41.99
- A 20 oz two-part resin kit listed at $79.00
- A 22 oz slip-guard kit listed at $100.39
That cost is usually for one standard bathtub, assuming you do not need lots of extra repair products. Compared with bathtub replacement, a reglazing kit is usually far more cost-effective upfront.
How long before you can use the bathtub again?
That depends on the product.
Typical ranges from the research:
- Dry to touch in about 10 hours on some kits
- Ready in about 24 hours for some fast-curing systems
- Water exposure after 72 hours for many epoxy kits
Our advice is simple: follow the manufacturer instructions exactly, and if your Florida bathroom is humid, wait longer rather than shorter.
Can you use a fiberglass tub reglazing kit on tubs with cracks or chips?
Yes, for minor issues.
A reglazing kit can usually handle:
- Small chips
- Light cosmetic scratches
- Minor surface imperfections after filler repair
- Hairline cosmetic cracks, if the tub itself is stable
A kit is not the right answer for:
- Structural cracks
- Soft tub floors
- Flexing fiberglass
- Leaking damage
- Large broken areas
If the bathtub is moving, the new coating will struggle too. Surface coatings like stability. Drama-free tubs hold finishes better.
Final Verdict: Is a Fiberglass Tub Reglazing Kit Worth It?
Yes, a fiberglass tub reglazing kit can absolutely be worth it if your bathtub has cosmetic wear and you want an affordable bathroom refresh without replacing the tub.
It makes the most sense when:
- The tub is structurally sound
- You want to save money
- You are comfortable following detailed prep steps
- You can give the coating enough cure time
- You understand that DIY lifespan is usually shorter than a professional finish
If you want to buy a kit, focus on prep quality, cure time, odor level, and whether the formula is built for fiberglass tubs and bathrooms.
If you would rather skip the risk of peeling, bubbles, and redo work, we can help. At All Surface Refinishing, we bring 30+ years of refinishing experience and more than 14,000 completed projects to bathroom surfaces across South and Southwest Florida.
To explore the professional route, see More info about professional bathtub reglazing or More info about bathtub services.
