Is a DIY Bathtub Refinishing Kit Actually Worth It?
A DIY bathtub refinishing kit is one of the fastest, most affordable ways to restore a stained, chipped, or outdated tub — without tearing out your entire bathroom. Here’s a quick summary before we dive in:
Top DIY bathtub refinishing kits at a glance:
| Kit | Best For | Price Range | Cure Time |
|---|---|---|---|
| Ekopel 2K | Odorless, long-lasting results | ~$110 | 24-hr set, 30-day full cure |
| Rust-Oleum Tub & Tile | Budget-friendly, multi-surface | ~$30-$50 | 3 days |
| Bathworks 20 oz. | Beginners, quick turnaround | ~$79 | Under 24 hours |
| Roll-On Essentials | Tile + tub enclosures | Varies | 24-72 hours |
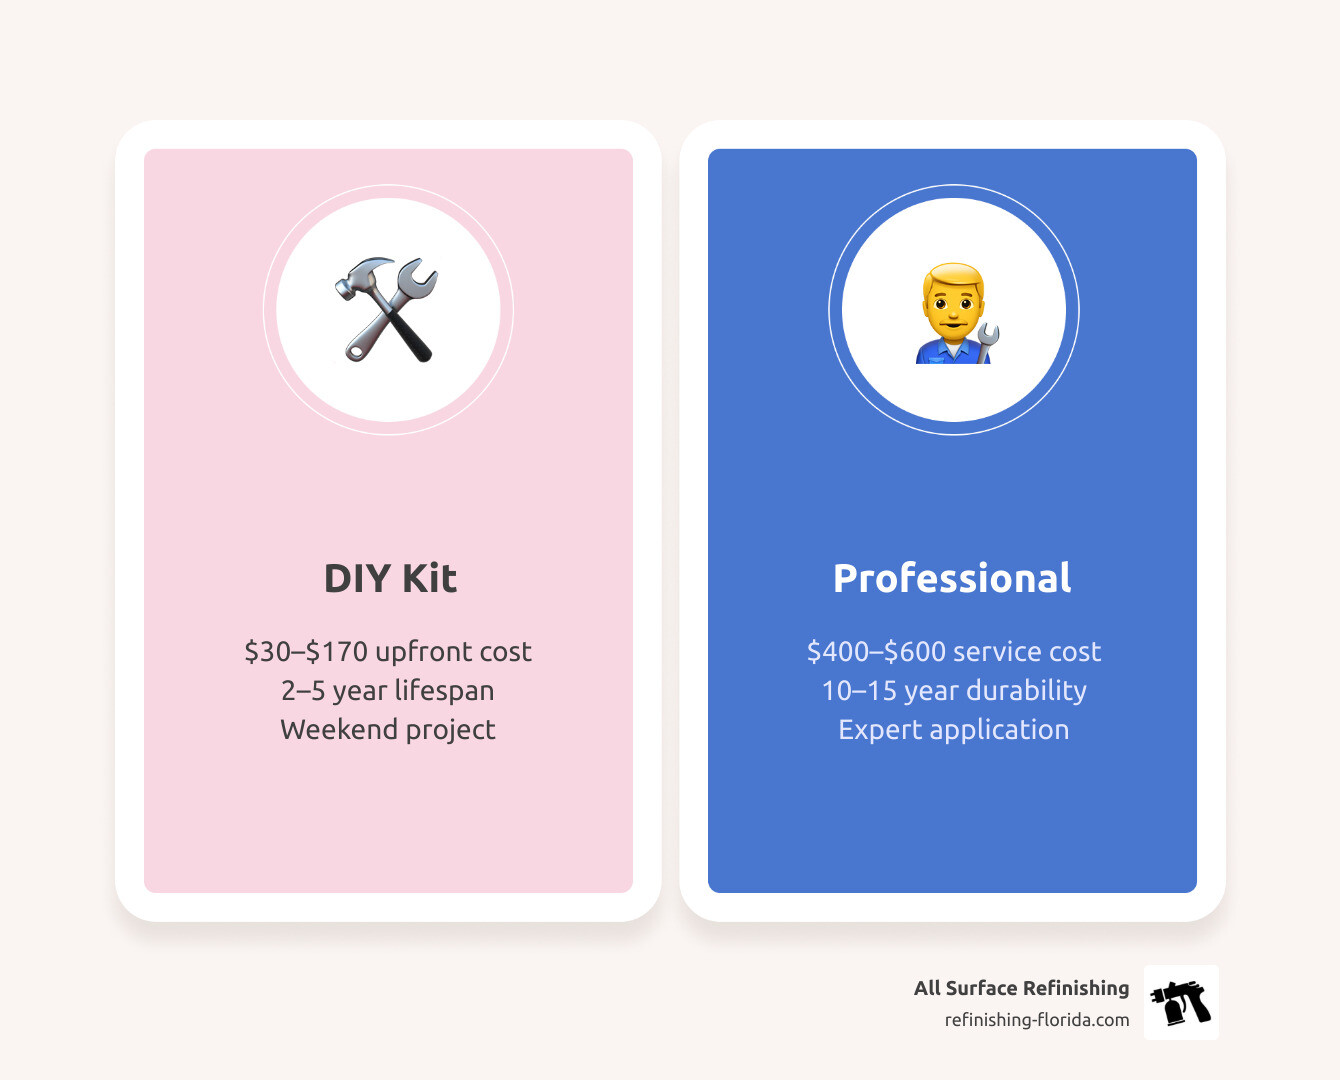
The bottom line: DIY kits typically cost $30–$170 and last 2–5 years with proper prep. Professional refinishing costs $400–$600 but can last 10–15 years. For a temporary fix or tight budget, a DIY kit can work well — if you prepare the surface correctly.
Your tub doesn’t have to look tired and worn just because a full replacement costs $3,000 or more. The right kit can transform a yellowed, chipped surface into something that looks brand new — often in a single weekend. But not all kits are equal, and the results depend heavily on choosing the right product and applying it correctly.
I’m Frank Hernandez, President of All Surface Refinishing, with over 25 years of hands-on refinishing experience in South Florida — and I’ve personally seen what works (and what fails) when it comes to DIY bathtub refinishing kits. In this guide, I’ll walk you through the top-rated options so you can make a confident, informed choice.
Understanding the DIY Bathtub Refinishing Kit: Materials and Compatibility
When we talk about a DIY bathtub refinishing kit, we aren’t just talking about a bucket of paint. These systems are typically engineered as two-part resin formulas. This means you have a resin (Part A) and a hardener (Part B) that, when mixed, create a chemical reaction. This reaction results in a hard, glass-like surface that mimics the original porcelain or acrylic of your tub.
The chemistry is vital because the coating must withstand constant water exposure, temperature fluctuations, and the weight of a person standing on it. Most high-quality kits use either an epoxy or a high-tech acrylic finish to ensure surface adhesion. If you are working with older fixtures, you might find our The Ultimate Guide to Resurfacing Your Cast Iron Tub at Home particularly helpful for understanding how these materials bond to heavy metal surfaces.
Compatible Surfaces for Home Kits
Before you run out to Home Depot or order from Amazon, you must know what your tub is made of. While most kits are versatile, some are better suited for specific materials.
- Porcelain and Ceramic: These are the most common surfaces. They require a strong etching agent to “rough up” the surface so the new coating can stick.
- Fiberglass and Acrylic: These are softer materials. You have to be careful not to use overly aggressive chemicals, but a good DIY bathtub refinishing kit will bond beautifully to these if sanded correctly.
- Cast Iron and Steel: These are incredibly durable but prone to rust. You’ll need to address any rust spots before applying the kit.
For a deeper dive into how these materials interact with new coatings, check out The Ultimate Guide to Bathtub Reglazing.
Application Methods at a Glance
| Method | Best For | Pros | Cons |
|---|---|---|---|
| Spray-On | Professional-looking finish | Smoothest result, no brush marks | High risk of drips, heavy fumes |
| Roll-On | Beginners | Easier to control, less mess | Can leave texture or “stipple” |
| Pour-On | Thick, high-gloss finish | Self-leveling, covers imperfections | Harder to manage on vertical walls |
Top-Rated DIY Bathtub Refinishing Kit Options for 2026
As we move through May 2026, the technology behind these kits has improved significantly. We are seeing more “self-leveling” formulas that help hide the brush or roller marks that used to plague DIY projects.
One of the most popular options is the 20 oz. DIY Bathtub and Tile Refinishing Kit- White – The Home Depot . This kit is a favorite because it uses a two-part resin that is extremely durable. Users frequently report that it makes their tub look “fabulous” or “brand-new” after it fully cures.
Best Odorless DIY Bathtub Refinishing Kit
If you’ve ever used traditional “tub paint,” you know the smell can be overwhelming—often requiring you to leave the house for a day. However, the market has shifted toward VOC-free (Volatile Organic Compound) options.
The Ekopel 2K kit is a standout here. Statistics show that 95% of customers who mentioned the smell said it was completely odor-free or had virtually no fumes. It uses a “pour-on” method that creates a very thick coating. Another great option for those sensitive to chemicals is the Tub & Tile Refinishing Kit – Bathtub Coating | Rust-Oleum , which is widely available and budget-friendly, though it does require a longer 3-day cure time.
Most Durable DIY Bathtub Refinishing Kit for Beginners
For those who are nervous about their first project, we often recommend kits with self-leveling properties. Bathworks offers several variations, including a 20 oz. DIY Bathtub Refinishing Kit- Bone and a 22 oz. DIY Bathtub Refinishing Kit with Slip Guard in Biscuit .
The inclusion of a “Slip Guard” is a major plus for families with children or seniors in Boca Raton or Miami. If you’re looking for quick tips to make the process easier, see our 5 DIY Bathtub Renewal Hacks.
The Step-by-Step Application Process for Professional Results
Achieving a professional finish with a DIY bathtub refinishing kit is 90% preparation and 10% application. If you rush the cleaning, the finish will peel. It’s not a matter of if, but when.
Preparation and Cleaning Essentials
- Remove Caulk: Use a utility knife to remove every bit of old silicone caulk. New finish will not stick to silicone.
- Scrub with TSP: Use Trisodium Phosphate (TSP) to remove soap scum, body oils, and mineral deposits.
- Etching or Sanding: For porcelain, use an etching cream. For fiberglass, use 120-grit sandpaper to create a “profile” for the paint to grab onto.
- Dry and Wipe: The tub must be bone-dry. Use lint-free towels and a final alcohol wipe-down to ensure no dust remains.
For a more detailed breakdown, follow our guide on How to Repaint a Bathtub in 7 Easy to Follow Steps.

Mixing and Curing Times
Once you mix Part A and Part B, the clock starts ticking. Most resins have a “pot life” of about 3 to 4 hours. If you take too long, the material will harden in the tray.
- Dry-to-touch: Usually 10 hours.
- Ready for use: Most kits say 24 hours, but we recommend waiting 48 to 72 hours in humid Florida climates like Fort Lauderdale or West Palm Beach.
- Full Chemical Cure: Some products, like Ekopel, can take up to 30 days to reach maximum hardness. Avoid suction-cup bath mats during this time!
For a deep dive into the “wow” factor, check out The Ultimate DIY Bathtub Reglazing Guide: From Worn-Out to Wow.
Pros, Cons, and Longevity: Is a DIY Kit Right for You?
Is a DIY bathtub refinishing kit a permanent solution? Generally, no. While high-end kits claim to last up to 20 years, real-world data from forums like Reddit suggest a 2–5 year lifespan for most DIY attempts.
Pros:
- Cost: You can save thousands compared to a $3,000 replacement.
- Speed: The project can be done in a weekend.
- Appearance: 91% of users confirm the tub looks brand-new immediately after curing.
Cons:
- Durability: Prone to chipping if you drop heavy objects.
- Fumes: Unless you buy a VOC-free kit, the smell can be intense.
- Maintenance: You can no longer use abrasive cleaners (like Comet or Ajax).
Before you commit, read Is Bathtub Reglazing Worth It? Your Step-by-Step DIY Answer.
Comparing DIY to Professional Services
While a kit costs about $80 to $150, hiring a professional service in South Florida typically costs $400 to $600. Why the gap? Professionals use industrial-grade spray equipment, high-strength bonding agents (like MM-4 non-acid bond), and often include a multi-year warranty.
In fact, about 25% of the work we do at All Surface Refinishing involves stripping off a DIY bathtub refinishing kit that failed or started peeling. If you’re also looking at your kitchen, you might find our guide on DIY Resurfacing Countertops useful for comparison.
Frequently Asked Questions about Bathtub Refinishing
How long does a DIY refinished tub last?
With perfect preparation and gentle care (no abrasive scrubbers!), a DIY kit usually lasts 2 to 5 years. Professional jobs often last 10 to 15 years because of the superior bonding agents used.
Can I use a DIY kit on a fiberglass jacuzzi?
Yes, but you must be careful. Ensure the resin doesn’t clog the jets. Most kits are compatible with fiberglass and acrylic, but the “flexing” of a large jacuzzi floor can sometimes cause DIY coatings to crack over time.
Are the fumes from refinishing kits dangerous?
Standard epoxy kits contain high VOCs that can cause headaches or dizziness. Always wear an N95 or respirator and use fans to exhaust air out of the bathroom. If you’re worried about safety, stick to odorless kits like Ekopel 2K.
Conclusion: Achieving a Like-New Finish in Florida
Whether you choose to tackle the project yourself with a DIY bathtub refinishing kit or decide to call in the experts, the goal is the same: a beautiful, clean bathroom you can be proud of. At All Surface Refinishing, we’ve spent over 30 years perfecting the art of the “like-new” finish.
With over 14,000 projects completed across Miami, Fort Lauderdale, Boca Raton, and West Palm Beach, we understand the unique challenges of the Florida climate. If your DIY project feels a bit too daunting, or if you want a finish that carries a professional guarantee, we are here to help.
Ready to transform your bathroom without the demolition headache? Explore our professional Bathtub Refinishing Services and see the difference 30 years of experience makes.
