Why Bathtub Reglazing Deserves Your Attention
Bathtub Reglazing is a transformative process that restores worn, stained, or dated bathtubs to look brand new—without the expense or hassle of full replacement. Also called refinishing or resurfacing, this cosmetic upgrade applies a durable coating over your existing tub, strengthening the surface and giving it a fresh, modern appearance.
Quick Answer: Is Bathtub Reglazing Worth It?
- Cost: Averages $480 for professional work vs. $3,000+ for replacement
- Time: Completes in 3-5 hours, ready to use in 24-48 hours
- Durability: Lasts 5-20 years with proper care
- DIY Kits: Cost $30-$200 but require careful preparation and safety precautions
- Best For: Tubs with surface damage, stains, or outdated colors that still hold water
The appeal is clear. You save up to 75% compared to replacement costs. You avoid the mess and disruption of tearing out plumbing and tile. And you keep functional fixtures out of landfills—a win for your wallet and the environment.
But here’s the catch: DIY reglazing requires meticulous surface preparation, proper ventilation, and strict safety protocols. The chemicals involved (especially methylene chloride in some stripping agents) can be dangerous. At least 14 worker deaths have been reported since 2000 related to improper ventilation during bathtub refinishing.
Professional refinishers use industrial-grade coatings, spray application systems, and bonding agents that create a chemical bond between old and new surfaces. This produces a seamless, durable finish that typically outlasts DIY kits by years.
So is bathtub reglazing worth it? Absolutely—if done correctly. Whether you tackle it yourself or hire a pro depends on your budget, skill level, and tolerance for risk.
I’m Frank Hernandez, President of All Surface Refinishing, and I’ve been perfecting Bathtub Reglazing techniques across South Florida since 2011, working with everything from porcelain to fiberglass to cast iron tubs. In this guide, I’ll walk you through the entire DIY process, the safety considerations you can’t ignore, and when it makes more sense to call in the experts.
The “Why”: Key Benefits of Reglazing Your Tub
When your bathtub starts showing its age with chips, stains, or a faded finish, you might immediately think “replacement!” But hold on a minute! Bathtub Reglazing offers a compelling alternative that brings a host of benefits, changing your bathroom without the hefty price tag or demolition drama. From saving your hard-earned cash to giving your tub a complete aesthetic facelift, reglazing is a smart move. It’s an eco-friendly choice that strengthens the surface and can even increase your property’s value. We’re not just restoring a tub; we’re giving it a new lease on life. To learn more about how this process can revive your bathroom, explore our guide on Revive Your Tub with Bath Resurfacing.
Cost and Time: Reglazing vs. Replacement
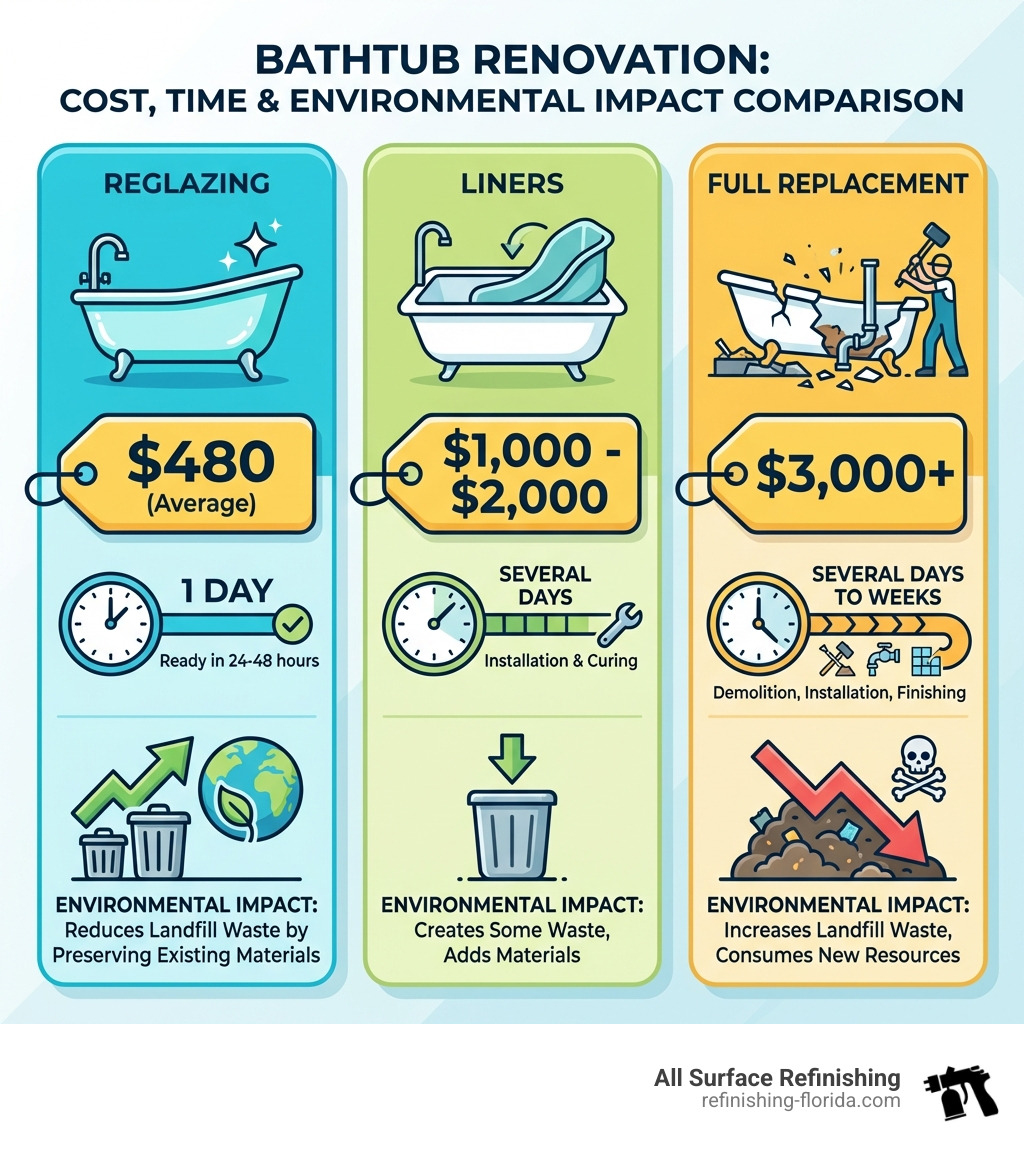
Let’s talk numbers, because that’s often where the decision-making begins. Replacing a bathtub is a major undertaking. It involves demolition, plumbing work, potential tile damage, and installation of a new fixture. The average cost for a full bathtub replacement can easily climb to $3,000 or more, and that’s before you factor in the mess and the days or even weeks your bathroom might be out of commission.
Now, compare that to Bathtub Reglazing. The average cost for professional reglazing is around $480. That’s a significant saving, often up to 75% less than replacement! Not only is it budget-friendly, but it’s also incredibly time-efficient. A professional reglazing job can typically be completed in just 3 to 5 hours, and your tub will be ready for use within 24 to 48 hours. This minimal disruption means you get your bathroom back almost immediately, without the headache of extensive construction. For a detailed breakdown of costs, check out our Porcelain Tub Refinishing Cost guide.
Environmental and Aesthetic Impact
Beyond the financial and time savings, Bathtub Reglazing offers substantial environmental and aesthetic advantages. Every bathtub we reglaze is one less tub heading to a landfill. By preserving your existing fixture, we significantly reduce waste and conserve resources that would be used to manufacture a new one. It’s a small step that makes a big difference for our planet.
Aesthetically, the change is remarkable. Reglazing can cover up years of wear and tear, hiding unsightly stains, chips, and faded colors. We can restore your tub to a gleaming white or even change its color to match a new bathroom design, giving it a modern, fresh look. The result is a smooth, glossy surface that resembles a brand-new tub, enhancing the overall appeal of your bathroom. This process truly takes your tub From Grime to Shine: Your Bathtub & Shower Reglazing Journey.
DIY Bathtub Reglazing: A Step-by-Step Guide
So, you’re considering taking on the Bathtub Reglazing project yourself? We commend your courage and DIY spirit! While it’s certainly a more involved process than a weekend paint job, with the right tools, materials, and a commitment to following instructions, you can achieve a refreshed look for your tub. Just remember, the quality of your finish largely depends on meticulous preparation and careful application.
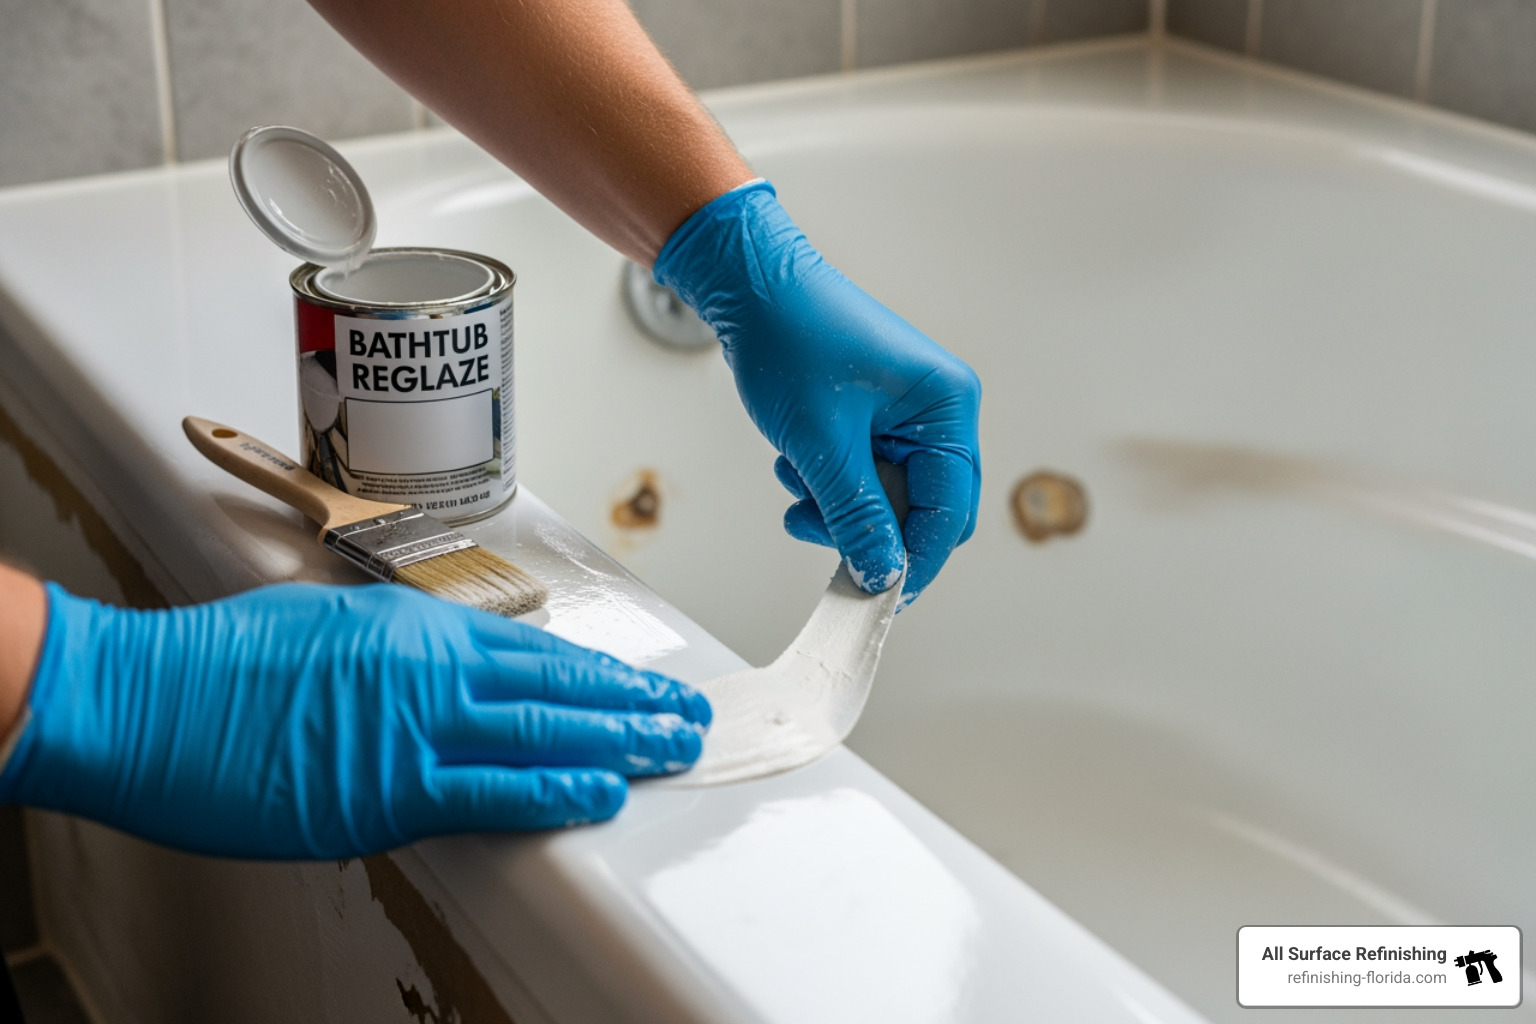
Here’s what you’ll typically need to get started:
- Essential Tools and Materials:
- Bathtub refinishing kit (often includes epoxy resin, hardener, etching powder, gloves, safety goggles)
- Bathtub cleaner (heavy-duty, abrasive)
- Scrub brush and sponges
- Caulk remover and utility knife
- Epoxy putty stick or patching compound for repairs
- Sander, sandpaper (100-220 grit, then 400-600 grit wet/dry), steel wool, or sanding block
- Paint brushes (foam brushes recommended for touch-ups)
- Nap roller (for applying the coating) and roller tray
- Painter’s tape (high-quality, thick)
- Plastic drop cloths or sheeting
- Solvent (e.g., acetone or paint thinner)
- Personal Protective Equipment (PPE): Respirator mask (NIOSH-rated, fresh-air supplied if possible), safety goggles/eyewear, chemical-resistant gloves, spray suit.
- Ventilation fan (box fan for air movement, or a small confined space ventilator if possible)
- Mild dish-soap degreaser for final cleaning
Always read your specific DIY kit’s instructions thoroughly, as contents and steps can vary.
Step 1: Preparation is Everything
This is arguably the most crucial step in the entire Bathtub Reglazing process. Skimp on preparation, and your beautiful new finish will likely peel or chip prematurely. Think of it like baking a cake – if you don’t prep your pan properly, the cake will stick!
- Thorough Cleaning: Start by giving your bathtub the deepest clean of its life. Use a heavy-duty abrasive cleaner and a scrub brush to remove all soap scum, mineral deposits, mildew, and body oils. Bleach can help with stubborn mildew stains. Rinse thoroughly and repeat until the tub is squeaky clean. Any residue will prevent the new finish from adhering properly.
- Caulk and Hardware Removal: Carefully remove all old caulk around the tub using a utility knife and caulk remover. Then, remove any hardware like escutcheons, cover plates, and spouts.
- Repairing Chips and Cracks: Inspect your tub for any chips, dings, or minor cracks. These need to be addressed before reglazing. For small chips, an epoxy putty stick or patching compound works well. If you have surface-level web-shaped cracks, these can often be refinished. For more extensive damage, such as rust or deeper cracks, we recommend consulting our Bathtub Repair – Complete Guide to ensure the tub is structurally sound enough for refinishing. Clean and sand any repaired spots smooth once dry.
- Masking Surrounding Areas: Protect everything you don’t want coated! Use high-quality painter’s tape and plastic drop cloths to cover walls, floors, sinks, toilets, and any fixtures or tiles adjacent to the tub. Ensure a tight seal to prevent accidental overspray or drips.
Step 2: The Critical Importance of Safety and Ventilation
We cannot stress this enough: safety first! The chemicals used in Bathtub Reglazing products, especially in stripping agents that might contain methylene chloride, can be extremely hazardous. These chemicals can cause serious health side effects, including headaches, dizziness, eye, nose, and throat irritation, and even brain function impairment. Tragically, at least 14 worker deaths have been reported since 2000 related to methylene chloride usage in bathtub refinishing due to improper ventilation.
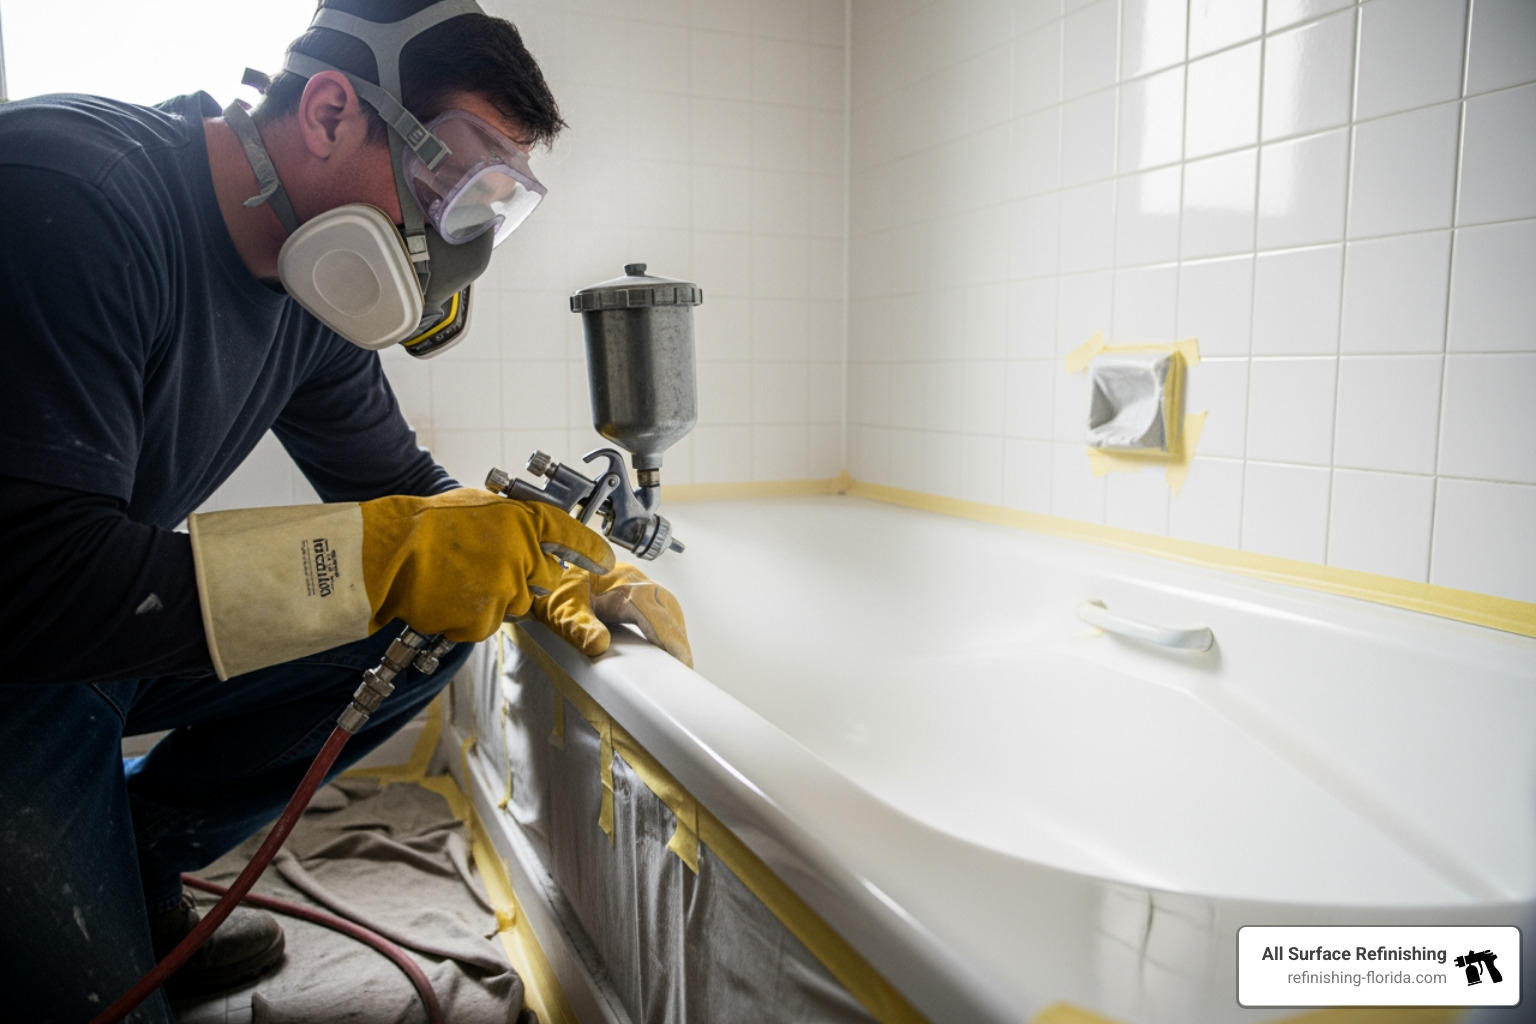
Proper ventilation is non-negotiable. Opening a window and running a small bathroom fan simply isn’t enough. You need to create a cross-ventilation system. Consider renting a powerful exhaust fan or a small confined space ventilator (approximately $200 to purchase, $50-$90 per day to rent) to effectively exhaust fumes from the work area. For more detailed information on these hazards, please refer to the OSHA/NIOSH Hazard Alert on Methylene Chloride.
Always wear appropriate Personal Protective Equipment (PPE):
- Respirator Mask: A NIOSH-rated fresh-air supplied breathing apparatus is ideal. At minimum, use a respirator specifically designed for organic vapors. Paper or cartridge masks are insufficient.
- Safety Goggles/Eyewear: Protect your eyes from chemical splashes and fumes.
- Chemical-Resistant Gloves: Protect your hands from direct contact with chemicals.
- Spray Suit: A disposable full-body suit can protect your skin and clothing.
Step 3: Surface Etching and Priming
Now that your tub is clean, repaired, and you’re safely geared up, it’s time to prepare the surface for adhesion. Most bathtubs are made of non-porous materials like porcelain, enamel, or fiberglass, which means the new coating needs something to grip onto.
- Sanding or Etching: Your DIY kit will likely include an etching powder or instruct you to wet sand the surface.
- Etching Powder: If using etching powder, follow the kit’s instructions carefully. This chemical process creates a micro-rough surface.
- Wet Sanding: Alternatively, or in addition, wet sand the entire tub surface with 400- or 600-grit wet/dry sandpaper. This dulls the existing finish and creates a mechanical bond for the new coating. After sanding, clean the tub thoroughly again to remove all sanding dust.
- Applying a Bonding Agent or Primer: Many professional systems, including our own, use a specialized bonding agent, like our proprietary MM-4, to create a chemical bond between the old surface and the new coating. Some DIY kits will include a primer as a separate step. Apply this according to your kit’s instructions. This layer is crucial for ensuring the topcoat adheres properly and doesn’t peel later. For specific considerations on different tub materials, our Cast Iron Tub Refinishing Guide might offer additional insights.
Step 4: Applying the New Finish
This is where the magic happens, changing your dull tub into a gleaming masterpiece. Accuracy and speed are key here, especially when working with two-part epoxy coatings.
- Mixing the Epoxy Coating: Most DIY kits use a two-part epoxy system that you’ll need to mix just before application. Follow the kit’s instructions precisely for ratios and mixing time. Be aware that once mixed, these coatings have a limited “pot life” and will start to harden quickly. Work efficiently!
- Application Techniques:
- DIY (Rollers and Brushes): For DIY projects, you’ll typically use a small foam roller for the main surfaces and a foam brush for corners, edges, and hard-to-reach areas. Apply the coating in thin, even layers to avoid drips and brush marks.
- Professional (Spray Application): Professionals, like us at All Surface Refinishing, use specialized airbrush systems. This allows for an ultra-fine, even spray that creates a factory-smooth, seamless finish without brush or roller marks. It’s truly the gold standard for quality.
- Applying Multiple Coats: Depending on your kit and the original color of your tub, you may need to apply multiple coats. Allow sufficient drying time between coats as specified by your kit’s instructions. Some quick-drying products, like professional Poly-Glass 320 Resin, can dry in as little as eight minutes between coats, but DIY kits often require longer. This step is critical for achieving full coverage and durability. For a deeper dive into professional application, see our Professional Bathroom Reglazing Guide.
Step 5: Curing and Aftercare for Your Reglazed Bathtub
You’re almost there! The application is done, but the job isn’t finished until the coating has fully cured. Patience is a virtue here; rushing this step can compromise the durability of your new finish.
- Curing Time: Your DIY kit will specify a curing time before the tub can be used. This is typically 24-48 hours before you can run water in the tub. However, the coating usually continues to harden and strengthen for up to 30 days. Avoid heavy use or harsh chemicals during this initial curing period.
- Reinstalling Hardware and Caulking: Once the tub is fully cured, carefully remove all painter’s tape and plastic sheeting. Reinstall your hardware (faucets, drains, etc.). Then, apply a fresh bead of high-quality silicone caulk around the perimeter of the tub where it meets the walls or tile. This creates a waterproof seal and a clean, finished look.
- Maintenance Tips and Recommended Cleaners:
- Use Non-Abrasive Cleaners: The golden rule for a reglazed tub is to avoid abrasive cleaners, harsh acids, or bleach. These can dull or damage the new finish over time. Instead, opt for mild dish-soap degreasers, baking soda paste, or a Mr. Clean Magic Eraser for stains.
- Rinse Regularly: After each use, rinse the tub thoroughly to prevent soap scum and mineral buildup.
- Avoid Rubber Mats: Rubber bath mats can trap moisture and chemicals underneath, leading to discoloration or peeling of the finish. If you must use a mat, choose one with suction cups that can be removed and hung to dry after every use, or better yet, opt for a non-slip treatment applied during the reglazing process.
- Wax Non-Standing Areas: You can wax non-standing areas of the tub (like the sides) with a car wax to help maintain the surface and improve coating life.
Professional vs. DIY Bathtub Reglazing
Deciding between a DIY Bathtub Reglazing kit and hiring a professional can be a tough call. While the allure of saving money with a DIY project is strong, it’s crucial to weigh the trade-offs in terms of quality, durability, safety, and your own time and effort. Let’s break down the comparison:
| Feature | DIY Bathtub Reglazing | Professional Bathtub Reglazing |
|---|---|---|
| Cost | $30 – $200 (kit only), plus tools & PPE | $330 – $630 (average $480) |
| Time | 4-6 hours working time, 1-3 days total | 3-5 hours working time, 24-48 hours cure |
| Durability | 2-5 years (highly variable based on skill) | 5-20 years (with proper care and professional application) |
| Safety | High risk with hazardous chemicals, requires strict PPE | Professionals use specialized equipment, ventilation, & training |
| Finish Quality | Can be inconsistent, prone to brush/roller marks, drips | Smooth, seamless, factory-like finish with spray application |
| Warranty | Typically none | Often 5-year adhesion warranty or more |
The Quality and Durability Difference
This is where the distinction becomes most apparent. Professionals use industrial-grade, multi-part coatings that are far more robust than what’s available in most DIY kits. Our professional coatings, combined with advanced spray application techniques, create a seamless, uniform finish that mimics the look and feel of a brand-new porcelain or fiberglass tub. This level of finish is incredibly difficult to achieve with a roller and brush.
Furthermore, professional refinishers understand the science of adhesion. They use specialized cleaning agents, etching processes (or superior bonding agents like our MM-4 that negate the need for harsh acids), and primers designed to create a molecular bond with your tub’s original surface. This meticulous preparation and high-quality material result in a finish that can last 15-20 years or more with proper care. DIY kits, while improving, often lack the chemical prowess and application method to deliver this kind of long-term durability, often leading to premature peeling or chipping. For a truly long-lasting change, we recommend Professional Bathtub Reglazing.
The Real Cost of a DIY Bathtub Reglazing Project
While a DIY kit might seem like a steal at $30 to $200, the “real” cost can quickly add up. Beyond the kit itself, you might need to purchase essential tools like a respirator mask (a good one isn’t cheap!), gloves, drop cloths, sandpaper, and potentially a ventilation fan. If you don’t already own these, your initial savings diminish.
Then there’s the value of your time. A DIY project typically takes 4-6 hours of active work, plus 1-3 days for curing and setup. Your time is valuable! Most importantly, there’s the risk of mistakes. Uneven coats, drips, peeling, or a less-than-perfect finish are common DIY pitfalls. If the DIY job fails, you might end up spending more money to strip the old finish and have a professional redo it, costing you more in the long run. When you choose an expert, you’re investing in peace of mind and a guaranteed, beautiful result. Sometimes it’s better to Don’t Replace, Refinish: Local Experts for Your Bathtub Makeover.
Frequently Asked Questions about Bathtub Reglazing
We often get asked many questions about Bathtub Reglazing, and it’s our pleasure to provide clear answers. Whether you’re curious about longevity or what types of tubs can be transformed, we’ve got you covered. This process is a fantastic solution for many, including those with unique fixtures like a Clawfoot Bathtub Reglazing.
How long does a reglazed bathtub last?
The lifespan of a reglazed bathtub largely depends on whether it’s a DIY or professional job, and how well it’s maintained.
- DIY Reglazing: Typically, a DIY reglazed tub might last anywhere from 2 to 5 years, though some can stretch to 10 with exceptional care and application. The durability is highly dependent on the skill of the applicator and the quality of the kit.
- Professional Reglazing: A professionally reglazed bathtub, using commercial-grade materials and expert application techniques, can be expected to last 5 to 20 years or even longer. Many professional services, including ours, offer a 5-year adhesion warranty, providing peace of mind. Factors affecting longevity include daily use, adherence to cleaning guidelines (avoiding harsh chemicals and abrasive cleaners), and preventing damage from dropped objects or rubber mats.
What types of bathtubs can be reglazed?
The beauty of Bathtub Reglazing is its versatility. Most common bathtub materials can be successfully reglazed, making it a viable option for a wide range of homes across Florida. This includes:
- Porcelain: A classic material, porcelain tubs take very well to reglazing, restoring their original luster.
- Cast Iron: Durable and heavy, cast iron tubs are excellent candidates for reglazing, bringing them back to their former glory. For more on this, see our Cast Iron Tub Repair guide.
- Fiberglass: Often found in modern homes, fiberglass tubs can be reglazed to repair cracks, chips, and fading.
- Acrylic: Similar to fiberglass, acrylic tubs also benefit greatly from a new, durable coating.
- Cultured Marble: These tubs can be refinished to update their appearance or repair surface damage.
Essentially, if your tub is structurally sound and holds water, it’s likely a candidate for reglazing.
Can you reglaze a tub that has been reglazed before?
Yes, in most cases, you can reglaze a tub that has been reglazed previously. However, it’s often a more involved process than reglazing an original surface. The existing reglazed finish typically needs to be stripped entirely to ensure proper adhesion of the new coating. This removal process can be labor-intensive and requires specialized tools and chemicals.
We always recommend a professional assessment for tubs that have been reglazed before. A professional can evaluate the condition of the existing finish and the underlying tub, determine the best stripping method, and ensure the surface is perfectly prepared for a long-lasting new coating. This is critical for cities like Miami, where many older properties may have tubs that have seen multiple refreshes. Learn more about local options in our Bathtub Resurfacing Miami Guide 2025.
Conclusion: Your Tub’s Second Chance in South Florida
Bathtub Reglazing presents a truly remarkable opportunity to breathe new life into your bathroom. It’s a cost-effective, time-saving, and eco-friendly solution that can completely transform the look and feel of your tub, whether it’s a porcelain classic or a modern acrylic. While the DIY route offers potential savings, it comes with significant challenges in terms of safety, ventilation, technical skill, and the ultimate durability and quality of the finish.
For a guaranteed, long-lasting, and flawless finish, the experts at All Surface Refinishing provide top-tier bathtub, tile, and bathroom reglazing services across Aventura, Bal Harbor, Boca Raton, Boynton Beach, Broward County, Carol City, Coconut Creek, Coconut Grove, Cooper City, Coral Gables, Coral Springs, Cutler Ridge, Dade County, Dania Beach, Davie, Deerfield Beach, Delray Beach, Fisher Island, Fort Lauderdale, Fort Pierce, Gold Coast, Golden Beach, Greenacres, Hallandale Beach, Hialeah, Hillsboro Beach, Hobe Sound, Hollywood, FL, Homestead, Indian River County, Indiantown, Islamorada, Ives Estates, Jensen Beach, Jupiter, Kendall, Key Biscayne, Key Largo, Key West, Lake Worth, Lauderdale By The Sea, Lauderdale Lakes, Lauderhill, Lazy Lake, Lighthouse Point, Loxahatchee, Marathon, Margate, Martin County, Miami, Miami Beach, Miami Lakes, Miami Shores, Miami Springs, Miami-Dade County, Miramar, North Bay Village, North Lauderdale, North Miami, North Miami Beach, North Palm Beach, Oakland Park, Palm Beach, Palm Beach County, Palm Beach Gardens, Palm City, Parkland, Pembroke Pines, Perrine, Port Saint Lucie, Port Salerno, Saint Lucie County, Sebastian, Stuart, Sweetwater, Tamarac, Vero Beach, Wellington, FL, West Miami, West Palm Beach, Weston, Wilton Manors. With over 30 years of experience and 14,000+ successful projects, we’re dedicated to delivering high-quality changes for your kitchens and bathrooms throughout South and Southwest Florida.
Don’t settle for a mediocre finish or risk your health with a challenging DIY project. Let our professionals handle it, ensuring your tub looks amazing and lasts for years to come.
