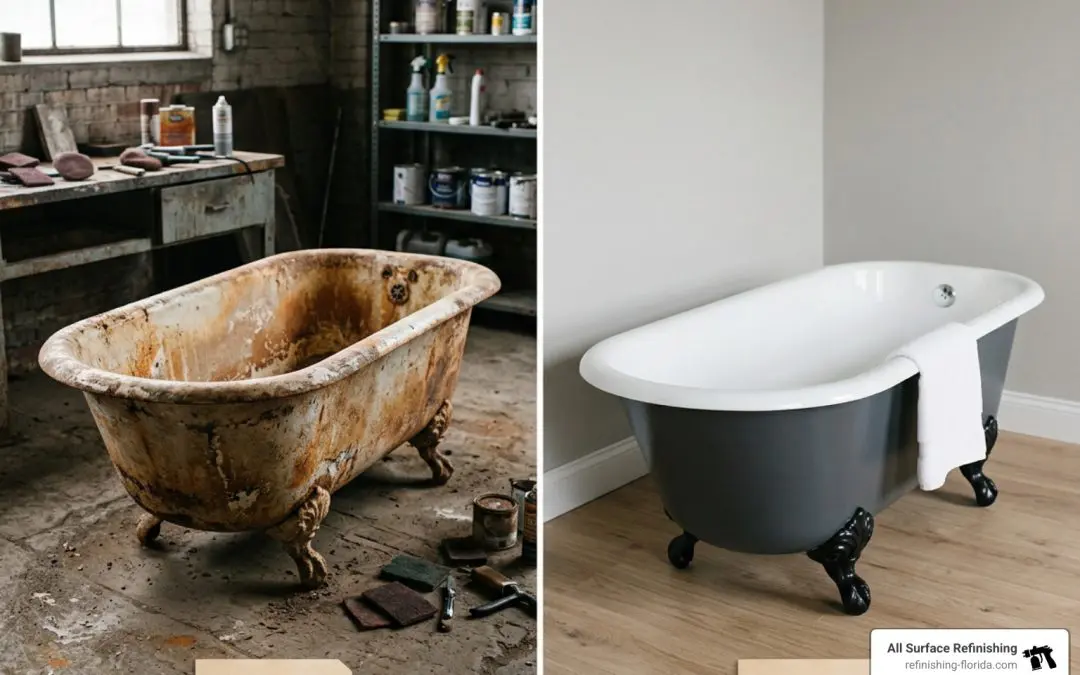
How Can You Fix Cast Iron Tub Damage Without Replacing It?
Vintage cast iron bathtubs are prized for their heavy construction, incredible heat retention, and timeless beauty. With wall thicknesses ranging from 3/8 inch to 1/2 inch and total weights between 200 and 400 pounds, these fixtures were built to last generations. However, the glass-like porcelain enamel fused to the iron during manufacturing can chip, dull, or develop rust after decades of daily use.
When faced with a damaged tub, many homeowners assume complete replacement is the only option. In reality, replacing a cast iron tub is a massive, invasive renovation. Because of the tub’s immense weight and built-in installation behind wall tiles and door frames, removal often requires smashing the iron apart with a sledgehammer or tearing out surrounding tilework and floor joists. A full bathtub replacement typically costs between $1,200 and $5,000+ when you factor in contractor labor, plumbing re-routing, tile repair, and disposal fees.
By contrast, targeted repairs and professional resurfacing permanently restore damaged enamel and rusted iron at a fraction of that cost:
- DIY Repair Kits: Range from $75 to $150 for localized chip and minor rust patching.
- Professional Refinishing: Costs between $350 and $1,000 depending on whether you need localized spot restoration or a full tub resurfacing.
Through chemical acid etching, waterproof resin patching, and multi-coat topcoats, we can seal raw metal, repair structural damage, and restore a glossy finish that looks and functions like a brand-new tub. At All Surface Refinishing, we have spent over 30 years perfecting these techniques across South Florida—completing more than 14,000 transformations in Palm Beach County, Broward County, and Miami-Dade County.
How Do You Determine If Your Cast Iron Tub Has Surface Rust or Structural Damage?
Before purchasing repair materials or starting surface preparation, you must diagnose the exact extent of the damage. Cast iron tubs suffer from three distinct tiers of deterioration: superficial enamel chipping, localized surface oxidation, and deep structural rust holes.
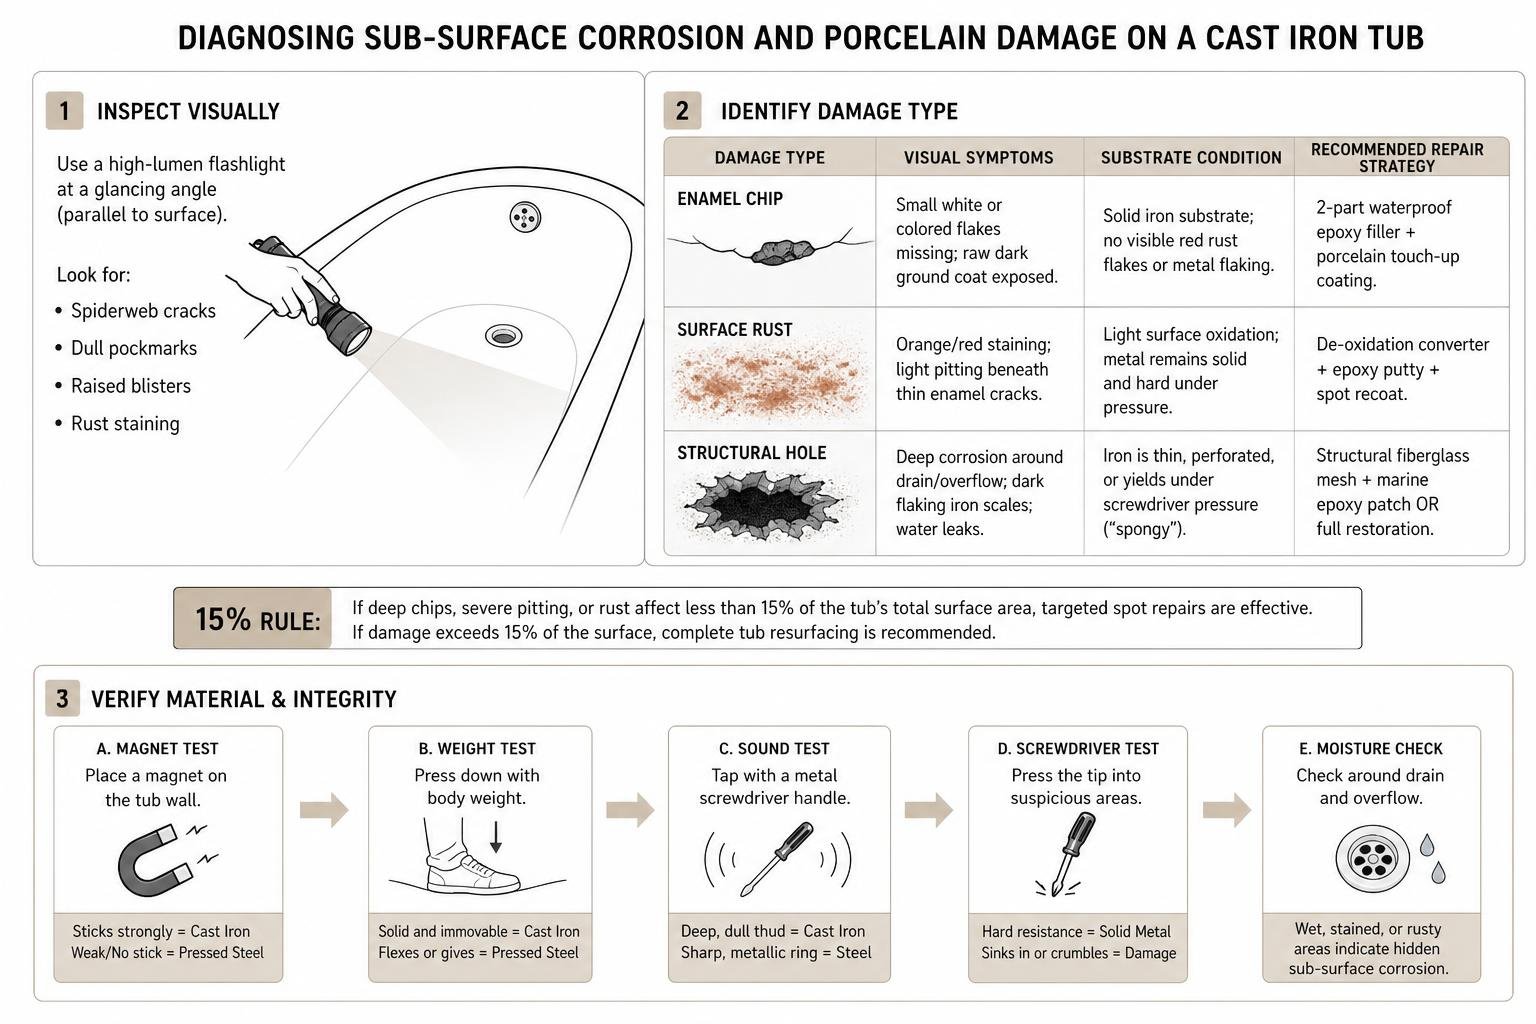
| Damage Type | Visual Symptoms | Substrate Condition | Recommended Repair Strategy |
|---|---|---|---|
| Enamel Chip | Small white or colored flakes missing; raw dark ground coat exposed. | Solid iron substrate; no visible red rust flakes or metal flaking. | 2-part waterproof epoxy filler + porcelain touch-up coating. |
| Surface Rust | Orange/red staining; light pitting beneath thin enamel cracks. | Light surface oxidation; metal remains solid and hard under pressure. | De-oxidation converter + epoxy putty + spot recoat. |
| Structural Hole | Deep corrosion around drain/overflow; dark flaking iron scales; water leaks. | Iron is thin, perforated, or yields under screwdriver pressure (“spongy”). | Structural fiberglass mesh + marine epoxy patch OR full restoration. |
To make an accurate diagnosis, apply the 15% rule: if deep chips, severe pitting, or rust affect less than 15% of the tub’s total surface area, targeted spot repairs are effective and economical. However, if damage exceeds 15% of the surface, attempting multiple isolated patches becomes inefficient, and complete tub resurfacing is recommended.
For more guidance on identifying localized issues, explore our detailed guide on Cast Iron Tub Repair or learn how to tackle deep metal breaches in How to Repair Rust Hole in Cast Iron Tub.
Diagnosing Surface Rust vs. Structural Corrosion
Porcelain enamel can hide sub-surface corrosion until moisture causes the finish to bubble and lift. To detect hidden damage, hold a high-lumen flashlight at a glancing angle (parallel to the tub floor). This reveals microscopic spiderweb cracks, dull pockmarks, and subtle raised blisters where rust is actively pushing porcelain away from the iron base.
When moisture penetrates hairline cracks in porcelain, it creates crevice corrosion. If you paint directly over untreated red rust, oxidation continues beneath the surface, causing your new finish to peel within months.
Performing Metal Identification and Integrity Tests
Homeowners often mistake pressed steel bathtubs for heavy cast iron. Because pressed steel flexes under weight and rusts through quickly, verifying your tub’s material is critical:
- The Magnet and Sound Test: Place a magnet on the tub wall—it will cling firmly to both cast iron and steel. Next, tap the tub wall with a knuckle. Cast iron produces a heavy, dull thud due to its high density, whereas pressed steel emits a hollow pinging sound.
- The Single-Foot Flex Test: Stand inside the empty tub on one foot and shift your body weight. A pressed steel tub (1/16″ to 1/8″ thick) will flex visibly under foot, whereas heavy cast iron (3/8″ to 1/2″ thick) remains completely rigid.
- The Screwdriver Probe Test: To evaluate rust around drain collars or overflow pipes, press a flathead screwdriver firmly against the rusted metal. Solid cast iron will resist penetration entirely. If the screwdriver sinks into crumbly, “spongy” metal or punches through, the iron has suffered full-thickness structural decay requiring a reinforced structural patch.
What Is the Step-by-Step Process for Preparing, Etching, and Repairing a Cast Iron Tub?
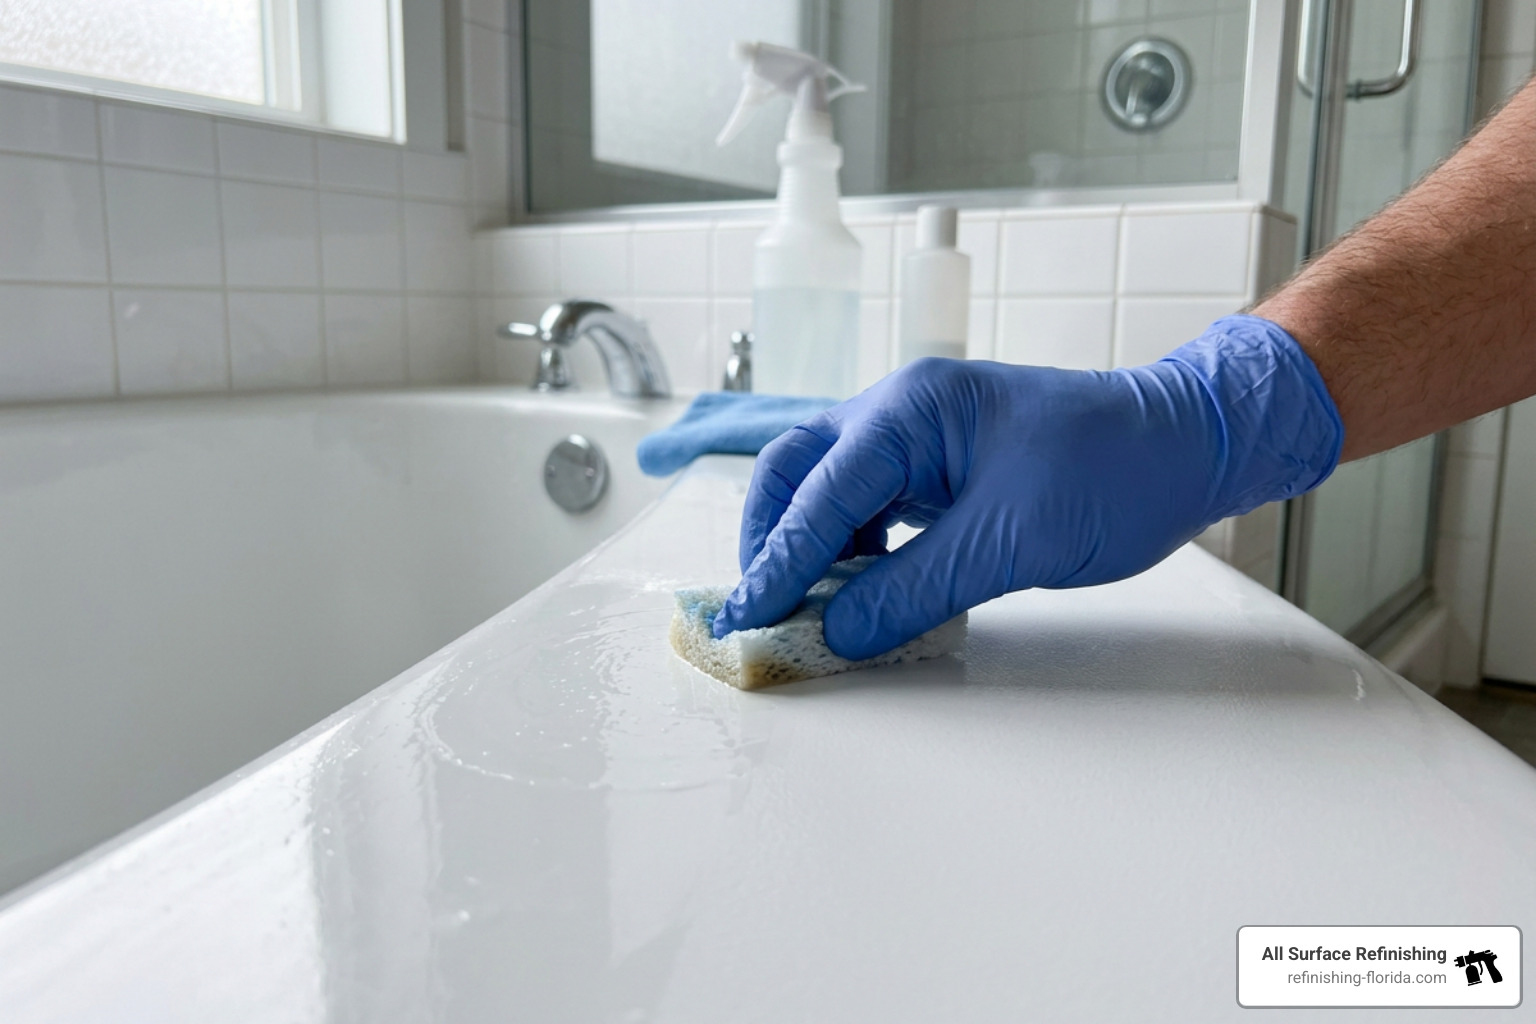
In bathtub restoration, the 90/10 rule applies: 90% of a repair’s success depends on surface preparation, while only 10% relies on topcoat application. Porcelain enamel is non-porous glass fused to iron; applying epoxy or synthetic topcoats directly onto unetched porcelain guarantees delamination.
Phase 1: Deep Cleaning and Chemical Etching
- Heavy Degreasing: Scrub the tub thoroughly using Trisodium Phosphate (TSP) or an industrial alkaline emulsifier to remove soap scum, body oils, and mineral deposits. Rinse three times with cold water.
- Limescale and Rust Removal: Clean iron deposits around drains using an acidic gel cleaner, followed by a denatured alcohol wipe down.
- Chemical Acid Etching: Wear protective gear and apply a specialized hydrofluoric or phosphoric acid etching solution over the porcelain finish. Allow the etchant to react for 10 to 15 minutes. The acid eats into the porcelain glass, opening microscopic pores (known as an anchor pattern) until the surface turns matte and bone-like.
- Neutralization: Neutralize the etching acid using a mixture of baking soda and water, rinse thoroughly, and dry completely using a heavy-duty heat gun.
Phase 2: Patching Chips and Rebuilding Damaged Metal
- De-Oxidation Protocol: For rusted areas, grind loose iron scale down to bright, bare metal using a rotary sanding drum or wire wheel. Immediately coat raw metal with a phosphoric acid-based rust converter. This chemical reaction converts unstable red iron oxide into black iron phosphate—an inert, corrosion-resistant base.
- Selecting Waterproof Epoxies: Never use standard hydrophilic automotive body fillers on bathtubs; automotive putties absorb water under continuous immersion, leading to swelling and patch failure. Instead, use a two-part waterproof marine-grade epoxy or specialized cast iron tub hardener.
- Layering and Mesh Reinforcement: Mix the two-part epoxy in its exact 1:1 ratio. Overfill deep chips by 10% to account for subtle curing shrinkage. For structural rust holes near drains, lay a thin base of epoxy, bed a piece of fine fiberglass mesh into the wet resin, and seal with a top layer of epoxy to bridge the void.
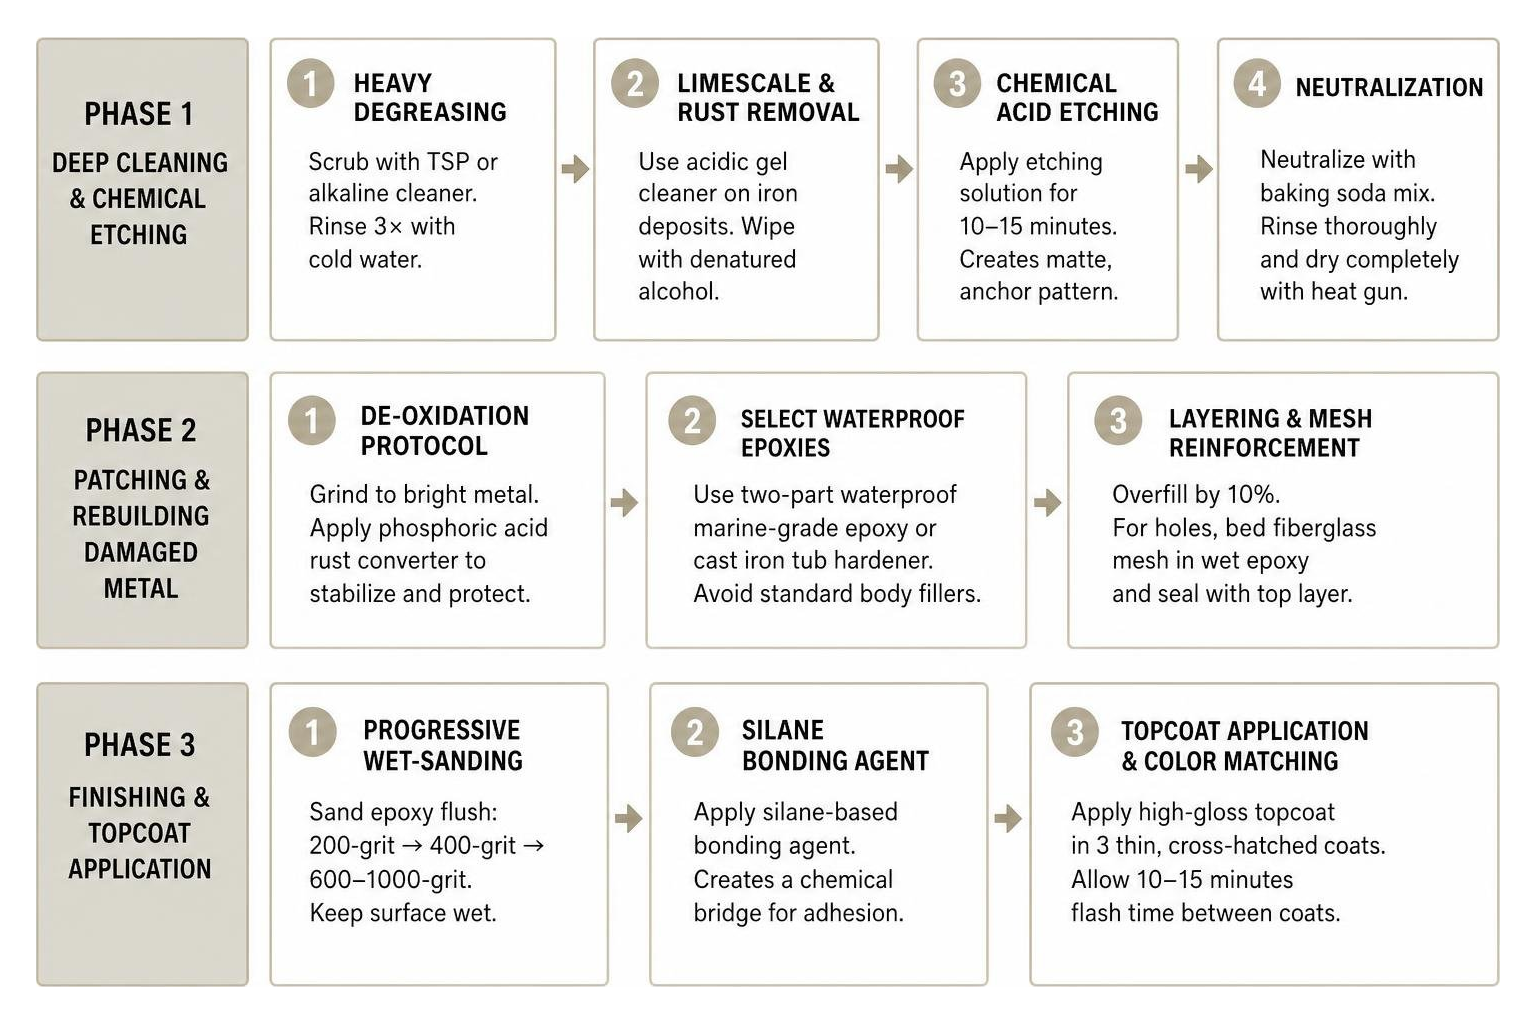
Phase 3: Wet-Sanding, Color Matching, and Topcoat Application
- Progressive Wet-Sanding: Once the epoxy patch cures completely (typically 2 to 4 hours), wet-sand the area flush with surrounding porcelain using a sanding block. Progressively step through grits: 200-grit to level high spots, 400-grit to remove scratches, and 600-to-1000-grit for feather-edge smoothing. Wet sanding prevents friction heat from softening the epoxy.
- Silane Bonding Agent: Apply a Silane-based molecular bonding agent across the prepped area. Silane acts as a chemical bridge, linking inorganic porcelain to organic synthetic resins.
- Topcoat Application and Color Matching: Apply high-gloss two-part aliphatic acrylic polyurethane topcoats using a specialized spray system or high-density foam roller. Apply three thin, cross-hatched coats, allowing 10 to 15 minutes of flash time between layers.
If you’re performing a localized touch-up, match original factory shades (white, biscuit, or almond) by blending tinting pastes into the topcoat. If you want a complete color transformation, dark or vintage porcelain finishes can be fully recoated in modern bright white.
For deeper technical insights into complete resurfacing, read our Cast Iron Bathtub Refinishing Guide or check out This Old House’s Tub Refinishing Overview.
Should You Repair Your Cast Iron Tub Yourself or Hire a Professional Refinisher?
Deciding between a DIY patch kit and professional resurfacing comes down to damage severity, budget, and desired longevity.
Evaluating DIY Repair Kits vs. Professional Restoration
DIY repair kits ($75 to $150) are suitable for fixing small, isolated enamel chips or hairline scratches. However, retail kits rely on brush-on or roll-on application tools, which often leave visible brush strokes, uneven ridges, or lap marks. Additionally, consumer-grade repair kits generally last 5 to 10 years under ideal conditions, provided surface etching and moisture isolation were executed flawlessly.
Professional refinishing ($350 to $1,000) utilizes commercial High-Volume Low-Pressure (HVLP) spray turbine equipment, industrial hydrofluoric acid etching compounds, and commercial-grade aliphatic polyurethane resins. Professional restorations typically last 15 to 20 years with proper maintenance.
Benefits of Professional Resurfacing for South Florida Homes
In South Florida communities—such as Fort Lauderdale, Boca Raton, West Palm Beach, Miami, Coral Springs, and Delray Beach—high ambient humidity can complicate DIY curing times. Professional technicians use specialized exhaust equipment, dehumidification protocols, and high-performance cross-linking resins designed to handle local climatic conditions.
While we do not sell paint or retail touch-up kits, our team at All Surface Refinishing provides comprehensive, professional tub transformations that deliver factory-smooth results in as little as 24 hours. Explore our Cast Iron Tub Reglazing Complete Guide or learn more about our professional bathtub refinishing services.
What Safety Gear and Environmental Controls Are Needed During Tub Repair?
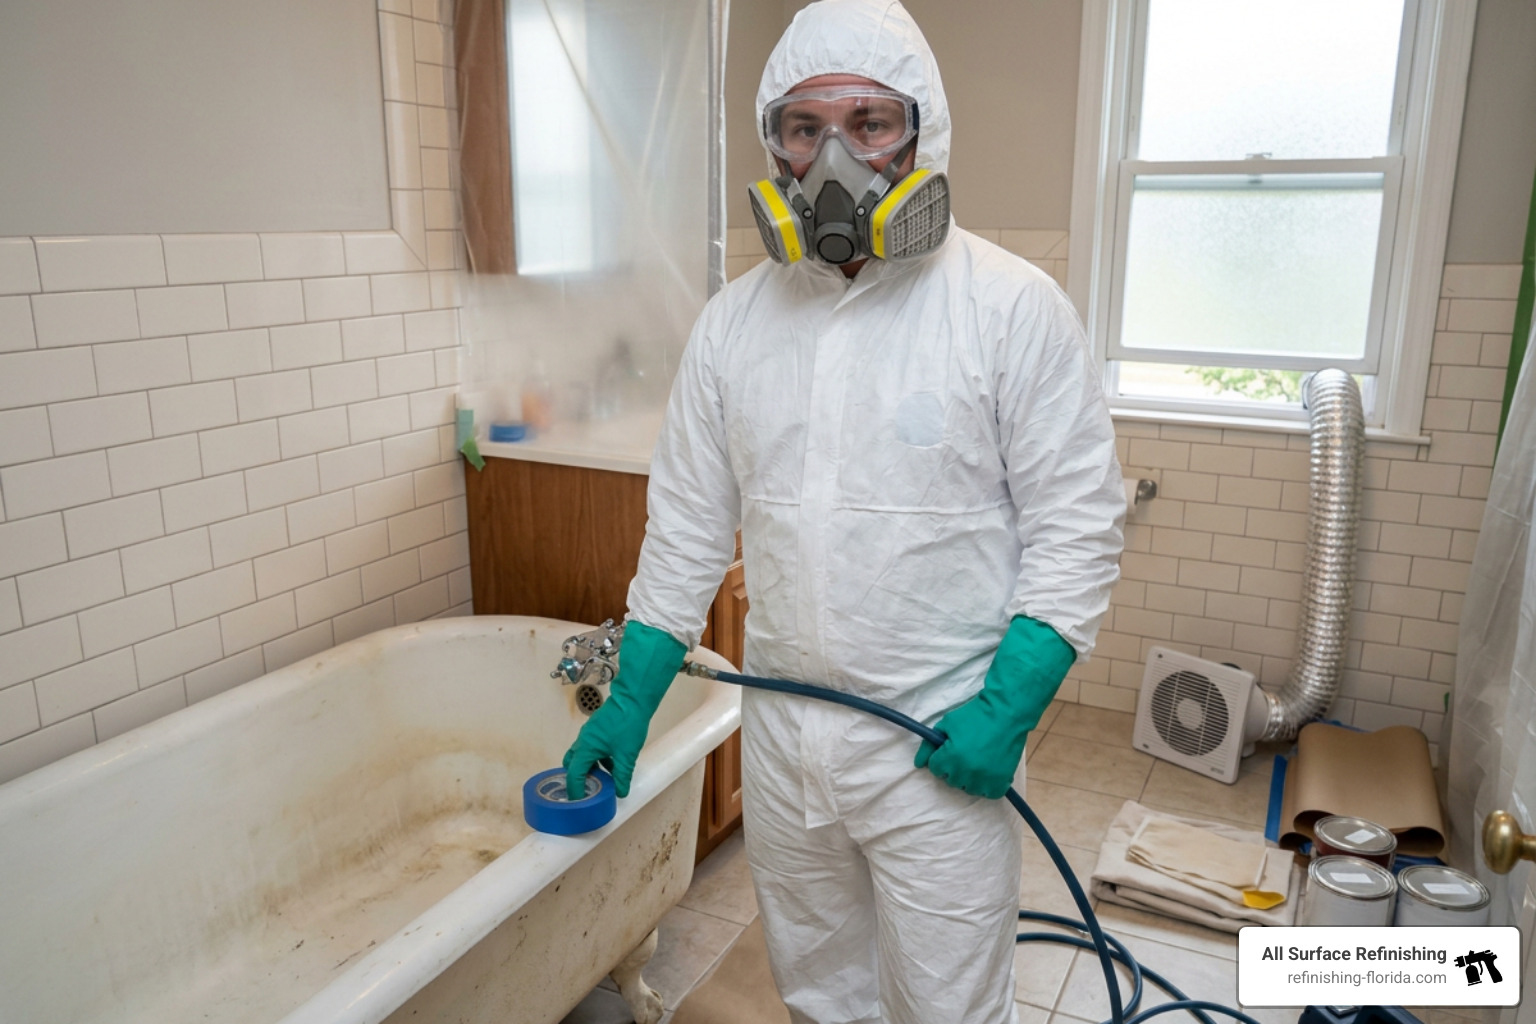
Working with chemical acid etchants, solvent cleaners, and two-part polyurethane resins requires strict safety protocols and environmental management.
Required Personal Protective Equipment (PPE)
- Respiratory Protection: Standard N95 dust masks offer zero protection against volatile organic compounds (VOCs) and acid gases. You must wear a half-mask or full-face NIOSH-approved respirator fitted with organic vapor and acid gas cartridges.
- Skin and Eye Safety: Hydrofluoric and phosphoric etching acids cause chemical burns on contact. Wear heavy-duty nitrile or butyl rubber gloves, chemical safety goggles, long sleeves, or a disposable Tyvek suit.
Managing Humidity and Airflow for Flawless Curing
- Exhaust Ventilation: Set up a high-CFM window exhaust fan using flexible ducting to pull solvent vapors out of the bathroom, creating negative air pressure that prevents fumes from spreading into living areas.
- Temperature and Humidity Control: Ideal room conditions for curing epoxy and acrylic coatings are 70°F ambient temperature and relative humidity below 60%. High humidity slows solvent evaporation, leading to “blushing” (a cloudy, dull haze) or soft curing.
- Dust Control: Keep bathroom doors closed, turn off central HVAC air circulation, and avoid entering the room during the first 4 hours while the fresh topcoat reaches a tack-free state.
For complete safety checklists, review How to Repair Cast Iron Tub Finish.
What Are the Most Common Mistakes That Cause Cast Iron Tub Repairs to Fail?
Improper application techniques cause many DIY bathtub repairs to peel or fail prematurely. Here are five critical errors to avoid:
- Skipping Chemical Etching or Silane Primer: Applying coatings over smooth, un-etched porcelain prevents mechanical adhesion. Without acid etching or a Silane bonding bridge, topcoats peel away like orange skin when exposed to hot bathwater.
- Painting Over Untreated Red Rust: Coating directly over raw iron oxide traps moisture beneath the patch. Crevice corrosion continues underneath, breaking down the bond and sending rust bleeding through the finish within weeks.
- Using Hydrophilic Automotive Fillers: Standard automotive body putties are formulated for dry sheet metal. They absorb water over time, causing the patch to swell, bubble, and crack under continuous bath immersion. Always use waterproof marine epoxy.
- Rushing the Curing Phase: Exposing new repair materials to moisture, steam, or bathwater before the mandatory 48-to-72-hour chemical cross-linking completes permanently weakens the resin structure.
- Using Abrasive Cleaning Products: Scrubbing a newly repaired tub with bleaching powders, acidic tile cleaners, or abrasive scouring pads scratches the topcoat glaze, dulling the shine and trapping dirt.
To ensure long-lasting results, explore How to Refinish Cast Iron Bathtubs: 5 Proven Methods.
Frequently Asked Questions About Cast Iron Tub Repair
How long must you wait to use the tub after a repair?
Localized epoxy spot repairs require 24 to 48 hours to cure fully before moisture exposure. Complete tub resurfacing with aliphatic acrylic polyurethane topcoats requires a minimum 48-to-72-hour curing window at 70°F room temperature. If bathroom temperatures fall below 65°F or humidity exceeds 70%, extend the cure time by an additional 24 hours.
Can you change the color of a cast iron tub during repair?
Yes. During a full refinishing process, vintage porcelain colors—such as avocado green, dusty rose, salmon pink, or harvest gold—can be permanently converted to modern high-gloss white or biscuit. Technicians apply specialized high-hide primer coats that mask dark underlying porcelain before applying white polyurethane topcoats.
What cleaners are safe to use on a repaired cast iron bathtub?
Clean your newly repaired tub using only non-abrasive, pH-neutral cleaners (such as mild liquid dish soap or specialized tub cleaners) paired with soft microfiber cloths or non-scratch sponges. Never use abrasive scrubbing powders, harsh bleach, ammonia, or steel wool pads.
How Do You Maintain Your Refinished Cast Iron Tub for Long-Term Durability?
With proper care, a professionally restored cast iron bathtub will maintain its gloss and durability for 15 to 20 years. Follow these long-term maintenance practices:
- Prevent Standing Water: Ensure your tub drains completely after every use. Repair leaky faucets promptly, as dripping water creates mineral deposits and erodes topcoat glazes around drain collars.
- Avoid Suction-Cup Bath Mats: Suction cups create localized vacuum pressure that can pull at synthetic coatings over time. Use soft, non-suction bath mats instead and remove them after bathing.
- Maintain Caulking Seals: Inspect and re-caulk the perimeter seam where the tub meets surrounding tile walls once every two years using 100% silicone sealant to block moisture intrusion behind the fixture.
By repairing and resurfacing your existing cast iron bathtub instead of tearing it out, you preserve a high-quality vintage fixture while saving thousands of dollars in demolition and plumbing expenses.
At All Surface Refinishing, we bring over 30 years of field experience and 14,000+ completed projects to homeowners across South and Southwest Florida—including Stuart, Jupiter, Palm Beach Gardens, Boynton Beach, Pembroke Pines, Hollywood, FL, and Miami. To learn more about our process, check out our Bathtub Resurfacing Complete Guide or contact our team today to schedule your tub transformation.
