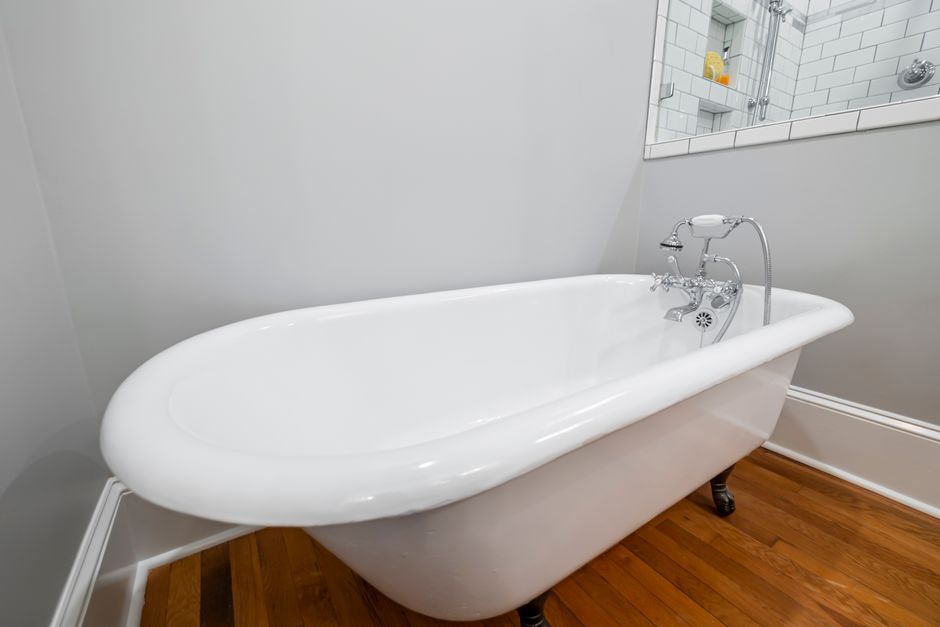
Your Cast Iron Tub Doesn’t Need to Be Replaced — It Needs to Be Reglazed
A cast iron tub reglazing kit lets you restore a worn, chipped, or stained bathtub to a like-new finish — without tearing out the tub or spending thousands on replacement.
Quick answer: What does a cast iron tub reglazing kit do?
- Bonds a new high-gloss coating directly to the existing tub surface
- Covers chips, stains, rust marks, and dull enamel
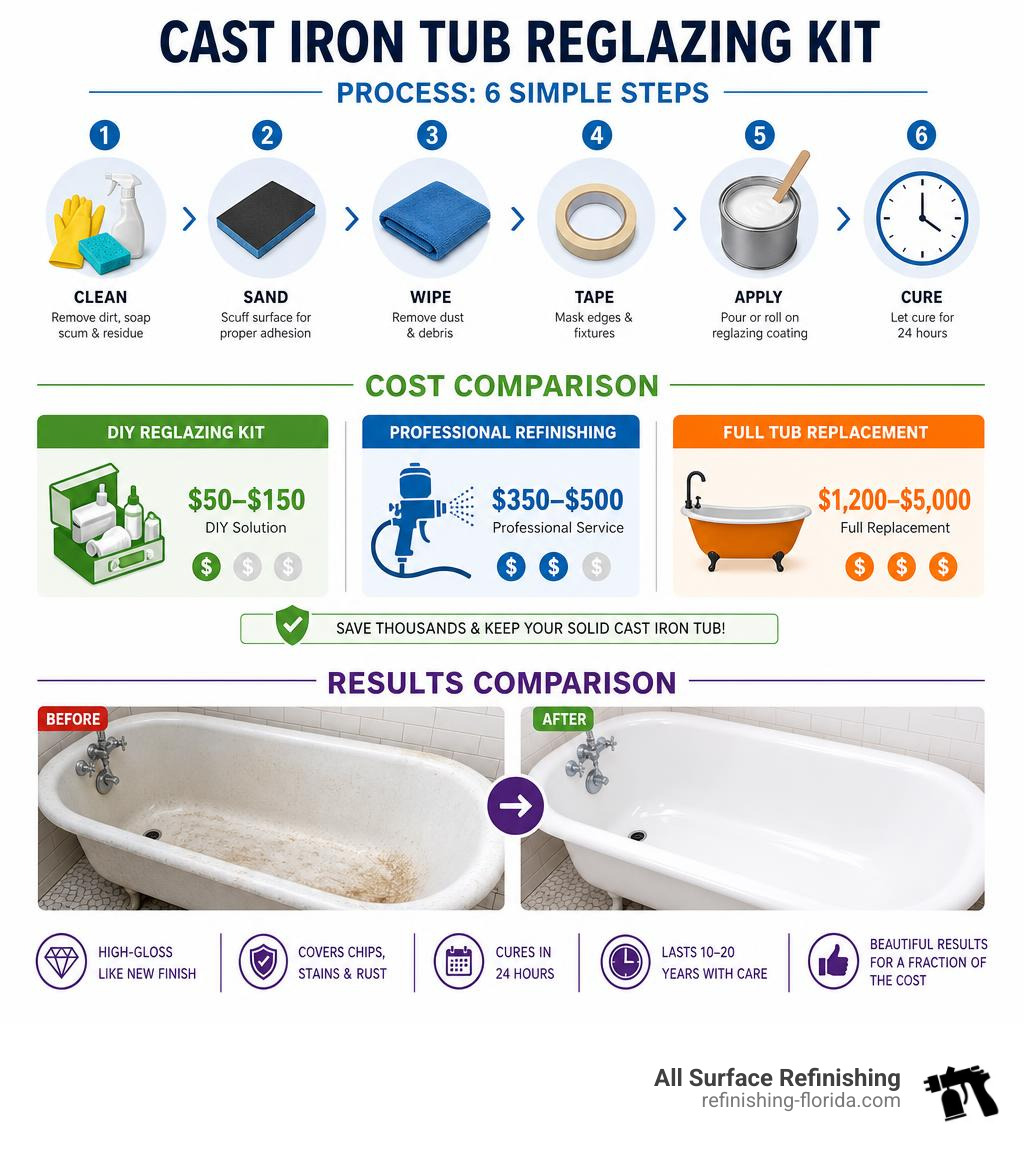
- Costs $50–$150 for a DIY kit vs. $350–$500 for professional refinishing vs. $1,200–$5,000 for full tub replacement
- Most kits cure in 24 hours and can last 10–20 years with proper care
- Works on cast iron, porcelain, fiberglass, acrylic, and ceramic surfaces
Cast iron tubs are incredibly durable — some are still in use after 100+ years. But the enamel surface that coats them? That’s a different story. Daily use, harsh cleaners, and hard water all wear it down over time. Eventually you’re left with a tub that looks tired no matter how much you scrub it.
The good news: the tub itself is almost certainly fine. It’s just the surface that needs attention.
I’m Frank Hernandez, President of All Surface Refinishing, and I’ve been restoring bathroom surfaces — including cast iron tubs — across South Florida since 1996. In this guide, I’ll walk you through everything you need to know about choosing and using a cast iron tub reglazing kit, so you can make the smartest decision for your home or property.
Cast iron tub reglazing kit glossary:
What is a Cast Iron Tub Reglazing Kit and How Does It Work?
At its core, a cast iron tub reglazing kit is a package of specialized chemical coatings designed to mimic the hard, glossy look of original porcelain enamel.
Original cast iron tubs were manufactured by heating a heavy iron shell in a blast furnace to over 1,500 degrees Fahrenheit, pouring melted glass-like porcelain powder over it, and letting it fuse into a rock-hard finish. Obviously, you cannot recreate a blast furnace in your South Florida bathroom.
Instead, a DIY reglazing kit uses advanced chemistry to achieve a similar result. The process relies on a two-part coating system—usually consisting of an epoxy resin, aliphatic acrylic polymer, or acrylic urethane enamel—paired with a liquid hardener. When you mix these two components, a chemical reaction begins.
For a deeper dive into the technical details of this process, check out The Ultimate Guide to Resurfacing Your Cast Iron Tub at Home.
Here is how the chemistry works to transform your tub:
- Surface Etching and Cleansing: First, you strip away old soap scum, oils, and minerals. An acid-based etching agent is applied to microscopically roughen the existing glossy porcelain.
- Chemical Bonding: A specialized primer or bonding agent is applied. This agent acts like double-sided chemical tape, grabbing onto the cast iron’s exposed pores on one side and the new topcoat on the other.
- Polymerization: Once the epoxy or urethane topcoat is applied, the chemical reaction causes the molecules to cross-link. This creates a dense, non-porous, high-gloss shell that is highly resistant to water, impact, and heat.
Choosing the Right Kit for Your Bathroom Project
If you search for a cast iron tub reglazing kit online, you will find dozens of options. Selecting the right one is the difference between a gorgeous finish that lasts for years and a peeling, sticky mess that you have to scrape off next month.
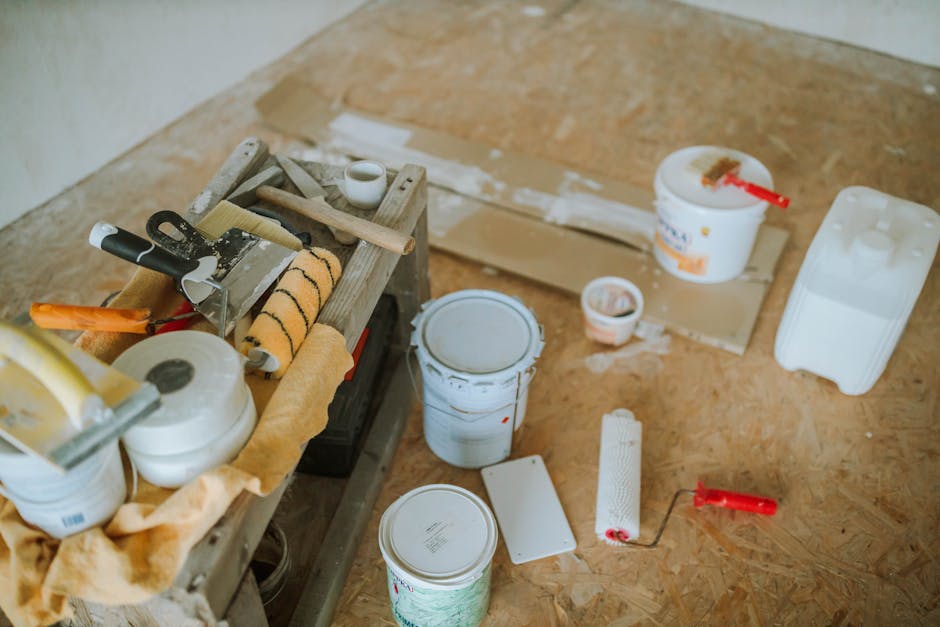
Before buying, you need to evaluate several factors:
- Surface Compatibility: Ensure the kit explicitly states it bonds to porcelain-enameled cast iron.
- VOC Levels and Odor: Traditional epoxy spray kits release high levels of Volatile Organic Compounds (VOCs). They require heavy ventilation and industrial respirator masks. Newer, eco-friendly pour-on kits are often 100% odorless and VOC-free, making them much safer for indoor use.
- Cure Time: Some budget kits require 3 to 5 days to fully cure before you can use the shower. Premium kits typically cure in 24 hours.
- Shelf Life: If you buy a kit, use it quickly. Most high-quality kits have a shelf life of approximately 2 years from the date of manufacture when stored in a cool, dry place.
For a complete list of the tools you will need alongside your kit, read our guide on DIY Tub Resurfacing Supplies Everything You Need to Get the Job Done.
Key Features of a Premium Cast Iron Tub Reglazing Kit
When shopping on platforms like Cast Iron Tub Refinishing Kit – Amazon.com, look for these high-performance features:
- Self-Leveling Properties: This is crucial. A self-leveling formula automatically flattens out brush strokes, roller marks, or drips as it cures, leaving a mirror-like finish.
- Coating Thickness: Standard spray-on kits apply a microscopic layer (around 0.15mm thick). Premium pour-on kits flow over the edge and create a thick, impact-resistant barrier up to 1.5mm (1/16 inch) thick—about 20 times thicker than paint sprays.
- Color Options: While high-gloss white is the standard, some premium kits offer bone, almond, or even custom colors to match your historic South Florida home’s aesthetic.
Comparing Roll-On vs. Pour-On Cast Iron Tub Reglazing Kit Options
As you browse home improvement stores or look through Buy Tub Resurfacing Kits for Quick Renovations | Lowe’s, you will notice two primary DIY application methods: roll-on (using high-density foam rollers) and pour-on (where you literally pour the liquid resin over the rim and let it flow down).
| Feature | Roll-On Kits | Pour-On Kits |
|---|---|---|
| Application Method | Applied with a roller and brush | Poured from the rim; spread with a squeegee |
| Coating Thickness | Thin (approx. 0.15 mm) | Thick (approx. 1.5 mm) |
| Odor & VOCs | Often high (requires respirator) | Usually odorless & VOC-free |
| Brush/Roller Marks | Risk of texture if applied poorly | Virtually zero; naturally self-levels |
| Working Time | 30 to 45 minutes | 45 to 60 minutes |
| Durability | 2 to 5 years | 10 to 20 years |
Step-by-Step Guide to Reglazing Your Cast Iron Tub
Reglazing is 90% preparation and 10% application. If you rush the prep work, your new coating will peel off in sheets within a few weeks.

Before starting, read The Ultimate DIY Bathtub Reglazing Guide From Worn-Out to Wow to visualize the entire workflow.
Preparation and Cleaning Steps
To prepare your tub, follow these steps meticulously:
- Remove Old Caulk: Use a caulk scraper or utility knife to completely carve away all silicone and acrylic caulk around the tub perimeter. New glaze will not bond to silicone.
- Deep Clean: Scrub the tub with an industrial degreaser and a heavy-duty abrasive pad to remove soap scum, body oils, and lime scale.
- Acid Etching: Apply the etching powder or cream included in your kit. This microscopically pits the old porcelain, giving the new resin a texture to grip. If your kit does not include an etchant, you can use a citric-acid-based cleanser.
- Repair Chips and Rust: If you have deep gouges or exposed black cast iron, fill them with a water-resistant fiberglass or polyester putty. Once dry, wet-sand the patches with 400-grit sandpaper until they are completely flush with the surrounding porcelain. Learn more about this fast-track prep in How to Reglaze Bathtub Fast by Using DIY Kit.
- Dry Completely: Blow-dry the drain and corners. Any trapped moisture under the new glaze will cause bubbling. Mask off your faucets, drain, and surrounding wall tiles with painter’s tape and plastic sheeting.
Application and Curing Process
Once the tub is clean, repaired, and dry, you are ready to apply the coating:
- Mix the Resin: Pour Part B (the hardener) into Part A (the resin base). Stir thoroughly for at least 3 to 5 minutes. Let the mixture sit for the recommended induction time (usually 5 to 10 minutes) to let chemical activation begin.
- Apply the Bonding Agent: Wipe or brush on the liquid primer/bonding agent. This is a crucial step that ensures the epoxy or urethane sticks permanently.
- Coating Application:
- If using a pour-on kit: Slowly pour the resin along the top ledge of the tub, letting it cascade down the walls. Use the provided foam spreader or squeegee to guide the material evenly across the bottom, pushing excess toward the open drain (with a catch bucket underneath).
- If using a roll-on kit: Roll the coating in thin, uniform, overlapping vertical strokes. Use a high-quality foam brush to feather out corners and hard-to-reach areas.
- Prevent Dust: Close the bathroom door, turn off any AC vents or fans that blow air into the room, and let the coating self-level.
- Cure: Allow the surface to cure undisturbed for a full 24 hours. Keep the room temperature stable.
For more tips on achieving a smooth finish, read Everything You Need to Refinish Your Tub Without Calling a Pro.
DIY vs. Professional Bathtub Refinishing
While using a cast iron tub reglazing kit is an appealing weekend project, it is important to weigh the realities of a DIY job against hiring a professional.
Pros and Cons of DIY Kits
DIY kits are incredibly affordable, with high-quality options running between $80 and $150. They allow you to work on your own schedule and can yield a beautiful, glossy surface if you follow the instructions perfectly.
However, DIY kits have distinct limitations. The working time of mixed resin is short (usually under an hour), meaning you must work fast without making mistakes. If dust, hair, or bugs land in the wet coating, they will be permanently cured into your tub surface. Furthermore, DIY coatings are generally less durable than professional-grade materials, and if the surface preparation is even slightly imperfect, the glaze will begin to peel within a year.
For a balanced look at this decision, read Is Bathtub Reglazing Worth It Your Step-by-Step DIY Answer.
When to Hire a Professional in Florida
If your cast iron tub has severe rust, structural cracks, or has been previously refinished with a failing coating, DIY kits are highly likely to fail. Stripping off an old, peeling DIY glaze requires incredibly harsh solvents and specialized tools.
In South Florida, our unique climate also plays a role. High humidity in cities like Miami, Fort Lauderdale, and West Palm Beach can interfere with how DIY resins cure, sometimes leaving the finish tacky or dull.
At All Surface Refinishing, we bring over 30 years of experience and 14,000 completed projects to every bathroom transformation. We use industrial-grade bonding agents and spray equipment to apply an incredibly durable, factory-grade acrylic urethane enamel. Our process takes just a few hours, cures beautifully despite Florida’s humidity, and comes with a professional warranty.
If you are debating whether to tackle this yourself or call in our team, read Don’t Throw the Tub Out With the Bathwater Use a DIY Kit and our comprehensive Cast Iron Tub Refinishing Guide.
Frequently Asked Questions About Cast Iron Tub Restoration
How long does a refinished cast iron tub last?
A DIY cast iron tub reglazing kit typically lasts 2 to 5 years for roll-on styles, and up to 10 to 15 years for premium pour-on epoxy systems, provided the prep work was flawless. A professional refinishing job by All Surface Refinishing regularly lasts 15 to 20 years with basic care.
To maximize this lifespan, never use abrasive cleaners (like Comet or Ajax), steel wool, or harsh bleach. Instead, clean the tub with mild dish soap and a soft sponge.
What safety precautions should I take during DIY reglazing?
If you are using a kit that contains VOCs or solvents:
- Wear an organic vapor respirator mask (a standard dust mask will not protect you from chemical fumes).
- Keep protective gloves and safety goggles on at all times.
- Run a window fan blowing outward to pull fumes out of the bathroom.
- If you have pets or children, keep them out of the house during application and the first few hours of curing.
- Alternatively, select a 100% VOC-free, odorless pour-on kit to avoid toxic fumes entirely.
What are the most common mistakes to avoid?
Based on the hundreds of failed DIY projects we have been called to fix across South Florida, here are the top mistakes to avoid:
- Inadequate Cleaning: Leaving even a microscopic film of body oil or soap scum will prevent the resin from bonding.
- Rushing the Dry Time: Applying glaze over a damp surface or around a dripping faucet guarantees immediate bubbling and peeling.
- Using the Tub Too Soon: Stepping into the tub or running water before the full 24-hour cure time is complete will ruin the finish.
- Trapped Dust: Failing to vacuum the bathroom and close all vents beforehand, resulting in a gritty, sandpaper-like texture.
For more clever restoration tips, check out our 5 DIY Bathtub Renewal Hacks.
Conclusion
Restoring a classic cast iron tub is one of the most rewarding bathroom remodeling projects you can undertake. It preserves the unmatched heat retention and historical charm of vintage cast iron while giving your bathroom a clean, modern, high-gloss upgrade.
Whether you decide to roll up your sleeves with a DIY cast iron tub reglazing kit or want the peace of mind, speed, and durability of a professional application, you are making a smart, cost-effective, and eco-friendly choice.
If you live in South or Southwest Florida—from the historic homes of Coral Gables and West Palm Beach to the coastal condos of Fort Lauderdale and Boca Raton—and decide you would rather leave the chemical mixing, etching, and spraying to the experts, we are here to help.
Schedule a Professional Bathtub Refinishing Service with All Surface Refinishing today, and let us bring your cast iron tub back to life!
