Key Differences: Built In Kitchen Cabinets vs Freestanding Units
When organizing a kitchen layout, the primary structural decision centers on choosing between permanent architectural cabinetry and standalone furniture units. Built-in units anchor directly into wall studs and floor joists, eliminating dead space between boxes and structural walls. Freestanding units rest on exposed feet or pedestals, providing flexibility but leaving gaps where debris and dust tend to settle.
Architectural integration provides a flush, continuous profile that maximizes ceiling-to-floor and wall-to-wall storage capacity. Standalone hutches or sideboards offer modular adaptability, but they cannot maximize vertical storage or provide clean containment for concealed plumbing and built-in appliances.
Evaluating freestanding kitchen storage options reveals clear tradeoffs between mobility and permanent structural longevity. For broader context on how cabinetry fits into residential design, the kitchen cabinet entry offers additional background on construction and terminology.
| Feature | Built-In Kitchen Cabinets | Freestanding Kitchen Units |
|---|---|---|
| Architectural Integration | Seamless wall-to-wall and ceiling-height fit | Standalone appearance with visible perimeters |
| Storage Optimization | 100% usable vertical and corner capacity | Reduced; limited by standardized external dimensions |
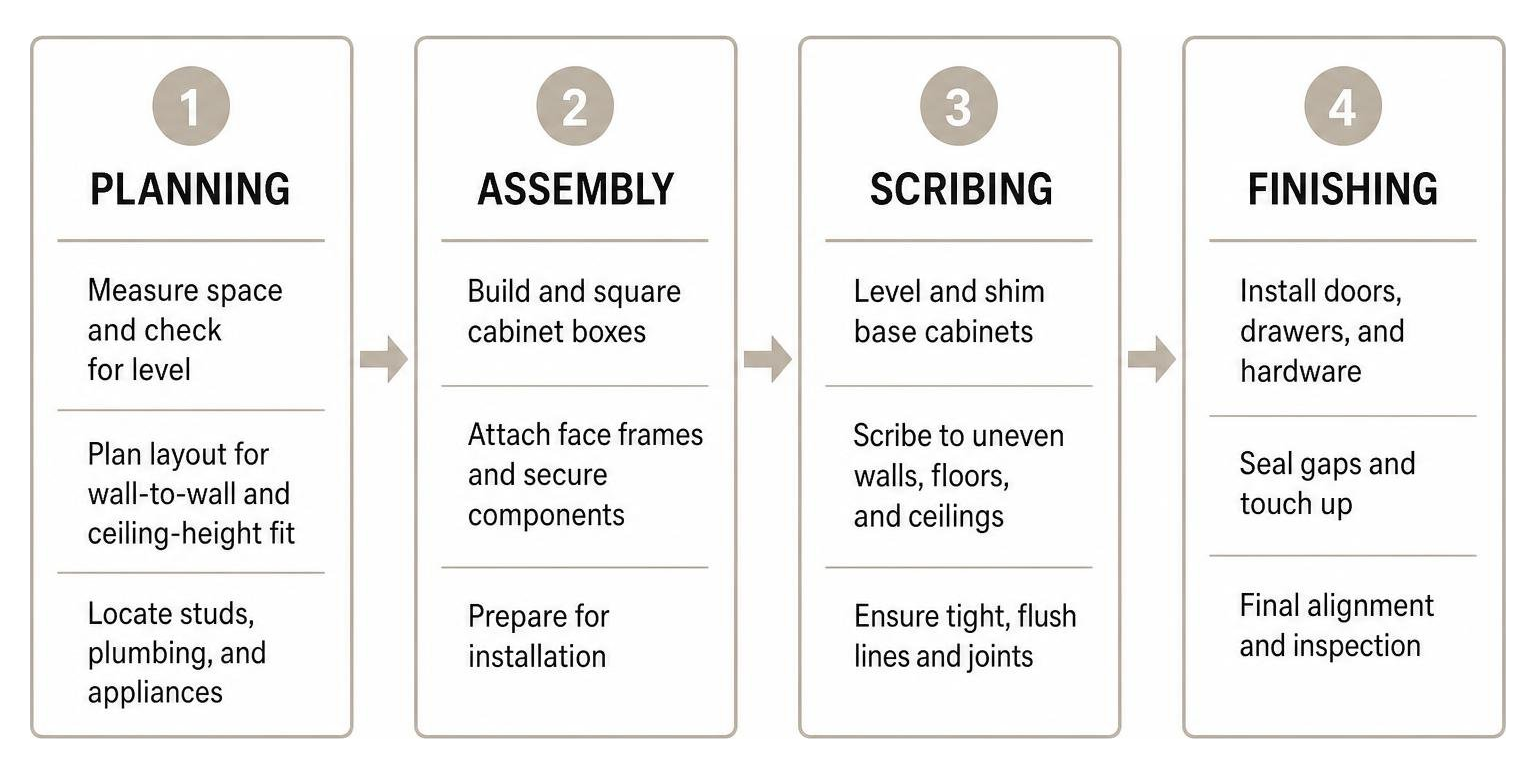
| Installation Complexity | Requires leveling, shimming, stud anchoring, and scribing | Minimal; position in place and anchor lightly for safety |
| Resale Value Impact | High; considered an integral home fixture | Neutral; items typically move with the homeowner |
| Customization Flexibility | Adaptable to uneven plaster, drywall, and tight corners | Fixed dimensions; cannot bridge out-of-square walls |
| Average Cost Range | $4,000 – $25,000+ depending on customization | $500 – $3,500 per independent furniture piece |
Cost and Material Breakdown for Kitchen Cabinets: Custom, Semi-Custom, and Stock
Budget planning for kitchen cabinetry requires evaluating materials, joinery methods, and labor expenses. The carcass box forms the structural foundation, typically constructed from 3/4-inch plywood or furniture-grade particleboard. Premium builds utilize formaldehyde-free birch plywood or Baltic birch for the carcass, paired with solid hardwood face frames (such as maple or oak) to resist racking over time.
Before committing to a project, evaluating new cabinet expenses helps determine whether stock, semi-custom, or fully custom casework best suits your goals:
- Stock Cabinets ($70 to $250 per linear foot): Mass-produced in standard 3-inch width increments (e.g., 12″, 15″, 18″, up to 36″). Carcasses often feature engineered wood sides. When paired with site-built filler strips and crown molding, stock boxes can achieve an upscale architectural appearance on a budget.
- Semi-Custom Cabinets ($150 to $450 per linear foot): Built to order from standardized component systems with customizable depth modifications, specialty finishes, and integrated pullouts. Soft-close undermount drawer slides and heavy-duty European hinges come standard.
- Full Custom Cabinets ($500 to $1,200+ per linear foot): Hand-built by local millworkers to the exact millimeter of your room’s dimensions. Eliminates standard filler strips entirely and accommodates non-standard heights, specialized pantries, and architectural recesses.
Standard base cabinet carcasses measure 34.5 inches high (reaching 36 inches with a 1.5-inch countertop) and 24 inches deep. Standard wall cabinets range from 12 to 24 inches deep and 30, 36, or 42 inches tall.
Designing and Styling Built In Kitchen Cabinets
Selecting the right door profile sets the architectural tone for the entire kitchen while directly impacting daily maintenance:
- Shaker Style: Features a five-piece frame with a recessed center panel. This versatile profile complements transitional, modern, and traditional aesthetics.
- Flat-Panel (Slab) Style: Minimalist, smooth fronts that emphasize horizontal grain patterns or clean solid colors. Slab doors pair well with contemporary spaces and European-style frameless boxes.
- Inset Styling: Doors and drawer fronts sit flush inside the face frame rather than resting on top. This technique delivers high-end craftsmanship but requires precise seasonal expansion allowances.
- Beadboard Profiles: Incorporates vertical grooved paneling into the center doors, adding texture to coastal or farmhouse themes.
When selecting profiles, exploring versatile cabinet styles ensures your millwork coordinates naturally with the home’s existing moldings and architecture.
Integrating Appliances and Lighting in Kitchen Cabinets
A true built-in layout integrates appliances flush with surrounding cabinetry:
- Appliance Garages & Microwave Alcoves: Hide countertop clutter behind bi-fold or pocket doors with dedicated power outlets inside.
- Integrated Refrigeration: Panel-ready refrigerators sit flush with 24-to-25-inch cabinet depths, finished with matching door panels to blend seamlessly into the wall run.
- Ventilation Clearances: Built-in ovens, induction cooktops, and microwaves require manufacturer-specified internal airflow channels to prevent heat buildup inside enclosed carcasses.
- Under-Cabinet Task Lighting: Routing 1/2-inch channels in the underside of upper cabinet panels conceals low-voltage LED strip diffusers, eliminating exposed wiring.
Step-by-Step Guide to Planning and Installing Built-In Kitchen Cabinets
Achieving a clean, level built-in installation on real-world drywall and subfloors requires systematic preparation.
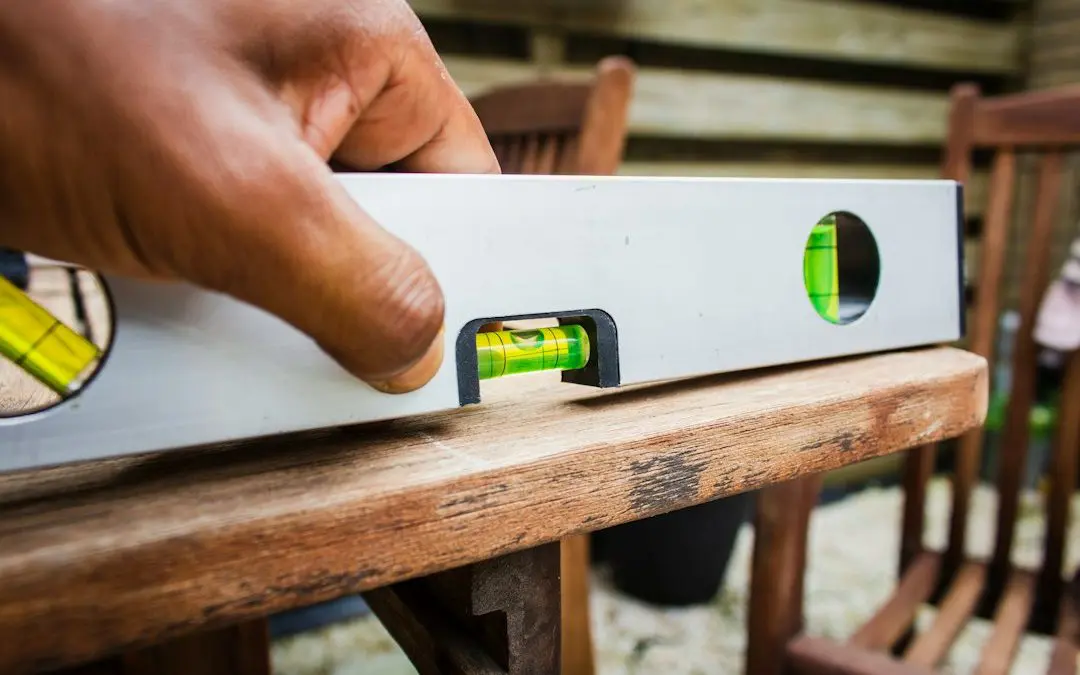
- Map High Points and Studs: Run a self-leveling cross-line laser across the room to locate the highest point of the finished floor. Mark your 34.5-inch reference baseline from this point. Locate and mark every wall stud with a stud finder.
- Remove Existing Moldings: Cut away baseboards, shoe molding, and crown trim along the installation wall using an oscillating multi-tool so boxes sit tight against the drywall.
- Construct or Level the Toe-Kick Platform: In multi-cabinet runs, building a continuous 2×4 lumber base platform leveled with composite shims provides a stable, flat foundation, speeding up individual box installation.
- Hang Upper Cabinets First: Fasten a temporary 1×4 ledger board along your upper bottom guideline. Rest upper cabinets on the ledger, clamp adjacent face frames together with T-style cabinet clamps, pre-drill, and secure boxes through the back structural rail into wall studs using 3-inch cabinet screws.
- Install and Shim Base Cabinets: Set the corner base unit first, verifying plumb and level across both axes. Work outward, using shims behind the carcass to compensate for bowed drywall.
For a deeper dive into mechanical fasteners, check out our step-by-step cabinet installation guide to ensure rock-solid results.
How to Install Built In Kitchen Cabinets for a Seamless Fit
The difference between basic modular boxes and a true custom built-in comes down to scribing and trim integration:
- Scribing to Out-of-Plumb Walls: Walls are rarely plumb. Place an oversized filler strip against the wall, set an installer’s scribe tool to the widest gap, trace the wall profile onto the wood strip, and cut along the line at a 5-degree back-bevel using a jigsaw.
- Closing Corner Dead Spaces: When resolving deep intersections, solving awkward corner cupboard spaces with blind corner pullouts or corner carousels prevents lost storage.
- Continuous Crown and Base Integration: Run continuous ceiling crown molding across upper cabinet tops and tie the baseboard trim into adjacent room baseboards for a seamless architectural look.
Finishing and Long-Term Kitchen Cabinet Maintenance
A high-quality finish protects wood substrates from kitchen humidity, grease, and daily handling.
- Surface Preparation: Sand bare wood or existing coatings progressively with 120-grit, 150-grit, and finally 220-grit sandpaper to remove surface imperfections.
- Industrial Priming: Apply a high-adhesion bonding primer (such as an industrial shellac or waterborne acrylic-alkyd primer) to block wood tannins and provide an anchor for topcoats.
- Protective Topcoats: Spray-apply two coats of urethane-modified enamel or industrial wood coatings, lightly scuffing with 320-grit between coats.
- Curing: While coatings dry to the touch within hours, full chemical hardness takes 14 to 30 days. Avoid harsh cleaning chemicals during this curing window.
If your built-in boxes are structurally sound but look dated, professional cabinet refinishing provides a durable, factory-smooth transformation at a fraction of the cost of full replacement.
Frequently Asked Questions About Built-In Kitchen Cabinets
Are built-in kitchen cabinets more expensive than freestanding alternatives?
Yes. Built-in cabinets require precise wall anchoring, specialized filler scribing, trim integration, and countertop fabrication. While freestanding pieces cost less upfront and move with you, built-ins maximize usable storage and add permanent resale value to your home.
Can I make stock kitchen cabinets look fully built-in?
Yes. Secure standard stock boxes together tightly, bridge wall gaps with scribed filler strips, add an integrated toe-kick cover, and install continuous crown molding to the ceiling. Finishing all components in a unified coating creates a seamless, custom look.
How do I handle uneven walls and floors during kitchen cabinet installation?
Establish level baseline reference marks using a laser level, and use composite shims beneath base platforms and behind rear mounting rails. Scribe outer filler strips to match curved or uneven drywall, creating straight, square cabinet faces.
Conclusion
Built-in kitchen cabinetry offers the ideal balance of storage capacity, visual balance, and long-term home value. Whether you are building from scratch or upgrading stock boxes with custom trim, proper planning, leveling, and finishing ensure your kitchen remains beautiful and functional for decades.
At All Surface Refinishing, we bring more than 30 years of hands-on experience and over 14,000 completed resurfacing projects across South Florida. If your existing built-in cabinets are structurally sound but need a modern refresh, we deliver high-quality, durable surface transformations without the expense or mess of a full remodel. We proudly serve homeowners throughout Fort Lauderdale, Boca Raton, West Palm Beach, Coral Gables, Boynton Beach, and surrounding communities.
Ready to revitalize your space? Explore our expert kitchen cabinet refinishing services and schedule your consultation today.
