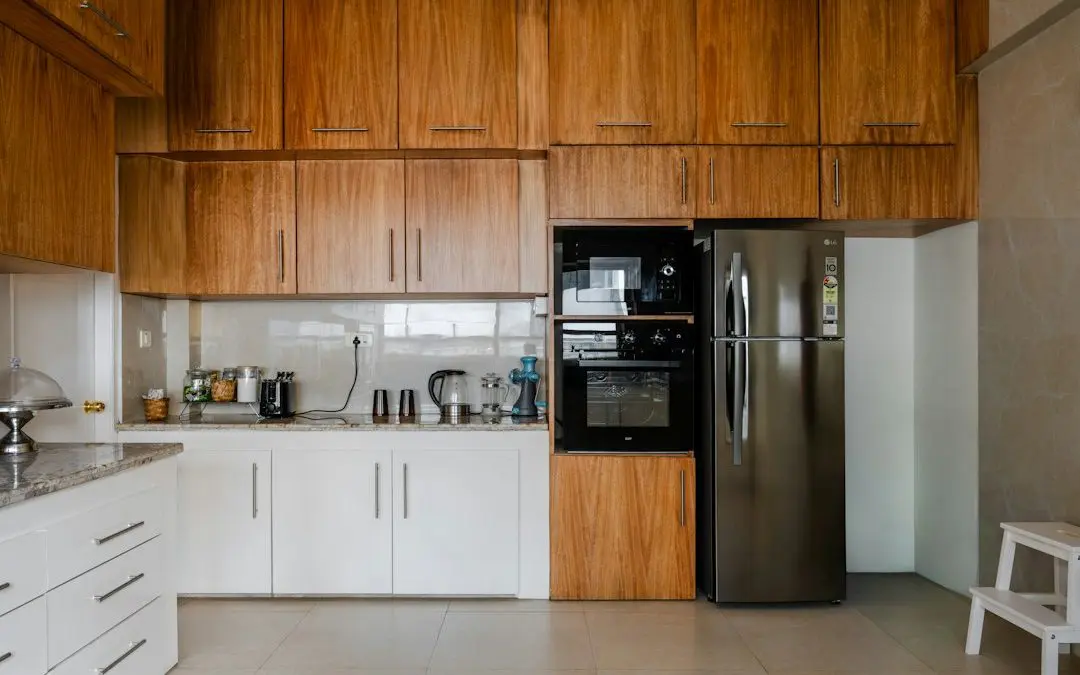
A Fast, Low-Mess Way to Update Kitchen Cabinets
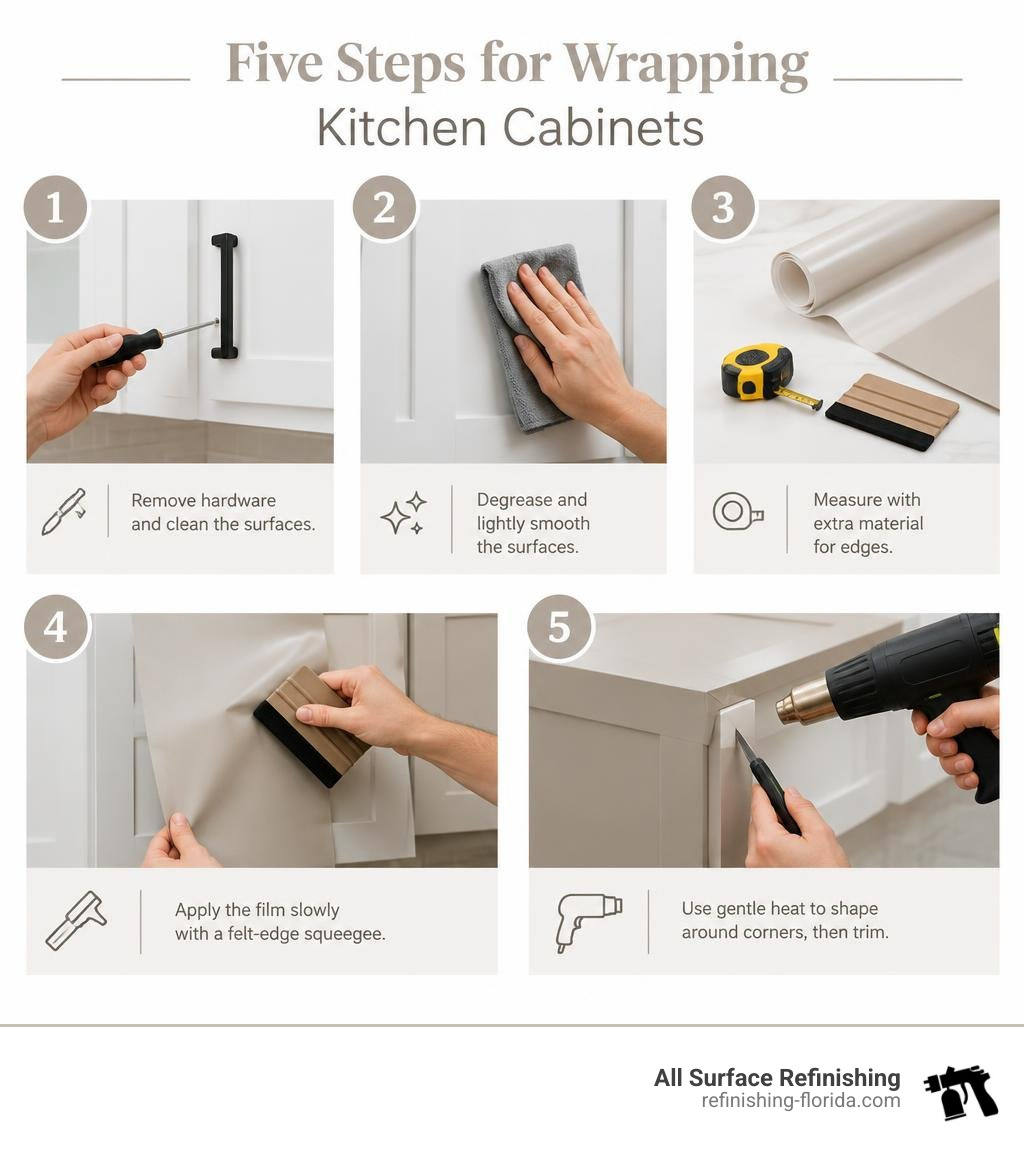
Wrapping kitchen cabinets means covering clean, smooth cabinet doors, drawers, and visible frames with adhesive vinyl film. For a durable result, remove the hardware, degrease and lightly smooth the surfaces, measure with extra material for edges, apply the film slowly with a felt-edge squeegee, then use gentle heat to shape it around corners before trimming.
It is a practical kitchen update when the cabinet boxes are sound but the finish looks dated or worn. Unlike replacement, wrapping keeps the existing cabinets in place. Unlike a coated finish, it creates a new surface layer that can usually be removed later with careful warming and peeling. Quality vinyl also comes in matte, gloss, wood-grain, and stone-look styles.
DIY materials can cost about $50 to $200 in the U.S., though larger kitchens and premium architectural films cost more. Good preparation matters most: grease, loose finish, chipped areas, and moisture-damaged edges can cause the vinyl to lift.
I am Frank Hernandez, President of All Surface Refinishing, with more than a decade of surface-refinishing experience serving South Florida property owners. In this guide to wrapping kitchen cabinets, I will walk you through the five steps that help create a clean, lasting kitchen update.
Related content about wrapping kitchen cabinets:
What Is Vinyl Wrap and How Does It Compare to Other Cabinet Upgrades?
Vinyl wrap is a specialized, adhesive-backed architectural film designed to cover flat or profiled surfaces. Made from durable polyvinyl chloride (PVC), modern cabinet films feature built-in air-release technology that allows trapped air to escape during installation. Homeowners choose it because it transforms tired wood or laminate surfaces into sleek matte finishes, high-gloss accents, or realistic faux wood grains without the demolition mess of a full remodel.
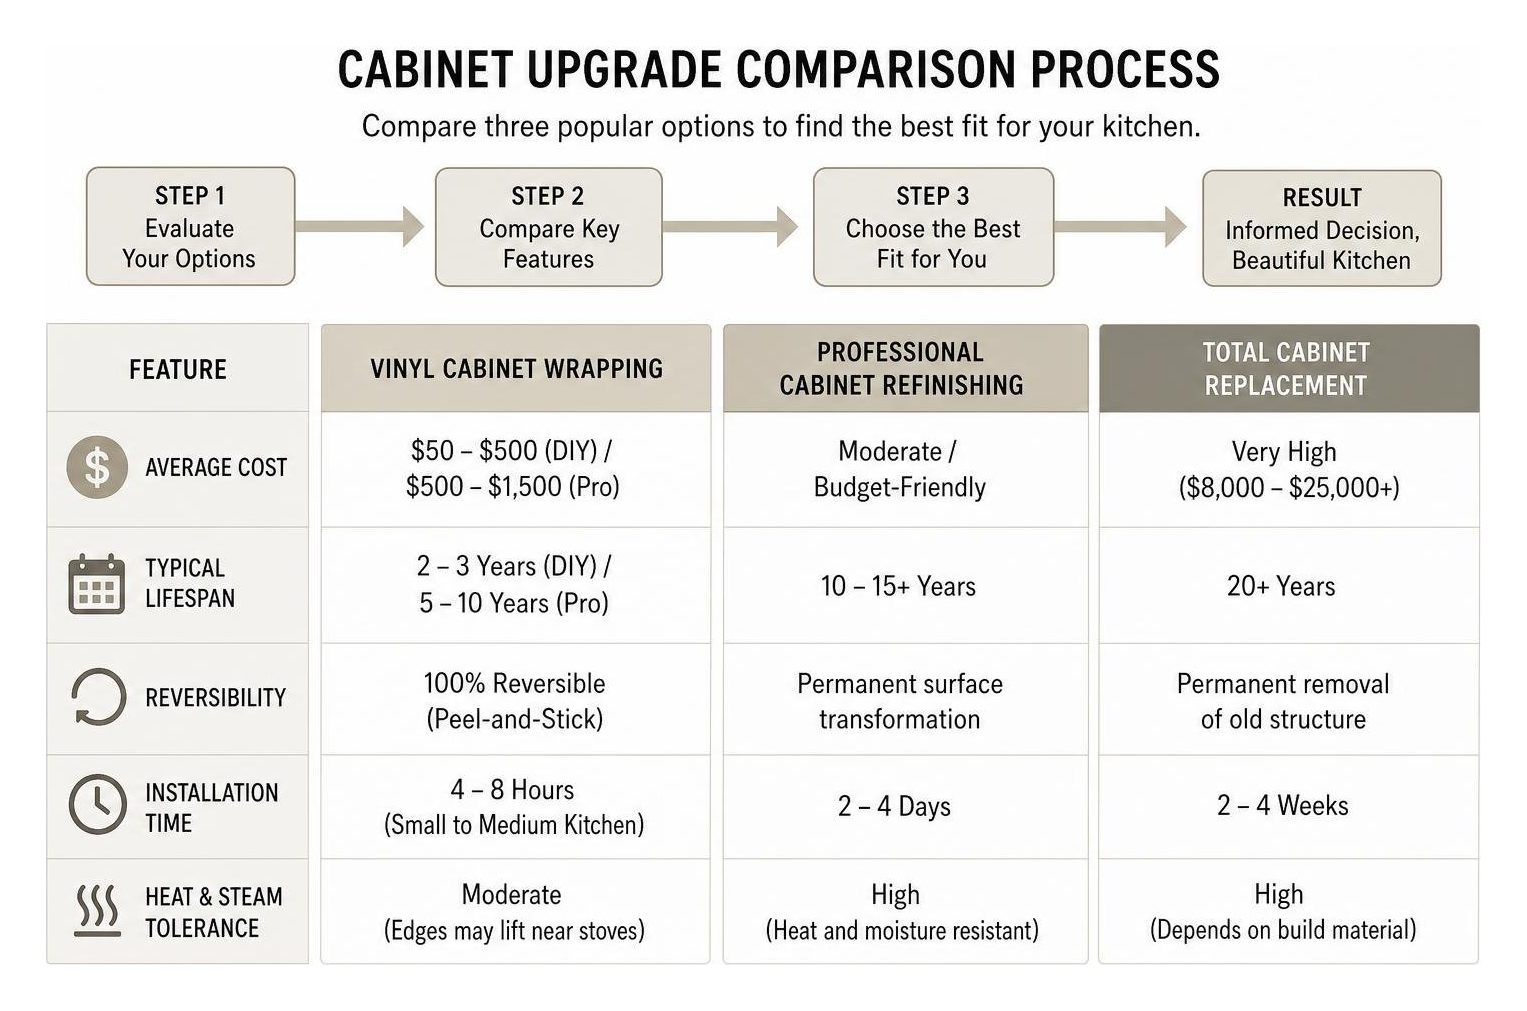
When considering options for your kitchen, it helps to understand how vinyl compares to other methods. Reviewing a cabinet resurfacing cost guide gives great perspective on overall remodel budgets. While replacing cabinets requires tearing out existing frames and waiting weeks for new millwork, wrapping applies directly over your current cabinetry. Professional finishes, on the other hand, bond molecularly to the wood or substrate, offering exceptional resistance to steam and high cooking heat.
| Feature | Vinyl Cabinet Wrapping | Professional Cabinet Refinishing | Total Cabinet Replacement |
|---|---|---|---|
| Average Cost | $50 – $500 (DIY) / $500 – $1,500 (Pro) | Moderate / Budget-Friendly | Very High ($8,000 – $25,000+) |
| Typical Lifespan | 2 – 3 Years (DIY) / 5 – 10 Years (Pro) | 10 – 15+ Years | 20+ Years |
| Reversibility | 100% Reversible (Peel-and-Stick) | Permanent surface transformation | Permanent removal of old structure |
| Installation Time | 4 – 8 Hours (Small to Medium Kitchen) | 2 – 4 Days | 2 – 4 Weeks |
| Heat & Steam Tolerance | Moderate (Edges may lift near stoves) | High (Heat and moisture resistant) | High (Depends on build material) |
The Benefits and Costs of Wrapping Kitchen Cabinets
Wrapping your kitchen cabinets delivers several distinct advantages:
- Budget-Friendly: You save between 60% and 80% compared to cabinet replacement.
- Fast Turnaround: A standard 12-door kitchen takes roughly 4 to 6 hours to wrap, meaning you will not lose the use of your kitchen for weeks.
- Reversible: Because the vinyl peels off without harming sound underlying surfaces, it is ideal for tenants or homeowners who like to update styles regularly.
- Surface Protection: High-grade 6 to 8 mil vinyl protects original surfaces from everyday scuffs and minor moisture spills.
Material expenses depend on the size of your kitchen and the type of film you choose. Standard DIY vinyl rolls range from $10 to $40 per roll (covering about 10 to 20 square feet). For a small kitchen with 10 to 15 cabinets, DIY materials usually run between $50 and $250. For larger kitchens requiring architectural-grade textured film, material costs range from $300 to $500. Professional wrapping installations typically run from $500 to $1,500 depending on door complexity.
For projects requiring permanent finishes, exploring our cabinet refinishing services can help you evaluate long-term alternatives. You can also review helpful external resources like this guide to rewrapping cabinet doors or read about how to transform kitchen cabinets in 2 hours for quick DIY inspiration.
Essential Tools for Wrapping Kitchen Cabinets
Having the right tools ready ensures clean lines, crisp corners, and no bubbling:
- Architectural Vinyl Film: Premium 6-mil to 8-mil vinyl with air-release channels.
- Heat Gun or Hair Dryer: Softens the vinyl to stretch neatly over edges and activate adhesive.
- Felt-Edge Squeegee: Smooths out film without scratching the new surface.
- Precision Utility Knife & Fresh Blades: Essential for razor-sharp, burr-free cuts.
- Cutting Mat & Metal Ruler: For accurate film measuring and squaring.
- Trisodium Phosphate (TSP) or Heavy Degreaser: Cleans grease deposits completely.
- Microfiber Cloths & Isopropyl Alcohol: Removes remaining lint, residue, and dust.
- Screwdriver or Drill: For hardware removal and reinstallation.

How to Wrap Cabinets in 5 Simple Steps
Follow this structured workflow to wrap your kitchen cabinets with professional results.
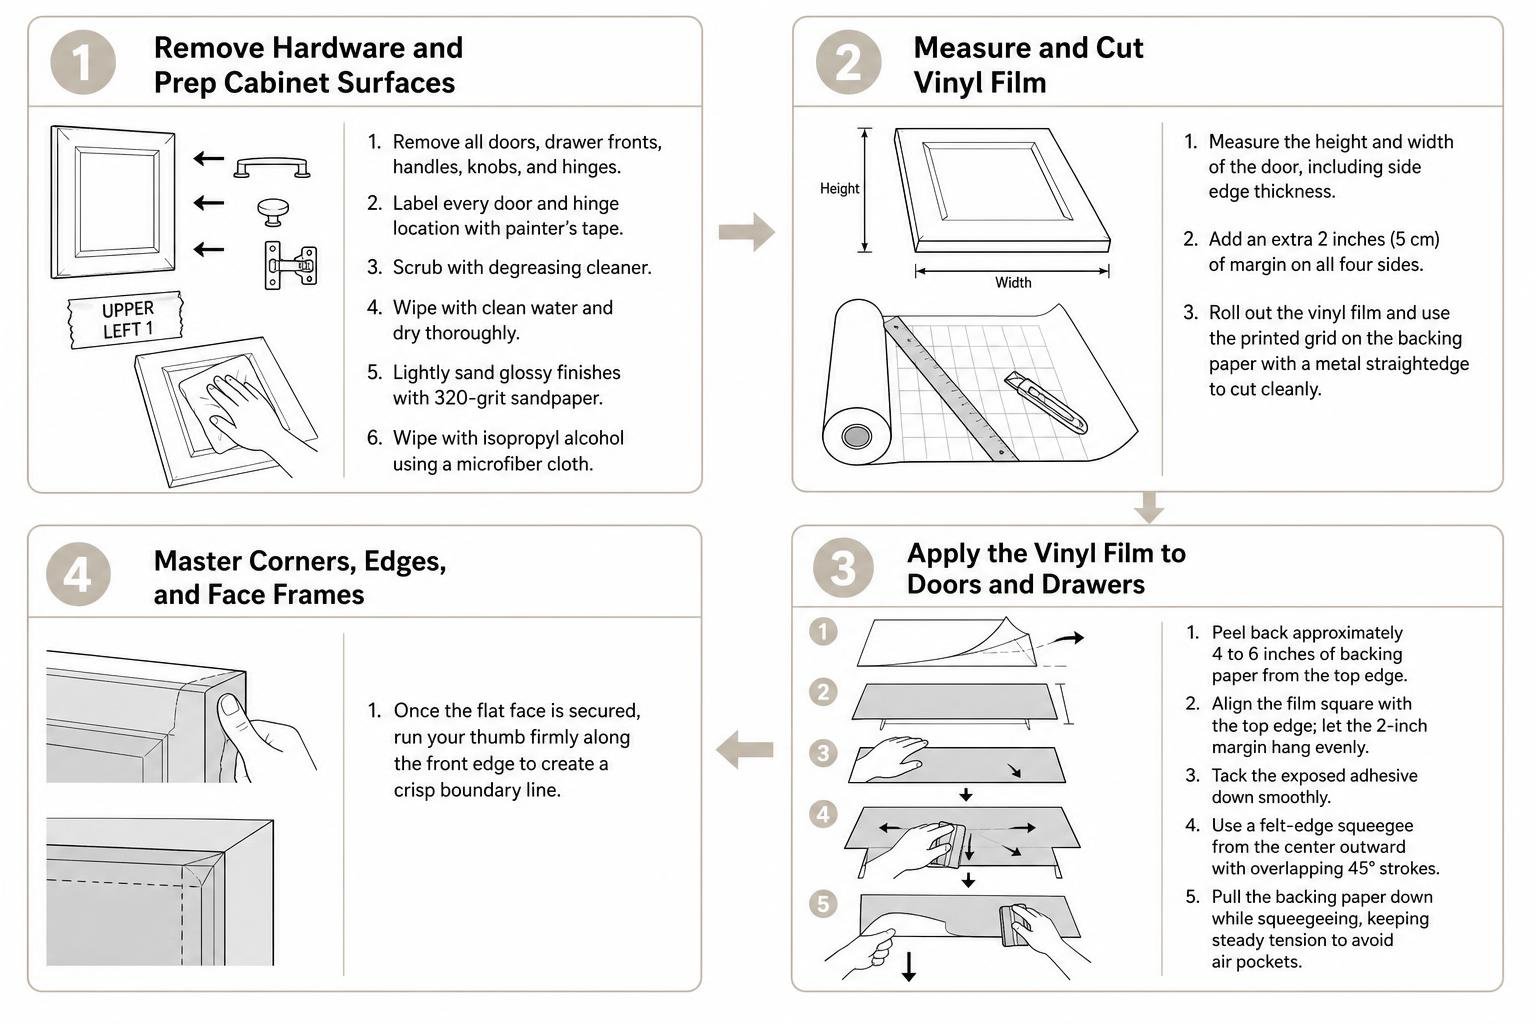
Step 1: Remove Hardware and Prep Cabinet Surfaces
Begin by removing all cabinet doors, drawer fronts, handles, knobs, and hinges using a screwdriver. Label every door and its corresponding hinge location using painter’s tape (for example, “Upper Left 1” or “Base Right 2”) so reassembly goes smoothly.
Thorough cleaning is essential for proper adhesion. Kitchen grease prevents vinyl adhesive from bonding:
- Scrub all door surfaces, edges, and cabinet face frames with a heavy-duty degreasing cleaner.
- Wipe surfaces with clean water and dry thoroughly.
- Lightly sand glossy finishes using 320-grit sandpaper to give the adhesive better mechanical grip.
- Wipe down every inch with a microfiber cloth dipped in isopropyl alcohol to eliminate lingering dust particles.
Step 2: Measure and Cut Vinyl Film
Lay your cabinet door flat on a clean work table over a cutting mat.
- Measure the height and width of the door, including the side edge thickness.
- Add an extra 2 inches (5 cm) of margin on all four sides. This allowance gives you material to grip, stretch, and wrap cleanly around the back edge.
- Roll out the vinyl film and use the printed grid on the backing paper along with a metal straightedge to cut your panels cleanly.
Step 3: Apply the Vinyl Film to Doors and Drawers
- Peel back approximately 4 to 6 inches of the protective backing paper from the top edge of your cut vinyl.
- Align the film square with the top edge of the cabinet door, allowing your 2-inch excess margin to hang evenly.
- Tack the exposed adhesive down smoothly.
- Using your felt-edge squeegee, work from the center outward toward the edges using firm, overlapping 45-degree strokes.
- Slowly pull the backing paper downward with one hand while squeegeeing with the other, keeping steady tension on the film to avoid trapping air pockets.
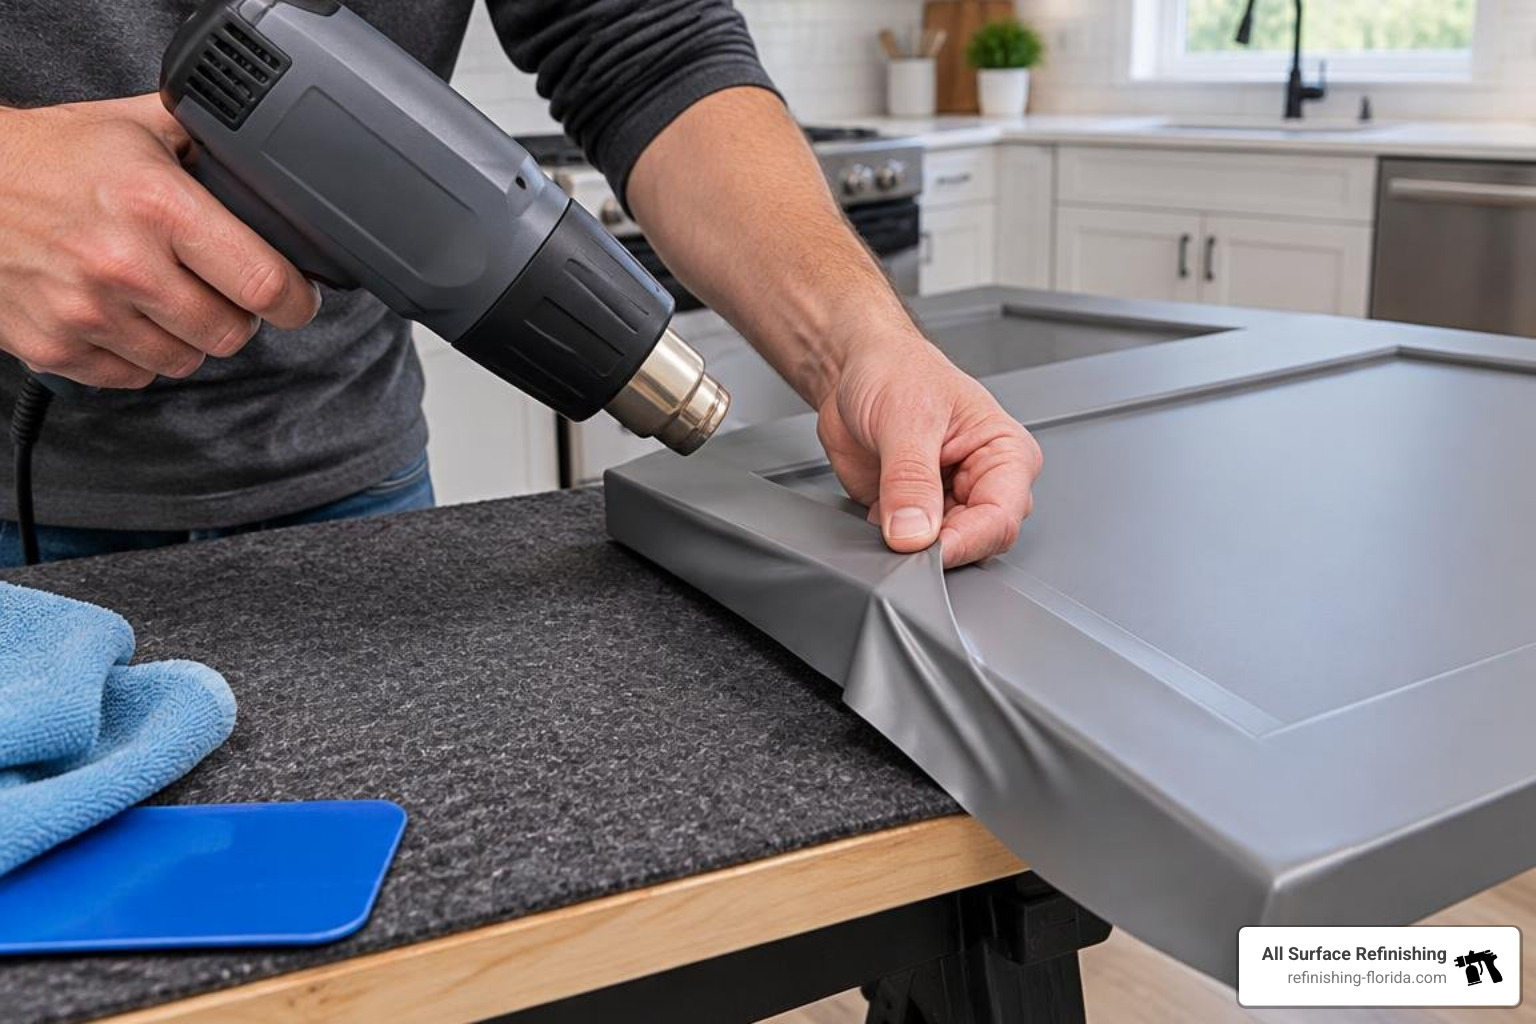
Step 4: Master Corners, Edges, and Face Frames
Corners require careful heat management to prevent thick bunches or peeling.
- Once the flat face is secured, run your thumb firmly along the front edge to create a crisp boundary line.
- Set your heat gun to low (or use a hair dryer) and gently warm the film overhang for 2 to 3 seconds until it becomes pliable.
- Pull the film tautly over the edge and smooth it down the sides and onto the back face.
- For exterior corners, make a 45-degree relief cut at the corner point. Fold one side flat against the edge, apply gentle heat, and fold the adjoining tab over it like wrapping a present.
- Repeat this process on cabinet face frames, working top to bottom and tucking seams tightly into inner grooves.
Step 5: Trim Excess and Reassemble Hardware
- Turn the door face down on a clean, soft surface.
- Run a fresh utility knife blade along the inner back edge, holding the blade at a slight 45-degree inward angle to create a flush, clean cut line.
- Run the squeegee firmly along all cut edges, applying low heat to secure the adhesive seal.
- Allow the adhesive to cure undisturbed for 24 hours.
- Locate the original hardware mounting holes through the vinyl backing, pierce them cleanly with a precision point, and reinstall your hinges, handles, and doors.
For more helpful details, check out this comprehensive guide on how to wrap kitchen cabinets.
Troubleshooting Common Vinyl Wrap Problems
Even careful DIYers run into small hiccups. Here is how to handle the most common issues:
- Trapped Air Bubbles: If the vinyl has air-release channels, push the bubble toward the nearest edge using your felt squeegee. For stubborn bubbles, gently pierce the center with a fine sewing pin, warm it slightly with a heat gun, and smooth the air out through the pinhole.
- Lifting Edges or Corners: Lifting happens when grease remains on the edge or the vinyl was stretched cold. Lift the loose corner, clean underneath with an alcohol wipe, warm the film gently with your heat gun to reactivate the adhesive, and press down firmly.
- Wrinkles During Application: Carefully pull the wrinkled section up away from the door. Apply brief heat to let the vinyl return to its original flat shape, then squeegee it back down smoothly.
- Accidental Tears: If a small tear occurs near an edge, use low heat to align the edges closely. If the tear is in the middle of a door face, replace that film sheet entirely.
If your existing cabinet surfaces have heavy wear, peeling laminate, or water damage, vinyl wrap may struggle to adhere properly. In those situations, consulting our cabinet painting contractors guide will help you find a durable, permanent solution.
Frequently Asked Questions About Kitchen Cabinet Wrap
How Long Does a Vinyl Wrap Last on Cabinets?
A DIY cabinet wrap typically lasts 2 to 3 years before high-use edges show wear. When installed with commercial-grade architectural film and proper heat sealing, wraps can last 5 to 10 years. In comparison, factory-grade refinishing provides 10 to 15+ years of durability. To keep wrapped cabinets looking great, clean them using a soft microfiber cloth with mild dish soap and warm water. Avoid abrasive sponges, bleach, and harsh chemical cleaners. To learn more about long-lasting options, read our kitchen cabinet refinishing guide.
Is Wrapping Kitchen Cabinets Reversible for Renters?
Yes, wrapping cabinets is completely reversible, making it a popular choice for apartment renters. Quality vinyl uses pressure-sensitive acrylic adhesive that releases cleanly when warmed with a hair dryer or heat gun. Warm the film section by section and pull it away at a 45-degree angle. If any light adhesive residue remains, wipe it away with isopropyl alcohol or warm soapy water without damaging the underlying cabinet finish.
Can You Wrap Over Painted or Damaged Cabinets?
You can wrap over painted cabinets if the paint is fully cured, smooth, and well-bonded. Never wrap over chipping, peeling, or chalking paint, as the vinyl will lift the loose paint right off the wood. If your cabinets have gouges, dents, or chipped corners, fill them with wood filler, sand them completely flush, and wipe away all dust before applying your film.
Conclusion
Wrapping your kitchen cabinets offers a fast, clean, and budget-friendly way to update dated kitchen styles without major demolition. With patience, thorough degreasing, and careful heat management around edges, you can achieve a fresh look over a single weekend.
While vinyl wraps are great for short-term and renter-friendly updates, homeowners looking for lasting beauty, seamless moisture protection, and premium factory finishes often choose professional resurfacing. At All Surface Refinishing, we bring over 30 years of experience and more than 14,000 completed projects across South and Southwest Florida—serving homeowners in Miami, Fort Lauderdale, West Palm Beach, Boca Raton, Coral Gables, Hollywood, FL, Boynton Beach, and surrounding communities. Contact our team today to explore our cabinet refinishing services and discover how easy it is to revitalize your kitchen.
