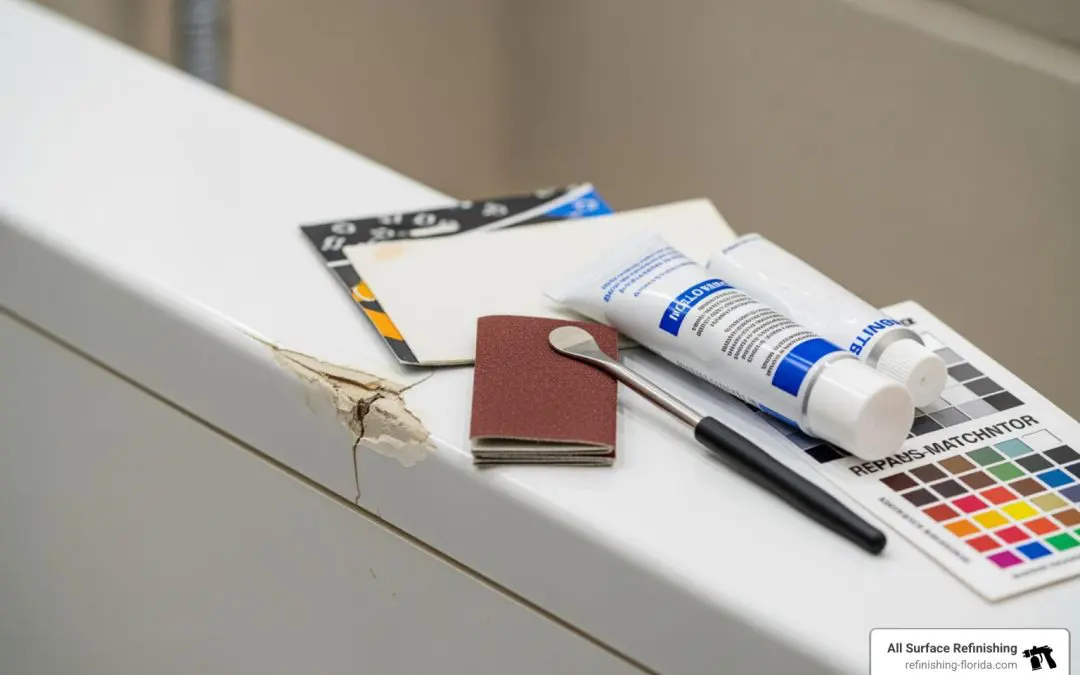
When a Cracked Bath Panel Needs Fixing Fast
A plastic bath panel repair kit is your fastest, most affordable way to fix cracks, chips, holes, and dents in plastic bath surrounds — without tearing out the whole panel.
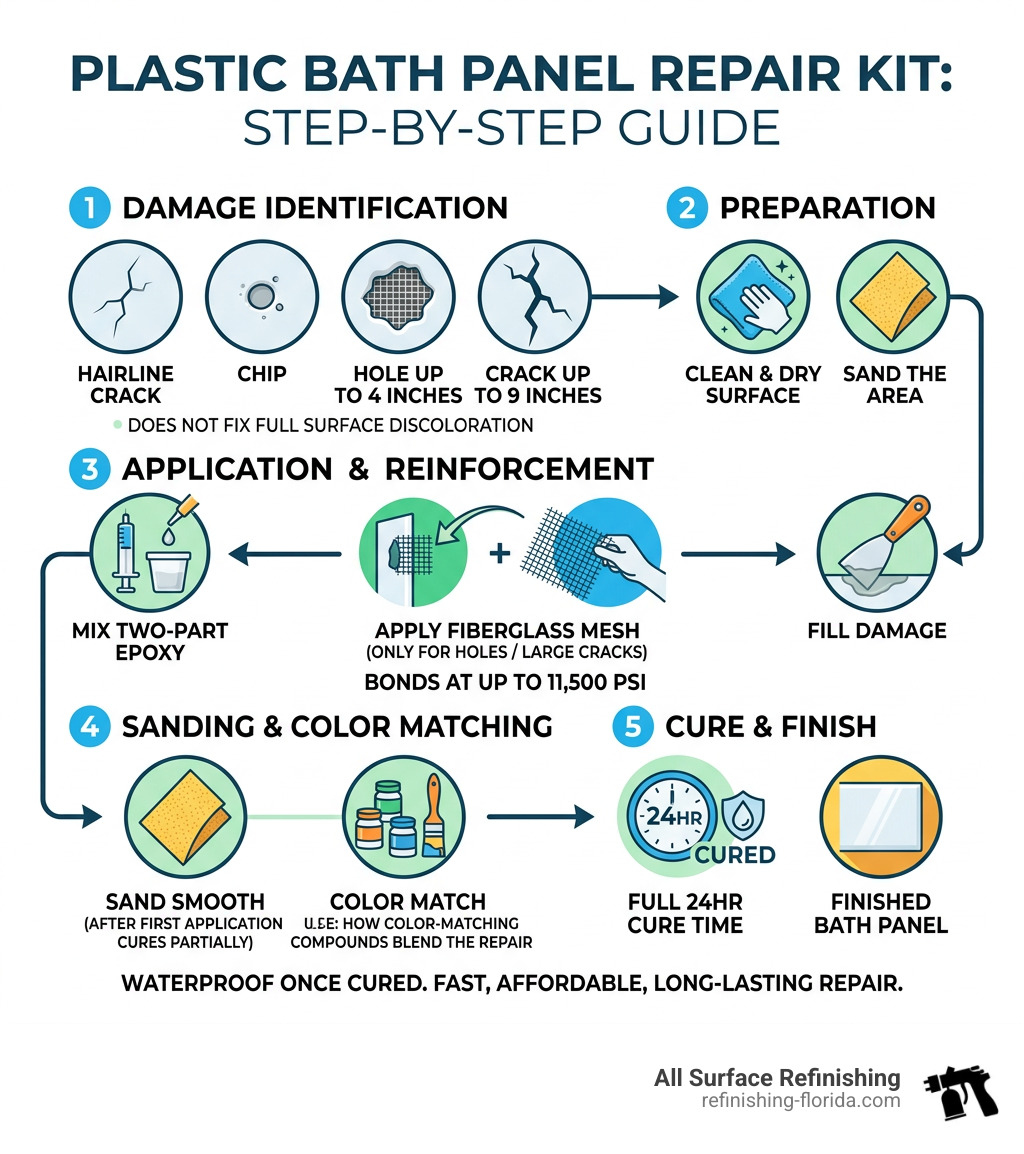
Here’s a quick look at what these kits fix and how they work:
| Damage Type | Can a Repair Kit Fix It? | Typical Repair Time |
|---|---|---|
| Hairline cracks | Yes | 2-3 hours + 24hr cure |
| Impact chips | Yes | 1-2 hours + 24hr cure |
| Holes up to 4 inches | Yes (with fiberglass mesh) | 2.5 hours + 24hr cure |
| Cracks up to 9 inches | Yes (non-weight-bearing) | 2.5 hours + 24hr cure |
| Full surface discoloration | No — needs refinishing | N/A |
Most kits include a two-part epoxy, fiberglass reinforcement, sandpaper, and color-matching compounds. They bond at strengths up to 11,500 PSI and are fully waterproof once cured.
A cracked bath panel isn’t just an eyesore. Water seeping through even a small crack can cause mold growth and structural damage underneath — turning a $20 fix into a costly renovation if ignored.
The good news? With the right kit and a few hours, most plastic bath panel damage is completely fixable at home.
I’m Frank Hernandez, President of All Surface Refinishing, with decades of hands-on experience refinishing and restoring bathroom surfaces — including every situation where a plastic bath panel repair kit works brilliantly, and the rare cases where it doesn’t. Let’s walk through exactly what you need to know to get a clean, lasting repair.
Basic plastic bath panel repair kit glossary:
Understanding Your Plastic Bath Panel Repair Kit
When we talk about bath panels, we are usually dealing with one of two materials: ABS plastic or Acrylic. While they look similar, their chemical makeup is different. A high-quality plastic bath panel repair kit is designed to create a molecular bond with these surfaces.
Standard polyester resins—the kind often used for car body repairs—might stick to a plastic panel initially, but they often peel off within weeks because they don’t truly “bite” into the plastic. Professional-grade kits, like the Tub Repair Kit White for Plastic and Acrylic, use specialized epoxy resins that offer up to 11,500 PSI of tensile strength. This ensures the repair is actually stronger than the surrounding panel.
Comparing Materials: What Needs Fixing?
Before you start, you need to know if your panel is a candidate for a DIY fix. Plastic panels are flexible, which is why they crack if they are kicked or if the bath flexes too much.
| Material | Repair Difficulty | Best Repair Method |
|---|---|---|
| Acrylic/Plastic | Moderate | Epoxy-based filler with color match |
| Fiberglass | Moderate | Resin + Fiberglass cloth reinforcement |
| Porcelain/Steel | High | Specialized chip fillers (non-flexible) |
Most kits are versatile enough to handle scratches, fragments, and even holes up to 4 inches in diameter (about the size of a baseball). If you have a non-weight-bearing crack on a side panel, these kits can successfully patch spans up to 9 inches long.
Essential Preparation and Safety for Plastic Surfaces
If there is one thing we’ve learned over 30 years and 14,000 projects at All Surface Refinishing, it’s that a repair is only as good as the prep work. If you skip the cleaning, your shiny new epoxy will pop off the moment the bathroom gets humid.
1. Clean and Degrease
Plastic panels are magnets for soap scum, body oils, and mineral deposits. Use a heavy-duty bathroom cleaner or a mixture of dish soap and warm water to scrub the area. For a professional touch, a quick wipe with isopropyl alcohol ensures every bit of grease is gone.
2. Sanding for Adhesion
Smooth plastic is “low energy,” meaning stuff doesn’t like to stick to it. Use 100-grit to 200-grit sandpaper to roughen the surface about one inch beyond the damage. This creates “teeth” for the epoxy to grab onto.
3. The “Stop-Hole” Trick
If you are dealing with a crack, it has a tendency to “creep” or grow over time due to temperature changes. Use a tiny drill bit to drill a small hole at the very ends of the crack. This stops the stress concentration and prevents the crack from spreading further.
4. Safety First
Most plastic bath panel repair kit resins contain chemicals that require respect.
- Ventilation: Open a window and use a fan.
- Protection: Wear the nitrile gloves included in the kit.
- Respirator: If you are doing extensive sanding or using high-VOC resins, a respirator (not just a dust mask) is a smart move.
For more specialized advice on different tub types, check out our fiberglass-tub-crack-repair-kit guide.
Step-by-Step Guide: Restoring Your Bathroom Fixtures
Repairing Cracks and Holes with a Plastic Bath Panel Repair Kit
Now for the “how-to” part. Whether you’re in Boca Raton or Fort Lauderdale, the process remains the same.
- Mix the Epoxy: Most kits come with a two-part epoxy pouch. You’ll usually burst a center seam and knead the pouch for at least 60 seconds. Consistency is key here; if it’s not mixed perfectly, it won’t cure.
- Apply Reinforcement: For holes or large cracks, you cannot just use paste. Cut a piece of the fiberglass cloth (included in most kits) to fit the area.
- Layering: Spread a thin layer of mixed resin over the damage, place the fiberglass cloth on top, and then saturate the cloth with more resin. Use the provided spreader to taper the edges so the repair doesn’t look like a “hump” on your panel.
- The Waiting Game: Most structural repairs require a 24-hour cure time before they can be sanded or exposed to water. Avoid the temptation to touch it!
If you are dealing with the floor of a shower rather than a side panel, the process is slightly more rigorous. You can see our professional tips on that here: fix-that-floor-repairing-your-acrylic-shower-base-like-a-pro.
Achieving a Seamless Finish with Your Plastic Bath Panel Repair Kit
A structural fix is great, but you don’t want to be reminded of the “accident” every time you brush your teeth.
- Color Matching: Most kits are “Bright White,” but many older Florida homes have “Almond,” “Biscuit,” or “Bone” fixtures. High-end kits include pigment pouches. Start with the white base and add a tiny drop of pigment at a time. It’s much easier to make it darker than to lighten it back up.
- Wet Sanding: Once the repair is rock-hard, use progressively finer sandpaper (up to 2000 grit) and plenty of water. This removes the “orange peel” texture and blends the repair into the original panel.
- Buffing: Use a fine buffing compound and a soft cloth to bring back the high-gloss shine. If done correctly, the repair should be nearly invisible.
For a deeper dive into making these repairs look professional, see our bathtub-repair-complete-guide.
Common Mistakes and Maintenance Tips
Even the best plastic bath panel repair kit can fail if you make these common DIY blunders:
- Improper Mixing: If you don’t knead the epoxy long enough, it will stay “tacky” forever.
- Temperature Issues: If your bathroom is too cold (below 65°F), the resin won’t cure. If it’s too hot (common in South Florida summers without AC), it might cure too fast, giving you no time to smooth it out.
- Using Abrasive Cleaners: Once repaired, stay away from bleach, Comet, or Bar Keepers Friend. These can erode the new coating and cause yellowing. Stick to non-abrasive, pH-neutral cleaners.
- Ignoring the Shelf Life: Most kits expire about 6 months after purchase. If that kit has been sitting in your garage in Miami for a year, the resin probably won’t bond correctly.
To learn more about the specifics of working with acrylic, visit our guide on beyond-the-break-a-diy-guide-to-acrylic-shower-repair.
Frequently Asked Questions about Bath Panel Repairs
How long does a plastic bath panel repair take to cure?
Typically, you should wait 24 hours before getting the area wet. While some “quick-dry” kits claim to be ready in a few hours, the full chemical bond—especially for structural cracks—takes a full day to reach its 11,500 PSI strength.
Can I use these kits for waterproof sealing around the panel?
While the repair paste itself is waterproof, these kits are not meant to replace silicone sealant. For the edges where the panel meets the floor or the tub, you should use a dedicated bath and shower seal kit or a high-quality mould-resistant silicone.
When should I call a professional in Miami or Fort Lauderdale?
If the panel is shattered, has multiple cracks over 10 inches, or if the plastic has become brittle and “chalky” due to age, a DIY kit is just a temporary bandage. In these cases, professional refinishing or panel replacement is a better investment. At All Surface Refinishing, we often see DIY attempts that didn’t go as planned—don’t worry, we can fix those too!
Conclusion
Repairing your bathroom doesn’t have to be a headache. A plastic bath panel repair kit is a fantastic tool for the proactive homeowner looking to save money and extend the life of their fixtures. By following the right prep steps and being patient with the cure times, you can achieve a result that looks like new.
However, if you’re looking at a larger project—like a full bathtub transformation or a color change for your entire surround—All Surface Refinishing is here to help. With over 30 years of experience serving South and Southwest Florida, from West Palm Beach down to Miami and the Keys, we provide high-quality, cost-effective alternatives to expensive replacements.
Ready to give your bathroom a professional upgrade? Visit our Professional Bathtub and Panel Refinishing page to see how we can transform your space in just one day.
