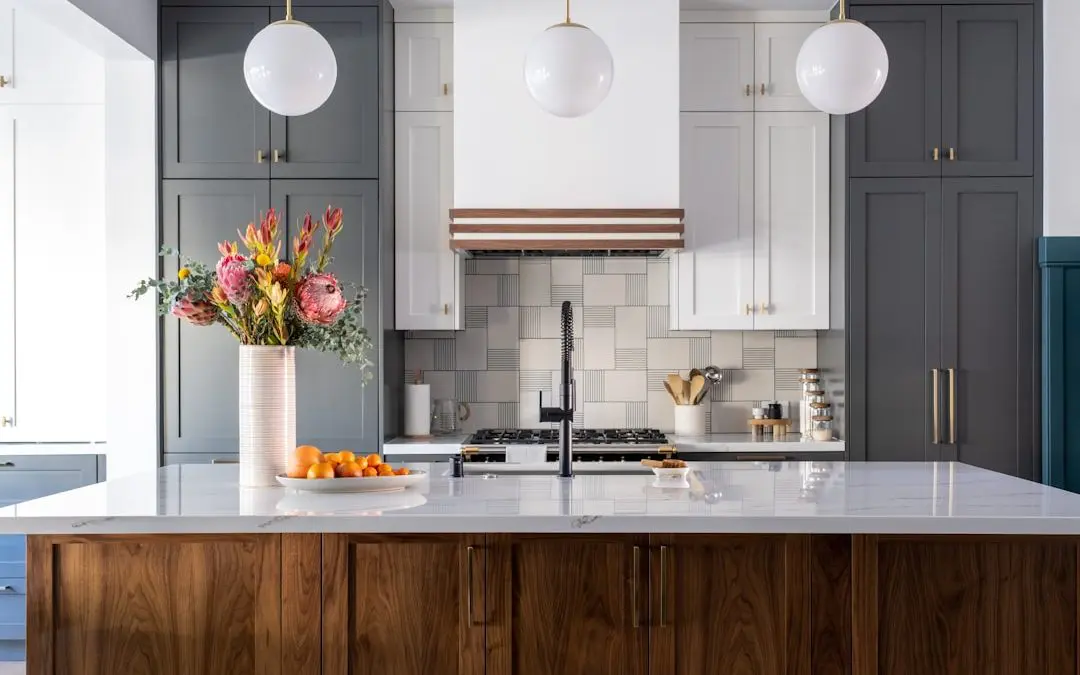
Is the Cost to Refinish Cabinets Yourself Actually Worth It?
The cost to refinish cabinets yourself typically runs between $100 and $500 in supplies — compared to a national average of $3,114 when hiring a professional.
Here’s a quick breakdown to answer your question right away:
| Option | Typical Cost |
|---|---|
| DIY cabinet refinishing | $100 – $500 in supplies |
| Professional cabinet refinishing | $1,990 – $4,497 |
| Brand-new custom cabinets | $12,000+ |
Bottom line: DIY can save you $500 to $1,000 per project — but it takes 2 to 3 days of careful, precise work to get results that actually hold up.
So what’s the catch? Most homeowners underestimate what the project actually involves. There’s sanding, degreasing, priming, painting, and reassembly — all requiring the right tools and the right sequence. Skip a step, and you’ll end up with peeling paint, blotchy finish, or cabinets that look worse than when you started.
This guide breaks down every cost involved, what supplies you actually need, and how to avoid the mistakes that turn a $200 project into a $2,000 headache.
I’m Frank Hernandez, President of All Surface Refinishing, and with over 15 years of hands-on refinishing experience across South Florida, I’ve seen what separates a clean, durable cabinet finish from a costly DIY disaster — and I’ll show you exactly how to calculate the real cost to refinish cabinets yourself before you pick up a single tool. Let’s get into it.
What is the Actual Cost to Refinish Cabinets Yourself?
When calculating the cost to refinish cabinets yourself, it is easy to focus solely on the price of a couple of cans of paint. However, a true DIY budget requires looking at the entire picture.
If you already own basic tools like a screwdriver and a drop cloth, your DIY supplies budget might hover around $100 to $200. If you need to purchase or rent specialized equipment, such as an orbital sander or a high-quality paint sprayer, that cost can quickly rise to $500.
In comparison, hiring a professional to refinish cabinets typically ranges from $1,990 to $4,497, with a national average of $3,114. For a standard kitchen, professional labor generally equates to about $4 to $10 per square foot, or roughly $2,700 for a typical layout.
By taking the DIY route, you are essentially saving on professional labor rates, which average $35 to $75 per hour. This means you can keep up to $500 to $1,000 in your pocket per project.
However, you must ask yourself: is your time worth the trade-off? To understand the financial and physical commitment of tackling this project over a weekend, we recommend reading our detailed guide on The True Cost of Painting Your Own Cabinets.
Here is a side-by-side cost comparison to help you visualize where your money goes:
| Expense Category | DIY Cost | Professional Cost |
|---|---|---|
| Paint & Primer | $50 – $150 | Included in quote |
| Sanding & Prep Supplies | $30 – $80 | Included in quote |
| Tools & Equipment Rental | $50 – $200 | Included in quote |
| Labor (Your Time vs. Pros) | Free (Your labor) | $1,500 – $3,500 |
| Total Project Cost | $130 – $430 | $1,990 – $4,497 |
DIY Cabinet Refinishing Supplies and Tool Checklist
To achieve a professional-looking finish, you cannot cut corners on your gear. Using the wrong sandpaper or a cheap paintbrush will leave visible brush strokes and texture.

Before you begin, gather the following essential tools and materials:
- Orbital Sander & Sanding Sheets: Essential for smoothing flat surfaces quickly.
- Fine-Grit Sanding Blocks: Crucial for reaching detailed crevices and profiles on cabinet doors.
- Shop Vacuum: To clean up fine wood dust before painting.
- HVLP Paint Sprayer Rental: Renting a High-Volume, Low-Pressure (HVLP) sprayer from a local home improvement store costs about $100 per day. This tool is the secret to achieving a smooth, factory-like finish.
- Stain-Blocking Primer: A high-quality primer prevents wood tannins and old stains from bleeding through your fresh paint.
- Painter’s Tape & Drop Cloths: To protect your countertops, walls, and floors.
- TSP (Trisodium Phosphate): A heavy-duty degreaser used to clean cooking grease off the cabinet frames.
Using chemical strippers, heavy paints, and sprayers means you must prioritize ventilation and safety. Always wear a respirator mask and safety goggles. To understand the safety standards for handling paint chemicals and fumes, refer to the EPA guide on volatile organic compounds (VOCs).
For a complete checklist of materials and step-by-step application instructions, check out Painting Kitchen Cabinets a DIY Guide to a Flawless Finish.
Why Cabinet Refinishing is More Cost-Effective Than Buying New Cabinets
Many homeowners in South Florida think that the only way to modernize an outdated kitchen is to rip everything out. However, replacing your cabinets is an incredibly expensive undertaking.

Brand-new custom kitchen cabinets can easily cost $12,000 or more. Even basic, builder-grade stock cabinets will run you thousands of dollars once you factor in the cost of demolition, disposal, and professional installation.
Throwing away structurally sound cabinets is a massive waste of money. If your cabinet boxes are solid and in good shape, refinishing them is the ultimate budget-friendly alternative. You can read more about how these costs stack up in our article How Much Do New Kitchen Cabinets Actually Cost.
Furthermore, most common cabinet materials are highly receptive to refinishing:
- Hardwood: The absolute best material for refinishing. It can be sanded down, stained, or painted repeatedly.
- MDF (Medium-Density Fiberboard): Highly stable and smooth, MDF takes paint beautifully because it lacks a natural wood grain.
- Laminate and Melamine: While they cannot be easily stained, they can be painted if you use a high-adhesion bonding primer.
To dive deeper into how refinishing preserves your kitchen layout while saving you thousands of dollars, explore our Cabinet Refinishing Cost Guide Save Thousands on Your Kitchen Remodel.
Step-by-Step Guide to Refinishing Cabinets Like a Pro
Refinishing cabinets is a precise science. If you skip a single step, your paint will bubble, chip, or peel within a few months.
Follow this proven step-by-step process to get a flawless, professional-grade finish:
- Prep and Protect: Empty your cabinets completely. Tape off your countertops, walls, and floors using painter’s tape and plastic drop cloths.
- Label Everything: Cabinet doors may look identical, but they often vary in size by up to 1/4 inch. Before removing any hardware, write a number on a piece of painter’s tape and stick it to the cabinet opening, then put a matching numbered piece of tape on the corresponding door.
- Clean and Degrease: Scrub every inch of the cabinet boxes and doors with a TSP solution. Cooking grease, oils, and dirt will prevent paint from adhering.
- Sand the Surfaces: Lightly sand all surfaces with fine-grit sanding blocks (around 220-grit) to remove the glossy sheen and create a “tooth” for the primer to grab onto.
- Apply Stain-Blocking Primer: Apply one to two coats of primer. If you are painting your cabinets a dark or bold color, use a tinted primer to reduce the number of paint coats required.
- Paint with Precision: Use your rented HVLP paint sprayer for the doors and drawers. Hold the sprayer tip at least 8 inches away from the surface and apply paint in a controlled, sweeping back-and-forth motion.
- Reassemble and Adjust: Once the paint has fully cured, reinstall the doors. Use a hardware template jig to align new handles or knobs perfectly, and place felt door dampers on the inside corners to prevent the doors from slamming and chipping the fresh paint.
For a detailed look at this sequence, check out our guide on How to Paint Kitchen Cabinets the Right Way.
How to calculate the cost to refinish cabinets yourself based on kitchen size
To calculate your exact material needs, you must look at the size of your kitchen.
First, count the number of door fronts and drawer faces. A standard-sized kitchen typically has about 20 to 30 openings.
Next, calculate the square footage. One gallon of high-quality cabinet paint generally covers 350 to 400 square feet. However, because you must paint both the front and back of the doors, as well as the cabinet frames, you will need to double your square footage calculation.
For a small kitchen (under 100 sq. ft. of cabinet surface), you will likely need:
- 1 gallon of primer
- 1 to 2 gallons of premium paint
For a large kitchen (over 200 sq. ft. of cabinet surface), plan for:
- 2 gallons of primer
- 3 to 4 gallons of premium paint
To help map out your paint and primer purchases step-by-step, take a look at our article How to Paint Cabinets in 5 Easy Steps.
Hidden expenses that increase the cost to refinish cabinets yourself
A classic DIY pitfall is forgetting about the “little things” that add up at the cash register. When budgeting for your cabinet project, make sure to account for these hidden costs:
- New Knobs and Pulls: If you plan to update your kitchen hardware, new knobs and pulls can cost anywhere from $2 to $10 each. Varying your hardware sizes (such as using longer pulls for wide drawers and smaller knobs for doors) adds designer flair, but it can increase your overall hardware budget.
- Wood Putty: If your new hardware doesn’t match the existing screw holes, you must buy wood putty to fill the old holes from front to back, sand them flush, and drill new holes.
- Detail Brushes: You will need high-quality angled sash brushes for touching up tight corners where the sprayer cannot reach.
- Mistakes and Re-runs: If you spray too close and cause paint runs, you will have to wait for it to dry, sand it flat, buy more paint, and spray again.
- The Cost of Your Time: Refinishing cabinets is physically exhausting. Giving up two full weekends means sacrificing your personal time, which is a significant hidden cost.
To make sure you aren’t caught off guard by these sneaky expenses, review our comprehensive Kitchen Cabinet Refinishing Cost Guide.
Frequently Asked Questions about Cabinet Refinishing
How long does it take to refinish kitchen cabinets yourself?
While professional refinishing takes an average of two to three days, a DIY project typically requires two full weekends.
The first weekend is usually dedicated to prep work: removing doors, labeling, deep cleaning, sanding, and applying primer. The second weekend is reserved for painting, letting the coats dry, and reassembling the kitchen.
That while the paint may feel dry to the touch within a few hours, the chemical curing process takes anywhere from 7 to 14 days. You must handle your cabinets with extra care during this curing window to avoid chipping the fresh finish.
What is the best paint or finish for durable kitchen cabinets?
For professional-grade durability, we recommend using a water-based acrylic alkyd or a premium oil-based enamel.
Water-based acrylic alkyds offer the best of both worlds: they flow and level like traditional oil paint to eliminate brush marks, but they clean up easily with soap and water and don’t emit harsh chemical odors. Oil-based enamels provide an incredibly hard, durable shell that resists kitchen grease and moisture, but they require mineral spirits for cleanup and have a strong odor.
Always wear proper protective equipment when working with these heavy-duty coatings. For safety guidelines on handling paint fumes and solvents, consult the CDC guidelines on chemical safety.
Can you refinish laminate or melamine cabinets?
Yes, you can absolutely refinish laminate or melamine cabinets, but you cannot use standard wood paint.
Because laminate is non-porous and slick, paint cannot grab onto it naturally. To solve this, you must thoroughly scuff-sand the laminate surface with medium-grit sandpaper to remove the factory shine, and then apply a high-quality bonding primer specifically formulated for slick surfaces. Once the bonding primer has cured, you can apply your durable topcoat.
Conclusion
Tackling a cabinet refinishing project yourself is a fantastic way to save money, with DIY supplies costing as little as $100 to $500. However, achieving a smooth, factory-like finish that lasts for years requires an immense amount of patience, precision, and physical labor.
If you don’t have the time to spend two weekends sanding and spraying, or if you want to avoid the risk of a DIY disaster like peeling paint or uneven runs, let the professionals handle it.
At All Surface Refinishing, we are Florida’s trusted experts in cabinet, countertop, and bathtub refinishing. With over 30 years of experience and more than 14,000 successful projects, we provide fast, cost-effective, and beautiful transformations. Please note that we are a professional refinishing service and we do not sell paint directly to consumers.
We proudly serve homeowners across South and Southwest Florida, including Miami, Fort Lauderdale, West Palm Beach, Boca Raton, Boynton Beach, and Broward County.
Ready to skip the DIY stress and get a flawless kitchen transformation? Check out our Kitchen Cabinet Refinishing Cost Guide or contact us today to get a professional estimate for your home!
