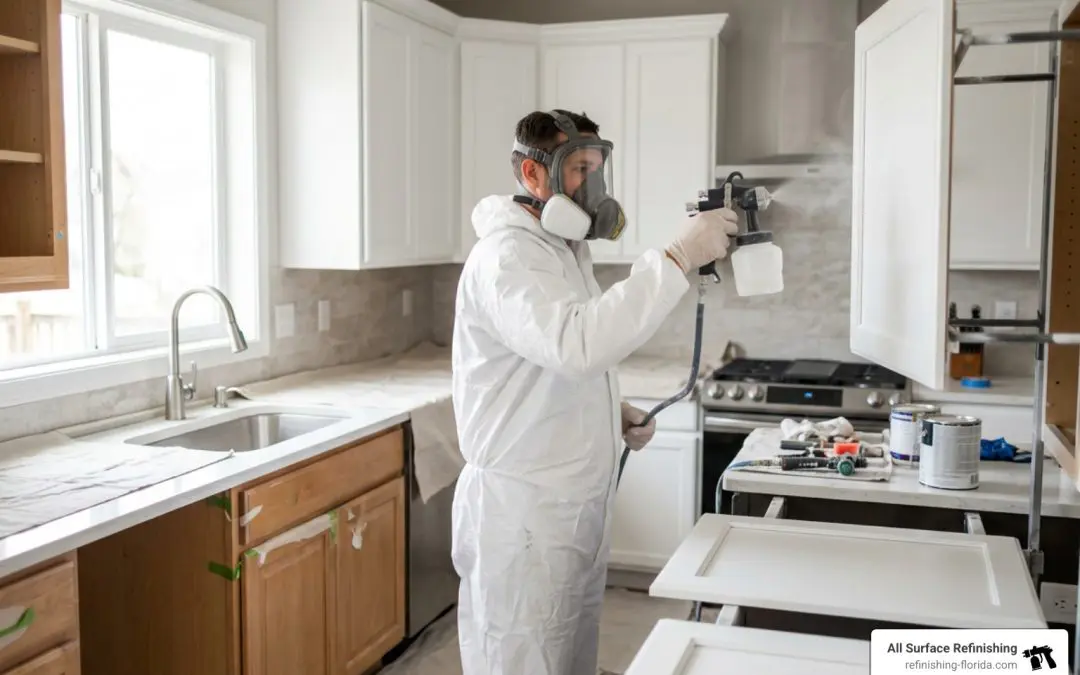
Why Spray Painting Kitchen Cabinets Beats Brushing or Rolling
Spray painting kitchen cabinets gives you a smooth, factory-quality finish that brushes and rollers simply cannot match — and at a fraction of the cost of full replacement.
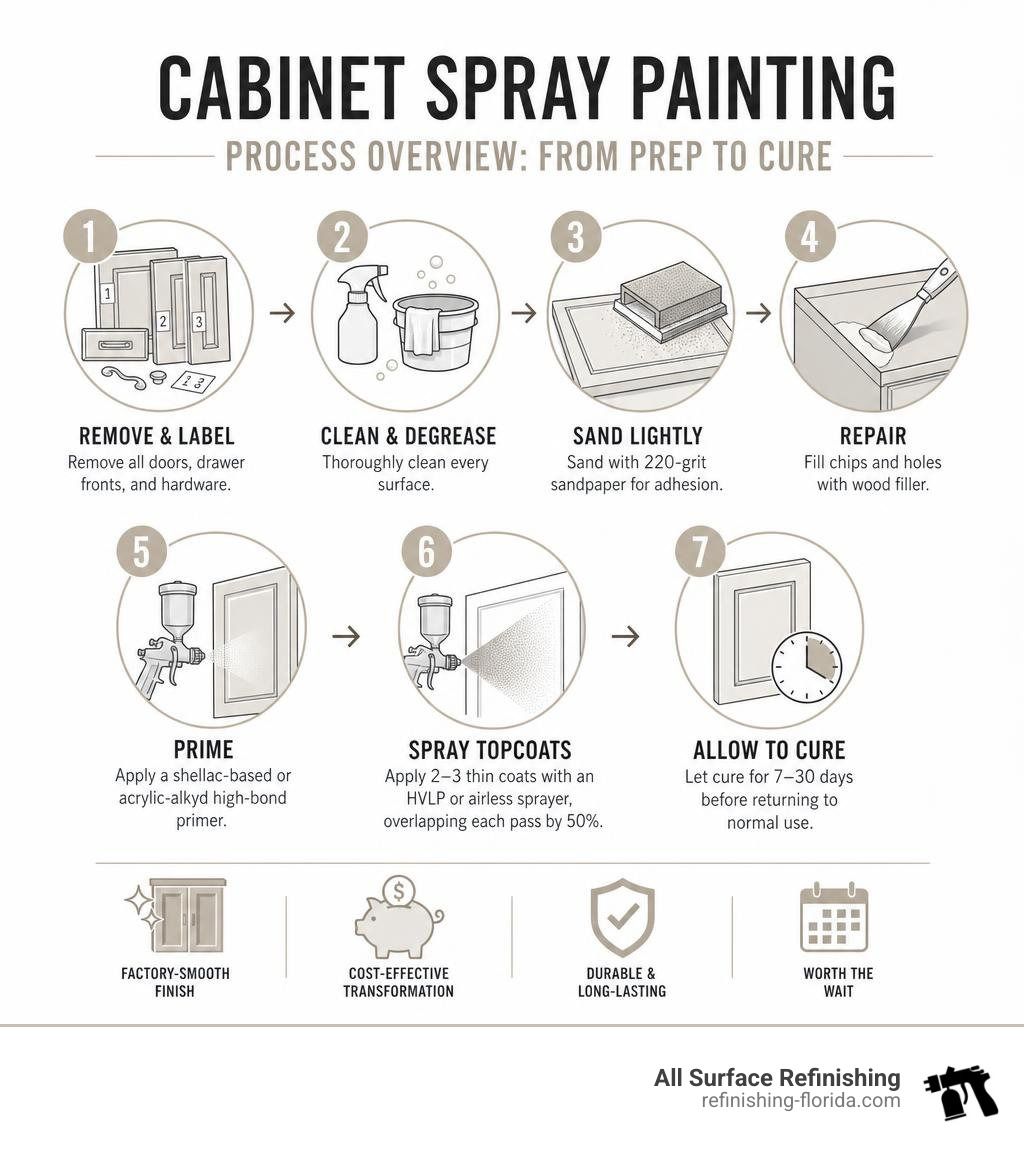
Here’s a quick overview of how to do it right:
- Remove and label all doors, drawer fronts, and hardware
- Clean and degrease every surface thoroughly (TSP or Krud Kutter)
- Sand lightly with 220-grit sandpaper to create adhesion
- Repair any chips or holes with wood filler
- Prime with a shellac-based or acrylic-alkyd high-bond primer
- Spray two to three thin topcoats using an HVLP or airless sprayer, overlapping each pass by 50%
- Allow to cure for 7 to 30 days before returning to normal use
Most homeowners pay around $4,250 for a professional spray job — roughly 65% less than the cost of replacing their cabinets. A confident DIYer can complete the project for $400 to $1,000 in materials, though the process takes considerably longer.
This guide walks you through every step — from choosing the right sprayer to nailing your technique — so you can decide whether to tackle it yourself or call in a pro.
I’m Frank Hernandez, President of All Surface Refinishing, and with over 25 years of hands-on refinishing experience serving South Florida — including hundreds of spray painting kitchen cabinets projects — I’ve seen every mistake and every shortcut worth taking. What follows is the same process my team uses to deliver results that consistently exceed our clients’ expectations.
Glossary for Spray painting kitchen cabinets:
When it comes to updating your kitchen, the application method makes all the difference. Traditional brush and roller methods are fine for drywall, but kitchen cabinets are furniture. Applying paint with a brush or roller leaves behind texture—microscopic ridges, stippling, and brush marks—that catches the light and instantly screams “DIY project.”
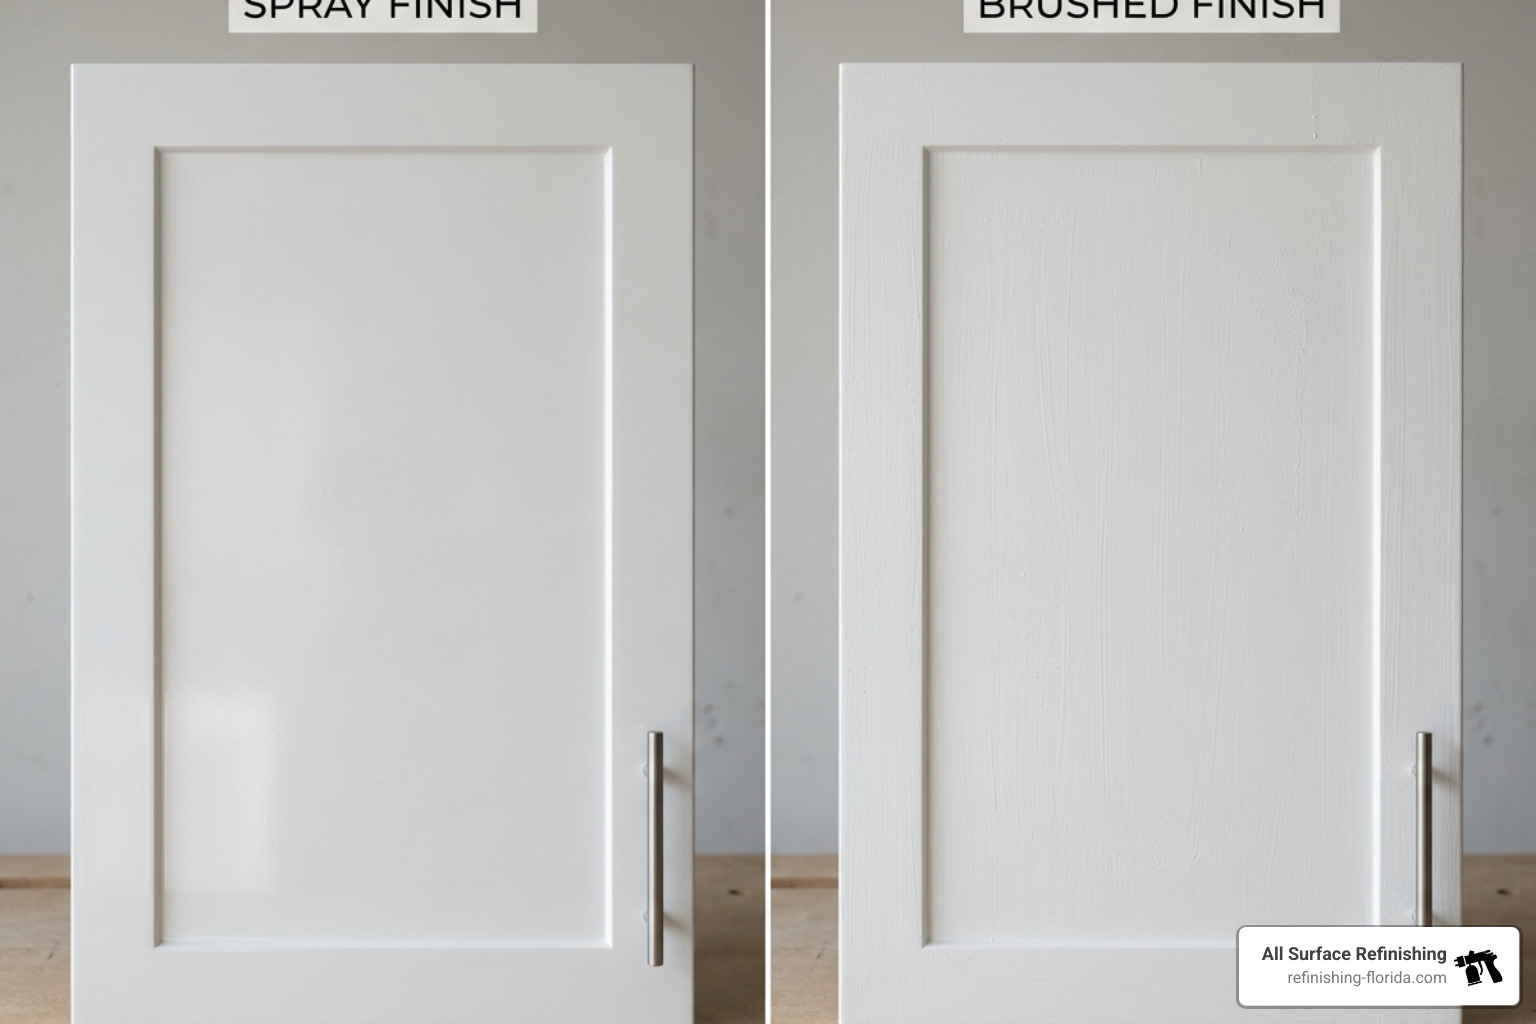
Spray painting kitchen cabinets atomizes the coating into a fine mist, allowing it to lay perfectly flat on the surface. This creates a glass-smooth, factory-like finish that mirrors the look of brand-new, high-end cabinetry.
Beyond aesthetics, sprayed finishes are vastly more durable. Because the paint is applied in even, controlled layers, it cures to a tighter, more cohesive film. This is crucial for meeting the durability standards set by the Kitchen Cabinet Manufacturers Association (KCMA), which tests finishes for resistance to grease, moisture, heat, and daily wear.
However, spraying does require a high level of control. Traditional architectural paint is too thick to spray without thinning, and improper technique can lead to runs, sags, or “orange peel” texture. For a deep dive into how these application methods stack up in the long run, check out our Cabinet Painting Services Complete Guide.
If you want a flawless, factory-grade finish without the headache, hiring professional technicians is often the smartest route. Homeowners looking for top-tier results frequently turn to local experts to ensure a durable and beautiful transformation.
The Cost-Benefit Analysis: Professional vs. DIY Spray Painting Kitchen Cabinets
At first glance, a DIY spray project seems like an absolute bargain. You can buy a budget-friendly sprayer, some high-quality primer, and a couple of gallons of paint for $400 to $1,000.
But there is a hidden financial trap here. To achieve a truly factory-smooth finish, you need professional-grade equipment. Buying a high-quality HVLP turbine, an industrial spray gun, personal protective gear, and a proper exhaust system can easily run upwards of $1,700. Additionally, the learning curve is steep. An experienced professional team can complete a medium-sized kitchen in about 5 to 7 days, whereas a DIYer balancing the project with work and family will often take 3 to 4 weeks. Living without a functional kitchen for a month is a massive hidden cost.
Let’s look at the numbers. The average cost of a professional kitchen cabinet spray project in South Florida is around $4,250.
- Small Kitchen (15–25 pieces): $2,500 to $4,500
- Medium Kitchen (25–40 pieces): $4,500 to $6,500
- Large Kitchen (40+ pieces): $6,500+
When you consider that professional spray painting is approximately 70% to 80% less expensive than a full cabinet replacement—which can easily top $15,000 to $20,000—the value of professional refinishing becomes clear.
For a realistic breakdown of the expenses involved, read our guide on Kitchen Cabinet Painting Costs Explained So You Don’t Get Ripped Off. If you are still weighing your options, you can also explore The True Cost of Painting Your Own Cabinets to see if the sweat equity is worth it.
For those located in South Florida, getting an accurate, professional assessment is highly recommended. Homeowners in Dade County, Aventura, and Hollywood, FL can consult local refinishing experts to compare rates and services.
Essential Equipment and Settings for Cabinet Spraying
To spray cabinets successfully, you cannot just grab any paint gun off the shelf. You need the right combination of atomization, pressure, and fluid control.
| Sprayer Type | Best For | Pros | Cons | Ideal Settings / Tips |
|---|---|---|---|---|
| HVLP (High Volume Low Pressure) | Detailed doors, trim, and DIYers | Extreme control, 80%+ transfer efficiency, minimal overspray | Slow application speed, requires thinning thick paints | Maximize air power, use a 1.3mm to 1.5mm nozzle |
| Airless Sprayer | Large kitchens, fast production | Rapid coverage, sprays unthinned heavy coatings | High overspray, steep learning curve | Use a 311 Fine Finish tip, lower pressure to eliminate “tails” |
Choosing the right equipment and dialling in your settings is the difference between a glass-smooth finish and a splattered mess.
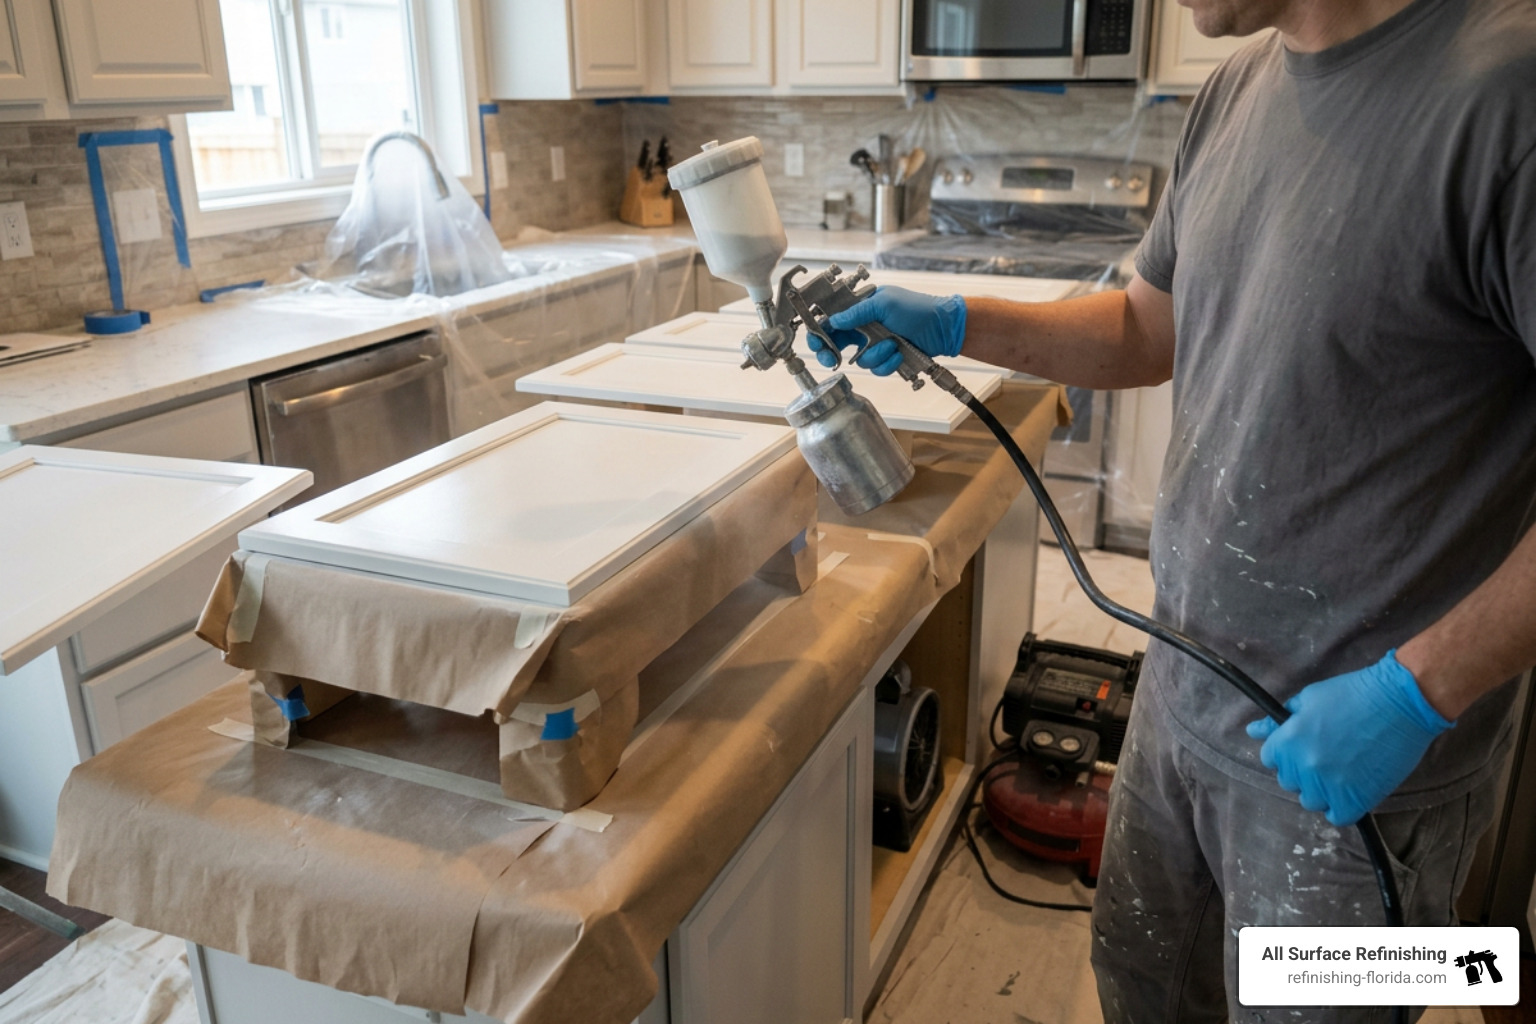
Choosing the Right Sprayer: HVLP vs. Airless
For cabinet refinishing, the two main contenders are HVLP and Airless sprayers.
HVLP sprayers use a high volume of air at low pressure to atomize the paint. This results in a very soft, highly controllable spray pattern with incredibly low overspray. It is the gold standard for detailed trim and doors because you can paint in tight spaces without creating a massive cloud of paint dust.
Airless sprayers, on the other hand, pump paint at incredibly high pressures (up to 3,000 PSI) through a tiny orifice to atomize the coating. Airless sprayers are incredibly fast and can spray thick, durable coatings without any thinning. However, they produce a massive amount of overspray. If you use an airless sprayer, you must use a 311 Fine Finish tip. The “3” indicates a 6-inch spray fan width (perfect for narrow cabinet parts), and the “11” denotes a 0.011-inch orifice size, which restricts the paint flow for an ultra-fine mist.
For more technical tips on setting up your sprayer, check out our Painting Kitchen Cabinets a DIY Guide to a Flawless Finish. If you are located in Broward County, consulting with local refinishing professionals can help you understand the best equipment setup for your specific home layout.
Setting Up a Safe DIY Spray Booth and Ventilation
If you decide to spray paint your cabinets at home, you must build a temporary spray booth. Spraying paint indoors without containment will result in a fine layer of paint dust settling on your furniture, floors, and appliances.
To set up a safe DIY spray booth:
- Isolate the space: Use heavy plastic sheeting and painter’s tape to seal off the garage, basement, or kitchen from the rest of the house.
- Establish negative pressure: Set up box fans in open windows blowing outward. Cover the intake side of the fans with cheap HVAC furnace filters to catch paint particulate before it clogs the fan motor or exhausts onto your neighbor’s driveway.
- Protect yourself: Never spray paint without a properly fitted half-mask respirator equipped with organic vapor cartridges and a P100 particulate pre-filter. A standard dust mask or N95 will not protect your lungs from airborne solvent fumes or atomized paint droplets.
For a great example of a home-based setup and inspiration on how to manage a large-scale project, check out the Painted Kitchen Cabinets – Stacy Risenmay guide, which details a family-friendly approach to managing containment.
Step-by-Step Guide to Preparing and Spraying Your Cabinets
Preparation represents roughly 75% to 80% of the work in any professional cabinet refinishing project. If you rush the prep, your new paint will peel, chip, or bubble within months.
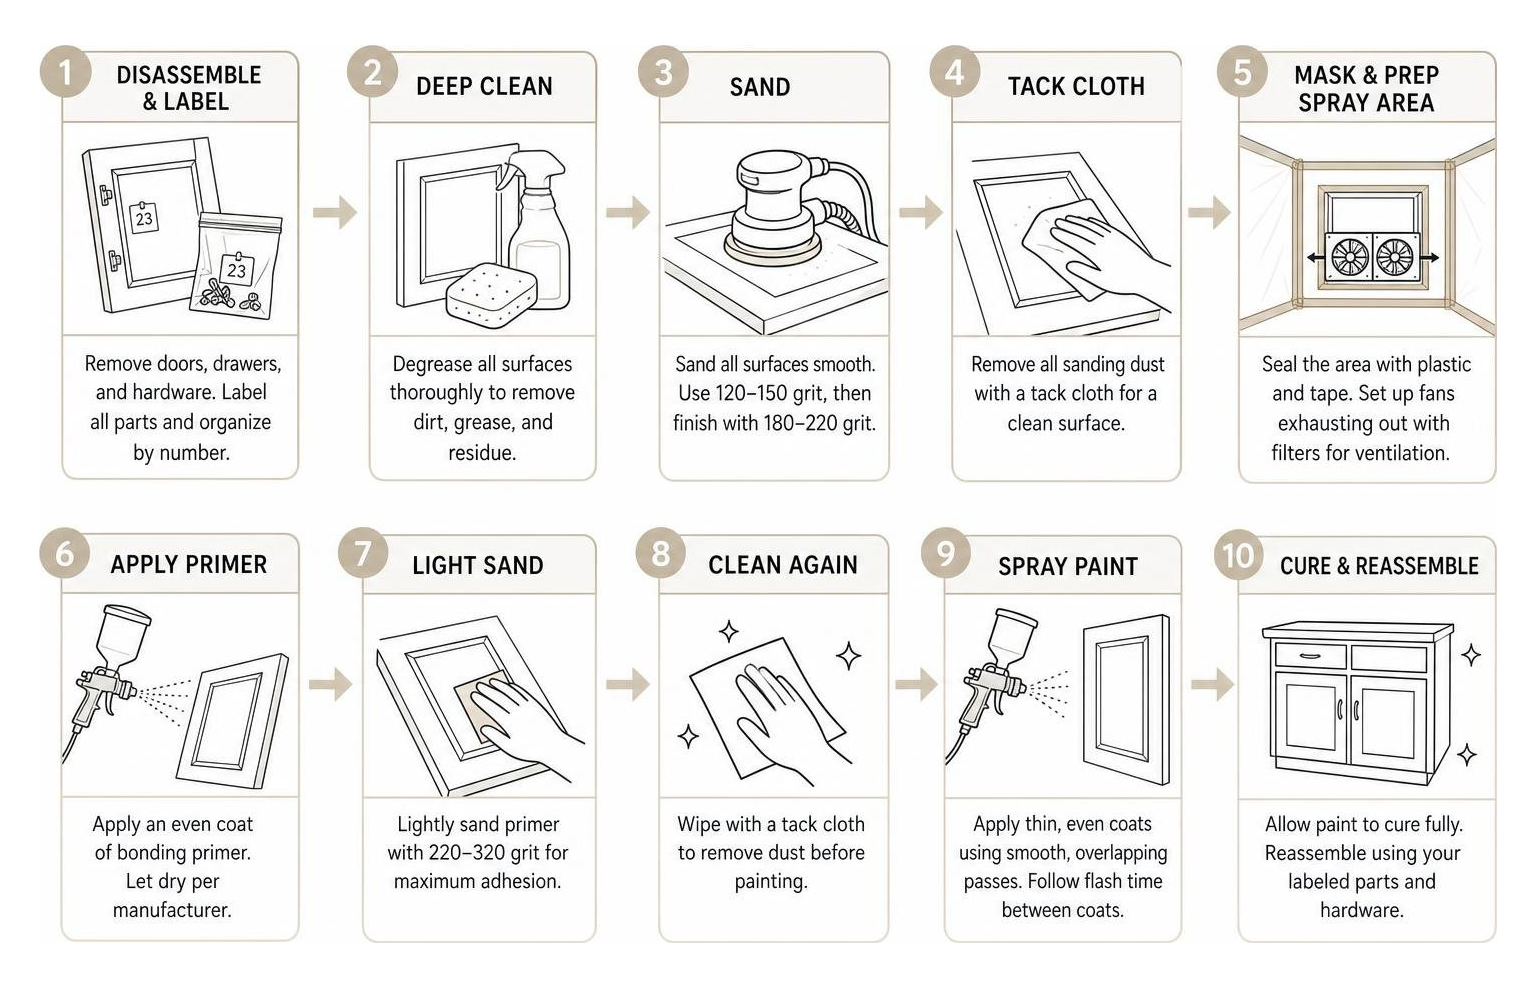
Here is our battle-tested, step-by-step process for achieving a flawless sprayed finish, which you can also read about in detail in our guide on How to Paint Kitchen Cabinets the Right Way.
Step 1: Disassembly, Labeling, and Deep Cleaning
Before you touch a sander or a paint gun, you must completely disassemble the kitchen.
- Label everything: Use a systematic labeling system. Write a number inside the hinge cup of each door (an area that won’t be painted), cover it with a piece of painter’s tape, and record the corresponding number on a master kitchen map. Put the screws and hinges for each specific door into individual, labeled sandwich bags. If you mix up the hinges, your doors will hang crookedly during reassembly.
- Deep clean and degrease: Kitchen cabinets accumulate a heavy layer of cooking grease, skin oils, and steam residue. Standard soap and water won’t cut it. Use a heavy-duty degreaser like Trisodium Phosphate (TSP) or Krud Kutter. Apply the cleaner with a scrub pad, let it break down the grease, and wipe it completely clean with a damp microfiber cloth.
For homeowners in Palm Beach County, including Boca Raton and Boynton Beach, getting professional help with this tedious process is easy and ensures a flawless, long-lasting result.
Step 2: Sanding, Repairing, and Priming Different Materials
Once the cabinets are clean, it’s time to prep the surfaces based on their specific material.
- Sanding: Lightly scuff-sand all surfaces with 220-grit sandpaper. You are not trying to strip the wood down to bare timber; you are simply removing the gloss from the existing finish to create microscopic grooves (or “tooth”) for the primer to grab onto. Vacuum away the dust and wipe the surfaces down with a tack cloth.
- Repairs: Fill any dents, deep wood grain, or old hardware holes with a high-build wood filler or polyester cabinet putty. Once dry, sand the repairs flush with 220-grit sandpaper.
- Priming: Your primer choice depends on your cabinet material. For solid wood (especially open-grain woods like oak), use a stain-blocking shellac-based primer (like Zinsser BIN). This prevents natural wood tannins from bleeding through your topcoat. For MDF or laminate, use a high-bond acrylic-alkyd primer to ensure maximum adhesion on slick surfaces.
If you are wondering if you can bypass this step, read our localized guide on How to Paint Cabinets Without Sanding in Florida to understand the risks and rewards.
Step 3: Mastering the Technique of Spray Painting Kitchen Cabinets
Now for the fun part: spraying.
- Set up your workspace: Lay your cabinet doors completely flat on elevated sawhorses or a turntable. Spraying doors horizontally is the single best way to prevent runs and sags.
- Practice your motion: Keep the spray gun exactly 6 to 10 inches (for HVLP) or 12 inches (for Airless) away from the surface. Keep the gun perpendicular to the wood at all times. Do not sweep your wrist in an arc; instead, move your entire arm parallel to the door.
- Trigger control: Start your hand moving before you pull the trigger, and release the trigger before you stop your hand movement. This prevents paint from piling up at the edges of your doors.
- Overlap your passes: Overlap each spray pass by exactly 50% to ensure uniform coverage. Spray the edges and detailed molding profiles first, then fill in the large, flat center panels.
- Apply thin coats: It is always better to apply three thin coats rather than one or two thick coats. Allow the paint to dry completely between coats, and lightly scuff-sand with a 400-grit sanding sponge between layers to remove any airborne dust nibs.
For more professional techniques, read our guide on 5 Ways to Paint Cabinets Like a Pro in Jensen Beach. Modern water-based lacquers and coatings have largely replaced traditional solvent-based paints, offering eco-friendly, ultra-durable finishes that stand up to daily wear and tear.
Frequently Asked Questions about Cabinet Spraying
To help you make the most informed decision for your home, we have compiled the most common questions we receive from homeowners across South Florida. For more local advice, check out our Local Cabinet Painting Guide.
How long does a cabinet spray painting project take to dry and cure?
There is a massive difference between dry time and cure time.
- Dry time: Modern water-based acrylic-alkyd hybrid paints are dry to the touch in 1 to 4 hours. You can safely handle and flip the doors after 24 hours.
- Cure time: Curing is a chemical process where the paint molecules cross-link to reach maximum hardness. This process takes 7 to 30 days. During this curing window, the paint is still relatively soft and susceptible to scratching or chipping. We recommend being incredibly gentle with your cabinets for the first month.
Can you spray paint laminate, MDF, and thermofoil cabinets?
Yes, but the preparation steps vary:
- MDF: MDF is highly absorbent. You must use a solvent-based or shellac-based primer first. Water-based primers will cause the MDF fibers to swell and ruin the smooth surface.
- Laminate: Laminate is non-porous and slick. You must thoroughly scuff-sand the surface and apply a specialty high-bond adhesion primer.
- Thermofoil: If the plastic thermofoil backing is peeling or bubbling, it must be completely stripped off (often using a heat gun) down to the raw MDF core before priming and spraying.
How durable is a spray-painted finish compared to factory-finished cabinets?
When executed with professional-grade materials—such as an industrial acrylic polyurethane blend—a sprayed finish is incredibly durable. It easily meets or exceeds KCMA standards for scratch, chemical, and moisture resistance. A professionally sprayed kitchen will easily last 8 to 15 years with normal use and proper cleaning (avoiding abrasive sponges and harsh chemicals).
Top-tier refinishers utilize specialized, high-performance coatings that are formulated specifically for the high-traffic demands of a kitchen, ensuring your cabinets remain beautiful for years to come.
Conclusion
Spray painting kitchen cabinets is the ultimate way to achieve a gorgeous, modern, brush-stroke-free kitchen transformation without the massive price tag and weeks of construction dust that come with a full cabinet replacement.
While a DIY approach is highly rewarding for intermediate-to-advanced DIYers with plenty of patience, the specialized equipment, painstaking prep work, and steep learning curve lead many South Florida homeowners to seek professional expertise.
At All Surface Refinishing, we have spent over 30 years perfecting our craft, completing more than 14,000 successful transformations across South and Southwest Florida—including Miami, Fort Lauderdale, Boca Raton, West Palm Beach, and Coral Springs. Our team uses specialized, low-VOC, factory-grade coatings and professional spray equipment to transform your kitchen in a fraction of the time, with minimal disruption to your daily life.
Ready to give your kitchen the flawless, factory-smooth finish it deserves? Schedule your cabinet refinishing consultation today and let our family-owned team bring your vision to life!
