Why Learning How to Bathtub Refinishing Can Save You Thousands
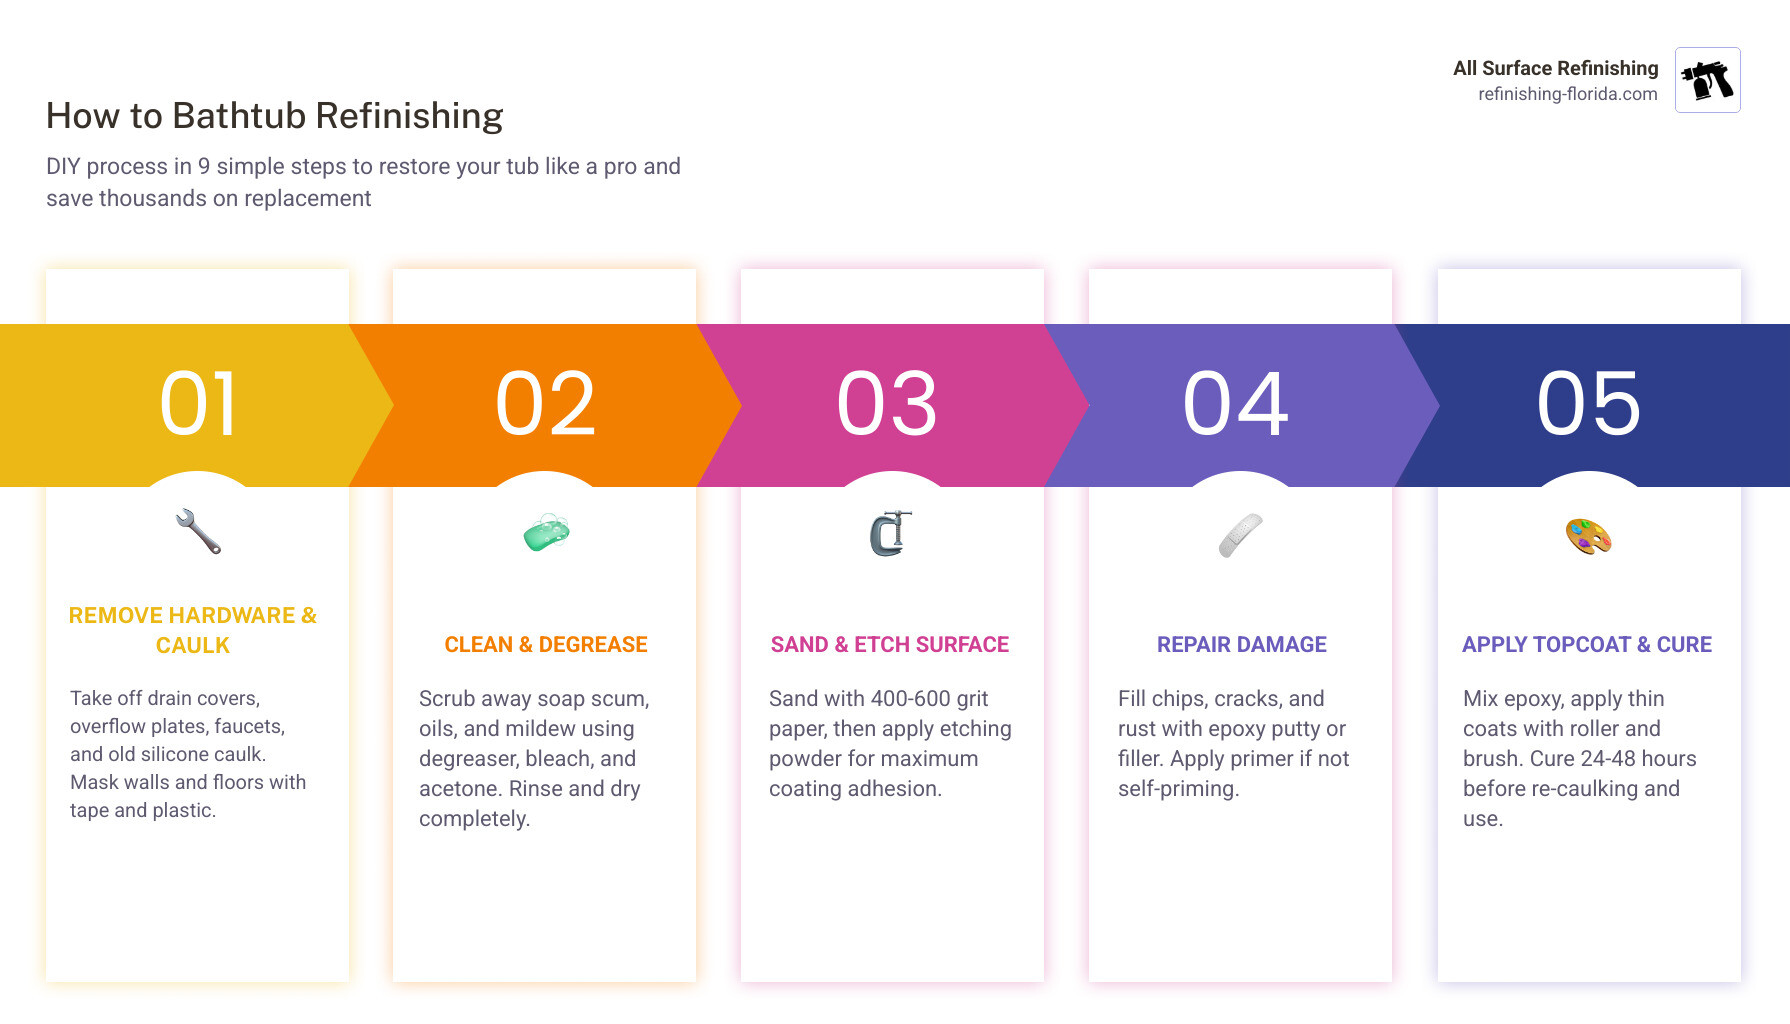
How to bathtub refinishing in 9 steps:
- Remove hardware and old caulk
- Clean and degrease the tub thoroughly
- Sand and etch the surface for adhesion
- Repair chips, cracks, or rust spots
- Mask off surrounding walls and floors
- Apply bonding primer (if required)
- Mix and apply epoxy topcoat in thin layers
- Let the finish cure for 24 to 48 hours
- Re-caulk, reinstall hardware, and inspect
Your bathtub doesn’t have to look worn out to feel that way. Stains that won’t scrub off, a finish that’s gone dull, or a color stuck in a decade long past — these things make an entire bathroom feel tired. Most homeowners assume the only fix is a full replacement. But replacement can cost anywhere from $1,565 to over $10,000 when you factor in labor and plumbing.
Refinishing — also called reglazing or resurfacing — is a fraction of that cost. A DIY kit runs $100 to $200. Professional service typically lands between $330 and $630. And the results, when done correctly, can last 10 to 15 years.
This guide walks you through the entire process, step by step.
I’m Frank Hernandez, President of All Surface Refinishing, and I’ve been working in how to bathtub refinishing since 2011 — restoring thousands of tubs across South Florida for homeowners who want lasting results without tearing their bathrooms apart. Everything in this guide reflects what actually works in the field, not just what sounds good on paper.
Key how to bathtub refinishing vocabulary:
What Bathtub Refinishing Is and When It Makes Sense
When we talk about giving a bathroom a “facelift,” bathtub refinishing is often the star of the show. It is the process of cleaning, repairing, and applying a new, high-performance coating over an existing tub. This isn’t just a coat of hardware-store paint; it’s a chemical bonding process that creates a hard, durable surface.
You might hear people use the terms “reglazing,” “resurfacing,” or “recoating” interchangeably. While they all point toward the same goal—making your tub look new again—there are nuances. For a deeper dive into the terminology, check out this guide to Bathtub Refinishing Terms Demystified.
What Does “how to bathtub refinishing” Actually Mean?
At its core, how to bathtub refinishing involves stripping away the old, worn-out surface (metaphorically or literally) and applying a fresh epoxy or acrylic urethane topcoat. The “magic” isn’t in the paint itself, but in the preparation. Without proper etching and priming, the new finish will peel off faster than a bad sunburn. Whether you are DIY-ing or hiring us for a project in Boca Raton or Fort Lauderdale, the steps remain the same: clean, etch, repair, prime, and coat.
Refinish or Replace Your Bathtub?
This is the $6,000 question. Actually, in May 2026, a full bathtub replacement often costs closer to $6,000 to $10,000 once you factor in the demolition, potential tile damage, and the plumber’s fee.
Refinishing makes sense if:
- Your tub is structurally sound (no leaks or major holes).
- You want to change an outdated color (like that 1970s avocado green).
- The surface is stained, dull, or hard to clean.
- You have an antique cast iron tub that is too valuable or heavy to move.
Replacement is the better choice if:
- The tub has severe structural damage or “rust-through” (holes in the metal).
- There are persistent leaks that have caused floor rot.
- You are already doing a full-gut renovation and the tub is easily accessible.
| Feature | Refinishing | Replacement |
|---|---|---|
| Cost | $330 – $630 (Pro) | $1,500 – $10,000+ |
| Time | 1 Day | 3 – 7 Days |
| Lifespan | 10 – 15 Years | 20+ Years |
| Mess | Minimal | Significant Demolition |
| Eco-Friendly | Keeps tub out of landfill | Adds to landfill waste |
Which Bathtub Materials Can Be Refinished?
The good news is that almost any standard tub material can be refinished. We regularly work with:
- Porcelain and Cast Iron: These are the most common candidates. They take the refinishing process beautifully.
- Fiberglass and Acrylic: These require specialized bonding agents so the finish doesn’t flex and crack. You can find more details on fiberglass bathtub resurfacing here.
- Steel Tubs: Similar to cast iron, these are durable but prone to surface rust.
- Cultured Marble: Often found in older South Florida homes, these can also be resurfaced to a modern white or almond.
If you have a vintage tub, read our cast iron bathtub refinishing guide to understand the specific needs of these heavy-duty fixtures.
Tools, Materials, and Safety Setup Before You Start
If you’ve decided to tackle this as a DIY project, you need to be prepared. This isn’t a project where you can “wing it.” You’ll need a specific set of supplies to ensure the finish actually sticks.
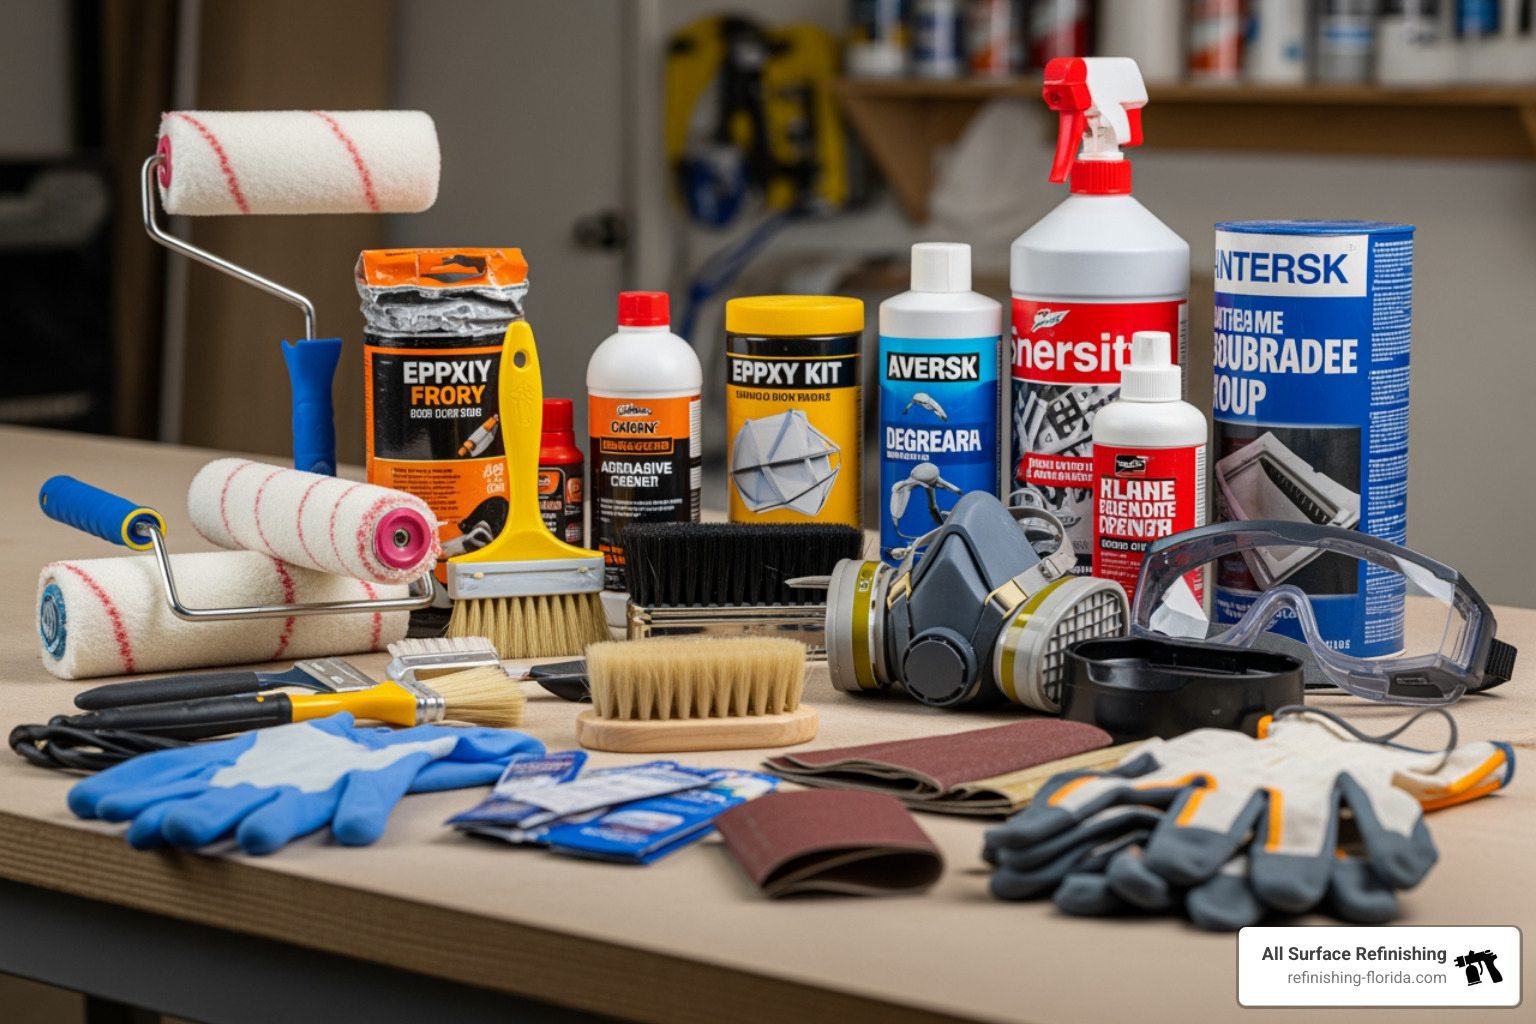
Essential Tools and Materials for a DIY Tub Refinish
To do how to bathtub refinishing properly, your shopping list should include:
- A DIY Refinishing Kit: Usually contains a two-part epoxy or acrylic coating.
- Abrasive Cleaners and Degreasers: To remove every trace of soap scum and body oil.
- Acetone: For a final wipe-down to ensure no residue remains.
- Wet/Dry Sandpaper: Grits ranging from 400 to 600 are standard.
- Etching Powder or Acid: To create microscopic pores in the porcelain for the primer to grip.
- High-Quality Tools: 3-inch foam rollers, foam brushes for corners, and a tack cloth to remove lint.
- Repair Materials: Epoxy putty or waterproof body filler for chips and cracks.
For a comprehensive list, see our guide on DIY tub resurfacing supplies.
Safety Precautions, Ventilation, and Fume Control
We cannot stress this enough: the chemicals used in bathtub refinishing are potent. The fumes are heavier than air, meaning they will sink into the tub where you are working.
- Respirator: You must use a NIOSH-approved respirator with organic vapor cartridges. A standard dust mask will do absolutely nothing to protect your lungs from these fumes.
- Ventilation: Open all windows. Use a box fan to pull air out of the bathroom. If your bathroom doesn’t have a window, we recommend renting a portable ventilator.
- Skin and Eye Protection: Wear long sleeves, gloves, and safety goggles. These chemicals can be corrosive.
- No Flames: Many refinishing chemicals are highly flammable. Turn off pilot lights and don’t smoke anywhere near the work area.
How to Handle Chips, Cracks, and Rust Before Refinishing
If your tub has a “beauty mark” in the form of a chip or a rust spot near the drain, you must fix it before the topcoat goes on.
- Chips: Fill these with a waterproof epoxy putty. Sand it flush once it cures.
- Rust: Sand the rust down to bare metal. Treat it with a rust-inhibitor primer. If you ignore rust, it will bubble up through your new finish within months.
- Cracks: For fiberglass tubs, cracks often indicate structural flexing. These may need a reinforcement kit before refinishing.
Check out our resources on tub repair and patching rusty bathtub spots for professional-grade advice on these repairs.
Step-by-Step: How to Bathtub Refinishing the Right Way
Ready to get to work? Follow these steps closely. As we say in the industry, 90% of the work is the prep; the last 10% is just the “painting.”
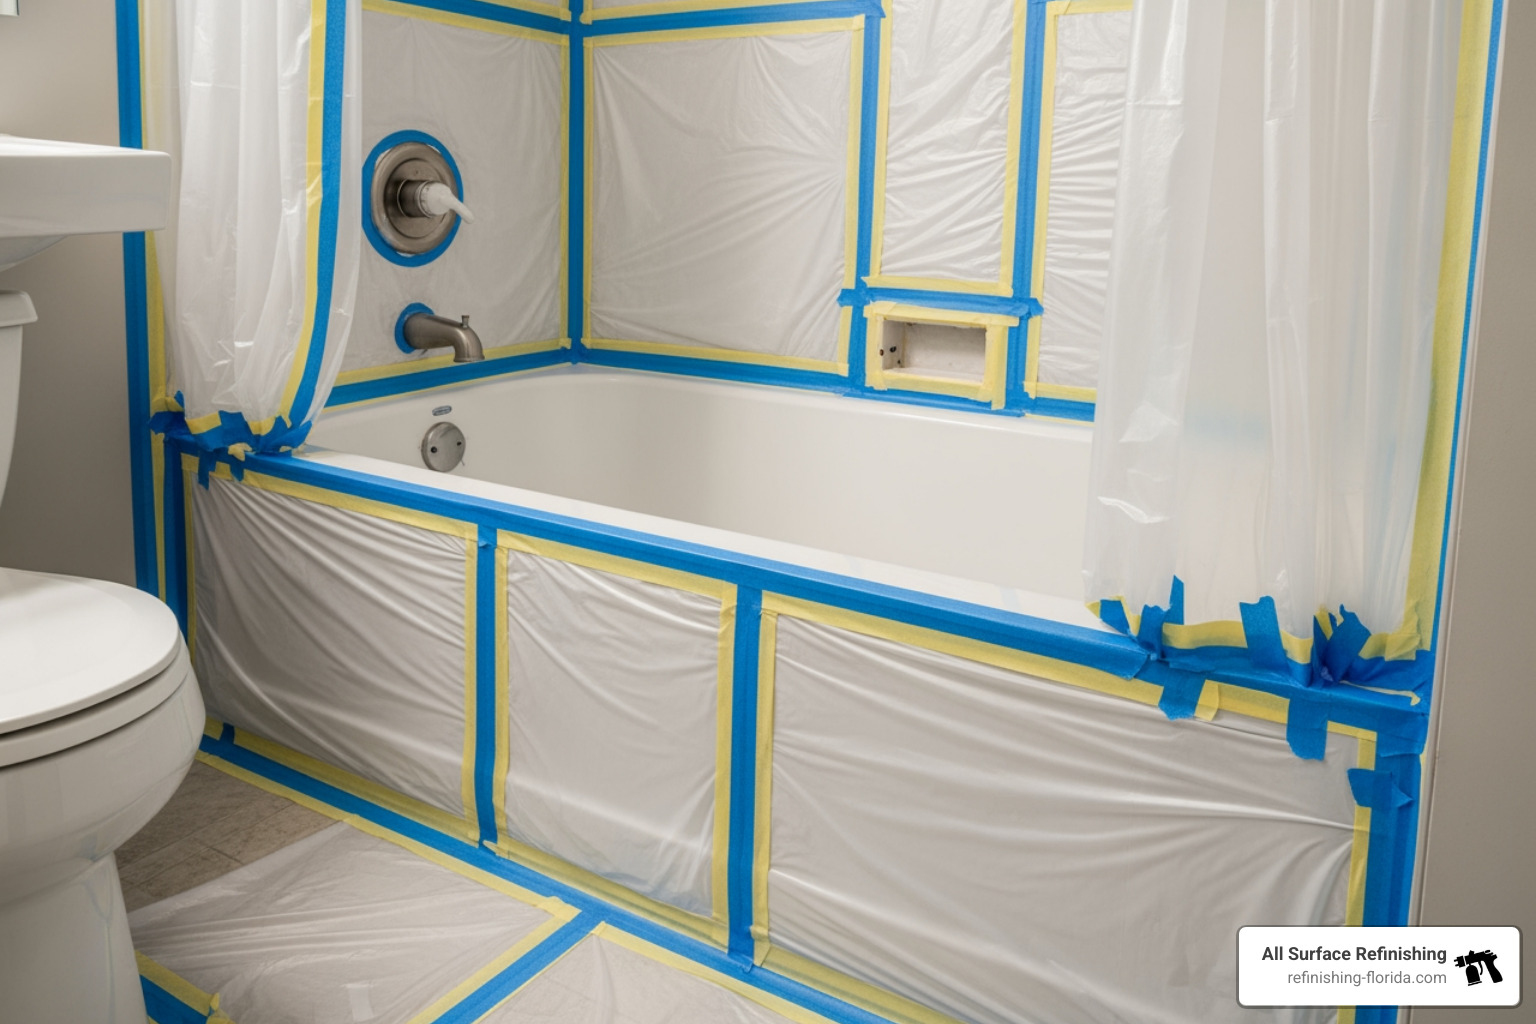
Step 1: Remove Hardware, Old Caulk, and Protect the Bathroom
Start by removing the drain cover, the overflow plate, and the faucet trim. If you can’t remove them, you’ll have to mask them off extremely carefully, but removing them yields a much cleaner result.
Next, use a putty knife or a specialized caulk removal tool to strip every bit of old silicone caulk from the perimeter of the tub. New finish will not stick to silicone. After the caulk is gone, mask off the surrounding walls and floor using painter’s tape and plastic sheeting. You want to create a “spray booth” environment to keep dust out and the coating only on the tub.
Step 2: Clean, Degrease, Sand, and Etch for Adhesion
Scrub the tub like it owes you money. Use an abrasive cleaner (like Comet or Ajax) and a heavy-duty scouring pad. Your goal is to remove all soap scum, body oils, and minerals.
Once clean and dry, apply your etching powder. This “de-glosses” the surface. After etching, rinse thoroughly and sand the surface with 400 to 600-grit wet/dry sandpaper. This creates a “mechanical bond” for the primer. The tub should feel slightly chalky and look dull when you are finished.
Step 3: Repair Damage, Prime, and Apply the New Finish
If you have chips, fill them now with epoxy putty and sand them smooth. Use a tack cloth to remove every single speck of dust.
If your kit includes a primer, apply it in thin, even layers. Once the primer is ready, mix your two-part epoxy coating. Once mixed, you usually have a “pot life” of only 30 to 60 minutes before the material hardens.
Apply the topcoat using a high-quality foam roller for the large flat areas and a foam brush for the corners and edges. Use alternating vertical and horizontal strokes to ensure even coverage and avoid “runs” or drips. For more tips, check out this Beginner’s Guide to Bathtub Refinishing or the Bob Vila guide to refinishing.
Step 4: Cure, Re-Caulk, and Inspect the Final Finish
Most DIY kits require at least 48 hours to cure before you can even think about getting them wet. In high-humidity areas like Miami or West Palm Beach, we recommend waiting a full 72 hours just to be safe.
Once cured, carefully remove your masking tape and plastic. Apply a fresh bead of high-quality bathroom silicone caulk around the edges. Reinstall your hardware, and you’re done!
Time, Cost, and Longevity: DIY vs Professional Tub Refinishing
Is it worth doing it yourself? Let’s look at the numbers.
How Long Does Bathtub Refinishing Take?
A typical project takes about 3 to 5 hours of active work. However, the “down time” is significant. You’ll need a full weekend to allow for cleaning, drying, multiple coats, and the final 48-hour cure. If you’re in a one-bathroom home in Coral Springs, you’ll need to make alternative arrangements for a couple of days!
DIY vs Professional: Pros, Cons, Costs, and Expected Lifespan
While a DIY kit is cheap (under $200), the results often reflect the price.
- DIY Lifespan: Typically 2 to 5 years. The coatings are thinner and the application (roller/brush) leaves a “texture” rather than a factory-smooth finish.
- Professional Lifespan: Usually 10 to 15 years. Professionals use high-solids acrylic urethanes and HVLP sprayers that provide a glass-like finish.
Interestingly, about 25% of the work we do at All Surface Refinishing involves stripping off failed DIY attempts. If the prep isn’t perfect, the finish will peel within months. For a detailed breakdown of what to expect financially, read our Bathtub Refinishing Costs Ultimate Guide. You can also see how the pros at Angi compare these options.
Most Common Bathtub Refinishing Mistakes to Avoid
- Poor Ventilation: This isn’t just a safety issue; high humidity and poor airflow can cause the finish to become “tacky” or cloudy.
- Leaving Old Caulk: The #1 cause of peeling is trying to paint over old silicone.
- Rushing the Cure: Using the tub too soon will cause permanent “water spots” or even cause the finish to slide.
- Using Suction Cup Mats: These will pull the finish right off the bottom of the tub. Always use an adhesive non-slip surface if needed.
If your finish is already failing, see our guide on bathtub coating peeling off quick fixes.
Aftercare: How to Keep a Refinished Tub Looking New
Congratulations, you have a beautiful “new” tub! Now, you have to treat it differently than the old porcelain.
How Soon Can You Use the Tub After Refinishing?
Even if it feels dry to the touch after 24 hours, wait the full 48 to 72 hours before running water. Do not leave wet bottles of shampoo or soap on the ledge during the first week, as the finish is still reaching its maximum hardness.
Cleaning and Maintenance Rules That Extend Tub Life
- No Abrasives: Throw away the Comet and the green scrubby pads. They will dull the finish in weeks.
- Use Liquid Cleaners: Mild dish soap or specialized non-abrasive bathroom cleaners are best.
- Rinse and Dry: After each use, rinse the tub and wipe it down with a soft cloth. This prevents hard water minerals from building up.
- No Bleach Soaks: Never fill the tub with bleach and let it sit; it can eventually break down the resin.
For more maintenance tips, read how to restore bathtub surface the right way.
How to Bathtub Refinishing Results Last Longer in Busy Bathrooms
In a high-traffic bathroom, ventilation is your best friend. In Florida, the humidity can trap moisture against the finish. Always run your exhaust fan for 20 minutes after a shower. If you notice a small chip, repair it immediately with a touch-up kit to prevent water from getting under the coating.
Learn more about preventing damage in our guide on how to stop your painted bathtub from peeling for good.
Frequently Asked Questions About Bathtub Refinishing
Are bathtub refinishing fumes dangerous?
Yes, they can be if not handled correctly. The VOCs (Volatile Organic Compounds) in professional and DIY glazes are strong. Always use an organic vapor respirator and ensure active ventilation. If you are sensitive to smells or have respiratory issues, we recommend staying out of the house for a few hours after the application is complete.
Is my tub a good candidate for refinishing?
If your tub is solid but ugly, it’s a perfect candidate. If it “flexes” when you stand in it (common in cheap fiberglass tubs) or has holes rusted through the bottom, it’s better to replace it.
Is refinishing worth it compared with replacement?
Absolutely. You save about 70-90% of the cost of replacement and avoid the headache of a week-long construction project. Plus, you’re keeping a perfectly good (though perhaps dated) fixture out of a South Florida landfill.
Conclusion: Should You DIY or Call a Tub Refinishing Pro?
Learning how to bathtub refinishing is a rewarding project for a dedicated DIYer with the right safety gear and a lot of patience. However, if you want a finish that is indistinguishable from a brand-new tub and a warranty that protects your investment, professional service is the way to go.
At All Surface Refinishing, we’ve spent over 30 years perfecting the art of the “invisible repair” and the “glass-smooth finish.” Whether you’re in Miami, Fort Lauderdale, or West Palm Beach, we can transform your bathroom in just one day.
Ready for a transformation? Check out our bathtub services or dive into our Professional Bathtub Resurfacing Complete Guide to see how we can help you fall in love with your bathroom all over again.
