How to Paint Laminate Cabinets So the Finish Sticks
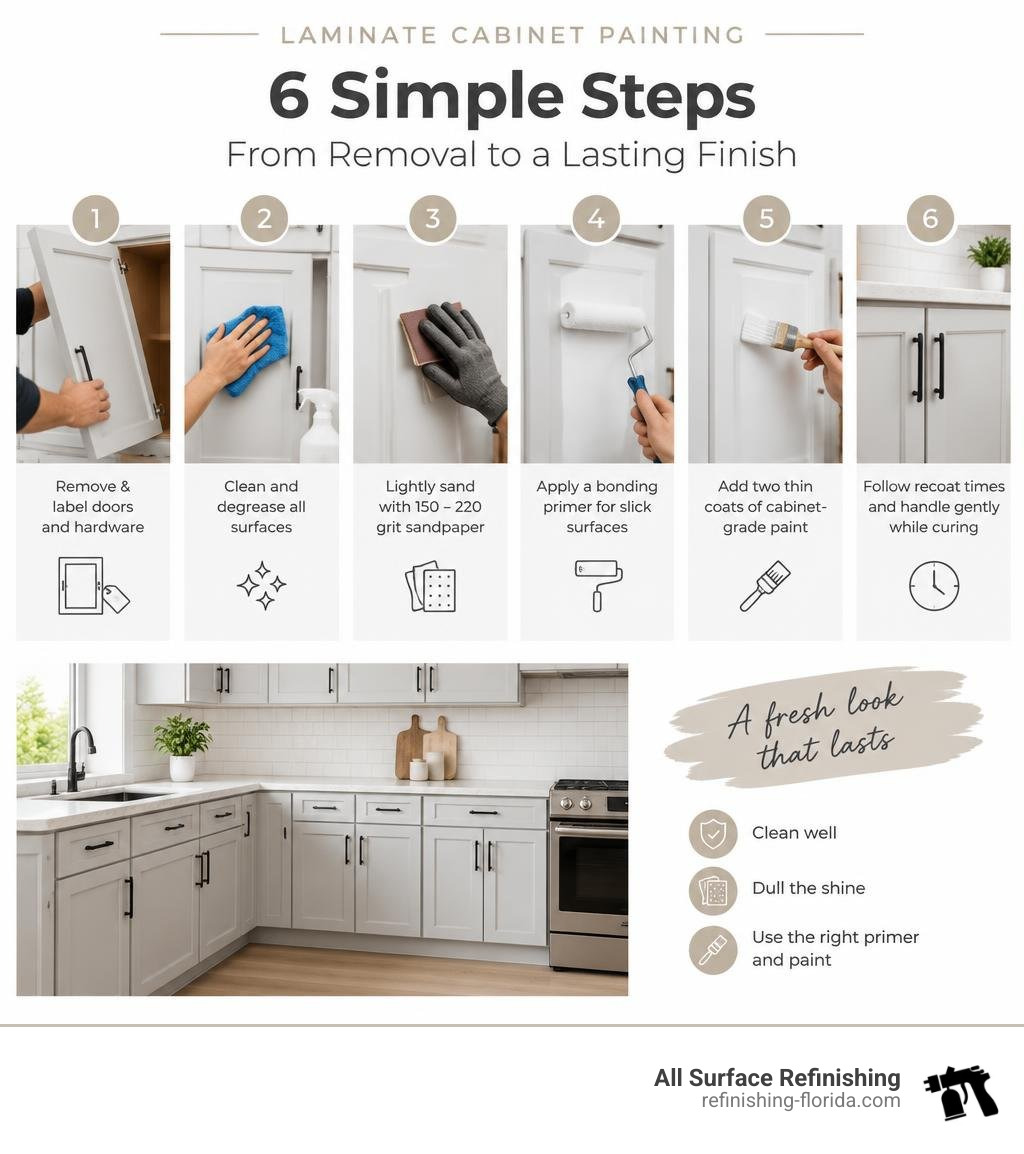
Yes, you can paint laminate cabinet doors. Remove and label the doors and hardware, degrease every surface, and lightly scuff the laminate with 150- to 220-grit sandpaper. Apply a bonding primer rated for slick surfaces, then add two thin coats of cabinet-grade paint. Follow the product’s recoat times and handle the doors gently while the finish cures.
Laminate does not absorb paint like wood. The key is to clean it well and dull the shine without sanding through its thin top layer. Successful cabinet painting for laminate cabinets depends on this prep-first approach.
I’m Frank Hernandez, president of All Surface Refinishing, with more than a decade of hands-on surface refinishing experience. If you’re looking for help with “cabinet painting laminate cabinets,” I’ll walk you through the prep and painting steps that matter most.
Key cabinet painting laminate cabinets vocabulary:
Why Cabinet Painting for Laminate Cabinets Requires a Unique Approach
If you have ever tried brushing standard wall paint over a fake wood bathroom vanity or shiny kitchen cabinets, you probably watched it slide around like butter on a hot skillet. Laminate is fundamentally different from traditional hardwoods. It is completely non-porous, meaning paint cannot soak into fibers to create a root system.
Industry reports highlight roughly a 20% failure rate when homeowners attempt to paint laminate cabinets without correct surface preparation. In high-humidity climates like South Florida—from Miami up through Palm Beach County—skipping critical degreasing or bonding steps guarantees the paint will peel or scratch off within months.
Laminate surfaces, including popular materials like Formica, are manufactured by pressing synthetic resin layers over an engineered core such as medium-density fiberboard (MDF). When you are understanding Formica and synthetic surface properties, you realize that creating a physical “tooth” through micro-abrasion is the only way coatings stay locked in place.

Real Wood vs. Synthetic Laminate and Melamine
Natural lumber has open pores, grain patterns, and organic texture that naturally accept stain, oil, or standard latex primers. Synthetic cabinets—such as high-pressure laminate, thermofoil, or melamine—feature a printed resin coating engineered specifically to resist liquids, stains, and dirt.
Because melamine and plastic laminate coatings repel foreign substances, they also repel paint. If you want a durable transformation without tearing out your kitchen framework, evaluating professional cabinet refinishing & resurfacing services helps you understand how specialists treat these synthetic layers differently from raw timber.
The Critical Role of Bonding Primers for Slick Surfaces
Standard multi-purpose primers rely on porous absorption. On slick synthetic plastic, standard primer simply dries as an unanchored film.
To achieve industrial-grade adhesion, you must use a dedicated bonding primer rated for slick surfaces, glass, tile, or laminate. Formulations such as INSL-X STIX, shellac-based sealers, or specialized waterborne bonding primers contain adhesion promoters. These chemicals fuse to glossy resin surfaces, forming a rock-hard foundation that topcoats can grip without bubbling or peeling down the road.
Essential Checklist and Supplies for Laminate Cabinet Refinishing
Before taking a single door off its frame, gather the right tools. Using cheap brushes or standard wall rollers will leave heavy textures and ridges on smooth laminate panels.
- Degreasing Cleaner: Trisodium phosphate (TSP) substitute or heavy-duty kitchen degreaser.
- Abrasives: 150-grit to 220-grit sandpaper or fine sanding sponges.
- Dust Control: Tack cloths, microfiber towels, and a shop vacuum with a brush attachment.
- Protection: High-adhesion blue or green painter’s tape, rosin paper, and plastic drop cloths.
- Applicators: 2-inch or 2.5-inch angled sash brush (synthetic bristles) and 4-inch high-density foam or micro-plush rollers (3/16-inch nap).
- Safety Gear: Nitrile gloves, safety glasses, and a dual-cartridge organic vapor respirator.
- Primer & Paint: High-adhesion bonding primer and premium cabinet enamel (waterborne alkyd or urethane trim enamel).
For an exhaustive breakdown of pro-tier gear, check out our comprehensive cabinet painting supply guide.
Surface Preparation Tips for Cabinet Painting Laminate Cabinets
Prep work makes up 80% of a professional finish. Grease and cooking oils invisible to the naked eye accumulate around cabinet pulls and over range hoods. If you paint over grease, your primer will never adhere.
- Deconstruct and Label: Never paint laminate cabinet doors while they are hanging. Remove all doors, drawer fronts, and hardware. Use painter’s tape to label each piece with a numbering system (e.g., “Upper Left 1”, “Lower Sink 2”). Put matching screws and hinges into labeled plastic bags.
- Deep Degreasing: Wash every door and cabinet frame thoroughly with a heavy-duty degreasing wash. Rinse with clean water and a damp microfiber cloth to remove residual detergent film.
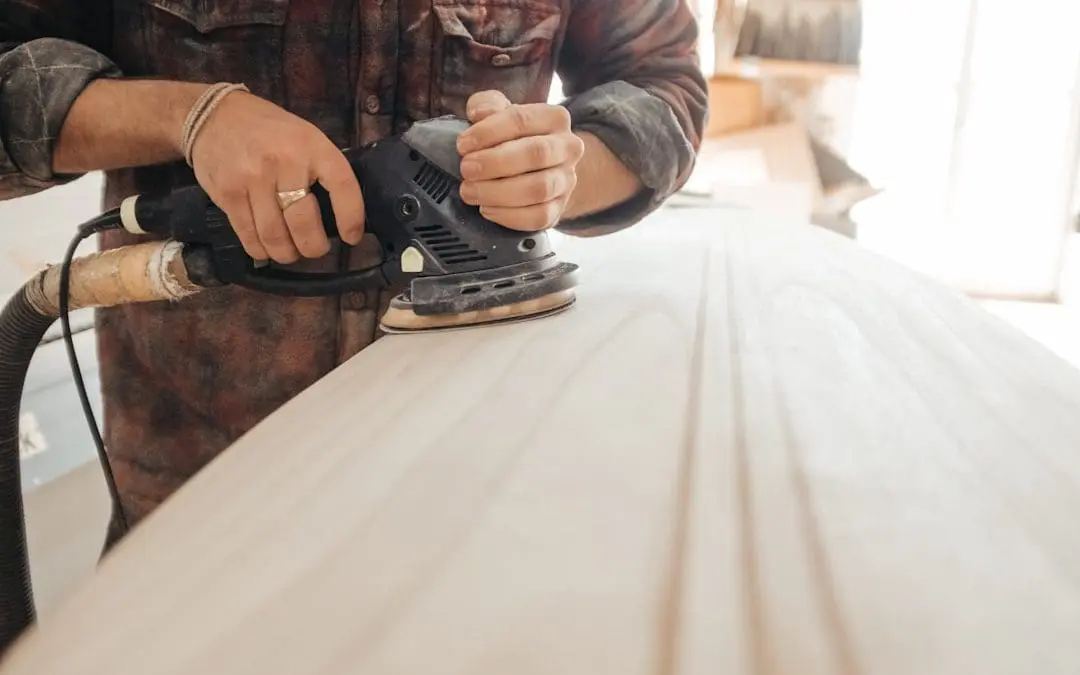
- Light Scuff-Sanding: Using 150- to 220-grit sandpaper, gently scuff all glossy areas. The goal is simply to knock down the shiny sheen to an even, matte finish. Avoid aggressive pressure—laminate is a paper-thin printed sheet, and oversanding will tear into the raw MDF substrate beneath.
- Dust Extraction: Vacuum all surfaces with a brush attachment, then wipe every corner with a tack cloth. A single speck of trapped dust can cause a permanent bump on smooth laminate.
For more hands-on preparation techniques, read our guide on painting kitchen cabinets: a DIY guide to a flawless finish.
Primer and Topcoat Strategy for Cabinet Painting Laminate Cabinets
Once your surfaces are scuffed and wiped down, apply one thin, even coat of high-bond primer. Avoid laying primer on thickly; thin layers bond better and prevent drips along recessed panels.
When choosing topcoat colors and sheens, satin and semi-gloss finishes provide the best balance of scrub resistance and flaw concealment. High-gloss sheens highlight minor surface imperfections and dings, whereas satin diffuses light, making older laminate boxes look flat, fresh, and modern. Select a hybrid waterborne alkyd or urethane enamel that levels out as it dries, leaving a hard, furniture-grade shell.
Step-by-Step Guide to Painting Laminate Cabinet Doors and Boxes
Executing a smooth paint job on non-porous cabinets requires systematic pacing. Work in a clean, climate-controlled space away from high foot traffic and outdoor debris.
- Prep the Room: Mask off your kitchen walls, backsplashes, appliances, and countertops. Cover flooring completely with drop cloths.
- Paint the Face Frames and Boxes: Use an angled sash brush to cut along the inside edges of the cabinet openings, then use a mini foam roller to roll the exterior stiles and rails vertically.
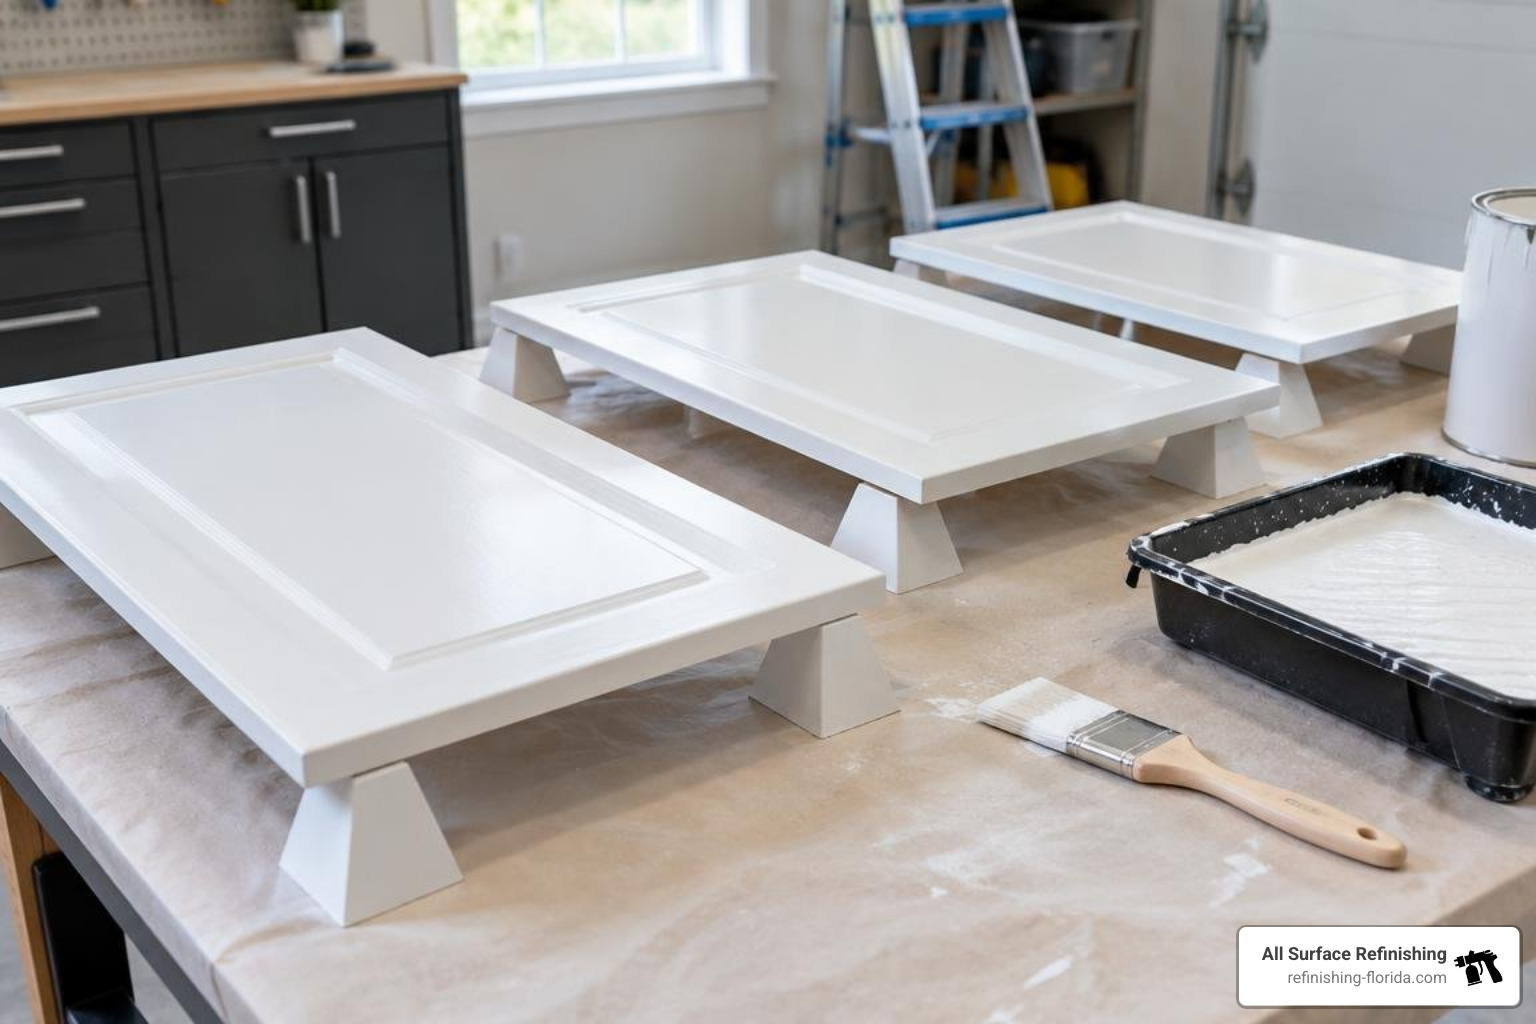
- Paint the Cabinet Doors Horizontally: Place doors flat across sawhorses or painter’s pyramids. Painting horizontally lets the paint self-level without running or sagging.
- Edge and Face Application: Paint the profile edges first with your brush, smoothing out any buildup. Immediately roll the large flat panels from top to bottom, keeping a wet edge.
- Observe Recoat Windows: Allow the primer to dry according to the manufacturer’s label (typically 4 to 16 hours depending on the product formula). Lightly scuff the primed surface with 220-grit paper, wipe away dust with a tack cloth, and apply your first thin coat of cabinet enamel. Apply a second thin coat once the first coat fully dries.
To make sure your project stays on track, follow our step-by-step wood and laminate cabinet painting guide along with our advice on how to paint kitchen cabinets the right way.
Comparing Application Techniques: Brush, Roller, or Spray
Achieving that glass-like factory feel depends heavily on your application method. Here is how the three main techniques compare:
| Method | Finish Quality | Application Speed | DIY Skill Level | Equipment Cost & Setup |
|---|---|---|---|---|
| Brush Only | Moderate (Visible brush strokes if unthinned) | Slow | Beginner | Low ($15–$30) |
| Brush & Foam Roller | High (Light orange-peel texture possible) | Moderate | Intermediate | Low-Moderate ($40–$75) |
| HVLP Spray Gun | Flawless (Ultra-smooth factory finish) | Fast | Advanced | High ($150–$600+ setup) |
If you decide to spray your doors, an HVLP (High Volume Low Pressure) system gives you tight pattern control without blowing heavy overspray across your home. Learn more about professional spray setups in our breakdown of cabinet spray painting for a finish without brush strokes.
Curing Timeline and Reinstallation
There is a huge difference between paint that is dry to the touch and paint that is fully cured.
- Hours 2 to 4: Paint is dry to the touch, but the film remains soft.
- Hours 24 to 48: The surface is firm enough to reinstall hinges, handles, and door bumpers. Always attach clear silicone bumpers to the back corners of doors to keep painted surfaces from sticking to cabinet frames.
- Days 14 to 21: The enamel finishes cross-linking to reach its maximum hardness. During this two-to-three-week window, avoid heavy scrubbing, harsh moisture, or slamming doors.
For more details on reassembling doors without gouging fresh paint, read our guide on cabinet doors refinishing.
Troubleshooting, Repairs, and Ongoing Maintenance
Laminate cabinets often suffer from chipped corners, peeling edge bands, or small gouges before painting even begins. Fixing these issues beforehand ensures a clean final product.
- Lifting Edges: If the thin laminate layer is peeling away from the MDF core, apply contact cement or carpenter’s wood glue beneath the flap. Clamp it down tightly with wax paper and a hand clamp for 2 to 4 hours before sanding.
- Chips and Deep Dents: Fill chipped spots with a two-part epoxy wood filler or hardening wood putty. Once cured, sand the repair flush with 180-grit paper so the seam vanishes under the primer.
- Bubbling or Blistering: Bubbles mean moisture or grease was trapped underneath the primer, or the primer was applied in extreme humidity. Scrape back the blistered area down to solid laminate, re-clean, re-sand, and apply a fresh spot coat of bonding primer.
- Cleaning Painted Cabinets: Never use abrasive scouring pads, bleach, or ammonia on painted laminate. Clean weekly with warm water, mild dish soap, and a soft microfiber cloth.
Frequently Asked Questions About Painting Laminate Cabinets
Can damaged or peeling laminate be repaired before painting?
Yes. Secure loose laminate using high-strength contact cement. Fill gouges, missing edge pieces, or screw holes with two-part epoxy filler. Sand the repaired patch completely flat with 220-grit sandpaper so it blends invisibly beneath your bonding primer.
How long must laminate cabinet paint cure before regular kitchen use?
While cabinet doors can be rehung after 24 to 48 hours of drying, full chemical cure requires 14 to 21 days (2 to 3 weeks). Treat your cabinetry gently during this period, keeping doors from slamming and wiping away moisture immediately.
Why is my paint peeling off my laminate cabinet doors?
Peeling happens for three main reasons: skipping grease removal, skipping scuff-sanding, or using a standard wall primer instead of an adhesive bonding primer. In humid areas, excess moisture can also weaken paint bonds. Review our insights on how to paint cabinets without sanding in Florida to see how local humidity affects adhesion.
Transform Your Kitchen with Professional Results
Painting your laminate cabinets is one of the most rewarding home upgrades you can tackle. With the right degreasers, careful 220-grit scuff-sanding, dedicated bonding primers, and self-leveling cabinet enamels, you can transform dated fake wood into a clean, modern kitchen centerpiece.
If the prep work, equipment investment, or long drying timelines feel overwhelming, let our family take care of it for you. At All Surface Refinishing, we bring over 30 years of experience and more than 14,000 completed surface restorations to homeowners throughout South Florida. We handle kitchen cabinets, bathroom vanities, bathtubs, and countertops with industrial spray systems that deliver durable factory finishes.
We proudly serve homeowners across Miami-Dade, Broward, Palm Beach, Martin, and St. Lucie counties—including Miami, Fort Lauderdale, Boca Raton, West Palm Beach, Coral Gables, Boynton Beach, and Hollywood. Contact Frank Hernandez and the team at All Surface Refinishing today for a free estimate on your cabinet refinishing & resurfacing services and let us bring your kitchen back to life!
