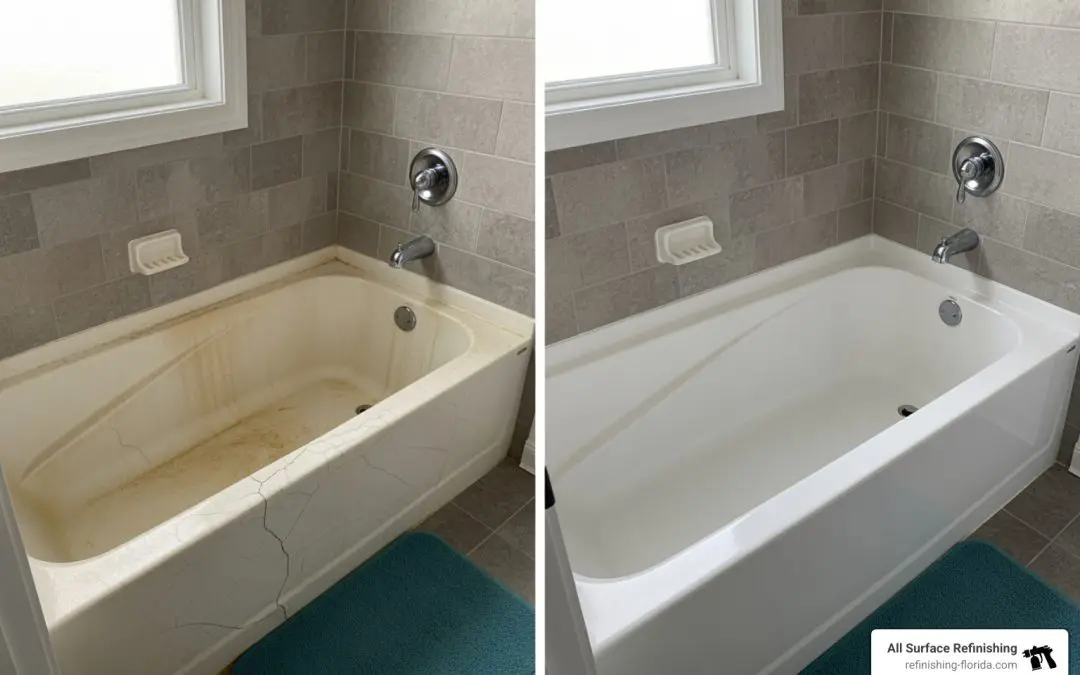
Why So Many Homeowners Are Resurfacing a Fiberglass Bathtub Instead of Replacing It
Resurfacing a fiberglass bathtub is one of the most cost-effective ways to refresh a worn, stained, or dull tub — without tearing out plumbing, spending thousands, or shutting down your bathroom for days.
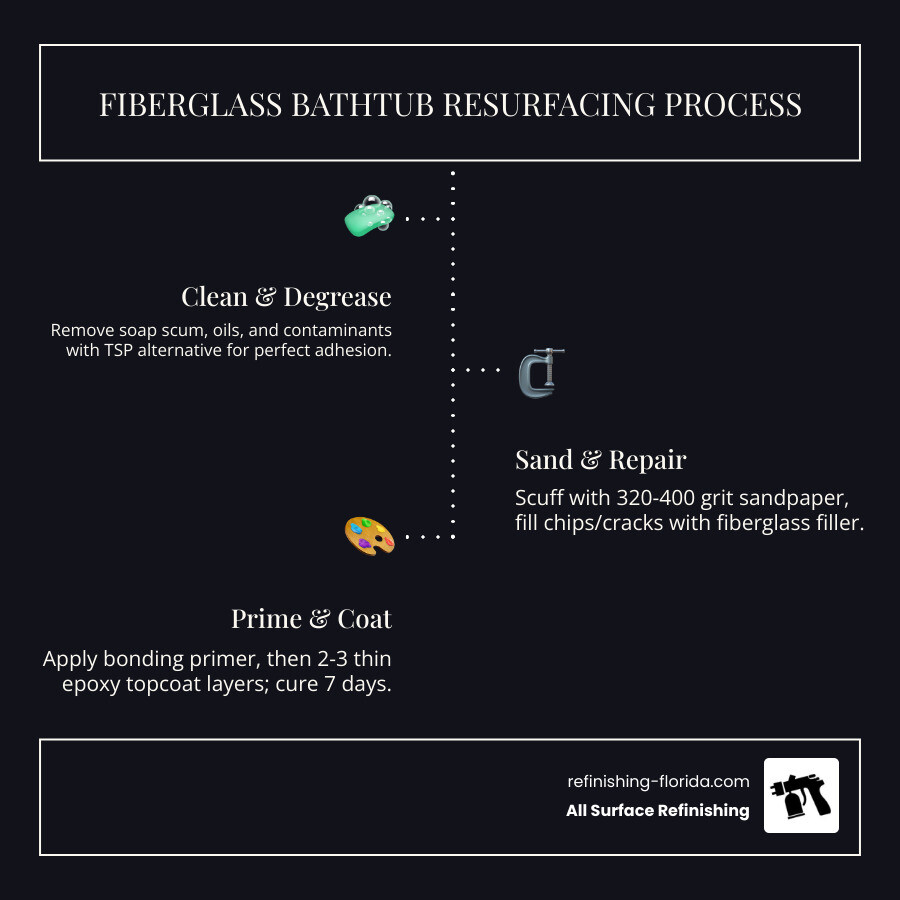
Here’s what the process looks like at a glance:
- Clean and degrease the tub surface thoroughly
- Sand the surface to help the new coating bond
- Repair any chips or cracks with a fiberglass filler
- Apply a bonding primer, then two to three coats of epoxy or acrylic topcoat
- Cure for up to 7 days before normal use
A properly refinished fiberglass tub can last 5 to 10 years with the right prep and maintenance. DIY kits typically cost $80–$160, while professional resurfacing runs higher — but delivers a more durable, longer-lasting result.
The catch? Prep work makes or breaks the finish. Skipping steps or rushing the process is the number one reason refinished tubs peel early. This guide walks you through every step so you don’t make that mistake.
I’m Frank Hernandez, President of All Surface Refinishing, and I’ve been resurfacing fiberglass bathtubs and other surfaces across South Florida since 2011 — first as a hands-on refinisher, and now leading a full team of trained technicians. I’ll share what actually works in the field, not just what looks good on paper.
Key terms for resurfacing a fiberglass bathtub:
What Resurfacing a Fiberglass Bathtub Actually Means
When we talk about resurfacing a fiberglass bathtub, we aren’t just giving it a fancy paint job. It is a chemical process where we apply a new, high-performance coating over the existing fiberglass shell. You might hear people call it reglazing or refinishing; in fiberglass, these terms all point to the same goal: restoring the original luster and sealing the porous surface.
Over time, fiberglass tubs lose their “gel coat”—that shiny outer layer. Once that wears down, the tub becomes porous, trapping dirt, soap scum, and hard water stains that no amount of scrubbing can fix. Resurfacing creates a brand-new, non-porous barrier that looks and feels like a factory finish.
Why homeowners choose resurfacing a fiberglass bathtub instead of replacing it
In our 30+ years of experience at All Surface Refinishing, we’ve seen that the primary driver is almost always the “hassle factor.” Replacing a tub isn’t just about buying a new one at the hardware store. It often involves:
- Demolishing the existing tile surround.
- Hiring a plumber to disconnect and reconnect drains.
- Dealing with a bathroom that is out of commission for a week or more.
- Spending $3,000 to $5,000 once labor is factored in.
Resurfacing bypasses all of that. We leave the plumbing alone, keep the tiles intact, and usually finish the job in a single day.
When a fiberglass tub can be resurfaced and when it should be replaced
Not every tub is a candidate for a makeover. If your tub has surface scratches, minor chips, or a dated “almond” color you’ve grown to hate, it’s a perfect candidate for Fiberglass Bathtub Resurfacing.
However, if the floor of the tub “flexes” or feels soft when you stand on it, you might have structural issues or a rotting subfloor. Similarly, if there is active mold growing behind the unit or severe cracks that leak water into the floorboards, a full replacement is often the safer long-term bet.
Pros and cons you should know before you start
Pros:
- Cost: You’ll save up to 70-80% compared to replacement.
- Speed: The application takes hours, not days.
- Aesthetics: You can change the color from an outdated 1980s pink to a modern, crisp gloss white.
Cons:
- Odor: The chemicals are strong and require serious ventilation.
- Maintenance: You can’t use abrasive cleaners like Ajax or Comet anymore.
- Prep Work: It is tedious. If you don’t enjoy sanding, this project might test your patience.
Tools, Materials, and Safety Gear for a DIY Fiberglass Tub Refinish
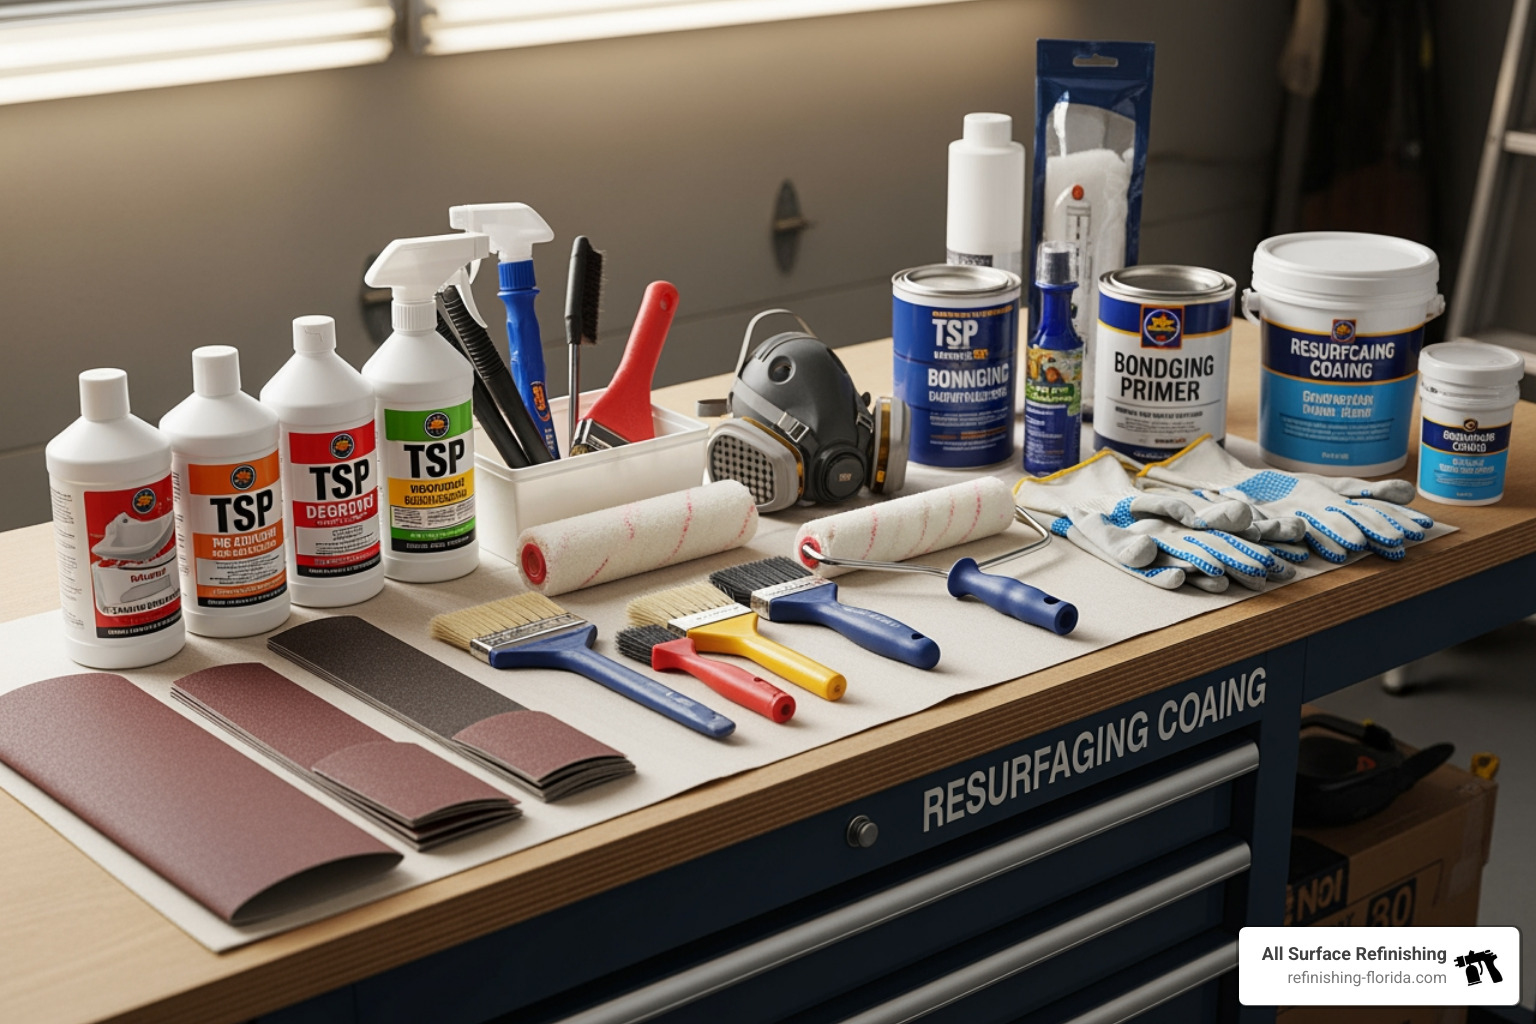
If you’ve decided to tackle this yourself, you’ll need more than just a brush and a bucket of paint. Fiberglass requires specific bonding agents because it is technically a porous material that standard paints won’t stick to for long.
Essential materials for resurfacing a fiberglass bathtub
To do this right, gather the following:
- Cleaning agents: Trisodium Phosphate (TSP) or a heavy-duty degreaser.
- Abrasives: 320-grit and 400-grit sandpaper (wet/dry).
- Repair Kit: A polyester-based filler or Fiberglass Tub Crack Repair Kit for any deep gouges.
- Refinishing Kit: This should include a bonding primer and a two-part epoxy or acrylic urethane topcoat.
- Application Tools: High-density foam rollers, a high-quality brush for corners, and a tack cloth for dust removal.
- Protection: Painter’s tape and plastic sheeting to cover the vanity, toilet, and floor.
Safety precautions, ventilation, and ideal working conditions
We cannot stress this enough: Ventilation is mandatory. The fumes from epoxy coatings and gel coats are toxic.
- Use an organic vapor respirator (a simple dust mask won’t cut it).
- Wear nitrile gloves and eye protection.
- Set up an exhaust fan in the window and keep the bathroom door closed to prevent fumes from migrating into the rest of the house.
- Aim for a temperature between 70°F and 80°F. If it’s too humid (common here in Florida!), the finish may not cure properly, leading to a sticky or dull surface.
Best fiberglass tub refinishing kit features to look for
When shopping, look for kits specifically labeled for fiberglass or acrylic. Some of the most popular options on the market include:
- Rust-Oleum Tub and Tile Refinishing Kit: A classic choice with over 13,000 reviews and a 4.3-star rating.
- Ekopel Pour On Bathtub Refinishing Kit: Known for being “no-smell” and having a thick, pour-on application that hides imperfections well.
- NADAMOO Tub and Tile Refinishing Kit: Often praised for its ease of use for beginners.
Look for kits that emphasize “high-gloss,” “self-leveling,” and “bonding primer included.”
Surface Prep: The Make-or-Break Step for a Lasting Finish
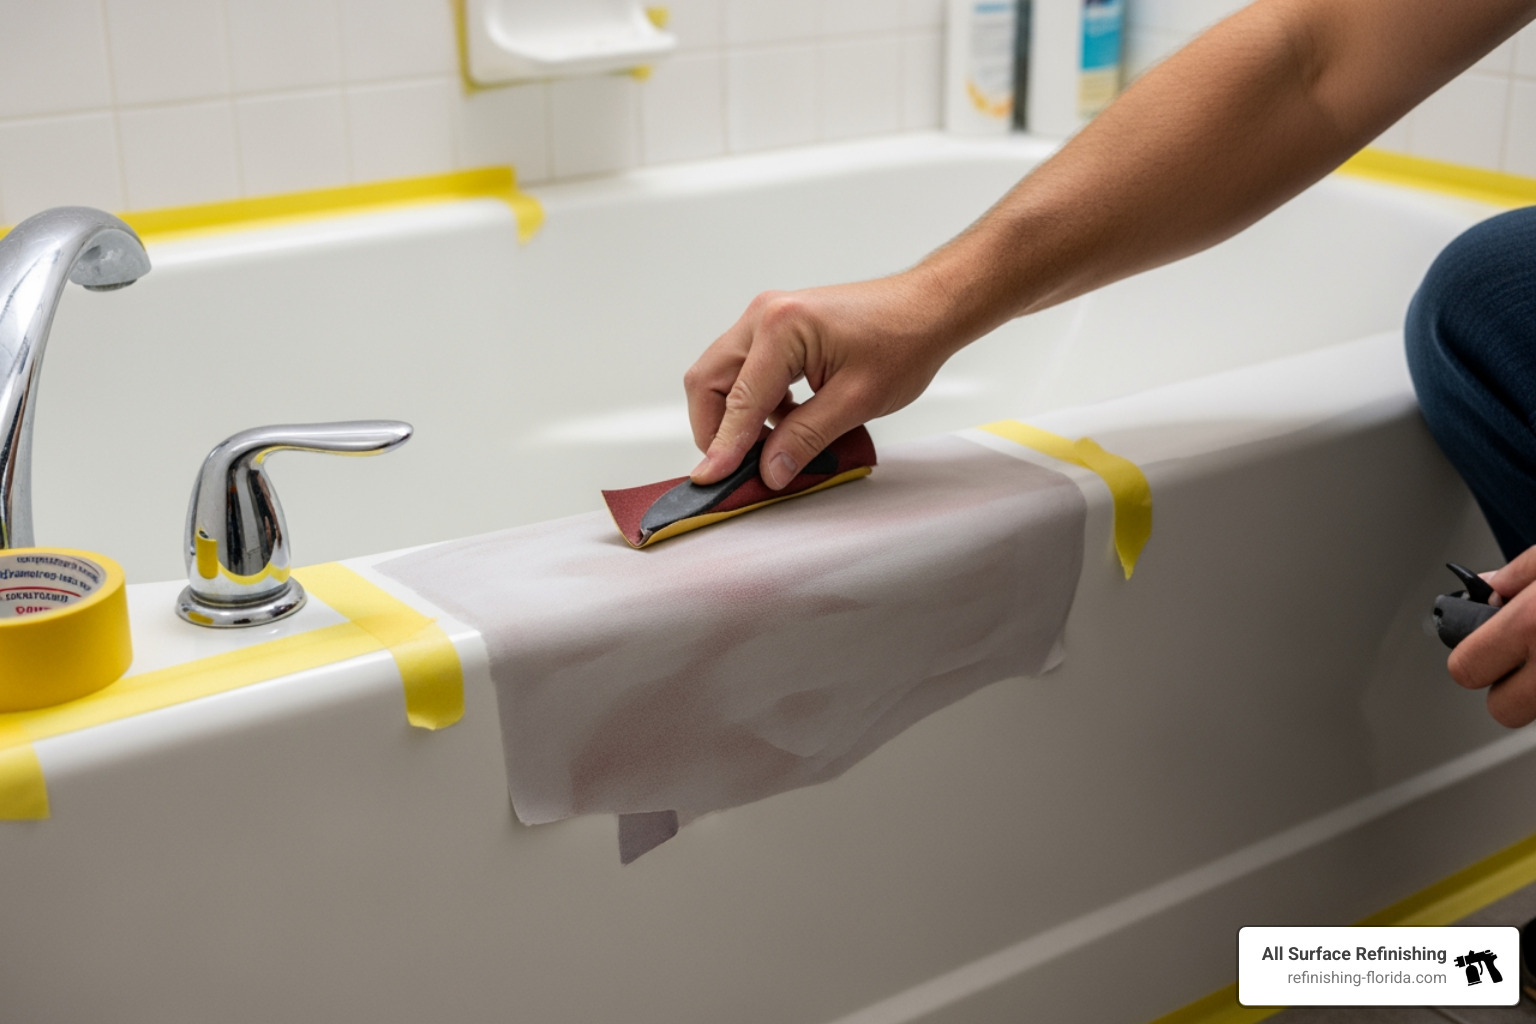
If you want your finish to last 10 years instead of 10 months, you must spend 80% of your time on prep.
How to clean, sand, and repair the tub before coating
- Remove Hardware: Take off the drain cover and faucet handles if possible. Remove all old caulk using a caulk removal tool and acetone.
- Deep Clean: Scrub the tub with TSP to remove every trace of soap scum and body oils.
- Sand: Use your 320-grit sandpaper to scuff the entire surface. You aren’t trying to remove the fiberglass; you are creating “teeth” for the new coating to grab onto. A palm sander is great for the flat areas, but you’ll need to do the curves by hand.
- Repair: If you find chips, use a filler. For more extensive damage, check out our Ultimate Guide To Patching Fiberglass Tubs And Showers.
- Final Wipe: Use a tack cloth to pick up microscopic dust. Even one hair or speck of dust will look like a boulder under the new gloss finish.
Common prep mistakes that cause peeling, fisheyes, or rough texture
The biggest enemy of resurfacing a fiberglass bathtub is silicone. If you used silicone caulk in the past, any residue left behind will cause the new coating to “fisheye” (pull away from the surface). Always use acetone to ensure the surface is chemically clean. Also, never rush the drying time after cleaning; if moisture is trapped in the pores of the fiberglass, the coating will bubble and peel.
Can you use the same process on tile surrounds or sinks?
Yes! Most high-quality refinishing kits are compatible with ceramic tile and porcelain sinks. This is a great way to create a unified look in your bathroom. Just remember that tiles have grout lines, which require extra cleaning to ensure no mold is trapped under the new coating. For more detailed instructions on related surfaces, you can visit How to Refinish a Fiberglass Bathtub | DoItYourself.com .
Step-by-Step: Resurfacing a Fiberglass Bathtub From First Coat to Full Cure
Step 1 through 4: mask, prime, mix, and apply the first coat
- Masking: Use plastic sheeting to cover everything within six feet of the tub. Over-masking is better than cleaning overspray off your new rug.
- Priming: Apply a thin, even coat of bonding primer. This is the “glue” that keeps the topcoat attached.
- Mixing: If using a two-part kit, follow the induction time (the time you must let the mixture sit after stirring) exactly as the instructions say.
- First Coat: Use a foam roller for the large sections and a brush for the corners. Work in one direction and maintain a “wet edge” to avoid lap marks.
Step 5 through 8: build coverage, inspect flaws, and let the tub cure
- Second Coat: Once the first coat is tacky (usually 1–2 hours), apply the second coat slightly heavier. This is where the gloss really starts to pop.
- Inspection: Look for drips or “runs.” If you catch them while wet, you can lightly roll them out.
- The Curing Wait: This is the hard part. While the tub may feel dry to the touch in 24 hours, it takes a full 7 days to reach “chemical hardness.” Do not put a drop of water on it or use a bath mat during this window.
How long a refinished fiberglass tub lasts and what affects durability
A DIY job typically lasts 3 to 5 years, while a professional job from a team like ours at All Surface Refinishing can easily last 10+ years.
| Feature | DIY Resurfacing | Professional Resurfacing |
|---|---|---|
| Average Cost | $80 – $200 | $400 – $800 |
| Lifespan | 3 – 5 Years | 10 – 15 Years |
| Durability | Moderate | High (Industrial Grade) |
| Time Investment | 2 Days + Prep | 4 – 6 Hours |
| Equipment | Foam Rollers/Brushes | HVLP Professional Sprayers |
Costs, Maintenance, and What to Do if the Finish Fails
DIY kit cost vs professional bathtub resurfacing cost in 2026
In May 2026, a standard DIY kit like Rust-Oleum or Ekopel will set you back between $80 and $160. When you add in the cost of respirators, sanders, and masking supplies, your total DIY investment is likely closer to $250.
Professional services in the South Florida area (from Miami to West Palm Beach) generally range from $450 to $750. While the upfront cost is higher, you are paying for industrial-grade coatings that are sprayed on for a glass-like finish that DIY rollers simply can’t replicate.
How to clean and maintain a refinished tub so it lasts longer
To keep your tub looking like new:
- Never use suction cup mats. They pull on the finish and will eventually cause it to peel. Use a stick-on non-slip surface if needed.
- Avoid bleach and abrasives. Use mild dish soap or specialized cleaners like Scrubbing Bubbles (non-bleach version).
- Wipe it dry. After your shower, a quick wipe with a soft cloth prevents hard water minerals from bonding to the surface.
- For more tips on keeping your tub pristine, read our guide: Stop The Scratches A Guide To Acrylic Tub Repair.
What to do if resurfacing a fiberglass bathtub peels, bubbles, or fails early
If you see peeling, it’s usually due to a prep error (moisture or grease trapped under the coat).
- Stop using the tub immediately to prevent water from getting under the rest of the coating.
- Sand the area down to the original fiberglass.
- Apply a touch-up kit if the damage is small.
- If the failure is widespread, the entire coating may need to be stripped and redone. This is the point where most homeowners call us to fix the “DIY disaster.”
Frequently Asked Questions about Resurfacing a Fiberglass Bathtub
Can I resurface a fiberglass bathtub if it has cracks or soft spots?
You can resurface it, but the cracks must be structurally repaired first. If the floor is “spongy,” the movement will cause any new coating to crack within weeks. Check out our guide on Beyond The Break A Diy Guide To Acrylic Shower Repair for help with structural fixes.
Is resurfacing a fiberglass bathtub worth it for a guest bathroom or rental?
Absolutely. It is the fastest way to increase the “clean” feel of a rental property or guest suite without a major renovation. It provides a high return on investment (ROI) by making the bathroom look modern and well-maintained for a fraction of the cost of new fixtures.
Can I paint a fiberglass bathtub without a full refinishing kit?
We strongly advise against using standard latex or oil-based house paint. It will bubble and peel the first time you take a hot shower. You must use a specialized epoxy or urethane system designed for submersion and high humidity.
Conclusion
Resurfacing a fiberglass bathtub is a fantastic way to breathe new life into your home. Whether you choose to tackle it as a weekend warrior or hire a professional to ensure a factory-perfect finish, you’re saving money and keeping a perfectly functional tub out of a Florida landfill.
If you’re in South Florida—from the high-rises of Aventura to the family homes in Coral Springs or the coastal retreats of West Palm Beach—and you’ve decided that the fumes and sanding aren’t for you, we’re here to help. At All Surface Refinishing, we’ve completed over 14,000 projects since 2011, and we’d love to make your bathtub our next success story.
Ready to transform your bathroom? Learn more about our bathtub services or give us a call today!
